We make the handle of the sword. Making a knife with your own hands Step by step weaving a knife handle with a cord
I bring to your attention a new lesson. Today I will tell you how to create a stylish pen without spending a lot of money and time. We will need:
- Ordinary ballpoint pen
- 8 meters of floss thread
So.
Step 1.
We disassemble the handle, we only need a rod.

Step 2
Now we need to measure 4 meters of thread of each of the two colors. Fold in half, and then in half again.
At the bend, we get a loop:

In this place, we place one color across the other to make an even cross.

So that the threads do not get confused during the work, I formed small hanks of them.

Step 3
Let's remember our core. We put it upside down exactly in the middle of the cross.

Then we do the following. We take any of the threads and put it on the next one clockwise so that we get a loop.
I took the upper blue thread first. Here's what happened:

We do the same with the remaining three threads:


We pass the last thread into the first loop, and our circle closes.

Step 4, where we need a little ingenuity and skill.
The difficulty lies in the fact that you have to simultaneously hold the rod vertically and tighten the threads.
You can ask someone to hold the rod, but if no one is around, hold it like me. That is teeth :)
Alternately (carefully!) Pull on the opposite threads (they should have turned out to be the same color), until all the loops are evenly tightened.
The result should look like this:

Repeat this step as many times as needed to braid the rod to the base.
My pen after five repetitions:

After 20 repetitions:

Step 5. The last one.
After about an hour of work, my pen looks like this:

It's time to fasten the threads. I have a little less than a centimeter of the rod left to make the final knots.
In order for the threads not to “fidget”, you can smear this part of the rod with glue (glue stick is suitable, you can also use PVA).
You need to regroup the threads, shifting one to the left or right. Like this:

Now you need to tie a few knots between adjacent threads, as you please, this is not critical.
The main thing is to keep it secure. We will cut the threads to the very root! Therefore, we grease them again with PVA.
Be careful not to cut the knots.
P.S.
Here's the pen I got:

Paracord(from English parachute cord, paracord) - a very light rope cord made of polymer, the fibers of which are made of nylon. This special type of rope was originally made for the military and was used to attach parachute rafters. Paracord weaving is a knowledge used by the military. But now paracord is used not only for military, but also for civilian purposes. To be honest, a good and high-quality paracord can always be found in a professional hunter. Actually, like the bracelet cord itself. Special paracord weaving patterns and instructions make it easy to make strong loops, belts and weave a so-called survival bracelet. Even a paracord braid for a paracord knife can be made by yourself. This way you get a real men's bracelet. Such a paracord bracelet can be given to a friend as a gift for Defender of the Fatherland Day, for example, and it will be appropriate. A paracord bracelet made by a craftsman is a beautiful and practical item.
The sheath of paracord is made up of numerous interlocked polymer fibers, making it quite smooth. If the paracord is made of polymer nylon mostly or completely, then it will also be quite elastic. For civilian use, paracord can be made from cheaper materials such as polyester, civilians do not need absolute compliance with standards, like military paratroopers. However, the standard is the standard, and before you buy paracord for yourself, you need to figure out whether you are buying a product.
How to tell real paracord from fake
Real paracord is usually made in the USA. One of the most famous brands of the manufacturer is Rothco. But, in fact, it is not so important in which country the product is made, what matters is how much its quality meets international standards.
However, under the name "paracord" anything can be hidden that is at least a little similar to the original.
Here are the signs by which you can distinguish a real survival rope from a fake that will not do its job.
- If you touch the paracord, you will immediately notice the softness. It is because of the softness of the pack cord that it is convenient to weave products.
- Light the edge of the paracord on fire. Burning will occur with a smoky flame, with black smoke. It will smell like burnt plastic.
- The core and sheath fibers are never fused together. The shell will always melt faster and expose the core, similar to stripping insulation.
In such men's survival bracelet you can weave a clasp: a carabiner or a metal loop. In addition, such a bracelet can be woven from leather straps. It will no longer carry a practical load, but it will look very stylish.
The scheme of weaving a paracord bracelet with a plastic carabiner
Thick braided knife handle
Very often you can see that hunters have a special braid on a knife It is also a type of paracord survival cord. Weaving a knife handle is quite simple, you can use the diagram below. Thick braided knife handle- comfortable and dense braiding of the handle of a knife or other product, even with a bend in the handle.

The easiest pattern for braiding a paracord knife
Simple paracord weaving patterns
A paracord bracelet can be woven from cords of several colors, then it will be elegant. However, the paracord bracelet is considered classic in protective colors: green, black, brown and white. A paracord bracelet can be woven in several ways. The most popular weaving patterns are listed below.
Thin paracord bracelet
Paracord bracelet with clasp
When making knives for the handle, I usually use textolite or wood, but sometimes I resort to weaving.
When people think of braided hilts, they usually think of a single color cord wrapped in a circle. Boring!
So I decided to come up with a beautiful technique using cords of two colors. This is the second knife, the handle of which I decorated in this way. In the first case, I wove with black and luminous cord. I sat in front of the TV, holding a knife in one hand, and in the other I had black and luminous cords. I started experimenting and this is what I came up with.
I hope you will enjoy.
Tools

You will need:
- ruler,
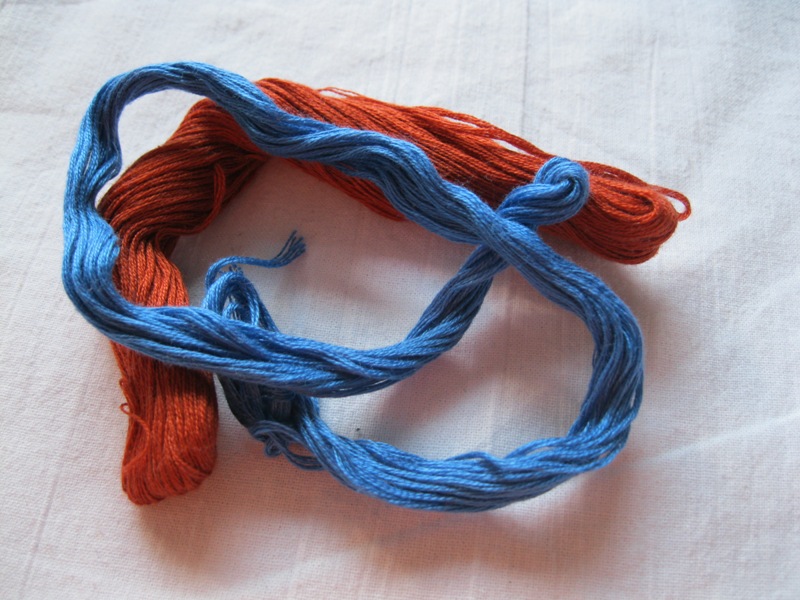
- paracord (2 colors),
- lighter,
- multitool (you can use simple pliers, and something sharp to cut the cord).
Cut and gut


Cut the required length of each color paracord, I do this sparingly. Remember that it is easier to cut off the excess than to build up if it is not enough.
Go ahead and don't forget to remove the inner strands. To do this, you need to make sure that they are not soldered to the outer shell, and pull them out.
Get ready to weave


Wrap the cutting edge of the blade with electrical tape to prevent cuts.
Pass the cords into the hole from which you start weaving, a couple of centimeters. Now you need to think. Whichever side you put the cords on, they will leave a ledge on it, so I always leave it on the inside of the handle. The inside is where your fingers rest on the handle, not your palm. If you do this, then the knife will be more comfortable in your hand.
In my opinion, there is logic in this.
So, after you thread the ends of the cord into the upper hole, glue their ends to the metal of the handle. Then they will lie more evenly and will not interfere during weaving. Just don't stick your fingers together.
Weaving


Do you know how the first knot is made when you lace up your shoes? We will use this node.
Flip the cords to the side where the glued ends are. The black should go under the orange, then drape it over the orange (just look at the photo and it will become clear).
After that, turn the knife over to the other side and do the same steps now on it. The cord must be well tightened. Then turn the knife over again and repeat.
Entertainment

While weaving, I like to watch an interesting show. But remember to pay attention to what you are doing.
ending


After the weave approaches the bottom hole, one cord will be closer to it, the other a little to the side. In my case, black turned out to be closer. Thread the near one into the hole, and continue wrapping the handle around the far one and thread it through the other side. Now tie a knot, and with the rest of the cords you can do whatever you want. I usually hook on a fun bead and then tie the knot again. But I didn’t have anything at hand, so I just cut off the edges a couple of centimeters below the knot.
resin coating


Now you need to completely wrap the blade with electrical tape and other parts that should not have resin on it. Of course, it can be removed from steel, but why waste time on this.
Stir in a small amount of glass fiber resin. I used 30 ml, but half would have been enough for me. I just didn't have a smaller measuring cup handy.
Take an inexpensive brush and gently apply the resin all over the lacing. Let it soak in, if necessary, apply the resin again. Then clamp the blade in a vise to dry the hilt.
After a few minutes, take out the knife and turn it over so that the resin does not solidify as a drop on the side of the handle that is pointing down.
We wrote that one of the principles of this direction is the use of the same things for different purposes. Today we want to introduce you to one of the examples of this approach. The handle for a knife or ax, woven from paracord, allows you to conveniently use it for its intended purpose, but if necessary, it will provide you with several meters of the strongest cord that can come in handy in field conditions. To make such a thing, you will not need any special skills or special tools.
Paracord (eng. Parachute cord, paracord, 550 cord) A lightweight nylon core cable originally used in American parachute lines during World War II. After landing, paratroopers used slings to solve various problems. Now paracord is used as a universal cable by both the military and civilians.
Necessary materials and tools
- Base in the form of a knife blade or tourist hatchet
- Thin nylon cord (paracord)
- Scissors
- Lighter
1. Put the item on top of the paracord

2. Cross the two ends of the cord on the right

3. We make a loop on the right side and pass the cord under the handle to the left side

4. Tighten the loop tightly

5. Move the right side of the cord to the left over the handle

6. Make a loop and pass the left cord under the handle

7. Pass the end of the cord through the loop so that you get a knot

8. Tighten firmly

9. Do the operation from step 7 in mirror image

10. Repeat the previous steps until the cord covers the entire handle

11. Secure the cord and burn the ends with a lighter