Decoupage on a metal can. Decoupage on an iron can. Master Class. Decorating a simple tin can using an interesting technique
We invite you to familiarize yourself with information on how to decoupage a glass jar for bulk products. In general, the technique is quite simple, so anyone can do it, even a beginner in this matter.
Perhaps, for many, as in the old days, bulk products in the kitchen are stored in the simplest ordinary jars. However, modern household stores offer various options for jars with lids in which bulk products can be stored.
We invite you to familiarize yourself with your own decoupage of jars, as well as how to make them look like ceramic ones using the example of a rustic style. In fact, you can choose absolutely any option, in any case the principle is the same.

Master class on decoupage of a glass jar
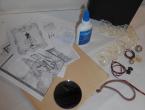
To get started, you need to prepare the following materials:

A very ordinary glass jar, along with a lid, will do.

Napkins with an original image, with which you will do decoupage.
- A sponge or a simple foam sponge.
- Acrylic based paints and varnish.
- Hairdryer, scissors, brush.

Decoupage on a glass jar
First of all, the surface of the jar is degreased. Use nail polish remover/acetone/alcohol for this. You need to wipe the entire surface of the container. Sponges/cotton wool will also help with this. The same procedure is performed on the lid.

When the surface has been degreased, apply white paint in one layer with a brush. Cover the lid completely as well. Let the items dry (by themselves or with golden air from a hair dryer).

Since the proposed version uses a rustic style, let's start with the sky. To do this, white paint is mixed with literally two drops of blue. The result should be a heavenly color. It is important to mix the paint thoroughly, then, using a sponge and light movements, apply this background to the top of the jar.

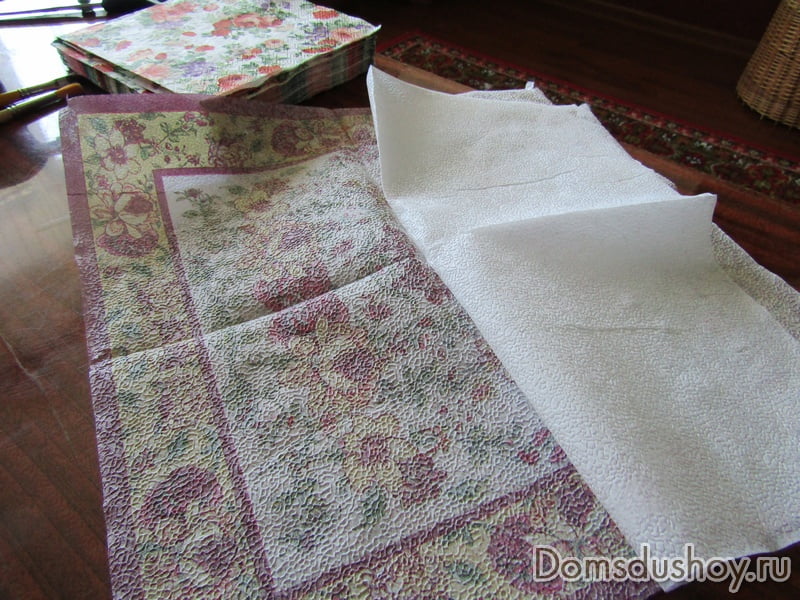
Then, in a napkin, separate the bottom layer and leave only its “top”. After this, mix PVA with 1k3 water and glue the napkin to the jar.

After placing the napkin on the surface, hold it with your hand and begin gluing. Dilute the glue in advance, dip a brush in it and brush the design on top of the napkin. You don't need to do this too quickly, since the napkin is very delicate, otherwise it will simply tear or wrinkle. Move in the direction - towards the edge from the central part. If bubbles or wrinkles form during the coating process, it is recommended to smooth them out using a soft sponge. If the napkin is not enough to apply the design completely to the entire surface of the jar, you can finish painting anything with a brush. It will turn out very cool! You can see this for yourself by looking at the proposed photos of decoupage glass jars.

When you have glued the decoupage napkin onto the surface of the jar, you need to give it time to dry thoroughly. You can use a hairdryer, but if you turn it on, use only cold air!

Then the lid also needs to be tinted. In our case, this is done with blue paint. To get a beautiful heavenly shade, you should mix white and blue paint. The resulting shade should be as beautiful as the color of the sky. When you achieve the desired shade, paint your entire lid.

Then open the jar using varnish, and this does not have to be done in one layer. It will be even better if you apply two or three layers. In this case, each applied layer must dry very thoroughly. As a result, using glue with glitter, you need to make dots of different colors on the lid and again let it dry well.

That's all, your independent work is done. We wish you success and creative ideas.

Photos of the best options for decoupage of a glass jar


Decoupage on an iron can will appeal to all fans handmade from waste material. In this publication, we will consider the decoupage technique, which will allow you to use and transform an iron can, which is usually immediately sent to the trash bin. We usually buy tomato paste, green peas or dry baby food in such tin cans and don’t even realize that unnecessary containers can turn into a beautiful vase for cutlery, in a flowerpot for indoor flowers, or simply to decorate the kitchen interior. I invite you to watch a master class that will help you easily complete the job using waste material.
For work we should prepare the following materials:
- iron jar;
- a napkin with a beautiful pattern;
- decoupage glue;
- decoupage varnish;
- acrylic paint;
- oil paints;
- alcohol or any other alcohol-containing liquid to degrease the jar;
- brush.
Let's get to work. First of all, the jar needs to be washed well and dried if it requires it. The next step is to degrease the tin using alcohol or any other alcohol-containing liquid. Now we take acrylic paint, the color matching the shade of the napkin prepared for decoupage, and cover the jar with it in two layers. Don't forget about the drying time for the first layer.


While our jar is drying, take a napkin and tear out the fragments you like from it for decoupage. Please note: we do not use scissors.


We take each fragment and separate the top layer of the napkin from the two bottom ones. Then we glue it to the jar with special glue for decoupage. Apply a very thin layer of glue to the jar.


Use a brush to push out all air bubbles from under the fragment. Next we glue the next fragment.


If the pattern on the jar is not very noticeable and not bright, you can glue another layer with the same pattern on top of the fragment.


When the jar is completely covered with napkins and you are satisfied with the result, you need to complete the work process - completely go over the top of the jar with the same decoupage glue.


Decoupage tin can
Decoupage tins for spices
The most exciting thing about crafting is the opportunity to give new life to things that are long overdue for a landfill. For example, decoupaged tin jars for spices from the Soviet past will decorate not only a cozy country kitchen, but also a completely modern dining room in the Provence style.
Two old small tin jars;
.sandpaper;
.piece of fabric;
.solvent;
.painting tape;
.piece of sponge;
.decoupage napkins with small plant motifs;
.acrylic paints: white, yellow, ocher, Indian red, red kraplak;
.acrylic lacquer;
.synthetic brushes;
.hairdryer
Manufacturing:
1. Since our jars have been used for many years to store spices and have become heavily “overgrown” with fat, they need to be thoroughly cleaned. To do this, use a cloth generously soaked in solvent.
2. To improve the adhesion of paint to metal, “walk” the jars with sandpaper.
3. If you completely paint the surface of the spice jars, there is a possibility that the lid will not close afterwards. To avoid problems when the work is completed, cover the top with narrow masking tape.
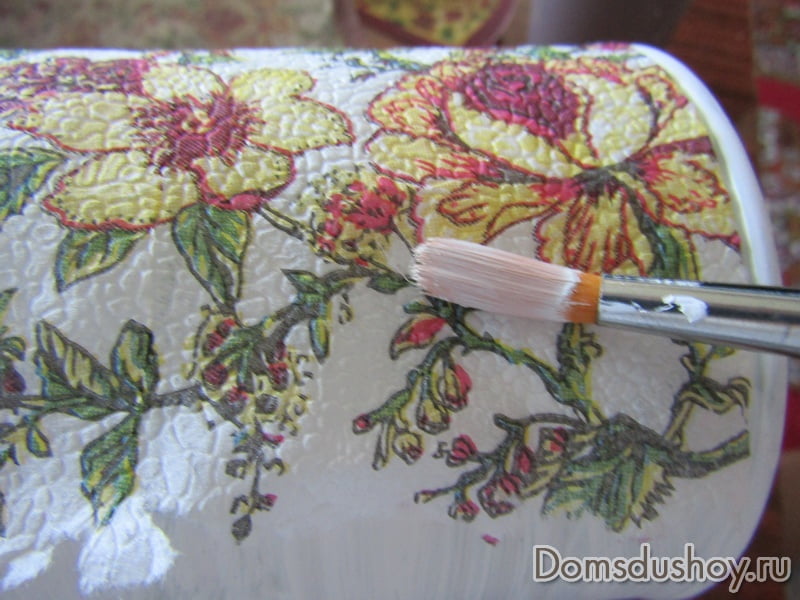
4. To give white paint a delicate creamy hue, add a little yellow and Indian red to it. Using a sponge, “stamp” the jars and lids. Dry the surface with a hairdryer and repeat the previous step again.
5. After drying, apply the final coat of paint using stroking movements from bottom to top.
6. Cut out the berry motifs from the napkins and separate the top layer with the pattern.
7. Sand the surface of the painted and dried jars with sandpaper.
8. Dilute PVA glue with water in a 1:1 ratio. Glue the motifs onto the jars and lids, applying PVA starting from the middle of the design, and then “accelerating” with a synthetic brush to the edges. After drying, coat the motifs with another layer of glue.
9. If small folds form during the work, do not be upset. Take fine sandpaper and carefully rub out the folds so as not to damage the design.
10. On a sheet of paper, make a palette of pastel colors - light yellow and muted pink. To do this, experiment with paints - white, yellow, ocher and red speckled.
11. Dip a flat synthetic brush into pink paint, wipe off the excess onto the paper, and, holding it upright, “stamp” the surface of the lid and box. Rinse the brush with water and similarly “dilute” the pink pastel with yellow.
When a small child appears, along with him many additional items appear in the house that you did not have before. This is also about metal baby food cans. Men have long appreciated these strong and durable containers and use them for their needs: for screws, nails and various repair items. Isn't it time to use them in the kitchen? After all, they are well suited for storing bulk products. Now these jars are covered with comfortable soft plastic lids and therefore will be quite convenient to use. But you need to work with them a little so that they acquire an elegant look. You will see, you will no longer put jars of cereals away in the closet, but just the opposite: put them in plain sight and tell everyone how you did it so beautifully. And I suggest you do it metal baby food cans.
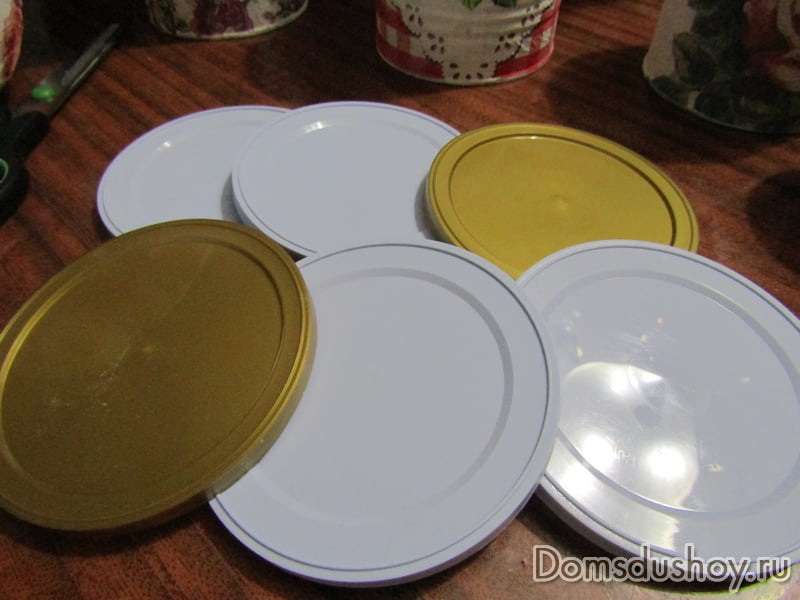
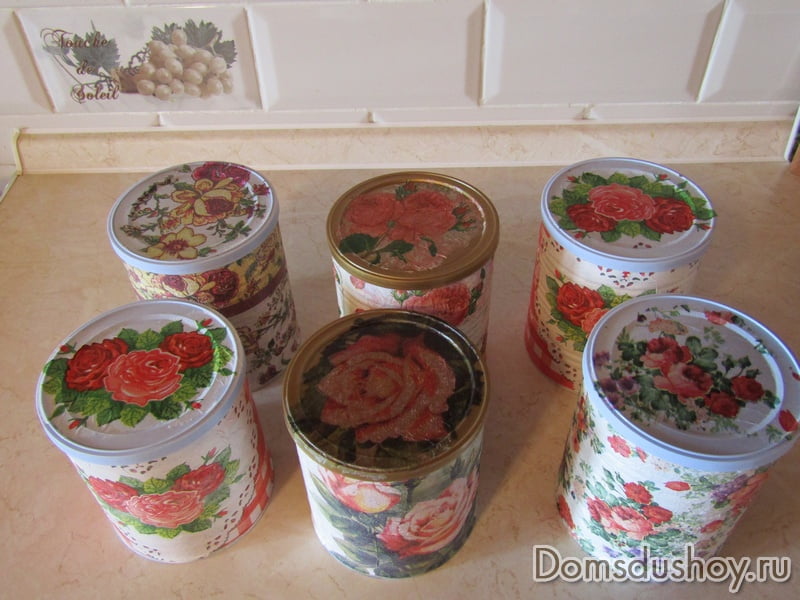
I’ll say right away that I am not a master of decoupage and did it on metal cans for the first time. I'm not going to teach anyone, but I just want to tell you how I managed to cope with this task. I had six baby food jars, five types of regular two- and three-ply napkins, and a desire to put it all together.
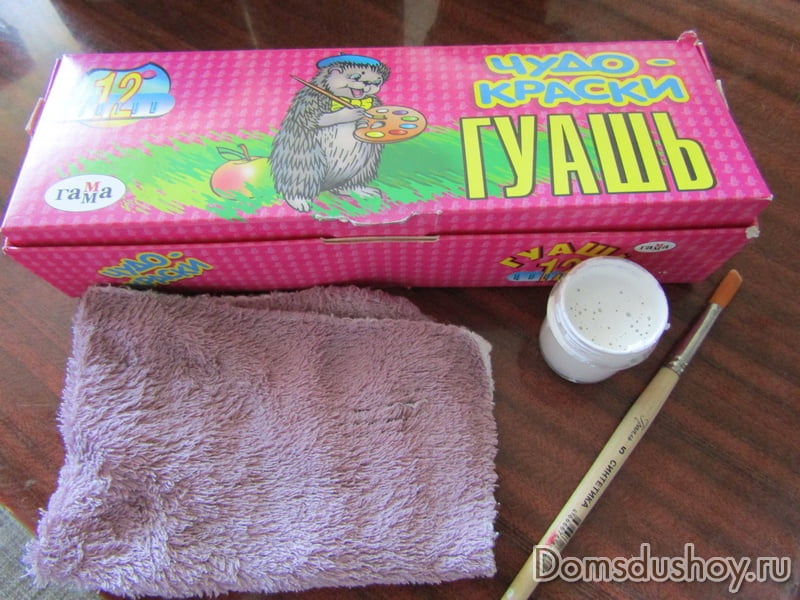
For work I used:
- an old table that you don’t mind dripping with glue or paint
- tin cans 6 pieces
- three-layer napkins with floral pattern
- PVA glue
- plastic cup for diluting glue
- scissors
- white gouache
- brush
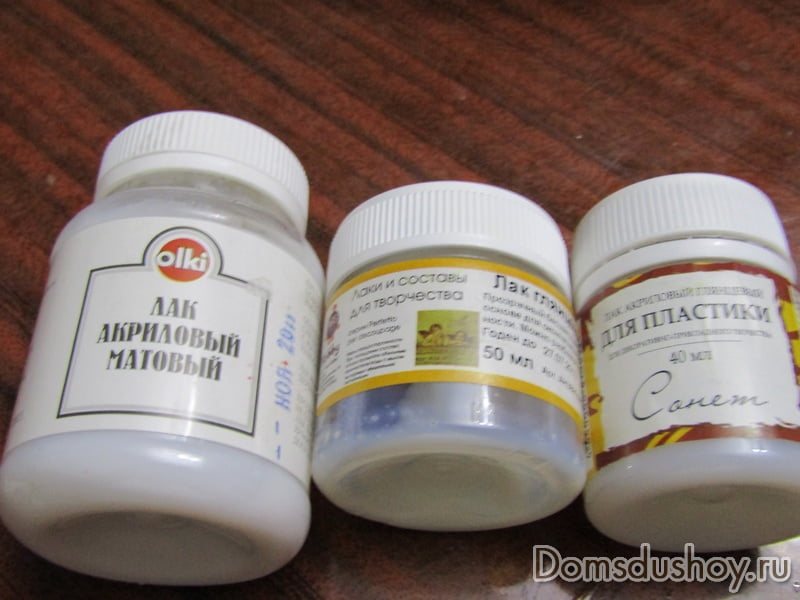
- acrylic varnish (glossy)
- a soft microfiber cloth (for timely removal of dirt)

By the way, for decoupage it is better to choose thick and even harsh napkins. They fit better on the surface and do not tear under the brush.

- I prepared the jars: I washed them inside and out. I read on the Internet that someone uses a regular hairdryer to speed up drying. My jars dried naturally. If the jar has a paper label, you need to wash it and remove any remaining glue with a cotton pad soaked in nail polish remover or acetone. If the labels are sticky, they must be completely removed from the surface of the jar. My jars have letters and symbols printed directly on the metal by the manufacturer, so I didn't have to wash anything. And I removed the sticky stickers from the lids.

- To ensure that what is written on the jar does not show through through a thin layer of napkin, it needs to be prime. Usually acrylic primer or paint is used. I had neither one nor the other. I decided to use regular white gouache. I diluted it with water, not too thin.
- I started painting the jars with gouache. But I took a rather thin brush; I could have used a normal one, which is used to paint windows, for example.
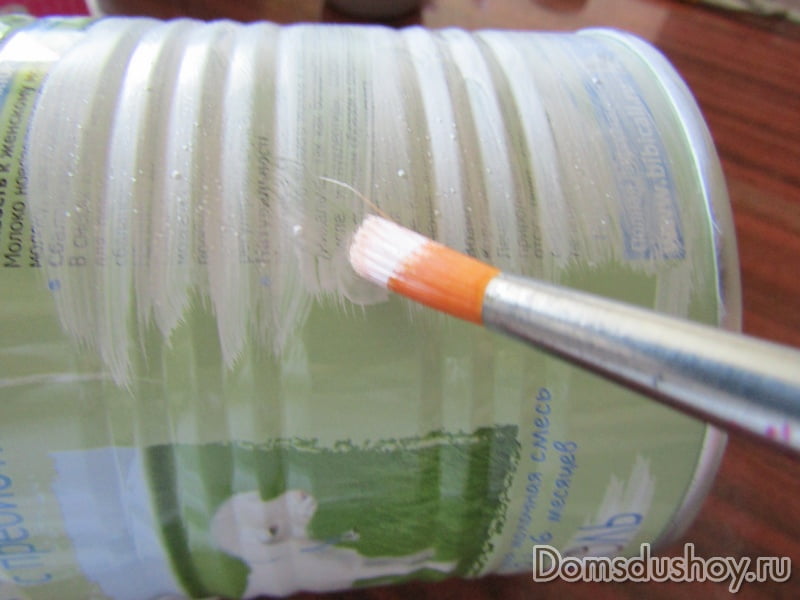
The gouache adheres well to the metal; you can hardly see through it what was painted on the cans. I coated the jars in one layer. But a second layer would hardly be needed, since there is a fear that the paint might peel off due to the thick layer.
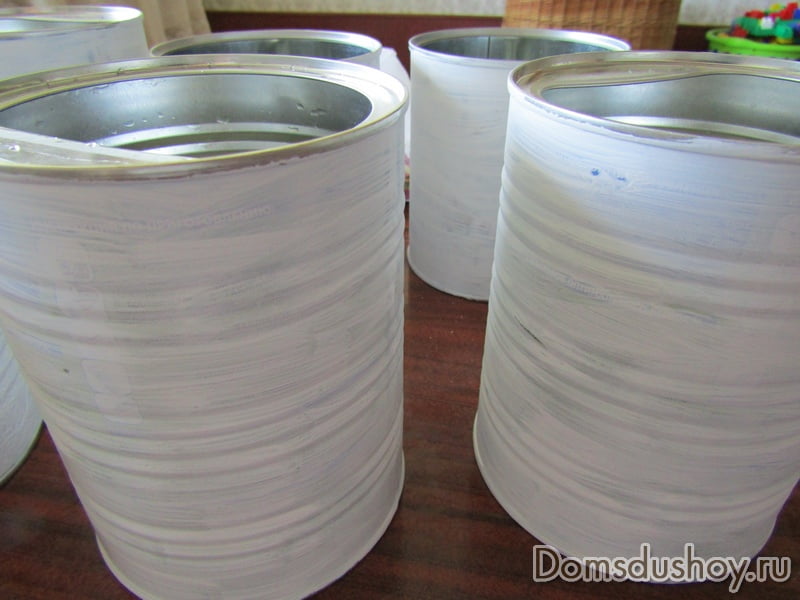
Quite quickly I painted all the cans and set them out to dry again.

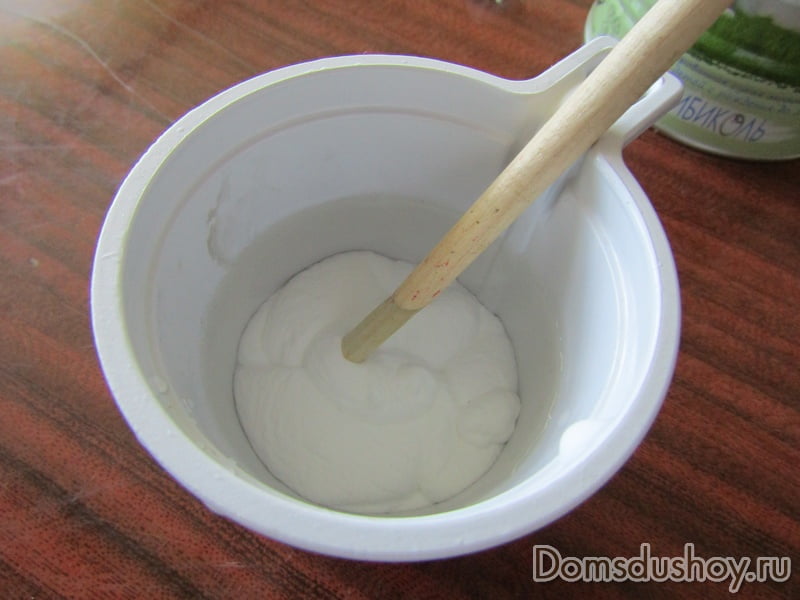
- While the jars were drying, I diluted PVA glue with water in a glass, approximately one to one. Stir well and leave for a few minutes for the glue to combine with the water.
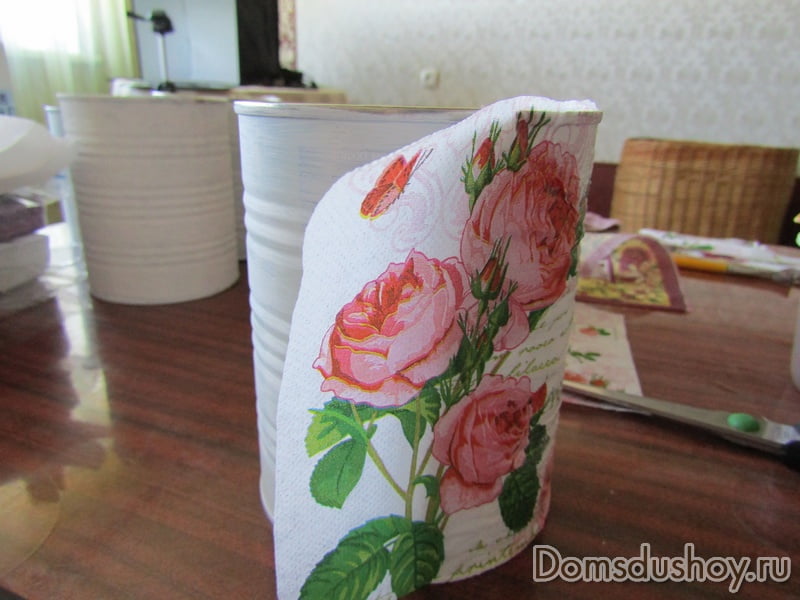
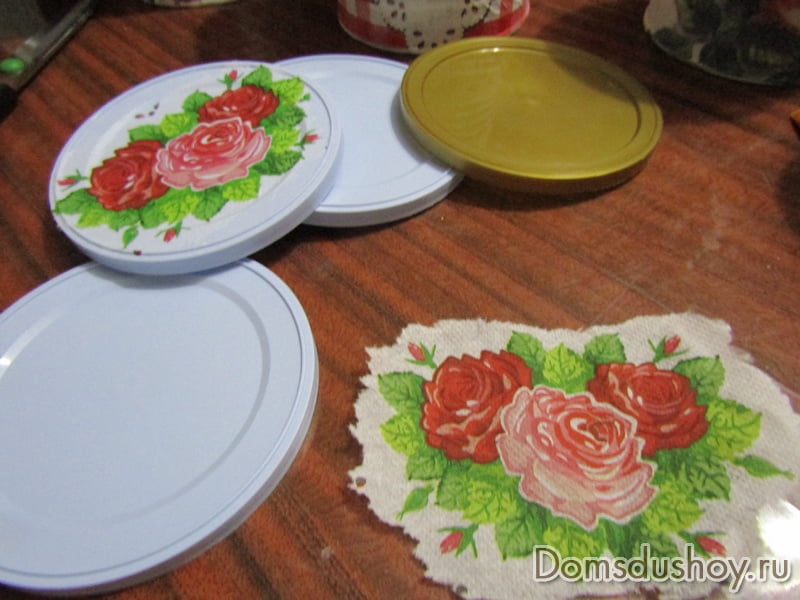
- In the meantime got busy with napkins. I separated the top paint layer from the lower white ones. I used napkins measuring 33*33 cm. And the length of the napkin turned out to be just enough to completely wrap the jar.
Without using scissors, I separated several fragments from the napkin.

- And finally, the jars dried up and I started gluing the top layer of the napkin to the surface. I first washed the brush of gouache, and then dipped it in glue and carefully spread it on a napkin. Some rules should be followed: place the napkin as evenly as possible on the jar and begin to spread glue on its edge, gradually moving further. You can’t do this too quickly, sweepingly, or in a hurry. Otherwise, the napkin will stretch, wrinkle, and by the end of the work it may not lie flat at all.
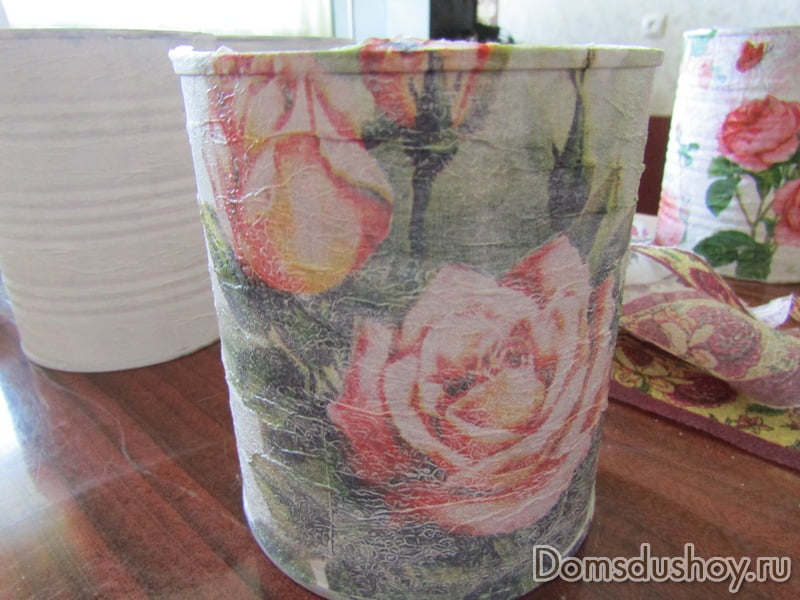
The first jar is ready. I got it with obvious flaws. But I already said that this is my first work on decoupage of metal cans. I’m not upset, because there are still five more cans ahead and I hope for “rehabilitation.” And the fact that the jar turned out to have a white coating is due to PVA glue; when it dries, the coating will go away a little.

- Started work with the second jar. Here I already cut the napkin to size with scissors and started gluing it carefully.
Now the second jar is ready.

- I did everything the same way on all jars. This is a photo of raw cans. Here's the third one. Of course, wrinkles are inevitable. They straighten out slightly when the jar dries. And these wrinkles are only visible up close.
- The fourth can was quickly sealed and now it was drying.

- I made the fifth and sixth jars the same, since there was no sixth type of napkins.

- While the jars are drying, got busy with the lids.
- So that the edge is uneven, tore fragments out of napkins and using the same technique I glued them onto the surface of the lids.
- And now a lid with the same pattern appeared on each jar.

I did all this in one evening, sitting in front of the TV. I left the jars and lids to dry until the morning.

And in the morning I took acrylic varnish and covered all surfaces.
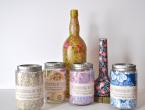
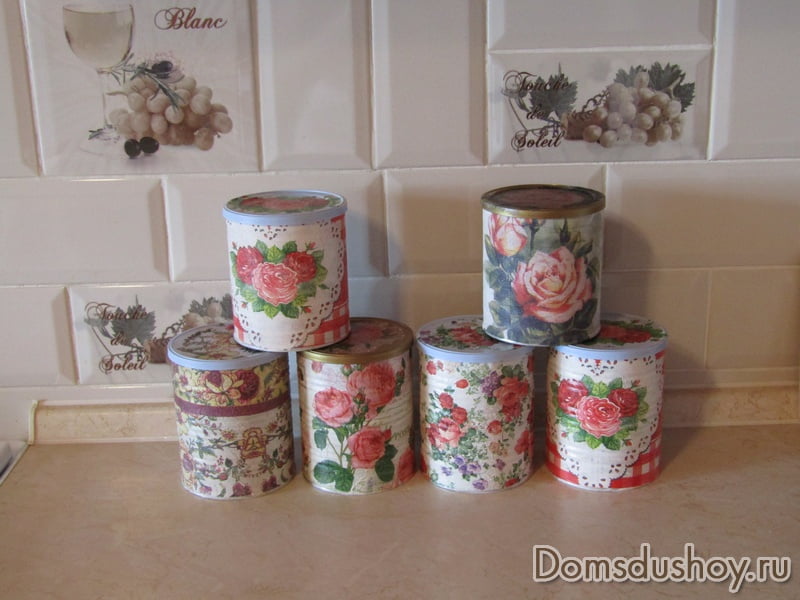
And this is how the jars turned out.

Perhaps some people don't like flowers. So, you can even use newspapers for decoupage! If you want, try it and you will definitely succeed in something.
Using the decoupage technique, you can decorate not only metal jars, but also glass ones. And much more. For example,
These are the pots I ended up with. I studied that same evening and the next morning, when I designed these jars.
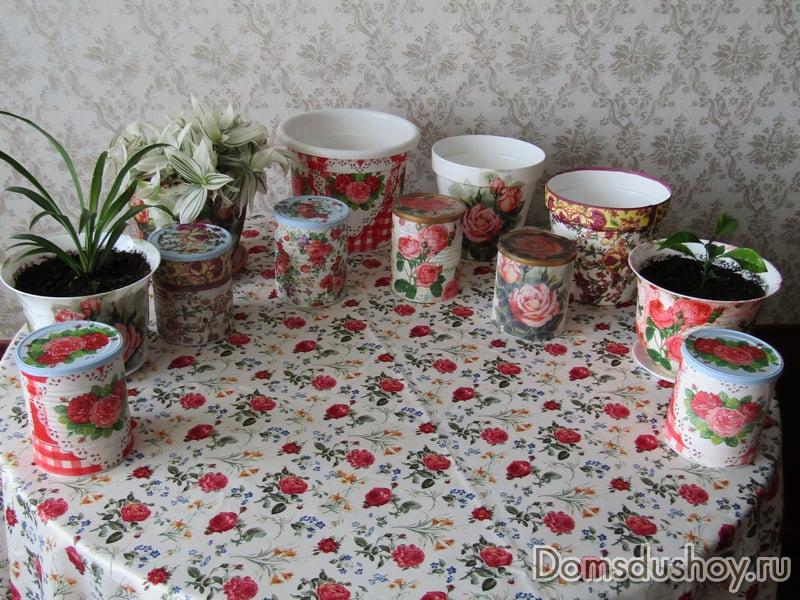
The great thing is that it’s easy to choose the napkins that you like.

And it will take very little time to work. But there is a prerequisite: desire do something for the home with your own hands and at the same time in a good mood. I wish everyone good luck!

More options for using baby food jars:
2016, . All rights reserved.
You can use anything for such needlework: ordinary glass jars, simple dishes, any bottles, glass, and even jars of chips and coffee. Try to make decoupage of jars for the kitchen, decoupage of plastic jars - and you will see how cool it looks on the shelves or on the table.

The meaning of this technique is to paste cut-out napkins, printed drawings, selected dishes or any interior item. After pasting, most often the entire surface is covered with a layer of protective varnish. This is if you want the item to last you longer.

The flower is not cut out of the napkin, but the edges are simply torn off.
Master class No. 1 – decoupage of enamel dishes
If you just want to try your hand at this technique, you will only need napkins or printouts, clippings from a glossy magazine, any acrylic paint, or regular stationery PVA glue.
Decoupage varnish (if you buy it in a special store - the price is steep) you can buy in a store for repairs, or you can make it yourself. There are 2 options for homemade varnish.
How to make Mod Podge (varnish) based on glue:
- 225 ml PVA glue.
- 112.5 ml water.
- 2 tablespoons water-based varnish (optional).
Mix everything in one jar, shake and close the lid. The varnish is ready.
How to Make Mod Podge Using Flour:
- 1 ½ (210 grams) cups flour
- ¼ cup (56.25 grams) granulated sugar.
- 1 cup (225 ml) cold water.
- ¼ teaspoon olive oil (optional)
- ¼ teaspoon vinegar (optional)
Mix all the ingredients in a ladle, beat a little with a fork, don’t forget about the vinegar. Turn on medium heat and bring to a boil. If it's too thick, add water. Bring to a boil, stirring, remove from heat. We wait for it to cool down and pour it into a jar with a lid.


You can start a master class for beginners. We choose the surface that we want to decorate and prepare the materials. The dishes can be decorated with any designs, such as cards, wrapping paper, magazine clippings, postcards, napkins, etc.
Images are printed only on a laser printer; they will be blurred on an inkjet printer.
To work you will need:
- White acrylic paint.
- Sandpaper (sandpaper).
- Brown acrylic paint.
- Brush.
- Mod Podge or DIY varnish from 2 options.
- Sponge
- PVA glue (diluted with water 1:1).
- Can, jug, mug - any enamel container.
We set up a work corner: lay down newspaper or paper. Degrease the surface (wash with water, then you can wipe with alcohol or cologne).

Print out the pictures and cut them out. We try to cut all the pictures at an angle so that the varnish adheres better.

Take a foam sponge (or a dish sponge) and “blot” the corners of the picture with brown paint. Place the tablet in water for 1-2 minutes. We need to remove the top layer on which there is a pattern. There are several ways to thin out an image.
You can simply split it (for example, office paper, cardboard), or you can, by attaching the picture with the reverse side, “roll up” the top layer with your fingertips.
Another “dry” way to split paper is with tape. We seal the pattern on the reverse side tightly across or along with strips of tape. It's better to use wide tape. Press the tape and paper firmly so that they stick together better. Starting from the corner, separate the layers of paper and carefully separate the top layer. Just do not tear sharply, otherwise the design may be torn.


We spread PVA glue on the place chosen for the picture, put the picture on this place, and also coat it with glue on top. After 30 minutes, cover the top with decoupage varnish or homemade varnish (recipe above). We put it aside and wait for the varnish to dry (2-3 hours), then you can go through it again, final. We made a vase from an old can.

Master class No. 2 – decoupage of a glass jar
We will make the next glass jar decoupage master class from ordinary glass jars; you can use them to make vases or stands for spoons and forks. Decoupage of glass jars should begin by soaking them in warm water, followed by removing the old labels.

Decoupage a glass jar is a good idea. For work we need everything that was in the first master class; PVA glue can be replaced with decoupage varnish (Mod Podge or homemade). If you use PVA glue, then it needs to be diluted with water 1:2 so that it is not too thick.

So, we print out pictures or cut them out from magazines, postcards, napkins, etc.
For work we take:
- Acrylic paints – white and black.
- Sandpaper.
- PVA glue.
- Decoupage varnish (can be replaced with homemade varnish: see above).
- Printouts or magazine clippings.
- Brush, sponge.

Apply primer to the glass. If you are a beginner artist, you can skip this moment; just cover the glass with black paint.

Apply black acrylic paint to the glass surface of the jar. Let it dry thoroughly.

We go along all the sides and bulges of the glass jar using sandpaper. We need this for the aging effect.

We print out the pictures and cut out the fragments with scissors. Place the cut out fragment on the file, take a brush and decoupage varnish (homemade varnish number 1, made from PVA glue: see above). Apply the solution to the fragment. We wait for it to dry and apply again, and so on up to 3 times.

Then put the fragment in warm water for 5-10 minutes. Using a brush, apply PVA glue to the center of the jar. Carefully, so as not to tear the picture, apply it to the jar and remove the top layer.

First we coat the picture with varnish, and then the entire jar. Dry and varnish again. This is how you can decoupage small and large glass jars.


Master class No. 3 – decorating a tin can
Next, we wash, degrease and dry jars, bottles, metal cans, flower pots, in general, everything that you are going to decoupage. In this master class we will decoupage a tin can. These jars are usually used to sell canned fruits or vegetables.
We start decoupaging cans by making sure there are no sharp edges or burrs. There are many ways to shape the edges: you can use pliers and bend the sharp tin edges inward, you can cut a wire with a diameter of 3-4 mm, and glue the vinyl top of the wire to the top of the can:


After we have washed and degreased the tin can with alcohol or cologne, and decorated the top, we need to apply dark acrylic paint to the surface of the can. This can be done with a brush or sponge. We are waiting for the paint to dry.

After the dark paint has dried, apply a layer of white acrylic. And we also wait for it to dry. You can cover it with white acrylic one more time.


We glue the pictures using the “file method”. Place the picture face down on the stationery file and pour water on top. Let's keep the pictures in water for 3 minutes and thin them after that. We drain the water, apply it to the desired place, press it, and remove the file. Using a brush, we smooth out and expel air bubbles, apply glue to the drawing. Smooth out evenly and straighten out wrinkles. We work from the center point to the edges. We go over the picture with a brush and glue. Let it dry. We apply varnish. Let's dry it. We repeat again.

Professionals apply 25-30 layers of varnish to the product, but we are beginners, 2-3 layers are enough for us.

Glass jars and bottles are processed in the same way. If the color of the glass is dark, then you don’t need to cover it with dark acrylic. Only use white paint and then sand with sandpaper.
Master class No. 4 – decoupage of cans for bulk products
And another master class using chip packaging. It is convenient to store tea, sugar, coffee. We repeat everything as in the first two works. As a result, you will get jars for bulk products.

Decoupage coffee jars. Very cute and cute decor.