Fallout 4 medallion ferris wheel. Precious medallions. Get the Nuka-Galaxy Medallion
31 October 2016 15:05
Who issues: LIYA
Locations for research:
- Galaxy
- Vault-Tec: among the stars
- Nucleus-Galaxy
- Dry gorge
- Mad Mulligan Mine
- Baby kingdom
- Ferris wheel
- Nuclear Racers
- Safari
- Mr. Cap's treehouse
- Beverage bottling plant
- World of Freshness
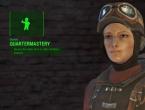
To make your stay at the Yader-Mir amusement park more exciting, be sure to visit LIA. If you were attentive and inquisitive, you probably already heard or read about LIA somewhere in the terminal, for example, in the terminal of the Yader-Mobile arena. LIYA is not only the park's mascot, but also a valuable source of information about Yader-Mir. This is a robot in the form of a Nuka-Cola bottle. You can stumble upon LIA at the entrance to the "Yader-Mir", from which you first enter the park after completing the quest "That's how we drove it." To get the current quest you need to chat with her until she tells you about finding the medallions. Suffer insults in your address, as one of the raiders changed her character programs.
When visiting the amusement park rides, you can collect medallions, and if you get a complete set, you will receive a prize! To better understand what to look for and where, ask LIA about the medallions again. She will tell you that there are several machines with special medallions in the park. The machines are installed near the most popular attractions and pavilions of the Yader-Mir park.
Get the Vault-Tec Medallion: Among the Stars

Medallion "Vault-Tec": among the stars you will find in the exhibition complex of the same name in the area of \u200b\u200b"Galaktika" park. You will visit this location during the Star Dispatcher quest. The machine with medallions stands at the exit from the exhibition, in the corner. To take the medallion, approach the machine and press the key to activate it. If you don't want to go through the entire exhibition just for the medallion, then enter from the second door "Vault-Tec": among the stars, which is locatedin the alley to the left of the entrance to the first floor of Yader-Kosmoport, with the sign "Starmarket".

Get the Nuka-Galaxy Medallion

You can collect the Yader-Galaktika medallion at the exit from the Yader-Galaktika attraction in the Galaktika park sector. Unfortunately, you have to go through the entire attraction in order to reach the exit - you can read about this in the passage of the "Star Dispatcher" quest in the task "Find star cores in the" Nuclear Galaxy "related to this location.

Get the Mad Mulligan Mine medallion

The Mad Mulligan Mine medallion is located in the attraction of the same name in the Dry Gorge Park area. You will visit this location without fail during the quest "Disassembly in the" Dry Gorge ". A machine with medallions stands at the exit from the attraction in a gift shop. For more details on how to reach it, read the specified quest.

Get the Tree House Medallion

The “Tree House” medallion can be obtained from the vending machine located in the “Mister Caps Tree House” location in the “Safari” sector. You will go to this location during the passage of the quest of the same name "Safari". However, in order to climb directly to the house, you need to go through the maze. To pass it without difficulty, follow the instructions: as you entered the labyrinth, turn right, then left, right, left through the arch, more left and more left, right through the arch, left, right, right again through the arch and the last time right - you should see the lift to the Treehouse.
In "Yader Town, USA", on the square, we meet LIA - the mascot of the Yader-Mira park, in the past this robot was a valuable informant for visitors. And now (albeit with some flaws) LIYA meets the new arrivals, making our stay at Yader-Mir even more exciting. LIA invites the Survivor to collect medallions on the territory of the park, for a complete set the robot mascot promises a valuable prize!

To find them, we need to visit the most popular attractions and pavilions located on the territory of Yader-Mir. In a location with machine guns for medallions, the Survivor can accidentally come across or get on the "Big Tour" story quest. The rides turn out to be not as attractive as LIYA describes them; instead of fun and celebration, all kinds of dangers, enemies and traps await us.
Mad Mulligan Mine Medallion
“It is worth looking into the past and strolling through the dusty streets of a Wild West town. The pages of history will come to life as cowboys and adventurers realistically act out scenes of conquering the Wild West. "

We find the machine with the "Mad Mulligan Mine" medallion in the mine of the same name, it stands at the exit of the attraction, you can get there by the quest "Disassembly in the Dry Gorge".

The next two medallions are found in the "Magic Kingdom" quest in the "Children's Kingdom" location.
“We are visiting the Children's Kingdom, a magical land where fantasy reigns and will be interesting for both adults and children. We will be happy to ride a Ferris wheel and visit the "Yader-King's Castle".

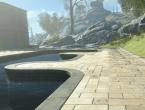
Ferris wheel medallion
We find the machine with the Ferris Wheel medallion near this attraction.

Medallion "Nuclear Racers"
The medallion "Yader-Racers" is located near the railway, along which nuclear-mobiles are rushing.


Medallion "Tree House"
“We are in a hurry to see the miracle of nature in Safari, which contains an amazing collection of exotic animals from all over the world! And try your hand at the labyrinth, and climb into the tree house, from where a delightful view of the stunning menagerie opens. "

The machine with the "Treehouse" medallion is located in a park called "Safari" in the location "Mister Cap's Treehouse". Here we find ourselves on the quest "Safari", on the street elevator through the maze.


The following medallions can be obtained by completing the Star Dispatcher quest.
“The attraction invites you to go to the stars in the" Galaxy "and see what an amazing future awaits people in space. Explore the Spaceport and embark on an adventure aboard the Yader-Galaktika ship.
Medallion "Nuka-Galaxy"

The machine with the Yader-Galaxy medallion is located in the Yader-Galaxy, in order to pick up the medallion, you need to go to the end of the entire attraction.

Medallion "Vault-Tec: Among the Stars"
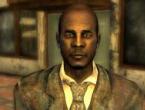
To receive the assignment, you must chat with a blond girl with glasses named Sierra Petrovita. It can be found on your first visit to Yader-Mir, when you head towards Mount Fizztop. Either way, look for her in Yader Town. After communication, agree to help.Purpose. Put on glasses Mister Caps.
Sierra will give you points. Look for them in your inventory in the "Clothes" section. Put on your glasses. Only in them will you be able to see the hidden drawings. In total, you need to find 10 drawings. These are clues to the whereabouts of Bradburton, the creator of Nuka-Cola.
Let's clarify right away - you will find images of Mister Covers with one of the Latin letters. From them you will need to make a word.
Purpose. Find the hidden images of Mister Cap in Yader Town.
Put on your glasses! It is necessary! Go to Fizztop's Grill Bar, where your den is. From the bar, if you face the entrance, move left, west. You will see the Nuka-Cherry sign. Found it? Then go from the sign to the left, along the buildings. On the right, there will be a porch with an entrance to two restrooms. You must go past this porch and turn right. On the wall behind the bushes will be the first hint (picture) Mister Cap (1/10)... This is the letter G.
ATTENTION! You must go to the clue image and interact with it. Only in this way will this item be counted. By the way, there is only one hint in Yader Town, so you will see how the achieved goal is crossed out.
Purpose. Find the hidden images of Mr. Cap in Dry Gorge.
Move to the "Dry Gorge" theater, which is at the beginning of this zone. On the right, there should be an opening with an orange cloth visor and the THEATER sign. But you must turn away from him to the left and walk forward along the fallen pillar on your left hand. Turn left behind the post. There is a stroller diagonally on the right (for reference). But you go ahead, leaving her on the right hand. There will be a small fence in front, and next to it is a haystack (to the left). Behind this fence is a small graveyard with tombstones. On the highest tombstone on the left, by the brickwork, find hint (picture) Mister Caps (2/10)... This is the letter E.
Move in the same location to the point called "Crazy Mulligan's Trolleys". Inside this building, you were still looking for the worm's womb. Go inside through the red door, go into the passage on the right, to which 3-4 steps lead. After the long shaft tunnel you will see a staircase. But to her on the left side there is another descent down, with a yellow fence. There is a metal building below, on the wall of which, to the right of the entrance, there will be hint (picture) Mister Caps (3/10)... This time with the letter H.
Purpose. Find hidden images of Mr. Cap in Galaxy.
Use fast travel to find yourself in the "Nuclear Spaceport". Face the entrance, there are stairs to the left and right. Go to the right of the stairs on the left side! Walk along the "Yader-Spaceport" building and in the place where there will be a narrow passage, on the wall of a high flower bed on the left, find hint (picture) Mister Caps (4/10)... Remember the letter S.
Approach the entrance to the Yader-Spaceport building again, but this time stand with your back to it and walk away, towards the exit from the "Galaxy" zone. In the center of the location is some kind of structure with a planet. Before reaching it, turn left. There are steps here. Climb along them, go to the right. Behind the next span there will be a signpost. Look at the passage to the non-working escalator stairs, but walk past it to the left. Find the passage behind the bridge with the SPACEWALK sign on top. Approach the passage, but do not go forward, but turn left. Find on the wall hint (picture) Mr. Cap (5/10)... There will be an R.
Purpose. Find hidden images of Mr. Cap in Children's Kingdom.
Move to this area and enter the Pavilion of Laughter. Inside the building, go through the door on the left, on which the chain originally hung (before the passage of the story). Continue to the left, into the corridor and open the red door. You will find yourself in a room with a rotating floor. Remember this? The floor doesn't rotate here anymore. Unless, of course, you turned it off. After going inside, open the second door if you go to the right (it will be red, just like this one).
There will be a small room behind the door with hint (picture) of Mr. Cap (6/10)... This is the letter F.
Stay in this area. Move to the castle "Yader-King". Don't go inside the theater where you fought Oswald. Come back, cross the bridge. Face the bridge you just came back across. But don't go there, but look to the left. There is a tower with a destroyed roof, to which there are steps. Climb them, go inside the building and follow the stairs to the fourth floor. Just after the last step, look at the wall on the left, where there will be hint (picture) Mister Caps (7/10)... This is the letter I.
Purpose. Find hidden images of Mister Caps in Safari.
Move to the "Primate House", go inside it. Approach the entrance inside, but on the right side find a path among the trees. Approach the wall and look even more to the right. That is, now you will be standing with your back to the "House of the Primates". On the brick wall ahead you will see hint (picture) Mister Caps (8/10)... Here is the letter N.
Follow Mister Covers' rooftop. Go through the passage with the inscription, take turns after the first fork: right, right, left, right. To the right of the tree, if you look at it facing in the direction of the roller coaster, there will be a brick wall with the desired hint (picture) of Mr. Cap (9/10)... This is the second letter E.
Purpose. Find hidden images of Mr. Caps at the Yader-Cola bottling plant.
Move along the World of Freshness marker. You enter inside through the tunnel with water, where there is an inscription in black on blue: "ENTER". Go forward through the tunnel with water, into the corridor with the WORLD OF REFRESHMENT sign on top. Run all the way forward, turn under the arch on the right (you will walk past a model of small multi-storey buildings). Next up is a Wild West layout, with cacti and old saloons. You need a third or fourth saloon house on the left side. If you look at this house, then you should go around it on the right side and find on the outer wall hint (picture) Mister Caps (10/10)... This is another letter R.
Purpose. Return to Sierra Petrovite.
Go back to Yader Town and chat with the girl. It will make a password from letters - REFRESHING.
Purpose. Use the digital panel.
The Sierra will be standing near the door you need. There is a panel on the right - enter the received code.
Purpose. Search the office.
As soon as the password is confirmed, then go inside the Bradburton office. The quest has several endings at once.
Explore the office, but know that you need to climb to the second tier. Use the terminal and read some useful information. You can either hack Bradburton's safe or open it later when you have the key. There is actually nothing inside the safe related to the quest.
Go to the Nuka-Cola vending machine in the corner, click on the hidden button located on the right outer wall. After opening the secret passage, call the elevator and go downstairs on it. You will find yourself in the lair of Mr. Bradburton and even get to know him. His life has been supported by a special machine for over a century.
You will have immediately three options for completing this quest:
“Either you're acting humanly and killing Bradburton, who is tired of this existence. As a reward, you will get access to his secret vault with powerful weapons. Also in the safe you will find the "Nuka-Cola" formula, which you can pass on to Sierra Petrovita.
- Either you don't touch Bradburton at the request of Sierra Petrovita, for which you receive a unique Yader-Mira jumpsuit from the girl.
- Either you agree not to kill Bradburton, get a jumpsuit from Sierra Petrovita, and then you still deal with a desperate man. In this case, you will get both awards, but the angry Sierra will have to be shot.
All that remains of John-Caleb Bradburton, the creator of Nuka-Cola.
SIDE QUEST "PRECIOUS MEDALLIONS"
A robot in the shape of a bottle (red) from the floor of "Yader-Cola" is walking around the territory of Yader Town. Find him and talk about everything. You will receive another collectible side quest. In total, you will need to find seven medallions. You may have found some of them before.Purpose. Receive the Ferris Wheel Medallion.
Move to the "Children's Kingdom", to the Ferris wheel (in the lower left corner of the park on the map). On the side of the Ferris wheel is a medallion machine. Interact with him to get ferris wheel medallion (1/7).
Purpose. Receive the Mad Mulligan Mine medallion.
At the location "Dry Gorge", move to the point of "Crazy Mulligan's Trolley". Go inside the building, Mulligan's mine. Go through the passage on the right, go past the descent downward, where there is a metal building with a picture of Mr. Cap (read the quest above). Move along the wall and notice that to the left you can jump off the bridge. There will be steps up. Go up and in the room ahead, find the machine gun, from where you get medallion "Mad Mulligan Mine" (2/7)... Or at the entrance, go to the room on the left and find the machine, which is probably even easier.
Purpose. Receive the Tree House Medallion.
Stand at the aisle to the tree house in the Safari location. Go through the passage with the inscription, turn right at the fork. Then go left, right and the next turn to the left, in front of a metal arch that looks like an entrance passage to the house. Turn left, left again and through the metal arch. Go further, taking turns to the right. There will be two more such arches, and then an elevator leading to the tree. Go up to the tree house and find the machine with medallions inside. Take away tree house medallion (3/7) on the first floor.
Purpose. Receive the Vault-Tec: Among the Stars Medallion.
To search for this medallion, move to the "Galaxy" zone, to the point "Vault-Tec: Among the Stars". Find not the main entrance, but the back one, with the usual red door and a red EXIT sign above it. To do this, after moving to the point, jump down to the left (if you have power armor). Go through the passage of this building and see a door on the left. Go inside, immediately after the turn on the right there will be a machine with medallions. Take away medallion "Vault-Tec: Among the Stars" (4/7).
Purpose. Get the World of Freshness medallion.
Open the map and move along the "World of Freshness" marker. The vending machine with medallions is located outside, opposite the Yader-Cola bottling plant. Take away medallion "World of Freshness" (5/7).
Purpose. Receive the Nuka Racers medallion.
Move to the pavilion of laughter. From here, find the very tracks you walked through the tunnel when you overheard the conversation between Oswald and some wild ghoul. But you don't have to go into the tunnel. When you again find rails with moving cars, then find an automatic machine right next to the fence next to them. Take away medallion "Nuclear Racers" (6/7).
Purpose. Receive the Nuka-Galaxy Medallion.
Select the "Nuka-Galaxy" checkpoint in the "Galaxy" zone. Climb up and enter through the front door. Move along the corridor until you enter the hall with the rocket rails. Follow the rails to the hall with "Yader-Girl". Climb the steps from her statue and find a medallion machine. Get out of there medallion "Nuka-Galaxy" (7/7).
Purpose. Receive a reward from Leah.
As soon as you have all 7 medallions (they are in your inventory in the "Miscellaneous" section), then return back to "Nuclear Town" and talk to Leah. As a reward, you will receive "Dark Nuka-Cola", "Nuclear Grapes" and "Quantum Nuka-Cola".
THE HISTORY OF THE MYSTERIOUS MANSION OF THE GRANDCHESTERS
This is, rather, not a quest, but a plot narration. You can learn about the terrible events that happened at the Grandchester Mansion. The main culprit is Lucy. To get to the mansion, you need to go west from the Yader-Express station, beyond the hobology camp. The mansion is visible from afar.During the period of prosperity of the Yader-Mira park, the attraction "Mysterious Mansion Grandchester" was very popular among visitors. By visiting it, one could learn about the terrible history of the Grandchester family. A daughter named Lucy was possessed by the devil, did terrible things. The parents tried to exorcise the demons until, ultimately, Lucy killed them, after which she committed suicide.
An unknown person turned this mansion, a former attraction, into a huge death trap. Surely someone's ominous presence is hidden behind these traps ...
The mansion consists of linear corridors - you will not be allowed into the part of the building where it is too early to enter. Be careful - neutralize the traps you meet on the way.
Enter the room on the left through the red door. Disarm the trap at the entrance - there will be scales under your feet, and there is a trap on the wall above them. The door will open further. Go there (if the door did not open, then study the hall of the mansion again).
In the corridor with flamethrowers, destroy the robot shooter. Look at the wall on the right and see a box. There is a switch inside - switch it to disarm the trap.
By the way, some doors in the rooms open only after the end of the speaker's speech. When the announcer has finished speaking, the door will open through which it will be possible to leave the upside-down room.
In the kitchen, kill two robots and head up the steps to the next door. It will open after the announcer's speech ends.
After destroying the turret, go to the hall balcony, where you may have already been. Go further, when you are in the children's room, then immediately leave it, as grenades fall from the ropes. In the next room you will meet Zechariah. After killing him, take the key to the Grandchester mansion. It is here that there is a recipe for "Yader-Impact". Read below.
SIDE QUEST "JOURNEY TO THE STARS"
You can get the quest from Dara Hubbell, who lives at the location "Hobology Camp", which is to the west of "Yader Town". But first, it seems, you must definitely find the Purified One. If you come to the camp without talking to the man, then most likely the hobologists and Dara will attack you. In short: you must find 5 spacesuits at the location "Vault-Tec: Among the Stars" in the "Galaxy" zone and bring them to Dara.For spacesuits, you will receive 200 caps, but if you use charisma and complete three stages, then raise the reward to 350 caps.
Spacesuits must be removed from animatrons (alien dummies).
Take the hobologists to the junkyard. Or tell them that it is cleaned (if you have been). Once in place, take the power distributor and cores. Approach the alien ship. Install the three fused cores as Dara asks to see a good ending.
If you install four fused cores, ignoring Daru, then all hobologists will die, and you will see a bad ending. If you do not kill them (install three cores), you will receive 100 cartridges for the alien cannon from Dara, and all hobologists will disappear after that.
OTHER
After the completion of the storyline, several tasks will appear at once in the quest "Miscellaneous". Select it and click on the tasks you want to track.Purpose. Talk to Lizzie Wyeth.
Chat with the girl who is in the "Salon" of the Operators. You will receive the "Persuasion" grenade from her. Throwing such a projectile at the feet of opponents, you can convince them of something.
Purpose. Talk to Harvey.
Do you still remember the guy who tried to lure you into Yader-Mir? So you can find it near the Yader Town market. Just chat and decide what to do with him - kill or spare.
Purpose. Collect the first tribute collected from the Commonwealth.
Return to Mount Fizztop, where the boss's lair is. There is a red chest on the upper balcony, inside of which you will find the first Commonwealth lids looted by the raiders.
Fallout 4 DLC review - Nuka-World
Nuka - World - is the official DLC (addition) to the game Fallout 4. Nuka-World according to official information, it is the last, 6th addition to the game. Its release is scheduled for 08/30/2016 and millions of fans of the game are definitely waiting for it.
Brief the content of the article :
Description of DLC for Fallout 4 - Nuka-World
According to the developers, in the Nuka World add-on, players will find a new, large settlement "Nuka World" and many other locations, as well as new characters, weapons, armor, items, quests and much more. Only in this add-on can you become the head of a gang of raiders, and leading this gang, try to bring the whole Commonwealth to its knees by attacking settlements and cities.

Nuka World is a few more gaming days spent playing your favorite game! Don't wait, visit Yader Mir now!
And if in essence, then in "Yader-Mir" there are 3 gangs of raiders who constantly squabble among themselves, you have to lead one of them in order to rally them together and conquer the Commonwealth !!!
Fallout 4 Nuka-World dlc walkthrough
Let's see what kind of storyline the developers have prepared for us in the Nuka-World add-on and whether this storyline can be compared with the Far Harbor DLC.
1. Quest "To places!"

2. Quest "We gave it a ride like this"
The second quest of the add-on, the main task of this quest is to pass the test, which the unknown raider Gage prepared for the protagonist. In this quest, the main character must go through a maze filled with different traps and enemies and at the end fight the raider boss Colter. After defeating him with the help of Gage, your character will receive an offer to take Colter's place. More information in the main article: "Quest" That's how it went "(DLC Nuka-World)".

3. Quest "Ambitious plan"
The third quest "Yader-Mira". The main objective of the quest is to meet with the heads of all three groups of raiders in Yader-Mir. First, you will need to talk to Gage at Colter's house. Leaving the arena, you find yourself in "Yader Town, USA", the streets are full of raiders, so to speak, in their natural habitat. We go through the streets to Colter's house, Gage is waiting for us there, from a conversation with him it becomes clear that Colter is lazy and his power over the gangs has weakened, now you, as a new boss, need to enlist the support of the leaders of the Pack, Adepts and Operators, for this you need to alternately meet with them.

Everything is simple here, we go to each gang leader and act on a whim. After you have enlisted the support of all the leaders, we return to Gage, he will outline the following tasks for the "Big Tour" quest, and the "Ambitious Plan" quest will be completed. More about this quest can be found in the main article: "Quest" Ambitious Plan "(DLC Nuka-World)".
4. Quest "Big Tour"
During this quest, you will need to capture sectors of the Yader-Mir amusement park and plant a flag of one of the gangs in each sector, thereby placing this sector under their control. To complete the quest, you need to be a politician, because from incorrectly allocated sectors, internal gangs can begin. More about this quest, you can read in the main article: "Quest" Big Tour "(DLC Nuka-World)".
Completing each task of the "Big Tour" quest gives rise to a side quest, that is, to complete this quest, you need to complete several others, for example, to complete the task to capture the "Galaxy" zone, you need to complete the "Star Dispatcher" quest, and to capture the " Children's kingdom ", you need to complete the quest" Magic Kingdom ". Next, we give a description of the quests to capture the zones of the amusement park:
- Quest "Star Dispatcher" - quite a long quest, with many opponents. When the main character enters the "Galaxy" zone, he stumbles upon the bodies of merchants who were killed by robots. After examining the diary of one of the dead, your character learns about the "Star Dispatcher" computer, which controls all equipment in the zone. Repairing this computer will allow the protagonist to capture the "Galaxy" zone and thereby complete one of the tasks of the "Big Tour" quest. For a detailed walkthrough of this quest, see the main article: "Quest" Star Dispatcher "(DLC Nuka-World)";

- Quest "Magic Kingdom" - having reached the zone "Children's Kingdom", the main character is surprised to find that he cannot calmly move around this zone, because some Oswald is constantly trying to unbalance him, discarding all current tasks, the main character is trying to find and punish this Oswald, but after completing your personal vendetta, you will be surprised to learn that the main task has also been completed. It was the expulsion or murder of Oswald that made it possible to seize the "Children's Kingdom" zone, and you just have to raise the flag of one of the gangs over this zone. For more information about this quest, read the main article: "Quest" Magic Kingdom "(DLC Nka-World)".

- Quest "World of Freshness" - during this quest, the main character must capture the zone "Beverage bottling plant", the main problem of capturing this zone, only new mutants obtained from the hard impact of nuclear cola on the swamps. After destroying all enemies, the hero will capture this zone. The quest is not at all difficult and not long. More information can be found in the main article: "Quest" World of Freshness "(DLC Nuka-World)";

- Quest "Safari" - this quest aims to capture the zone with the same name. To capture this zone, you will first have to turn off the mutant cloning equipment, which constantly clones the crocodile claw, and it does this because the equipment is jammed. If you want to know more about this quest, then read the information in the main article: "Quest" Safari "(DLC Nuka-World)".

- Quest "Showdown in the Dry Gorge" - this small quest is necessary to capture the "Dry Gorge" zone. During this quest, the main character cleans the area from the invasion of bloody worms. More information in the main article: "Showdown in the Dry Gorge" quest (DLC Nuka-World) ".
5. Quest "Home sweet home"
In this quest, the main character meets his assistant named Shank and begins to take over the Commonwealth. For this, outposts are first created in the Commonwealth, the places from which all power operations aimed at capturing the Commonwealth will begin. In order for the outposts not to need anything, the nearest settlements will have to be forced to supply the outposts. In addition, you will have to deal with local raiders who will be against the "newcomers" on their territory. More information in the main article: "Quest" Home Sweet Home "(DLC Nuka-World)".

6. Quest "Demonstration of Power" (Nuka-World's bad ending)
Everything seems to be going according to plan, outposts have been created, the Commonwealth already knows about the new threat, but not everyone can live without adventures, one of the gangs decided to betray you. This is what you have to deal with in this quest. This quest is considered a "bad" ending for the Nuka-World expansion, or rather it is even 3 "bad" endings. Now we will explain why this is so, in total there are 3 gangs under your command, when distributing territories in the "Big Tour" quest and when distributing outposts, necessarily one of the gangs will remain dissatisfied, this is the one of the gangs that will receive the least territories, it is this gang that will start a rebellion against the main character in the "Demonstration of Power" quest. Therefore, 3 endings are possible, that is, any of the 3 gangs may be left out and will have to be destroyed. In this case, you yourself can choose which of the gangs to destroy, for this you just need to give them the least territories.
Also, in addition to these 3 "bad" endings, there is a "good" ending, to start it you need to start the "Season of the Hunt" quest.
7. Quest "Season of the Hunt" (good ending Nuka-World)
In order to clear the Nuclear World of bandits and finish the passage of this add-on on a positive note, you need to go to the Yader Town market and find a girl who is also a doctor, her name is Mackenzie. After talking with her, you will start the "Season of the Hunt" quest, during which you will have to eliminate all the raiders. This ending is considered an alternative and, in the opinion of many, too boring, because it is more interesting to seize the Commonwealth than just make a profit from an amusement park.
So far, this is all the information that we found on the Fallout 4 DLC - Nuka-World, we will sometimes try to supplement this article so that you have more information. We hope this article helped you through this exciting addition to Fallout 4.