Growing beans: planting and care in open ground. Do I need to soak beans before planting in open ground? How much to soak beans before planting?
Legume plants usually do not require special care, so growing them should not cause difficulties even for amateurs, because the main varieties of beans produce good yields in most regions of our country. Of course, good yields can be achieved not only as a result of the use of special agricultural technologies, but also by proper preparation of seed material.
The plants in question develop well on soils that are light in mechanical composition and aerated. Clay soil is not suitable for planting beans, because the root system of the plant does not tolerate stagnant moisture. When choosing a place to grow legumes, it is necessary to take into account the influence of predecessors, that is, follow the rules of crop rotation. According to experts, it is better to plant beans after potatoes, all types of cabbage, cucumbers, as well as onions and garlic. Leguminous plants are considered good green manures, so living them in a certain place will enrich the soil with the necessary nutrients.
For beans, soil with neutral or weak acidity is suitable, but if the soil on the site is acidic, then dolomite flour, chalk or lime should be added to its composition. Organic matter (humus or compost) is added to soil with insufficient nutrients at the rate of 4 kilograms of these substances per square meter of area.
Do I need to soak beans before planting?
Among the various vegetables planted in garden plots, it is necessary to mention legumes, which are unpretentious and even a beginner can cope with their cultivation. A good harvest can be achieved if you follow certain requirements for care and preparation for planting seed material.
There are many different types of legumes, so many people forget about beans, but any variety of them (asparagus, green or grain) is not only nutritious, but also very healthy. These fruits contain many important minerals and vitamins, plant proteins and fiber. With all this, beans are perfectly absorbed by the body.
You can plant beans around your house or along the fence, or you can place them between potato or cabbage rows. At the same time, the places where it grows Beans, in the future they will be saturated with nitrogen, so you can safely plant vegetables in this soil next year. The choice of planting site will be determined by the variety of beans. Bush varieties can be compressed in beds, and climbing varieties can be planted near a fence or in places where they will have support.
Preparing seeds for planting
Before planting beans, they should be processed by carrying out certain activities with the seeds. First, the beans are sorted very carefully, removing all that are diseased, damaged by pests, or of irregular shape. After this, it is recommended to soak the beans in ordinary water to speed up the process of seed hatching, because they have a fairly hard shell.
Beans should be soaked for no more than fifteen hours, otherwise they will begin to deteriorate. Before planting, you also need to place the already swollen beans in a heated solution of boric acid. This procedure will protect the sprouted sprouts from pests (nodule weevil). Soak the beans in this solution for literally five minutes.
If suddenly you were unable to pre-soak the bean seeds before planting, then before sowing you will need to fill them with hot water (70°C), to which you need to add literally a couple of manganese crystals, after which the seeds must be immediately planted and the water poured onto the garden bed .
Preparing the soil for planting
Light, fertile, well-drained soil is ideal for legumes. If the soil is clayey and there is groundwater nearby, then beans will grow very poorly in such an area.
It is very good to plant beans in an area where cucumbers, potatoes, onions or cabbage previously grew. For higher yields, before planting beans in open ground, you need to fertilize the soil with compost or humus; you can also use ammonium nitrate. If the soil has a high nitrogen content, then the beans will produce a lot of green mass, and the pods will not be large enough.
You can start sowing beans at the end of April or at the beginning of May, but if frost is still possible, then the crops should be covered with film. Beans are a heat-loving plant, so frost can destroy them. Bean seeds will begin to germinate when the ground warms up to 12°C at a depth of several centimeters
Discuss this article on the forum
- Lunar sowing calendar for January 21, 2017
- Seasonal work in the garden and vegetable garden: late January – early February
- Leafing through the folk calendar: third week of January
- Lunar sowing calendar for January 20, 2017
- We walk barefoot in winter: which heated floor is better to install?
Legume plants usually do not require special care, so growing them should not cause difficulties even for amateurs, because the main varieties of beans produce good yields in most regions of our country. Of course, good yields can be achieved not only as a result of the use of special agricultural technologies, but also by proper preparation of seed material.
The plants in question develop well on soils that are light in mechanical composition and aerated. Clay soil is not suitable for this, because the root system of the plant does not tolerate stagnant moisture. When choosing a place to grow legumes, it is necessary to take into account the influence of predecessors, that is, follow the rules of crop rotation. According to experts, it is better to plant beans after potatoes, all types of cabbage, cucumbers, as well as onions and garlic. Leguminous plants are considered good green manures, so living them in a certain place will enrich the soil with the necessary nutrients.
For beans, soil with neutral or weak acidity is suitable, but if the soil on the site is acidic, then dolomite flour, chalk or lime should be added to its composition. Organic matter (humus or compost) is added to soil with insufficient nutrients at the rate of 4 kilograms of these substances per square meter of area.
Sowing of seed material must be carried out when warm weather sets in, when frosts have passed. It should be noted that some gardeners cannot decide: do they need to soak bean seeds before planting? Of course, the seed does not need to be processed, but in this case it will lie in the ground for a long time and wait for favorable conditions for germination. Now let’s describe the technology for preparing seeds for planting in stages:
- grain calibration. This event involves the selection of whole, undamaged fruits;
- soaking the seed material for 10-12 hours. As you can understand, soaking beans before planting is necessary to speed up germination, but there is no need to wait for sprouts to appear. The purpose of this operation is to soften the hard shells of the grains;
- at the next stage of work, it is necessary to place the seed material for several minutes in a special solution based on boric acid. Carrying out such a procedure will protect the grains from pest attacks.
If for some reason you forgot to soak the bean seeds, then before planting you need to place the seed material in water heated to 70 degrees, and you need to add a little potassium permanganate to the liquid. This will soften the grain shells and accelerate the germination of seed material.
Beans have long been valued for their rich protein content. Due to its nutritional value, this product even received the name “medical meat”. This vegetable, however, can replace any type of meat, so during fasting or when prescribing diets it has practically no equal.
Beans amaze with the richness of varieties and varieties. Some are grown until grains form in order to eat only them. Others are cultivated for the pods with tender green seeds. They are also commonly called vegetables. This species has more varieties than grain, and most of them are able to grow without support. The main beauty is that it ripens much faster, which means you can get more than one harvest per season.
Beans are a fairly popular plant in any garden. It has many beneficial properties and is easy to grow. With proper care and proper planting, you can get a lot of grains even from a small area. The first thing to do is prepare the planting material.
Shelf life of bean seeds for planting
Beans for planting
When purchasing seed material at the market or in a store, you need to ask the seller in what conditions the beans were stored and how long they lay on the counter.
Later, you yourself need to adhere to the basic storage rules:
- Air humidity should not be more than 50%;
- The temperature is at +10 degrees.
The ideal place is the refrigerator.
If the grains were stored correctly, they will have signs that must be checked:
- flowability;
- absence of any plaque or stains;
- smooth, clean surface without foreign particles;
- uniform grain size.
You can safely take such seeds. They will be suitable for cooking for 6 years from the date of collection. But, if you plan to plant them, then it is better to sell the grains within 2 years. Moreover, to be sure of their keeping quality, it is better to play it safe and carry out additional processing.
The fact is that the crop is susceptible to attack by the bean weevil. This is a small bug that penetrates the grains at the ripening stage. On a hot day, one bean can be colonized by 20 to 30 larvae. As a result, the product becomes unusable.
One of the following options may help with this:
- Pour the beans into fabric bags and add a clove of garlic or dill seeds. They secrete substances that repel grain beetles;
- With the same additives, beans will be perfectly preserved in a dark, cool place, for example, in a pantry;
- Reliable protection against bugs is cold. Therefore, it will not be superfluous to keep the beans in the refrigerator for some time;
- You can pour the grains into a glass jar and add a little ash. If tightly closed with a metal lid, it can be stored at room temperature;
- A slightly less reliable, but still effective method is to place the beans in a box, the bottom of which is covered with a thick layer of newspaper. There is an opinion that these insects are afraid of printing ink.
When all preventive measures are completed, you can begin preparing the grains for planting. One of the most important points is their soaking.
Why soak beans before planting?
The main question that arises for all beginning gardeners is: do they need to soak beans before planting in open ground? The answer to this is almost always positive.
To begin with, it is recommended to sort through all the beans and remove any diseased or damaged ones. Only then can you soak it. This is necessary so that the seeds can hatch faster. After all, it is difficult for sprouts to break through the hard and dense skin of the grains.
Experienced summer residents do not recommend leaving beans in water for a long time. This way it can be ruined. The best method is considered to be pre-germination in a humid environment. This approach will prevent the use of so-called idle beans and create optimal conditions for the grain to form a sprout.
The procedure is carried out as follows:
- You need to take a flat colander and cover its bottom with a thick, wet cloth;
- Sort and wash the grains, place the first class beans in the prepared bowl in 3 layers;
- Gently pour clean water on top and cover with a thin cloth or 5-layer gauze;
- You need to keep the beans hydrated all day. But this must be done carefully so that the water does not stagnate, otherwise the planting material will rot.
The first sprouts will appear within a day, or in extreme cases - after 2 days. But it’s too early to plant them in the ground. You need to wait until they grow to 3 cm. To know how long to wait, you need to study how bean and pea seeds germinate.
Then, when the weather is warm outside, you can sow the sprouted grains into the soil to a depth of 5-6 cm.
Should you soak green bean and green bean seeds?
To answer the question of whether it is necessary to soak the seeds of asparagus beans before planting, you should first understand which crop is called asparagus and which is called pod. Often these names are taken as synonyms. This is not entirely correct. Every green bean is a green bean, but not every green bean can be considered an asparagus. It's worth understanding the difference.
Black Eyed Peas
Green beans are also called regular beans and are a member of the legume family. There are about 50 varieties of this plant, including bush and climbing varieties, differing in germination rate and ripening time. Varieties are also divided into shelling, decorative, semi-sugar and sugar. The latter are devoid of hard fibers and, when unripe, are very soft. They are valued for this quality and for their delicate taste. It is these beans that are called asparagus beans. At the moment, many hybrids of this crop are known, but they all have one thing in common: they have weakly expressed grains.
As for soaking the seeds before planting, many gardeners prefer not to do this for asparagus crops. It is believed that this way the seedlings appear more friendly. But you must follow some rules. It is recommended to plant after May 20th. If you do this earlier, the sprouts may freeze. We need to prepare a long, narrow bed. Arrange the grains on it in 2 rows. Form furrows 5 cm deep every 10 cm and pour water into them. Then put the beans in there and sprinkle with earth.
For other types of green beans, it is best to use traditional soaking methods. Those. immersed in water for several hours or sprouted on a wet cloth.
Green beans
Step-by-step soaking instructions:
- If you have chosen the method of completely immersing the seeds in water, it is important to know how to do it correctly. It is recommended to soak for no more than 15 hours. Otherwise, the beans will start to spoil. Although it is better to calculate the time based on the solution. For example, beans can be kept in melt water for about 12 hours, and in potassium permanganate - no more than 8 hours.
- After water, the swollen seeds are dipped in a boric acid solution to protect future shoots from pests. This procedure is carried out no longer than 5 minutes.
- There are situations when it is not possible to pre-soak the grains. Then you can use the express method. Right before sowing, pour hot water (about 70 degrees) and add a pinch of manganese. Then immediately sow the grains and water them with the remaining solution. This way they will be more reliably protected from pests.
Further care
It may seem to an inexperienced summer resident that soaking and disinfection can solve all the problems that are possible when growing beans. But this is far from true.
One of the most important requirements is a constant supply of large amounts of air to the roots of the plant. Therefore, the soil should be regularly loosened and irrigated. Be sure to prevent crust formation after watering and rain. Plus, you need to be more careful to ensure that no diseases arise. If their appearance is noticed at the initial stage, the culture will be easier to save.
Planting beans
Beans need pollination. Spraying the leaves and flowers of the vegetable with sweetened water will help make it more noticeable to insects.
Before flowering, the legume plant should be watered at the rate of 6 liters per square meter. When the pods begin to form, you will need 2 times more water. With irrigation, it is very important to know when to stop.
Over-watering will cause the beans to turn green, reducing the number of pods. And a lack of water threatens to shed the ovaries, which will also significantly reduce the yield.
According to reviews from summer residents, beans do not require fertilizing, except for what is added during sowing or left over from previous vegetables. If fruiting is weak, you can add wood ash or bird droppings.
Whatever variety of beans is chosen, any variety of this crop is rich in vitamins and microelements that help the body maintain tone. In addition, the substances contained in the grains and pods of the vegetable can prevent such serious diseases as atherosclerosis, hypertension, and diabetes. People prone to such problems simply need to include this product in their diet. The question of whether it is necessary to soak beans before planting can be considered resolved. The main lesson to learn is that it is easier for grains to germinate through a softened shell.
Beans are grown successfully and without problems in open and protected ground. Open ground harvests are not inferior to greenhouse crops, except that they please summer residents a little later. Therefore, if the goal is not to obtain a guaranteed abundant harvest of beans for sale, you can plant them in open ground without fear. This culture is unpretentious, feels good both along the fence and in joint plantings. At the same time, it even helps other vegetables grow and develop, and it itself saturates the soil with useful nitrogen from nodule bacteria.
Conditions for growing beans
In general, beans are unpretentious in care, but still have some special requirements for growing conditions. Due to the fact that beans are an exceptionally heat-loving crop, most varieties are very damaged by late frosts. It only takes one time for it to freeze, and then all your spring work will go to waste. At the same time, beans can tolerate short-term cooling down to –1°C.
The optimal conditions for the growth and development of this plant are considered to be a temperature of 20-25 °C. Fruits begin to form already at 15°C. Too cold weather, winds and rains provoke the fall of flowers and the appearance of fungal diseases. A significant increase in temperature, like cold weather, is also undesirable for beans. In hot and dry air at 30°C, the flowers fall off and the fruits do not set.

Soil for beans
Beans grow well on calcareous light soil; they do not tolerate acidic, heavy, damp, over-compacted soils. Indicators for beans are recommended within the pH range of 6.5-7.0. Sandy loam and light loam with deep groundwater are suitable.
The soil on the site should be cultivated and warm, fertile, but without excess nitrogen. Since bean nodule bacteria themselves take nitrogen from the air and saturate the soil with it, excess mineral nitrogen fertilizer can lead to the development of powerful green mass to the detriment of the fruit. Therefore, when enriching the soil, it is worth considering and thinking, first of all, about adding potassium.

Planting beans
When planting beans, for high-quality seed germination, you need to take into account the temperature of the soil and ambient air, calculate the timing and choose a place for planting, properly prepare and soak the seeds, following the sowing scheme and technology.
Bean planting dates
To correctly determine the timing of planting beans, you need to take into account the period of the expected last frost and plant the seeds no earlier than a week before a possible cold snap. Therefore, in a specific climatic region, the time for planting beans is calculated individually. Moreover, in warm southern areas, where summers are long, warm and sunny, beans can be harvested several times per season.
Beans are planted in open ground starting in April; in colder regions (Ural, Siberia, Far East) - no earlier than May 15-20. When determining planting dates, it is best to focus on soil temperature. Bean seeds begin to germinate at a soil temperature of at least +10 °C. If you plant beans in cold, unheated soil, the yield decreases sharply. They can rot even at the swelling stage, in the seedling phase. There is no such danger in heated soil, so plant beans when the soil at a depth of 5 cm warms up to 12-14°C. It is necessary to calculate the time of planting so that seedlings appear when the threat of return frosts has passed. Beans sprout just 7-8 days after sowing.

Bean planting site
When choosing a place to plant beans, you should take into account its biological characteristics. Beans are a short-day plant, but light-loving. Therefore, it needs sunny areas, because... Lack of lighting leads to stretched plants and reduced yield. Therefore, it is recommended to plant it in an open place where the sun shines all day, and away from tall crops that can shade it.
Cultivated areas with a southern slope that are well heated and protected from the wind are suitable for beans. To better warm the soil, especially in lowlands, places, it is better to make the beds for beans higher. Beans can be planted along the fence in one row, and the harvest will be sufficient.
Beans in joint plantings
Climbing and semi-climbing varieties of beans are often used as a seal for other plants and are planted along the edges of the garden or beds. Beans enrich the soil with nitrogen due to nodule bacteria, so it is useful to use them in mixed plantings. Crops compatible with it are,.
Seed disinfection
Most plant diseases are transmitted through planting material, so it is recommended. They are placed in a solution of potassium permanganate for 30 minutes, after which they must be washed and allowed to dry. Also, to disinfect seeds, they can be treated with fungicides immediately before sowing. To protect against the nodule weevil, beans can be briefly immersed in a warm solution of a mixture of ammonium and boric acid before planting.
Seed germination
To speed up seed germination, they are soaked the night before planting in clean (possibly melted) water for 15 hours. Also, to improve the germination of bean seeds, they should be heated. The seeds can be poured into a thermos with hot water (temperature no more than 45 °C), screw the lid tightly and leave for 10-12 hours. Under the influence of high temperature, the seeds will swell and the beans will germinate faster and more efficiently.
Hardening of seeds
The procedure is very useful for beans; it allows you to sprout earlier. The soaked bean seeds are placed in the refrigerator on a shelf at a temperature of 2 °C and kept there for 5-7 days, not allowing the seeds to dry out. Contrast hardening can also be carried out. Bring the seeds to swelling at a temperature of 18-20 ° C, while making sure that they do not have time to germinate. Then again place in the refrigerator at a temperature of 2-3 °C for 6 hours and repeat this procedure several times.

Bean planting scheme
Beans are planted in rows so that the distance between them is 50-60 cm, and between plants about 25 cm. When planting using the square-cluster method, the holes are made at a distance of 45 cm from each other. The sowing rate of bean seeds depends on the weight of the seeds and. On wet soils, seeds are planted to a depth of 3-4 cm, on dry soils - 5-6 cm. After sowing the beans, the surface is compacted to improve seed germination and retain moisture. The soil can also be mulched with a layer of 3-4 cm.
Thickening the crops is tantamount to shading them, so it is better to sow beans less often. If thickening does occur, it is better to thin out the beans so that each plant receives enough light
Planting beans through seedlings
To get a bean harvest 2 weeks earlier, it is recommended. Then, from the end of April, in the phase of two true leaves, the seedlings are planted in open ground and covered with polyethylene to protect them from low temperatures.

Bean care
General care for beans includes the same basic principles as care for other legumes: for,. When caring, special attention should be paid to watering - beans love water, but in moderation. When planting beans, it is imperative to loosen the top layers of soil, feed and disinfect the plants in a timely manner.
Beanpole
Low-growing bush varieties do not need garter at all. Taller varieties may require support. For climbing bean varieties, supports are installed before sowing and planting holes are made next to them. The supports will support the plants and promote normal growth and development.
Loosening and hilling beans
When caring for bean crops, it is important to prevent crust formation. Therefore, during the growing season, do not forget to loosen the soil and break the crusts, otherwise the seedlings will break as they make their way to the surface. Bean seeds are embedded in the soil shallow when planted, so the plantings require hilling. Thanks to this procedure, the plants receive support, stand more steadily and do not lie down after rain and wind. The first time the beans are hilled up to the base of the first leaf, the second time - slightly higher.
Bean feeding
Beans are an unpretentious crop; most often, fertilizers applied during planting are sufficient. Manure is not applied to beans; nitrogen fertilizers are added at 20 g/m², phosphorus and potassium fertilizers - 30 g/m² each. With weak growth, fertilizing is possible.
The beans themselves absorb nitrogen from the environment with the help of nodule bacteria on the roots. It does not require special feeding, but will appreciate the addition of mineral microelements. When applying fertilizers, you should be careful not to burn the plant. Make sure that dry fertilizers or solutions do not get on the bean leaves - even if you quickly wash off the residue with clean water, this will not prevent the burn. Place dry fertilizers at the very surface of the soil, and water liquid fertilizers between the rows through the narrow spout of a watering can.
Watering beans
Excess and lack of moisture in the soil equally leads to inhibition of growth and loss of yield. The greatest demand for water is during the fruiting period. Although beans thrive in higher temperatures than other legumes, they do not tolerate heat or drought well. At high temperatures, buds, flowers and even young ovaries fall off. The same thing happens when there is a lack of moisture during flowering and bean setting. Therefore, watering in hot, dry weather is mandatory.

Diseases and pests of beans
In order not to lose the harvest, you need to carefully monitor pests and diseases that affect beans. First of all, weeds should be carefully removed, especially spurge, in the rhizomes of which the rust pathogen can overwinter. If signs of this disease are found during the growing season, the plant can be sprayed with a solution of 1% Bordeaux mixture.
The main diseases of beans are bacteriosis - any bacterial disease that spreads throughout the body of the bean. Various spots and rot often occur. This mainly happens when grown in greenhouses and greenhouses. Since beans are a heat-loving crop, many summer residents try not to freeze them and put them under cover for the whole season. This is not very correct, because the beans are poorly ventilated and are very quickly affected by bacteriosis.
Sprout fly
One of the worst pests of beans is the sprout fly. It gnaws at the base of young shoots, they begin to dry out quickly, and you can lose all your crops. As a preventative measure, it is necessary to observe crop rotation and not plant beans one after another, since the pest accumulates in the soil in the form of laid eggs and overwintering larvae. It is not recommended to add fresh humus compost, since it contains a lot of sprout flies.
Bean grain
Prevention of this pest is to harvest beans before they crack. The harvested grains are placed in the refrigerator for 15-17 hours or in the oven at a temperature of 60-70 °C for the same time.
Pea moth
Prevention of control of the pea codling moth is compliance with crop rotation and joint planting. You should not plant beans in a place where other legumes grew or next to them.

Harvesting beans
In beans, both unripe beans (green pods) and grains are eaten, so two harvest periods can be distinguished. If you collect beans for spade (immature fruits), then start from July 25 to August 10, and if for grain, from September 10 to 20. Beans are picked selectively at several times at intervals of 4-8 days as mature beans form, so that they do not age and become coarse on the bushes. You cannot be late with collection, because when they dry, the leaves peel and the seeds spill out.
How do you know when it's time to harvest beans? It is believed that green beans are ready to eat when the seeds inside the bean just begin to grow and reach a length of 3-4 mm - no more than a grain of wheat. You can pick the green pods earlier - then the taste and texture of the beans will be more delicate. If you pick the crop at a later stage, when the seeds are almost ripe, then it is not the pods that are eaten, but the dense bean grains.
If rainy weather is expected at the time of harvesting the beans, you need to cut off not the beans, but the whole bushes at the very surface of the soil. The plants tied in a bunch should be hung in a dry place with good ventilation, wait until the seeds are completely dry and peel them. When harvesting, bean plants should not be pulled out, but carefully cut off at the base so that the roots with nodule bacteria remain in the ground - this way they will serve as a good fertilizer. When they rot, the soil is saturated with nitrogen. Plants planted after beans will not require additional nitrogen fertilizers.
To obtain bean seeds, you need to wait for the pods and grains to fully ripen - they are harvested in a state of biological maturity. The seeds are collected, placed without additional processing in bags made of well-ventilated, loose canvas fabric, and then hung.
Storing beans
Freshly cut green beans are not stored for a long time, since the beans consume moisture very quickly and become unsuitable for food and processing. To preserve their taste, beans should be stored in a refrigerator with a relative humidity of 85-90%. Green pods lend themselves well to freezing and canning.
Cut bean bushes can be stored in special vegetable stores, simply by hanging whole bunches directly with the stems from the ceiling. This way, mice won’t get to them, the beans will be very well ventilated, and there will be less chance of them being damaged by harmful disease-causing pathogens.

Among the various vegetables planted in garden plots, it is necessary to mention legumes, which are unpretentious and even a beginner can cope with their cultivation. A good harvest can be achieved if you follow certain requirements for care and preparation for planting seed material.
There are many different types of legumes, so many people forget about beans, but any variety of them (asparagus, green or grain) is not only nutritious, but also very healthy. These fruits contain many important minerals and vitamins, plant proteins and fiber. With all this, beans are perfectly absorbed by the body.
You can plant beans around your house or along the fence, or you can place them between potato or cabbage rows. At the same time, the places where it grows beans, in the future they will be saturated with nitrogen, so you can safely plant vegetables in this soil next year. The choice of planting site will be determined by the variety of beans. Bush varieties can be compressed in beds, and climbing varieties can be planted near a fence or in places where they will have support.
Preparing seeds for planting
Before planting beans, they should be processed by carrying out certain activities with the seeds. First, the beans are sorted very carefully, removing all that are diseased, damaged by pests, or of irregular shape. After this, it is recommended to soak the beans in ordinary water to speed up the process of seed hatching, because they have a fairly hard shell.
Beans should be soaked for no more than fifteen hours, otherwise they will begin to deteriorate. Before planting, you also need to place the already swollen beans in a heated solution of boric acid. This procedure will protect the sprouted sprouts from pests (nodule weevil). Soak the beans in this solution for literally five minutes.
If suddenly you were unable to pre-soak the bean seeds before planting, then before sowing you will need to fill them with hot water (70°C), to which you need to add literally a couple of manganese crystals, after which the seeds must be immediately planted and the water poured onto the garden bed .
Preparing the soil for planting
Light, fertile, well-drained soil is ideal for legumes. If the soil is clayey and there is groundwater nearby, then beans will grow very poorly in such an area.
It is very good to plant beans in an area where cucumbers, potatoes, onions or cabbage previously grew. For higher yields, before planting beans in open ground, you need to fertilize the soil with compost or humus; you can also use ammonium nitrate. If the soil has a high nitrogen content, then the beans will produce a lot of green mass, and the pods will not be large enough.
You can start sowing beans at the end of April or at the beginning of May, but if frost is still possible, then the crops should be covered with film. Beans are a heat-loving plant, so frost can destroy them. Bean seeds will begin to germinate when the ground warms up to 12°C at a depth of several centimeters
Discuss this article on the forum
- Lunar sowing calendar for January 21, 2017
- Seasonal work in the garden and vegetable garden: late January – early February
- Leafing through the folk calendar: third week of January
- Lunar sowing calendar for January 20, 2017
- We walk barefoot in winter: which heated floor is better to install?
Beans are a hearty vegetable crop that, with proper care, can produce an excellent harvest in a personal plot, in a vegetable garden, and even in an apartment. Taking into account some capriciousness of the plant, it is important to know how to plant beans using seedlings or sowing in open ground, and how to properly maintain their growth and fruiting.
How to choose bean seeds for planting
 How to choose bean seeds for planting
The first thing you need to do before planting beans in the garden is to choose the right variety. The key guidelines are the type of fruit produced and the climatic zone of the cultivation site. According to the first characteristic, the available varieties are divided into three groups:
- Pulse or shelled beans. Representatives of this type, after ripening, only eat dense, nutritious beans stored in dried pods. Popular varieties: Shokoladnitsa, Gribovskaya 92, Mechta Khozyayki, Ballad, Zolotistaya, Rubin.
- Green beans are the direct opposite of the previous type. In plants of this group, the fruiting part is represented by green pods without large beans inside. Varieties suitable for planting in the garden: Purple Queen (Purple Queen), Melody, Zhuravushka, Saksa 615, Fatima, Deer King, Caramel.
- Semi-sugar crops are a universal option. In the early stages, their pods can be completely consumed, but in later stages a parchment-like fibrous layer forms inside, which must be removed before cooking. On a personal plot, it is advisable to plant beans of the Indiana, Secunda and Rant varieties.
How to plant beans: seed selection criteria
The fundamental factor of choice is the temperature and climatic characteristics of the landing site. Before choosing bean seeds for planting, you need to think about the duration of the warm season so that the cultivated plantings can reach maturity before the onset of cold weather. Based on ripening time, bean varieties are divided into:
- Early ripening: Saxa 615, Melody, Caramel, Butter King (asparagus), Indiana, Secunda, Deer King, Gribovskaya 92. These hybrids were bred for successful cultivation specifically in northern and temperate latitudes.
- Mid-season: Ballad, Mistress's Dream, Ruby, Golden, Winner, Panther (asparagus), Fatima, Purple Queen. In a season with good weather conditions, these bean hybrids grow well in any area.
- Late ripening: Gama, Dita, Kentucky Beauty, Tara. The bean harvest for these varieties occurs 60-80 days after planting, and the grain harvest - 100-137, so in the latter case, cultivation is advisable only in warm regions.
When choosing a variety for home cultivation, it is advisable to isolate yourself as much as possible from worries about combating all kinds of infections and pests. Therefore, when choosing between two similar hybrids, it is better to lean in favor of the one that is more resistant to such negative factors.
Naturally, during acquisition, seed material must be assessed visually. The beans must be smooth and hard, free from bugs and defects caused by them, and the bag must not contain debris. In specialized stores, when purchasing, you can familiarize yourself with the certificate of quality and compliance with GOST requirements.
How to Plant Beans in a Good Place
Experts and experienced summer residents note that beans, the planting and care of which require close attention, grow well in conditions of a short but bright sunny day, lasting no more than 12 hours. With such a rhythm of sunlight, plants, oddly enough, begin to bear fruit faster, boasting decent yields.
 How to plant beans at home
In the southern regions, long daylight hours in this case have to be shortened artificially by planting beans in the ground in the second half of the season, or by covering the beans after 12 hours of illumination with an opaque film or cloth until morning.
It must be said that such serious requirements for the nature of lighting are imposed only at the initial stages of the growing season. Somewhere towards the equator of development, plants calmly grow and bear fruit, regardless of the length of the sunny day.
It is worth remembering the differences in growth of specific varieties of crops. Bush varieties of beans feel good planted between rows of cabbage and potatoes, and climbing varieties - wherever there is support that allows the branches to climb upward.
Soil preparation
How to plant beans so that they germinate faster and delight you with an enviable harvest? Prepare the soil correctly! It should be airy, rich in nutrients and well drained with an acidity level of 6-7 pH. Planting beans in clay soil or close to groundwater makes maintenance much more difficult.
The crop yield on dense and clayey soils increases with the pre-planting application of compost (4-8 kg/m2), humus (8-12 kg/m2), sand or loosening mulch. Ammonium nitrate, enriched with a mixture of superphosphate and potassium chloride, also has a decent fertilizing effect. But it is better to avoid an excess of nitrogen in the soil - it will provoke an active increase in leaf mass, which will negatively affect the fruit part. There is no need to feed with nitrogen - the plant fully receives this element from the air supplied to the root nodules.
How to soak beans before planting
In fact, to effectively grow beans, the grains do not need to be subjected to any pre-sowing treatment. After being immersed in moist soil of a suitable composition, they confidently break through and reach ripeness within the expected time frame.
However, it is often practiced to pre-soak beans to stimulate their germination. How long to soak the beans before planting depends on the solution in which the grains are placed: you will have to keep them in melt water for up to 12 hours, and in a mixture of warm water with potassium permanganate - up to 6-8 hours.
 How to soak beans before planting
Before planting in the ground, both dry and sprouted bean seeds should be dipped for 3-5 minutes in a disinfecting aqueous solution of H3BO3 (0.2 g per 1 l). This will make the grains more resistant to infections and pests.
How to plant sprouted beans
Sprouting beans before sowing can significantly speed up the time of emergence and quality of emerging seedlings. This method of seed preparation, firstly, allows you to eliminate “idle” grains even before immersion in the ground, and secondly, provides the seeds with comfortable conditions for the formation of a strong and healthy seedling. Order of conduct:
- Take a container with a wide flat bottom and holes to drain excess water.
- A moistened cloth is placed inside.
- The sorted and washed dry grains are laid in 2-3 even layers.
- The top of the grains is generously moistened with water.
- The whole thing is covered with a thin cloth or 4-6 layers of gauze.
- You will need to water the seeds several times throughout the day to keep them moist. But the liquid should not be allowed to stagnate, otherwise the beans will begin to rot.
The first roots emerge from the seeds after 24-40 hours from the start of germination. Before planting sprouted beans in open ground, you should wait until the seedlings reach a length of 2-3 cm. The planting process itself is no different from how dry, unsprouted grain is sown - in soil warmed above +10˚C to a depth of 5 -6 cm.
How to plant beans with their roots facing up
If you place a bean sprout with the root up when sowing in a garden bed or in a pot, nothing critical will happen. The part that is formed in the seeds after germination grows from the subcotyledon and should in the future become a root. Even if the location is incorrect, the seedlings, as a rule, rush towards the sun and hatch. If you have doubts about the correct placement of the beans, it is better to place them sideways in the holes to make it easier for the roots to go in the right direction.
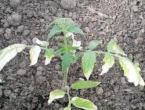
Beans planting and care
 Photo: How beans grow
How to plant and care for beans in open ground
Suitable temperature conditions for planting crops in different shiroats are established at different times. In cold regions - by the end of spring and beginning of summer, in warm regions - in early May. The main indicator that you can start sowing is the temperature of +12-15˚C at a depth of 10 cm. It also makes sense to check the weather forecast to find out when you can plant grains without the risk of them being spoiled by cold weather. A good sign of the onset of suitable weather is also the flowering of chestnuts. If a drop in temperature occurs after sowing the beans, you need to cover them with polyethylene overnight.
As a rule, climbing hybrids are planted a week later than erect ones. For conveyor harvesting in autumn, you can sow the crop from May to July, taking breaks of 10 days.
What's the best way to plant beans?
The most optimal planting scheme for a personal plot and vegetable garden is a planting scheme in rows with each plant spaced 20-30 cm apart from each other, and the rows 35-50 cm apart. The grains themselves should be planted 2-3 pieces in each hole to a depth of 4 to 6 cm. Several seeds are needed so that there are no “idle” holes in the garden bed - one of the grains will definitely sprout, and if there are several of them, it will be enough to remove the weak ones. This results in a bed of lush, healthy bushes.
Before planting beans at home, which are climbing varieties, it is necessary to construct posts or supports on the site to lift the branches up. A cone-shaped tripod made of wooden slats is well suited for this, since the branches of the plant form and “crawl” onto the support counterclockwise. You can also get by with a classic trellis of two posts with a rope or wire stretched between them.
How to plant beans in a pot for seedlings

- Pour a substrate of garden soil mixed with rotted humus into plastic or peat cups.
- A month before transferring the plants into the ground, sow the beans in glasses to a depth of 3-5 cm.
- Sprinkle a small layer of sand on top.
- Seedlings should be provided with sunlight, according to the rules described above, and also watered in a timely manner.
- Before planting sprouted beans in the ground, you need to make sure that the air temperature outside remains above +5˚C both day and night.
Transferring seedlings to the ground should be carried out after warming up the ground at the planting level to +10-15˚C according to a scheme similar to that given above. For bush varieties: 15-25 cm between sprouts and 40 cm between rows, and for climbing varieties - 20-30 cm and 50 cm, respectively.
Beans: outdoor care
 How to plant beans in open ground
One of the main requirements for confident growth and fertility of beans is an active supply of oxygen. Therefore, it is very important to regularly loosen and irrigate the soil, and not allow a crust to form after watering and precipitation. It is also necessary to timely check for the presence of diseases - the extent of possible losses depends on this.
Until the sprouts have entered the flowering phase, daily watering is required at the rate of 5-6 l/m2. During the setting and ripening of pods, it is recommended to double the irrigation volume. When there is a shortage of water, beans shed ovaries and inflorescences, and when there is too much water, the green mass grows too much, negatively affecting fruit formation.
In general, additional fertilizing for beans is not required, since what is applied before sowing and what remains from previous crops is enough. If fertility is low, it is permissible to add a little wood ash or rotten bird droppings.
Green beans: features of planting and care
- Seedlings of green beans are more sensitive to cold, so they are sown 1-1.5 weeks later than grain varieties.
- The best green manures for asparagus varieties are carrots, onions, potatoes and tomatoes.
- Organic matter should be added to green beans in the fall, and rotted compost and wood ash should be added in the spring. Twice a season you can enrich the soil with mineral complexes.
- These beans are very sensitive to lack of moisture, so you need to constantly maintain moisture.
- Regular loosening of the soil gives the roots the opportunity to extract nitrogen from the air and prevents weeds from developing.
- After the buds have formed, you can add fertilizer to the beds in furrows at a distance of 10 cm from the rows.
- To stop the growth of individual branches, you need to pinch their tops.
- Shoots 10 cm high need to be hilled to improve nutrition and strengthen the root system.
How to grow beans at home
For those who do not have their own garden plot or who do not have the opportunity to cultivate legumes because the summer is too short, an alternative such as growing beans at home may be suitable. When equipped with a suitable lighting mode, indoor mode will allow you to plant and harvest beans all year round. In apartments, glazed loggias, which are essentially the same greenhouses, are well suited for these purposes.
 Growing beans in a greenhouse
Bush and low-growing varieties of beans are well suited for growing at home; they will not occupy the entire space of a balcony or window (when cultivated on a windowsill). It should be noted that in indoor conditions it is more advisable to grow sprout beans rather than shelling beans. Firstly, it has a shorter growing season, and secondly, it is impossible to achieve a serious grain harvest that pays off the efforts in such cramped circumstances. Vigna Chinese or Japanese are quite suitable varieties for cultivation in the loggia.
Sowing is carried out in accordance with the standard procedure, but somewhat more densely. You can leave 10 cm between plants in a row, and 20-30 cm between rows.
How to grow beans at home: care
Beans require saturated and light soil for growth, which you have to take care of creating at home. In addition to the peat-sand base, it is necessary to add fertilizers like Fitosporin, OMU or AVA to the soil. To enrich the soil with minerals, you can pour the universal product Uniflor-micro, diluted with water in a proportion of 1 tsp, into the soil. for 3 l.
Excess moisture negatively affects the health of beans. From the appearance of seedlings until the appearance of 4 leaves, you need to water it moderately but regularly. After this, you need to stop watering until the flowering phase begins.
If AVA was not applied during pre-sowing soil preparation, during the growing season small mineral supplements from potassium and phosphorus fertilizers (1 tsp per 3 l) may be needed. No nitrogen needed.
To protect your home garden from pests, it is better to spray it with biological products like Fitoverm. The main thing is to consider how many days after spraying the pods are safe to eat. To prevent fungal and bacterial diseases, the leaves need to be washed a couple of times before flowering with Fitosporin.
It is believed that planting beans is not a difficult task. Indeed, you can simply throw the seeds in the garden and forget about them. Stunted vines with a pair of flaccid pods will grow. If you want to have delicious fruits from your own garden on the table, pay attention to the plant and provide the care that this species requires. In areas with short summers, find out how long it will take for the crop to ripen after planting and consider whether the variety is right for you.

Features of beans
One name hides many varieties of legumes. Before purchasing seeds, you need to decide what varieties you need. Much depends on how you intend to use the crop: cook unripe pods or make bean soups.
According to food use, beans are divided into 3 categories.
- Asparagus produces tender pods without a parchment layer. A very tasty variety, but the harvest can only be preserved frozen.
- Peeling. Only seeds that can be stored in dried form for many years are suitable for food.
- Semi-sugar. Young pods can be eaten, but later they harden and only the seeds become suitable for culinary purposes.
In addition to the quality of the fruit, there are many more ways to classify this crop. One plant may be completely different from another, it is even difficult to assume that they belong to the same species.
Beans are:
- curly;
- bush;
- erect;
- annual;
- perennial;
- vegetable;
- decorative
Although the plant came from warm countries, it is not very picky about temperature. Of course, if there is frost, the sprouts will die, but at above-zero temperatures the grains can be sprouted in open ground. The main problem when growing in northern regions is not the cold summer, but the long duration of daylight hours. The homeland of the species is Latin America, located near the equator. The duration of light and dark time of day there is approximately the same, about 12 hours. White nights interfere with the development and yield of beans; care for them will need to include covering them with opaque materials.
A big advantage for the gardener will be the ability of plants to be pollinated only by their own flowers. You can grow several varieties of beans in a garden bed, but the pollen of one specimen will not fall on others, and all qualities will remain unchanged. If you do not have hybrid varieties, you can safely collect the seeds and plant them next year in your garden. All varietal qualities will be preserved, no matter how many other varieties grow in front of the bush.

How to wake up seeds
When purchasing planting material, be sure to look at what type of plant it is. Asparagus varieties will give you young pods, while shelled varieties will only give you seeds. In any case, the beans must be soaked before planting, otherwise they will not hatch for a long time. With a short summer, pay attention to the timing of fruit ripening. Try to purchase regionalized varieties of local selection, which are more hardy and do not require special care.
Planting times depend on the weather. For the beans to germinate, the ground must warm up to +15⁰ and the spring frosts must end. In the southern regions, they begin to plant when the chestnut tree blooms, but in areas where this tree does not grow, you will have to rely on the weather forecast and your own intuition. First, plant the upright varieties of beans in the ground; after a week the climbing plants will come in turn. If the summer is warm and long enough, bush beans can be planted in July in the beds where earlier vegetables and herbs grew before.
Sort through the seeds, set aside any rotten, damaged or deformed ones. They need to be soaked in the evening and kept in water all night. In the morning, select those that have not swollen, and keep the rest for a few minutes in a solution of boric acid (dilute 1 g of powder in 5 liters of water). With this treatment before planting, the plants will not be afraid of diseases and pests.

Site preparation
It's time to determine how to plant beans so that they germinate faster. Legumes have their own soil requirements. They do not need excess nitrogen; they themselves are good green manures and enrich the soil with nutritional components. The plant does not like soils that do not drain water well and contain a lot of stagnant moisture. It grows best in sunny areas where there is no strong wind. Remember that legumes can be grown in one place for only one season; you can return to the same bed no earlier than after 3 years, so that the plantings are not attacked by pests and diseases. But if vegetable crops grew in front of them, the plants develop correctly and enrich the depleted soil.
Grow beans in poor, nutrient-deprived soils. Next year the bed will be saturated with nitrogen and ready to accept vegetable crops.
In the fall, dig up the area, add 0.5 buckets of compost, 1.5 tablespoons of superphosphate and 1 tablespoon of ash per m2. Make rows at a distance of 0.5 m from each other, dig holes at intervals of 30 cm. No more than 3 bushes should grow in each nest, but you can put 5 beans for insurance. Water well and compact the soil. If you are afraid of night frosts, cover the bed with film.
The correct planting of beans is to a depth of 5 cm. If the soil layer is too thin, the sprouts may fall to the ground. If the planting is too deep, you will have to wait a long time for germination. In this case, the crop sometimes does not germinate at all; the grains rot in the soil.

Plantation care
When the beans have already sprouted, bush varieties should be hilled to keep the stems straight. For climbing beans, you need to provide support: trellises or cords running from top to bottom. You can plant the plant under fruit trees and tie twine to the branches. Legumes will fertilize the soil for the apple tree, and it will protect the lashes from the wind. Do not use slippery materials as support for the stems: metal, plastic: the lashes will slip off them. Other tall crops (corn, sunflower) are suitable as supports, just make sure that the plants are not affected by the same diseases and pests.
You can drive a stake into the area, tie pieces of twine to its top and secure them on the ground in a circle. The plants will braid the cords, and you will get an Indian wigwam for children's games.
For irrigation you need to use rain or settled water. The temperature of the liquid should not differ greatly from the surrounding air. If you brought water from a well or underground container, do not pour it directly under the bush, let it warm up.
If you want to get a rich harvest, water the beans according to the correct pattern.
- After planting, water no more than once every 7 days. Determine how much water you need: the soil should be moderately moist, but not soggy.
- When the fifth leaf appears, stop watering.
- When flowers appear, resume watering as after planting.
- Gradually increase the amount of liquid and reduce the intervals between waterings. Watering should be doubled and more frequent before pods form.
Care includes fertilizing the beds. Fertilizing begins after the appearance of the true leaf. During this period, the plant needs fertilizers with a high phosphorus content. When the buds begin to appear, water the bed with a solution of potassium salt, and when the beans are forming, sprinkle ash under the bushes. Legumes do not need nitrogen; they will take the required amount from the air, and with an excess of nitrates, greens will begin to develop rapidly to the detriment of the harvest. Remember that plants can absorb all nutrients only in dissolved form; after each feeding, water the bed.
 Manifestation of anthractosis on a bean leaf
Diseases and pests of legumes
Legumes rarely get sick. Mostly, improper care, contaminated soil or planting material are to blame for the occurrence of diseases. To avoid infection, do not plant the same crops in the same area for several years. Soaking in boric acid helps develop immunity. As soon as the beans have sprouted and after harvesting, you can treat the soil with the Fitosporin disinfectant. If the disease appears, dig up and burn the damaged plants, and treat the soil and other plantings with Bordeaux mixture.
There are 3 main diseases of legumes.
- Viral mosaic. When infected, dead areas appear on the leaves.
- Bacteriosis. It not only causes the death of this season's plantings, but also remains in the soil for many years.
- Anthracnose. Brown spots appear on the leaves, then the affected areas acquire a yellow tint and holes.
Beans are dangerous pests: cutworms, whose larvae eat greens, and bean weevil, which lives in beans. Larvae can be controlled using insecticides. To prevent weevil from entering the area, sort out the seed, plant only intact beans that have been pre-treated with boric acid, and organize proper care of the plantation.

Harvesting and storage
Both green pods and ripened beans are suitable for food. 15 days after flowering, young fruits can be collected. It is better to cut the pods with scissors in the morning. At this time, they gain the maximum amount of moisture and become juicy. You can eat green beans fresh, in salads, or in vegetable dishes.
The grains are harvested when the pods become dry. Cut the stems and hang them by the bottom in a dry area with good air circulation. After 15 days, the pods will easily open and the grains will easily separate from the cuttings. If necessary, dry the harvest, and then store it in jars with lids. Only fruits from the lower part of the bushes are suitable for seeds. Select the strongest and most productive plants without signs of disease, collect the grains and store them on the bottom shelf of the refrigerator.
There is no need to dig up the roots. Special nodules on the underground part of the plants will continue their work. Biological processes enrich the soil with nitrogen. The remaining root system will decompose and turn into organic fertilizer before the next season.

Growing beans indoors
Grain varieties in cold regions do not have time to produce a harvest. For this area, growing beans at home or in greenhouses is more suitable. The bush variety is more suitable for indoors; it does not need much space to grow. If you have tall windows, you can also plant climbing ones.
The plant container must be deep so that the roots can develop properly. Fill the boxes with a mixture of peat, sand and compost with the addition of complex fertilizers. For climbing varieties, provide supports 1.5 m high. Watering and care are carried out according to the same scheme as for planting in open ground.
Plants do not have enough light indoors. Arrange lighting with fluorescent lamps so that the “day” for beans lasts at least 12 hours. Please note that grain yields at home will be low. This option is more suitable for obtaining young pods, although you will not get as many of them as in the garden.

Conclusion
Growing beans in open ground is better in the southern regions. The ripening period for grain varieties can exceed 100 days. If you plant grains in June, harvesting will begin in mid-September. Find out if warm weather in your area will last until early fall. When purchasing planting material, choose types of local selection; they are more adapted to the conditions of your territory. The grains must be soaked before planting; they will not germinate when dry.
Caring for beans includes watering according to a special scheme. During each period of development, plants need different amounts of moisture. Be careful, the volume of the harvest depends on this. If everything is done correctly, in the middle of summer you will eat plenty of young pods, and before the onset of frost you will create a supply of grains for the entire winter.
Anna
How to plant beans so that they germinate faster? Do I need to soak beans before planting?
To get a rich harvest of beans, only high-quality care of seedlings is not enough. The process of germinating seeds to obtain strong sprouts is important. In order for them to germinate quickly, you need to know how to plant them correctly and whether they need to be soaked. We will answer these questions.
Attention! As for soaking in water, this should under no circumstances be allowed, since the bean seeds may simply rot. But a small amount of moisture is needed.
The germination process is quite simple, but before you begin, you need to carefully sort the seeds in order to identify defective specimens: wrinkled, moldy, damaged, and just garbage.
There are several different ways to germinate bean seeds. All of them are quite effective and are based on the same principle: creating an environment with sufficient light and moisture. Such conditions will contribute to the rapid soaking of the outer hard shell of the seeds and their swelling.

Germinating bean seeds
So, you can quickly germinate seeds in the following ways:
- Wrap the bean grains in a damp, loose cloth/gauze (moist, but not wet, otherwise the seeds may rot and no sprouts will appear). Then re-wrap the gauze base with another layer of damp gauze. To prevent plaque from appearing on the bean seeds, the cloth/gauze must be washed periodically, not forgetting to squeeze it thoroughly. If you wish, you can add a little growth stimulator to the water for rinsing the gauze. You will find the first sprouts literally the next day. And you can safely plant them in the ground.
- The second method is perhaps more reliable than the first in the sense that its use minimizes the possibility of mold appearing due to impaired air exchange and rotting of seeds due to excess moisture. You will need a small glass container and a piece of damp cloth. Place the seeds in a container, cover the top with a cloth and place in a warm place. When germinating seeds in this way, sprouts appear a little later - after 2-3 days.
- The last method is the most unusual and most visual. We will need small cotton balls. So, how does germination occur? First of all, we form fairly dense balls of cotton wool, lightly moisten them with water and place selected bean grains on them. Then we place them in a transparent glass container and place it in a warm place with enough light. In just a few hours you will be able to observe the first activity. And in a day, young shoots will appear.
As you can see, germinating bean seeds can be done quite simply and quickly. The main thing is to do everything carefully and carefully so that the sprouts turn out strong and healthy. Good luck!
How to grow beans: video