Schemes of crafts made from colored corrugated paper. DIY flowers made of corrugated paper: production and examples of work. Simple and small
DIY flowers and floral arrangements. Master Class
In the spring we celebrate the holidays of March 8, Easter, and spring name days. Traditional gifts for these holidays, as well as decoration for festive interiors, are flowers and floral arrangements.
Age of children: Children 5 years old, senior group
Teacher:Kozlova Natalya Yurievna
Flowers made of corrugated paper. Master class for children
I present to your attention Flowers and floral arrangements made of corrugated paper using the “Cutting” technique.
Trimming is one of the types of productive activities - a technique for making three-dimensional paper crafts. This is a type of paper design - the art of paper rolling, in which three-dimensional terry compositions are created by gluing rolled pieces of paper - tubes - end pieces onto a template or base: paintings, panels, mosaics, postcards, etc.
There are two types of facing:
On paper (the trims are glued to the base paper);
On plasticine (the plasticine base is laid out with trim pieces).
Trimming on paper happens:
❀ three-dimensional (the trims are glued at different angles to the surface of the sheet, which allows you to create a three-dimensional image;
❀ multi-layered (the trims are glued into each other in layers, one inside the other).
Trimming on plasticine happens:
❀ contour (trimmings are laid out along the contour of the image without filling the internal space);
❀ planar (the trims are located tightly to each other over the entire surface of the pattern);
❀ volumetric (the trims are glued at different angles to the surface of the sheet, which allows you to create a three-dimensional image.
❀ The basis for trimming on plasticine is an image covered with plasticine or a three-dimensional figure made of plasticine.
To make crafts using the trimming technique, you need the following equipment:
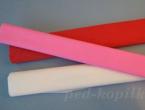
❖ Crepe (corrugated paper) or napkins
❖ Plasticine or PVA glue (you can use a glue stick)
❖ Scissors
❖ Ballpoint or gel pen refills, or cotton swabs, or brushes with a blunt end
The basis: velvet paper, cardboard, three-dimensional molds, foam plastic, thick paper, plasticine mold, etc.
Stages of work:
❖ cut out a small square from corrugated colored paper, 1 - 1.5 cm in size
❖ Place a rod end-to-end (for example, an unsharpened pencil) in the middle of the square and twist the paper tightly around the rod. It turns out to be a tube - a short end.
❖ The resulting small trim, without removing it from the rod, is glued to the workpiece and only then the rod is removed.
Each subsequent trim is glued next to the previous one tightly to each other so that there are no gaps left. The work is ready.
Works made using the cutting technique are unusually beautiful, voluminous and very popular with children and their parents.
To make our Flowers and floral arrangements using the Trimming technique, we need the following equipment:
❖ Corrugated paper of different colors
.jpg)
❖ Glue stick and cotton swabs
.jpg)
❖ Scissors
❖ Container for storing paper blanks
❖ Blanks for making a flower arrangement:
Cardboard mugs with a diameter the size of the flower;
Circles of corrugated paper of any shape - flower petals;
Job No. 1
Composition “Volume Peonies”
Blanks for making peony:
.jpg)
Circles of corrugated paper with a wavy shape - peony petals;
.jpg)
Leaves cut from green corrugated paper;
.jpg)
Background for a composition with the outline of a vase made using the cutting technique or a background with a glued-on vase cut out of colored paper.
.jpg)
Stages of work on making a peony:
❖ We take the petal blank in our left hand, and a cotton swab in our right hand. Place a cotton swab in the middle of the petal circle
.jpg)
And twist the petal tightly around the stick to the middle of the petal. It turns out to be a tube - a short end - a peony petal;
.jpg)
❖ grease the end-petal of the peony at the base with glue without removing it from the stick;
.jpg)
❖ glue the resulting petal-edge, greased with glue, without removing it from the stick, into the middle of the workpiece - a cardboard mug, and only then remove the stick;
.jpg)
❖ We glue each next peony petal trim into each other, one inside the other (multilayer trimming);
.jpg)
❖ Peony is ready;
.jpg)
.jpg)
.jpg)
.jpg)
.jpg)
❖ All that remains is to place our peonies in a vase made using the “plane facing” technique.
.jpg)
Job No. 2
Composition “Tender Carnations”.
Blanks for making cloves:
Circles of corrugated paper in a zigzag shape - carnation petals;
.jpg)
Cardboard circles with a diameter the size of the flower;
Leaves cut from green corrugated paper;
.jpg)
.jpg)
Background for a composition with the outline of a vase made using the cutting technique or a background with a glued-on vase cut out of colored paper.
Corrugated paper flowers are typically used to decorate gifts. But if you decorate a photo frame, wall clock with them, make a panel or an elegant one, then they will decorate the interior and bring lightness to it. Before you learn how to create flowers from corrugated paper with your own hands, you need to understand what material is suitable for this and what else is needed to make the craft look like a real plant.
Getting to know the material
Corrugated paper is also called crepe or crepe paper. The only difference is that gaufrer is a French name, and crepe is an English name. In Russian there is also an analogue - reaper, pressed paper. There are several options for corrugated paper on sale, but the main classification is divided according to the density of the sheets:
Paper for creativity and gift wrapping: density 30–50 g, small folds, the height of which is not regulated. It is not suitable for floristry because it does not stretch well, tears and gets wet from the glue.

Floral paper is used for packaging flowers and sweet designs. Its density is in the range of 120–180 g. Deep folds provide the necessary amount of stretch to create realistic colors.

Corrugated cardboard has a high density and is only suitable for making gift boxes.

Please note that the craft paper label says “fine crepe” on the packaging. The floral paper is marked with the inscription “crepe extra”, and the sheets themselves have transverse textured stripes.

Folds on floral paper are called flutes, which are divided into three types:
- E-flute up to 1.6 mm high – for making small flowers;
- B-flute up to 3.2 mm high – for life-size paper flowers;
- A-flute up to 4.8 mm high – for packaging.
The color palette includes not only plain paper, but also metallized double-sided paper, with gradient and rainbow colors.

We will also need auxiliary materials for creativity:
- Type tape, which is used as colored tape to decorate the base of the flower and stem;
- Scissors and stationery knife;
- PVA glue (thick), heat gun;
- Threads for attaching petals, sheets;
- Floral and regular wire;
- Wooden sticks for stems;
- Styrofoam balls or candies for the center of the flower.
And also: ribbons, frames, baskets, vases and even cups and saucers - the decor is limited only by the imagination of the master.
Basic techniques and secrets of creating flowers from corrugated paper
Master florists have come up with hundreds of ways to make flowers from corrugated paper with their own hands. However, there are basic techniques that, by combining and transforming, can achieve almost perfect resemblance to the original.
Stem
Please note that the stem for any type of flower is created according to the same principle:
- The base is floral wire, a wooden stick or a paper tube.
- You need to attach the stem to the head of the flower at the initial stage (it is threaded through the layers of paper that form the petals) or the flower is collected directly on the stem.
- The stem can be decorated either with a thin strip of corrugated paper with glue or green tape.
- To make it look more like a real branch, you need to cut out the leaves and attach them to the stem, masking the junction with tape.
How to easily roll a thin paper tube is explained in this video:
Stamens

Use a ready-made strip of corrugated paper in two or more colors, or you can cut it out from a sheet yourself. The layers are ground down.
Gathering should be done immediately - then you will not be able to pull out the thread without damaging the paper.
Then the workpiece is wound in a spiral around a rod or attached to a surface, and the collected waves create volume.
They are also made for this ball by twisting.

But in this case, a strip of corrugated paper is folded in half and then rolled into a roll. To prevent the flower from falling apart during assembly, it must be glued as the roll increases. Finally, use your fingers to carefully straighten the curls, forming an open rose. The base is a foam ball onto which the roses are glued.
Flowers made from corrugated paper using a similar technique are shown in a master class on creating a rose with an original curled edge:
This technique is popular for making chrysanthemums, daisies, daisies, carnations and other flowers with many small petals. The base is a long strip with cut fringe or cut rounded petals. For example, this charming rose.

Flowers from individual petals
These delicate flowers are made without a base, by joining individual petals cut out according to a template.

For sakura flowers you will need:
- three long rectangular strips with rounded edges for petals,
- one long rectangular strip with pointed edges for leaves,
- for the core, a short strip with transverse cuts.
The petal and leaf blanks should be folded in half, mark the center and straighten the edges, forming a bend. Assembly is carried out using glue by simply connecting the blanks one on top of the other, and a twisted core is attached to the center of the resulting flower.
Blanks for pansies are cut out of multi-colored paper; if desired, the middle can be tinted and veins drawn. The assembly of the flower is carried out by connecting the petals to each other also with glue or thread. Floral wire would be appropriate here as a stem.
This chamomile is collected using a similar technology, but to make a bouquet, a stick is used as a base.
To make this tulip as similar as possible to the real one, it was necessary to create a core using a special technology.

Flowers on a fixed basis
There are many varieties of flowers that are made using this technique: chamomile, but the most common is the English rose.

The peculiarity is that the petals are wound onto a base - a foam or paper ball, which can be replaced with a small round candy.
MASTER CLASS ON THE TOPIC
It is precisely on this principle that this
1. Cut strips of corrugated paper approximately 6 cm wide and 10 cm long. Colors can be combined at your discretion: a delicate milky core and rich yellow, orange or red outer petals.
2. Fold the blanks like an accordion along the width of the petal, rounding the edges.

3. Using your fingers, slightly straighten the corrugations, forming a wavy edge, then use toothpicks to wrap the petals, giving a natural shape.

4. The petal blank should be stretched, giving it a semicircular shape - this will facilitate the formation of the flower.
5. We wrap the base of the flower in a rectangular strip without cuts, pulling the corrugations so that the paper tightly envelops the ball or candy. We fix it with a drop of glue and tighten the bottom with thread.
6. We lay all subsequent petals overlapping in a circle, tightening them with thread. At the end of the work, we decorate the assembly site with a sepal of green or any other color in accordance with the intended composition.

Advice. If you want to make a bouquet on stems, then sticks should be glued with hot glue to the base of the flower - a ball or candy - before the flower begins to form.
Here is a slightly simplified, but no less spectacular version of this flower.

Master Svetlana Bormotova proposed a simple technique that turns an ordinary rose into an exquisite flower:

This decorative artichoke is also created on a fixed base. An incredibly beautiful decorative element!

You may not immediately guess that there is a candy hidden in the graceful daffodil - you will definitely be sorry to disturb such grace:

Original compositions and examples of decor creation
Traditional decoration - bouquets in a vase. You can collect a bouquet of daisies, roses, tulips, and for experienced florists it will not be difficult to create a gladiolus branch:
If you love indoor flowers, but don’t have time to grow them, then a corrugated paper orchid flower is just what you need. This is difficult work that requires certain skills, but the result is worth it.
You can decorate a room not only with bouquets of paper flowers. For example, for indoor wedding ceremonies, you can create a photo zone using paper flowers. They are attached to a perforated wall using a wire bent into a hook.

Using the techniques described, you can create a topiary. The base is a foam ball, which is covered with corrugated paper petals.

This “cool magazine” harmoniously combines the warmth of the created bouquet and the sweet filling of the box. This gift will definitely be remembered for a long time!

Your guests will immediately pay attention to the decorations decorating the interior, but will not immediately understand how this cup does not fall...

With a little patience and effort, you will create elegant decorations for your room, make a celebration unforgettable, or just give your loved ones an unconventionally decorated simple gift.
Master classes from the unique master Lia Griffith
Lia Griffith makes incredibly beautiful flowers from crepe paper! Her step-by-step master classes are accessible and understandable, despite the fact that they are presented in English.


Inspiration and beautiful flowers!
CategoriesOften at school and in kindergarten they give tasks to children, read - to parents, to make crafts on a specified topic, usually for the fall holiday, federal holidays, such as New Year, etc. And here begins the dance of fantasy and the competition of skillful parental hands, we try to remember what we ourselves did in childhood.
But you want the child to also participate in the process and receive pleasure and satisfaction from it. Still, everyone needs creativity. That’s why today I picked up a few fairly simple crafts that you wouldn’t be ashamed to use at a school or kindergarten exhibition. And the baby will be able to repeat this himself, under your strict guidance.
Have you ever cut out snowflakes by folding a piece of paper several times and then cutting out circles and triangles? Most likely yes, and they probably compared later which one turned out more beautiful and more delicate. So the craft that I want to invite you to make is created using this technique.
This basket is suitable for kindergarten and for keeping a small child occupied.
And today we will make a basket.

We need two blanks, as in the photo. I will give you a template, but you can make them yourself; I will also describe the process below.

1.To make them yourself, you need to take a piece of paper and make a 16*16 cm square out of it.

2. And roll towards the middle 4 times.

3. Remember how you made snowflakes as a child. Now we cut off a part from the edge in a semicircle.

It turned out to be a flower.

From each edge between the petals you need to trim a little so that the petals can curl.
4. We also prepare the leaf. Make the leaf square.

We do not cut off a semicircle, but first we need to make a long pestle.
Let's expand.

5. You need a strip of 30*2 cm, glue the handle of the basket.

We decorate it with multi-colored flowers, circles, beads or beads.

We bend the edges of the green leaf.

And glue the basket to the leaf.

You can use this template.

Of course, if the child is small, then you will have to make the blank yourself, but let the baby decorate the basket. He should enjoy this activity.
How to make a watch quickly and easily
And many more can remember how, carried away by the game, they remembered about the craft only for the coming sleep. There is simply no time to stretch out the process: the child has to go to school, and you have to go to work. We need to create something fast, cute and big.
Here is the next version of paper crafts just for this case. It's called "Clock". Depending on the chosen color and decor, this could be a New Year's watch, an autumn holiday, a decoration for a birthday, etc. You can continue the list yourself.

We will need:
- 4 sheets of A4 colored paper
- 4 circles with numbers
- Scissors
- Strip 20-30 cm long
- A piece of black construction paper

The basis for the clock is a fan made from sheets folded into an accordion. Let's start making them.
1. We begin to make an accordion; to do this, we fold the sheet in half along the long side.

2. Now fold the fold line to the edge again and repeat again.

3. Unfold and fold the edge in half towards the first fold.

4. And we continue to bend the sheet of paper in this way until we get a smooth, beautiful accordion.
We also fold the remaining 3 sheets.

5. Fold each corrugation in half and find the middle.

6. Now we make a fan, to do this we coat the edge with glue and glue both parts.

This is what the preparation should look like. We form the remaining fans.

7. Now we assemble the clock, for this we glue the fans together.

8. Cut out arrows from black paper.

9. And glue them to the clock.

10. Cover the junction with decor, a circle, a snowflake.

11. Glue the numbers.
12. Glue a strip to hang the clock.

That's all the work!
We make DIY crafts step by step for children from 9 to 11 years old
For older children, nine or eleven years old, I can offer an option for a simple, beautiful craft. But it requires care and accuracy. This is a beautiful ball of paper. You can also decorate a room with it, or you can take it to school for a holiday, or use it to make fruits or vegetables from your homework. And it looks very beautiful and unusual.

By the way, it is done without the use of glue, stapler, or tape. All you need is paper and scissors.
We make blanks as in the photo, you need to make 12 of them.

We cut out the blanks. You can make them yourself, so there is no special template.
To draw them beautifully, I suggest first drawing a pentagon with equal sides, and then using a compass to draw a semicircle with a diameter equal to the width of the side to each side. I hope I explained it clearly. In other words, the pitch of the compass leg will be the same as the width of the side.
Cut straight lines and bend them a little. Now we insert the blanks into each other.

Here is a photo of what the ball looks like in the process.

This is a fairly simple craft, but it requires dexterity and accuracy, so it will be just right for children 9-11 years old. A small child may not be able to cope with this task or may tear the workpiece.

By the way, you can take thicker paper, so the ball will turn out denser.
Corrugated paper cone
Flowers and candy bouquets are usually made from corrugated paper, but we will make a cone. Because boys like to make flowers more, but all children, regardless of gender, can make a spruce branch with cones.

We will need:
- Corrugated paper: brown and blue (green)
- Scissors
- Thread
1. Take a brown roll and cut off one edge without unpacking.

2. Cut the fold to make two strips.
3. Bend the edge 1 cm along the entire length.

4. Now we wrap the tucks along this edge, as in the photo.

5. We begin to roll this ribbon into a cone, leaving only the openwork edge on top.

6. The end of the cone can be tied with a rope, then we wrap it with a strip of blue or green corrugated paper.

7. Now we make twigs from the green strip. We cut the edge wider than the middle.

8. And we roll these strips into pine needles and twist them lengthwise, like a cone.

And here is a detailed video on how to make a bump.
Cardboard crafts for kids 5-6 years old
Well, what to do with small children? After all, they are interested in it in most cases. I offer two simple crafts. Not everyone still knows how to cut exactly along the lines, but they should still like the result. We will make a three-dimensional tree from cardboard and paper and a simple dog using the origami technique.
Cardboard tree
We will need:
- sheets of paper,
- cardboard,
- pen,
- glue,
- scissors.

1.Two A4 sheets need to be folded together and folded in half vertically.

2. And draw a tree so that part of the trunk is on the bend. Cut out the workpiece.
3. Fold the tree in half to determine its middle.

4. Now we separate the sheets and get 2 blanks.

We also find the middle of the second tree.
5. Now we retreat 3 mm from the fold for the first workpiece from the bottom to half, and for the second from the top to half.

6. You get two such halves of one tree.

7. Now we transfer these patterns onto cardboard and cut out the trunk.

8. You need to cut out leaves of different sizes from colored paper and glue them to the branches.

Now the tree needs to be assembled by inserting cardboard blanks into the grooves of each other.
You can make flowers or juicy fruits and berries.
Paper craft for kids “Dog”
The entire craft is created from just one piece of paper and is done quickly, the child will not have time to get tired. But diligence must be at the highest level in order to get everything right.

White leaf 10*10 cm.

Fold the leaf diagonally. This will be the head of our dog. Then we fold it again, so we determine the middle.
We wrap the edges, form ears, we do this in any order, but so that the tip extends beyond the sheet.

Now we are making a muzzle; for this we bend the bottom corner a little.

Let's cut out two small circles in advance and draw black pupils in them, these will be the eyes. Cut out a pink tongue and a black nose. And glue it all to the muzzle.

Did your children like the dog?
Paper leaves for school: 4th grade on the theme of autumn
Autumn is usually represented by either colorful leaves or an abundance of fruits and vegetables. We will also recreate it in the form of leaves. But they will be quite labor-intensive, but very beautiful.
Craft “Autumn leaf”

We will need:
- Need 5 squares 15*15 cm
- Rectangle 15*5 cm
- Double sided tape
- Scissors
- Stapler
1. Find the diagonal of the square by folding it in half, and then in half again.

2. We make 3 cuts on this triangle, leaving 3 mm from the fold.

We open the workpiece.
3. We begin to glue the corners into a tube. The first layer is to make the middle, using double-sided tape.

4. Turn over and glue the next corners.

5. And glue the remaining two corners, but alternately turning the leaf over.
This is the part of the leaf you will get. We make 4 more such leaves.
6. For the stem, simply twist a tube from a paper rectangle.

We connect the leaves with the stem, securing them with a stapler.
Watch the video on how to make these leaves.
Craft “Wreath of autumn leaves”
And here we will create a whole composition of autumn leaves, it looks very elegant and self-sufficient!
We need 10 squares 8*8 cm. Choose the color of the paper to match the colors of autumn.
Let's start making a yellow leaf.
1.Fold it in half, then fold each side into another half. You will get two large triangles.
2. Turn the leaf over and fold the remaining part to get two small triangles. As shown in the photo. We make 6 such blanks.

3. Now fold the next leaf in half again.
4. We wrap the two edges to make two large triangles and leave them.
5. Now we collect the leaf. We take the first two blanks and one with large triangles, coat the edges and glue it inside the first two blanks, as in the photo. It's like we'll put it inside.
6. Now you need to make a twig. To do this, turn the leaf over to the front side and place another leaf under it.

Glue it.

7. Turn it over to the wrong side and trim the leaf for the branch along the edges of the future leaf. This is necessary so that everything looks neat.

8. Now we wrap the cut edges inward and glue them.
We need at least 8 of these leaves.

Lay out a circle and glue them on top of each other to create a rounded shape for the wreath.
All leaves need to be connected to each other.
Schemes and templates
Most often, it is kids who make crafts, so I want to give here a few templates and diagrams that can be used in joint creativity.

For example, simply trace, attach a blank sheet of paper to the computer, cut out and let your child decorate.
Or suggest gluing butterflies to a piece of paper, but this is more related to appliqués.
Or make a wreath from such leaves.
Patterns of animals and trees.
Or tell your child that the bell is blue, cut it out and color it.
These are the crafts I prepared today to complete your homework or decorate your apartment for the holiday.
One of the ways to develop children is through creative activities. For adults, they help get rid of stress and relieve the tension of the past day. Therefore, many spend their evenings assembling models, knitting, embroidering or making crafts.
The most pliable and accessible material is the header. It has a good texture and takes almost any shape. Making crafts from corrugated paper is suitable for children and adults.
Material selection
Previously, it was difficult for craftsmen to obtain this material; in Soviet times, it was used very carefully and the remains were stored. Now it is available, has a lot of shades. The header is sold in rolls; it is thin and soft to the touch. You can choose quality material if you follow the rules:

- The corrugation must be plastic and durable at the same time. Ignore samples that appear brittle in appearance. You won't be able to make a beautiful craft out of them.
- There should be no shedding upon contact with the glue. If you notice discoloration, do not buy this manufacturer's header again.
- Choose bright and rich shades; the roll should be evenly colored, without gaps or stripes.
- Don't save money. You should not take a crumpled or torn reaper. A discounted roll may be badly damaged inside and you won't have enough of it for the craft.
Various crafts are made from corrugated paper - from appliqués to carnival costumes. Most often, this material is used to make a variety of plants for interior decoration.

Making flowers
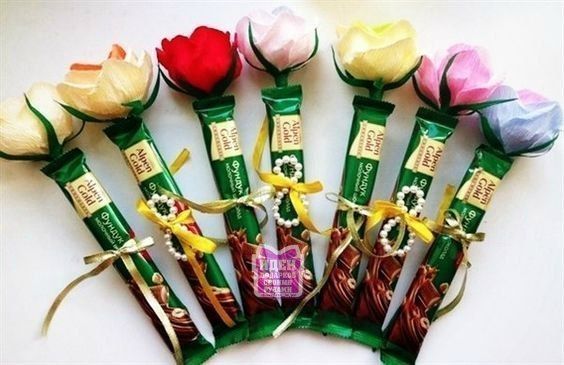
Corrugated flowers will decorate a box of krnfet (chocolate is hidden in the core) and will replace the bride’s bouquet during the celebration.
To do this you will need:
- green craft wire;
- header of a suitable shade;
- several toothpicks;
- sheet of cardboard for templates;
- scissors;
- a tube of PVA glue with a thin spout.
Let's figure out how to make crafts from corrugated paper with your own hands step by step using the example of a rose:
- Make templates of six types of pink petals with dimensions: 5.5x4, 5x3, 4.5x3, 4x2.5, 4x2, 4x1.5 centimeters. The first four types should be heart-shaped, like a real rose.
- Cutting out the petals is easy. Cut a strip from the roll equal to the length of the petal. Roll it up so that the corrugation lies in 8 layers. This will allow you to make 8 petals of each size in one go.
Don't rush to throw away the trimmings, put them aside.
- Make realistic petals from all the blanks. Pull the edges lightly and use your fingers to shape.
- To curl the edges of the petals, take a wooden stick. Screw the pieces onto it to form a curved edge.
- Twist the wire so that a loop forms at the top. If the flower will be used for a bouquet, wrap the wire with strips of green paper or use a header of the same color as the petals.
- Wrap the loop on all sides with harvester trim. Secure the edges with glue.
- Start assembling the bud. Apply glue to the petals with a toothpick. Proceed carefully so as not to start the work over again.
- Each subsequent petal should be located slightly higher than the one that was glued earlier.
- Finish the work with wire, which additionally secures the petals.
You will be left with petals that can be used to make other plants. If you want to make a bouquet with sweets inside, then place only heart-shaped petals around a round chocolate bar. Using a similar principle, you can make any other flowers; you need to repeat the shape of the buds of real plants.

Fluffy balls
Before any holiday, you can get creative with your child. Make some paper pompoms together. To do this you will need:
- several header sheets;
- A4 sheet of cardboard;
- sharp scissors;
- wire.
Step-by-step instruction.
- Cut the corrugated paper into several A4 sheets.
- Fold the sheets one on top of the other, twist them like an accordion. This work can be entrusted to a child if he is 5-6 years old.
- There will be a fold line in the middle of each accordion, mark it. Secure with wire.
- Trim the edges of the corrugated workpiece with a wave.
- Carefully open the workpiece so that it looks like half a sphere.
- Connect the accordions together with wire or a stapler.
To decorate a room, you will need several of these balls. Tie a ribbon to the center mount to hang the ball. Such balls can be made from pastel-colored paper if the holiday is for adults or school-age children. Choose bright colors for preschoolers.

Craft for Easter
Children really enjoy making crafts that resemble animals. At Easter, many people eat boiled eggs, and children all over the world are presented with their chocolate counterparts. To decorate the holiday table, you can decorate chocolate eggs with your baby - make chickens out of them. This craft is suitable for children or beginners.
For it you will need:
- yellow corrugated paper;
- red cardboard;
- satin ribbon;
- wire;
- chocolate egg;
- yellow threads;
- ready-made eyes for crafts;
- glue;
- scissors.
Most of the work can be entrusted to children. You need to help them a little, set an example.
- Cut out several rectangles from yellow paper. One should be slightly larger than a chocolate egg, and two should be 10cm by 3cm.
- Pack the egg into a corrugated rectangle so that all the edges meet at the top. The chocolate figure should remain inside.
- Secure the edges of the paper with wire or thread. Trim them to create an even tuft. Tie it with a thin satin ribbon.
- Make the wings from small rectangles. Twist them on both sides.
- Tuck the curled edges inward and glue them to the main figure. The wings should be voluminous.
- From a piece of red cardboard, make a beak and a base in the form of legs placed together.
- Glue the cardboard blanks and eyes.
Make several of these chickens and decorate the table with them. This way you can decorate chocolate eggs not only for Easter. Corrugated paper chickens will look good along with other reaper table decorations.

Trimming method
One of the interesting techniques for creating panels from corrugated colored paper is trimming. It allows you to get an unusual picture that is pleasant to the touch. Tell children over 7-8 years old about this technique, since at a younger age they will not have enough perseverance to create beautiful appliqués.
To work you will need:
- preparing a picture;
- a simple pencil;
- several rolls of corrugated paper in suitable colors;
- PVA glue.
You can print the blank picture or draw it yourself. The lines should be clear so that you can see the boundaries of the colors. Plan in advance how the details of the drawing will be painted. You need to start with small drawings that have few color transitions.
Beginners should make pictures no larger than an A5 sheet of paper.
Step-by-step work plan:
- Cut the corrugated paper into 1cm squares.