Building a greenhouse on your own: How? Of what? What is the price? Film greenhouses How to make a film greenhouse with your own hands
Foreword
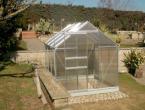
A do-it-yourself greenhouse built from frames is the pride of every owner of a summer cottage.
Necessary tools and materials
Bituminous masticBulgarian barNailsNail pullerplaned boardDrillPenciljigsawShovelMaster OKHammerknifePerforatorSandPolyethylene filmRuberoidRouletteself-tapping screwsLaddersquareExtensionLevelCementscrewdriverelectric planer
Content
A do-it-yourself greenhouse built from frames is the pride of every owner of a summer cottage. There are several nuances in the work that you will learn from this material. We suggest you read how to build a greenhouse from frames in such a way that it will serve you for at least 10 seasons without major repairs and periodic replacement of the film.
Do-it-yourself frame greenhouse
Frame greenhouses can have a glass or polyethylene coating. The choice of a particular material affects the further construction of the structure. So, a do-it-yourself frame greenhouse under a glass coating is made on a powerful and rigid frame based on metal corners or edged boards, and under a plastic film - from pipes or strong wooden bars. Polyethylene-coated greenhouses are not recommended for installation in those climatic latitudes where the summer months are too hot, heavy snowfalls and powerful gusts of wind.


A frame greenhouse from a metal corner is constructed as follows. At the corners and perimeter of the future building, at a distance of no more than 1.5 m, holes are dug with a size of 20 × 20 cm and a depth of about 50 cm. sides 50 and 2700 mm (the given dimensions are minimal, it is not recommended to reduce them). Then the recesses are concreted so that the upper ends of the corners are at the same level, the lower ones are strictly along the outer perimeter of the greenhouse, and the concrete columns are 15-20 cm above ground level. The inner side of the corners should look outward, as if forming a niche-stretcher, where subsequently, a wooden frame for the glasses will be inserted. The same principle must be observed when installing the remaining parts of the metal frame.


Further, the upper and lower ends of the racks are connected with a strapping and gable frames are installed at the place of the racks, on top of which subframes are welded from the corners. When the frame is ready, holes with a diameter of 10-12 mm are drilled around the perimeter in each stretcher at a distance of 50 cm for attaching the frames.
At the next stage, proceed to the manufacture of frames for glass. To do this, take the exact dimensions of each subframe designed for walls, roof, front and rear sides. For example, greenhouse segments have the following dimensions: front and back sides - 2.15 × 1.15 m, side segments - 2.15 × 1.2 m, roof segments - 1.8 x1.2 m and triangles (four pieces) - 0.6 × 1.70 x1.8 m. For a niche in the central part of the front wall, a frame with a built-in door is assembled, and in places where ventilation is arranged - with vents. The outer sides of the frame are made of a 50-70 mm thick bar, and the inner crossbars are made of a 50 × 50 mm lath, cutting grooves for double glazing along the edges. The frame itself can be divided into two, four, six or nine cells - the smaller the size of the glasses, the more convenient they are to use, durable and less prone to cracking.


At the end of the work, the frames are glazed, inserted into metal stretchers and the gaps between them are sealed, rigidly reinforced with coupling bolts of the appropriate diameter. Glazing and installation of frames is preferably carried out using a rubber seal. The gaps between the frames are sealed with any available heat-insulating material: tow, moss, glass wool, etc. It is tightly packed and covered with a wooden plank on top.
Depending on the method of supplying water to the greenhouse, heating and ventilation, technological openings are provided. To do this, a piece of plywood or tin is installed in one of the cells of the frame through which the pipe passes and a hole of the desired diameter is drilled. For pipes with cold water, plywood is usually used, for pipes with hot - tin.
The lower part of the greenhouse between the posts can be filled with bricks, concrete mortar, clay mixed with stones or soil backfill.
Along the perimeter of the walls, it is desirable to lay a cement-sand screed or lay pieces of slate. Do the same with other types of greenhouses.
The uniqueness of the considered design lies in the fact that when using a polyethylene film, the segments of the greenhouse are pulled from both sides with small pieces of material. In this regard, if the coating is damaged, it is possible to replace only individual places, and not to overtighten the frame as a whole, as is the case when a large piece of film is used.
How to make a wooden greenhouse with your own hands: video and job description


A frame greenhouse made of wood for glazing is constructed from high quality coniferous wood, otherwise the deformation of the supporting structures (after natural shrinkage) will cause the glass to crack.


The following do-it-yourself wooden greenhouse design with improved technical and operational characteristics is possible, close to the previous version. For racks, rafters, beams and strappings, a beam of 50 × 150 or 100 × 150 mm or more is used.


In the first case, to form subframes in the wall and roof segments, a 35 × 100 mm bar is additionally stuffed, and in the second case, grooves 50 mm deep and 35 mm wide are cut in the places where niches are formed.


All types of joints are used to fasten structural elements to each other, including metal brackets, mounting angles and overhead mating plates. Ukosina (oblique supports) and dressings in greenhouses are used only for temporary strengthening of racks and harnesses.


The manufacture of frames for glazing, the glazing itself and insulation are carried out in the same way as in the previous version.
The wooden greenhouse shown in the video is assembled according to the technology described above:
Do-it-yourself greenhouse under the film
A do-it-yourself frame greenhouse under a film is distinguished by its relatively low cost and ease of installation. At the same time, it has quite good performance characteristics. From time to time, such a greenhouse can be dismantled in order to import soil, plant plants in the open air, or carry out other earthworks. The most successful option is a frame made of bent pipes with a wall thickness of 2.5 mm and a diameter of 50 mm or more.
At the preparatory stage, arched ribs are bent along the estimated width of the greenhouse. For a do-it-yourself film greenhouse, both solid pipes and trimmings that can be used as segments are suitable. From two finished arches, front and rear ceilings are made by welding additional racks, veins and a box for a wooden door frame. On all arched ribs from the inside, through holes with a diameter of 10-12 mm are drilled in increments of 50 cm. Next, the attachment points for the legs of the arch are concreted in increments of a multiple of half or a third of the width of the purchased film: 55, 65 or 75 cm. The attachment points are made from scraps pipes of the same diameter 35-50 cm long, one end of which is prepared for a detachable connection, or pieces of pipes one standard size larger or smaller. Then the ends of the arches are threaded into the racks and securely fastened to the bolted joints - the frame is ready.
How to fix the film on the greenhouse
The next step is to stretch the plastic film. Before fixing the film on the greenhouse, work begins from the front side of the front and back parts, the edges of the film are tucked onto the elements of the arches around the perimeter. Where the doorway is located, to fix the film on the box, a bar is stuffed, excess material is cut off with a knife. The door itself is covered in a similar way.
Fixing the film on the greenhouse
In order to fasten the film on the greenhouse, the rest of the frame is wrapped inside and out. To do this, a ditch is first dug at one of the sides of the greenhouse, then one end of the film is pressed down with a stone, brick or other material, the film is turned to the opposite side and its second end is pressed down with a stone. With the help of bolts through the holes made, the canvas is attached to the ribs, laying some strong and flexible strips from above and below. As such a strip, you can use a PVC pipe cut lengthwise into four parts with a diameter of 35-70 mm.
Video: how to cover a greenhouse with a film
At the final stage, the inner sides of the front and rear arches are covered: the film is cut out along the contour and glued around the perimeter or melted with an iron at a temperature of about + 100 ° C. Along the entire perimeter of the greenhouse, earth is poured, a cement screed is made on top or slate is laid and grooves are dug to drain water.
The video shows how to cover the greenhouse with foil yourself without possible flaws:
Greenhouse from a wooden beam
A frame greenhouse made of wooden beams under plastic wrap is a cheap and affordable building. Its main drawback is some weakness of the design. For the construction of such a greenhouse, bars with a section of 40 × 50, 35 × 60, 50 × 50 mm and more are used. Below is a convenient and practical option with collapsible elements.
The uniqueness of the presented design lies in the fact that it consists of the same parts. This allows for quick installation and dismantling of the structure, as well as, if necessary, storing it in disassembled form. In addition, by adding or subtracting the required number of parts, you can change the area of \u200b\u200bthe greenhouse.
First, assemble the frames for the walls. The dimensions of the frames must be the same and a multiple of the width of the standard polyethylene film. For example, for a film 1.15 m wide, a frame with sides of 1.05 × 1.85 m can be made. In this case, when stretching the film along the roll, 5 cm will remain on the bend on each side. details.
The frame is assembled from bars, a cross-spacer is installed inside, which is strengthened with screws screwed into the end. On the sidewalls on opposite sides, two holes are drilled at the same distance. Finished frames are pulled with a film. In this case, one frame is used to make a door frame and another one to make a door. Next, eight roof trusses are made with a base of 3 m, a height of 0.7 m and a slope length of 1.75 m. Two trusses, front and back, are covered with a film on one side, the second side is pulled after connecting to the slope. In all farms, two holes are drilled per slope at the same points. Next, eight frames with sides of 1.05 × 1.75 m are assembled, holes are drilled at the same points and pulled from both sides with plastic wrap. At the same stage, a ridge and visors are prepared from tin or galvanized metal sheet. For the same purposes, you can use a polyethylene pipe with a diameter of at least 160 mm, cutting it in half lengthwise.
It remains to prepare fasteners from a 35x100x18.5 mm board: four pieces for connecting frames into a corner, six pieces from single boards for connecting wall frames along a line, and six more for roof frames 1.75 m long. Holes are drilled in each element corresponding to the holes in the frames. To improve waterproofing and thermal insulation along the perimeter of the planks, it is advisable to stick rubber seals, which are used when assembling plastic windows.
The installation of walls occurs in the following sequence. First, the corners are assembled at their location, and the void between the panels and the mounting corner is filled with tow, moss, glass wool and other heat-insulating material using a rail or pin. Then the wall panels are mounted using fasteners. Moreover, the connecting strips can be fastened both from the outside and from the inside of the greenhouse, or from both sides, by making an additional number of fasteners to increase strength.
After completing the assembly of the walls, proceed to fix the base of the structure. On uneven areas, the surface is pre-leveled. Then, to a depth of at least 50 cm at a distance of 15-20 cm from the corners with a further step of no more than 2 m, stakes made of boards with a section of 35 × 100 mm and a length of 60-70 cm are hammered in. To prevent the stakes from splitting during driving, into place strike enclose a piece of board or slats. The driven stakes are connected to the base of the greenhouse with nails or screws of the appropriate length. Then backfilling is carried out to a height of 5-10 cm from the bottom of the base, and on the outside, roofing material, concrete slabs or slate about 40 cm wide are laid on top. ) precipitation, it is necessary to provide a columnar or strip foundation.
Next, proceed to the assembly of the roof elements. First, trusses are installed on the sides of the wall panels, fixing them at the junction points to the corners. Skates are laid on top of the trusses, installing fasteners in parallel and fastening them with bolts along previously drilled holes. Then, at the joints along the front, back and sides, as well as in the corners between the slopes, soft thermal insulation such as tow, glass wool, etc. is laid. A ridge and a visor are mounted on top, fixing them on nails or self-tapping screws 3-4 cm long, and tighten all the bolts on roof elements.
In the last article, we talked about the idea of a greenhouse business. In this article, I would like to move from words to deeds.
How to build a winter greenhousewith your own hands from a film on a frame.
If you want to get the maximum profit this season, then it is advisable to build from any available materials to make it cheaper. Otherwise, more than one season will pass before this whole event pays off.
If we are talking about industrial scale, this article is not for you. There are ready-made solutions, pay money and the greenhouse will be built on a turnkey basis with all the necessary supporting documents and permits.
If you are interestedhow to build a greenhouse with heating then read below.
First of allwe need a clean area of land on which the greenhouse will be built. If technologies such as hydroponics or aeroponics are used, then there are no requirements for the land, but if the crop is grown in the soil, then in addition to enriching it with minerals (fertilizers), the earth will need to be heated.
The height of the greenhouse is calculated based on the crop being grown. For cucumbers and greenhouse tomatoes, a plant height of 2.5 meters will be more than sufficient, otherwise there will be difficulties with tying on trellises.
Secondlywe need fittings of at least 8 mm in diameter and arc welding with electrodes.
If before that you have not learned how to use a welding machine, then here it is this opportunity. If there is no desire to learn, we invite a friend or not very welder. The difference in the price of the issue, again, include everything related to money in production costs.
An ordinary film greenhouse is made in one layer of film. But when it comes to building a winter greenhouse or a greenhouse with heating, this option does not suit us in terms of heat loss.
Output in two layers of film with an air gap. On an industrial scale, this layer is supported by special pumps that force air between the films, but we need to get off with a little blood.
So the pump is an excess and we exclude it from the list of necessary things. So proper design is needed.How to build a greenhousefrom two layers of film for heating? As easy as pie.
From the reinforcement we weld the same type (according to the model) trusses. The distance between the supporting arc fittings should be at least 20 cm, which, to strengthen the structure, is welded together as often as possible with cut fittings. Yes, it will take a long time to tinker, but the result is worth it. Don't forget farm endings. They should have segments that can then be buried in the ground and, if possible, filled with concrete, the latter is not necessary.
After all the load-bearing stiffeners are ready, we place them on a plane. So it turns out the frame of our winter greenhouse.
Now, to complete, it is necessary to connect the trusses with the same reinforcement. The more often you do this, the stiffer the whole structure will turn out. It is necessary to weld the reinforcement between the farms of the winter greenhouse only from the bottom. In this case, the top of the farms will remain out of business, I will explain why later.
The frame is ready. From one end we weld everything necessary for the door - we make an opening from a profile or fittings. With fittings in the future it will be more difficult to fasten the hinges. They either have to be welded or screwed onto the timber reinforcement in the same way.
In the third turnwe need film. Best of all (from personal experience) the Svetlitsa film is suitable. It does not lose its elasticity even at sub-zero temperatures and there is no need to remove it in the off-season. And of course, knitting wire.
If you think that the film is sold according to the size of your greenhouse, you are greatly mistaken. The film will have to be soldered. Great help with this:
Ironing board, can be homemade,
Cheap but proven iron,
A piece of HB matter,
Straight arms.
We overlap the cut pieces of the film and fuse with an iron. In 20-30 minutes you will be the best winter greenhouse film fuses in the world.
Now we stretch the bottom layer of the film on our frame. And at the base of the hump of the farm we press it with a stretched knitting wire on both sides.
Schematically like this.

Now we stretch the top layer of the film over the humps of the trusses. That's what they were for. The top layer of the film turned out at the level of the outer edge of the trusses, and the bottom layer on the inside. And between them turned out a distance equal to the width of the farm.
This is how it turned out for usgreenhouse for growing vegetables in winter.
Now we bring the heating boiler into the greenhouse, connect and dilute the heating. The cheapest option is from steel pipes along the perimeter of the greenhouse from one end with gas burners, and the other - the output of combustion products to the street.
We stretch trellises on farms. If you have not calculated the load on the frame of the greenhouse in the form of future plants hanging on it, then now is the time;)
We bring in and install tanks for dissolving fertilizers, connect the pump, throw in a drip irrigation system, and go for the seeds.
From practice - the most expensive film in all this, well, metal, if it is not lying around on your site or from a neighbor.
In many areas you can find greenhouses and greenhouses covered with polyethylene film. At the same time, gardeners manage to use this coating not only for seasonal greenhouses, but also for greenhouses operated all year round.
For this, special frames and certain technologies are used to grow plants under a film coating in severe frosts.
Today we will not consider the issue of growing plants under a film in the winter, but we will talk about the construction of greenhouses and greenhouses with a film coating, about the film itself and how to install it.
First, let's look at the main differences between greenhouses and greenhouses.
The main difference between these two structures intended for the same purposes is the way the plants are serviced.
Greenhouses - pros and cons

A greenhouse is a building in which seedlings and plants are grown, and they are cared for outside.
If, when growing seedlings, greenhouses do an excellent job with their functions, then when growing plants to produce fruits, the gardener may encounter certain difficulties.
- For example, in a greenhouse it is very difficult to prune plants.
- The shading of some leaves by others leads to the fact that the leaves in the shaded areas begin to turn yellow and die.
- Maintenance and ventilation of the greenhouse is carried out by full or partial opening of the greenhouse cover, there is simply no other method of maintenance.
- This action leads to the fact that a sharp temperature drop occurs inside the greenhouse.
Experienced gardeners know that temperature changes more than 2 degrees for 15 minutes t leads to a halt in plant growth, the productivity of photosynthesis is disrupted and the plant loses accumulated nutrients. As a result, a significant decrease in productivity. (Cm. )
Greenhouses - pros and cons

A greenhouse, like a greenhouse, is intended for growing seedlings and plants. But unlike a greenhouse, plant maintenance is performed by a gardener directly inside the building.
- Tying plants to the trellis allows you to productively use as much of the internal space of the greenhouse as possible.
Our reference - Tapestry - vertically or at an angle stretched cord, rope or wire. Used in horticulture for tying plants.
- A greenhouse is much more convenient in terms of plant maintenance, watering, and harvesting.
The main types of plants in greenhouses and greenhouses
The following crops are grown in greenhouses:
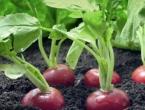
- radishes, spinach, lettuce, beans, dill, undersized tomatoes, peppers. (Cm. )
In greenhouses mainly:
- cucumbers, curly beans, tomatoes, eggplants, peppers.
Covering greenhouses and greenhouses
When building a greenhouse or a greenhouse, every gardener has a question, what kind of coating to use for the structure, glass or film?
Each of these coatings has its pros and cons.
Glass - all the advantages and disadvantages
Let's briefly analyze the main ones.
- For the construction of a greenhouse with a glazed coating, a mandatory device of a powerful foundation is required. Otherwise, there is a high probability of glass cracking from deformation of the greenhouse frame.
- All glass coated greenhouses have a strong frame. Because of this, the greenhouse frames have a significant thickness, which cannot but affect the loss of a certain percentage of plant illumination.
- In heavy snowfalls, the glass can easily break.
The obvious advantages of glass coating include the following:
- Although such greenhouses warm up much more slowly from exposure to sunlight, they have a much lower threat of frost.
- The coating does not require annual replacement, it is enough to wash the glass surface once or twice a year.
- The correct location of the angles of the walls, significantly reduces the reflectivity of the glass, increasing the rational use of sunlight.
Glass or film - your choice
- Unlike a glass surface, do-it-yourself greenhouses under a film do not require a mandatory foundation.
- The frame of such structures is much lighter with the same resistance to external influences.
Our reference is that the film is almost 70 times lighter than glass.
- Greenhouses under the film warm up much faster from the sun's rays.
- The coating is cheap and does not require serious material investments.
- The annual replacement of the coating does not have a significant impact on the budget of gardeners.
- A clear disadvantage of such a coating can be called a high threat of frost and a large range of temperature fluctuations during the day.
Coating and thermal insulation
If you are going to build a greenhouse or film greenhouses with your own hands, you need to clearly understand for yourself that any thin, and even more transparent surface, is poor thermal insulation.
- In other words, although the film does not let water and air through, it is a poor heat insulator and the cold outside will cool the air inside the greenhouse in contact with the film.
- The warm air rising up, having reached the roof of the greenhouse made of polyethylene film, cools down very quickly and sinks down.
- Such a circuit significantly increases heat loss.
- You can reduce them using a two-layer coating in this design.
- The air between the layers of polyethylene film will serve as a heat insulator, significantly reducing heat loss.
Frameworks for greenhouses and greenhouses
Metal carcass
Usually a do-it-yourself greenhouse from a film has the following dimensions:
- Length 6000 – 7000 mm
- Width 2400 mm
- Height 2500 mm
If you decide to use metal in the construction of the frame, then a pipe with a diameter of 25 - 30 mm.
- Tarred timber or old impregnated sleepers are well suited for the base of the greenhouse.
- When using a wooden base, holes are drilled in it for arches, to a depth 70 - 100 mm. In this case, the installation step of the arches varies within 1000 - 1500 mm.
If you decide to use metal as the base of the greenhouse, then the best option would be to make the base from a corner.
- In this case, the arches are attached to the base using a welded joint or bolted.
- A ridge rail must be installed on top of the arches, it connects the arches.
- On the sides it is necessary to install two rows of rails - runs.
- Bolts are best suited for their fastening, but welding can also be used.
- If you will use a bolted connection, pre-weld the brackets to the arches.
- The purlins are bolted directly to the brackets. Do not drill holes in the arches for bolts, this action will weaken the structure.
Film - calculation of the amount per greenhouse

Many are interested in the issue of calculating the film for the greenhouse. In this example, proceed as follows:
- The length of the greenhouse is 7000 mm and the height is 2500 mm.
- The width of the film roll is 3000 mm.
The calculation is made according to the following formula: height * 2 is added to the length of the greenhouse and 1000 mm is subtracted from this amount. You will need two of these panels.
- (7000+2500*2)-1000=11000
- 11000*2=22000
Result: you need 22 meters of film, 3000 mm wide.
Wooden frame of the greenhouse
When constructing greenhouses or greenhouses under the film with their own hands, many use wood for their frame. A reasonable question is how to build such a greenhouse?
- For the manufacture of such a greenhouse, a bar with a minimum section of 50X50 mm is required.
- Before you build a greenhouse or a greenhouse from a film with your own hands from a bar, it must be treated with a protective antiseptic.
- The beam is well impregnated with an antiseptic, possibly in several layers and dried well.
- For the base, it is necessary to use a bar with a section of at least 50X100 mm or arrange a concrete base. It all depends on the size of the greenhouse and your preferences. If you want to get a capital structure, the foundation is best made of concrete.
- Racks are cut from their timber with a section of 50X50 mm. It will take four beams for the side walls and two for the end walls.
- In order to correctly calculate the size and number of racks of your greenhouse, all the bars are laid out on a flat surface and carefully measured.
The same applies to the bars forming the roof. The ridge beam in this case completes the structure.
Greenhouse frame

Many are wondering - how to make a gable, wooden, frame greenhouse?
- The basis of this design are enclosing frames. Frames are made of bars with a section of 40X30 mm.
- When making frames, their width must be calculated based on the size of the plastic film that is commercially available in your area.
- Most often, the width of the frames is 1500 mm, and the height can reach 1500 -1800 mm.
- The film on the frames must be stretched in two layers.
- Finished frames are inserted into the frame of the greenhouse.
- The wooden framework is made of a bar with a section of 750X400 mm. If the frame is made of metal, then for this it is best to use a corner with a cross section of 25 mm.
- In the wooden frame of the greenhouse, a groove is selected into which the frames are inserted. The frames are attached to the wooden frame with nails.
- The frames through which the greenhouse will be ventilated are hung on hinges.
- Ventilation frames can be installed both on the side walls and on the roof.
Film coating - installation methods and maintenance
Do you make a greenhouse or greenhouse with your own hands under the film, an important design element is the coating.
Regardless of the size and performance characteristics of such structures, most of them use polyethylene film.
Main advantages
The advantage of this material is its low cost, elasticity, with simultaneous strength.
- The size of the film coating practically does not change during operation, even under the influence of adverse weather phenomena.
- The film is not affected by fungi, is odorless and non-toxic.
- It does not have a detrimental effect on plants.
- The polyethylene film is water and steam impermeable.
- Relatively well passes carbon dioxide and oxygen.
- Well suited for mounting on a rigid frame.
- It resists well to alkalis and acids.
Disadvantages of film coating
However, polyethylene film also has certain disadvantages.
- Over time, it becomes brittle.
- Doesn't resist oils well.
- From exposure to ultraviolet rays, moisture and oxygen, the film becomes cloudy. Which negatively affects its light transmission.
- Relatively short service life 1.5 - 3 years.
Types of films - main technical characteristics
Commercially available have different specifications. When building a greenhouse or a greenhouse with your own hands from a film, this fact must be taken into account.
Reinforced film

- There is a polyethylene film with low-density polyethylene reinforcement.
- A distinctive feature of such products is their increased reliability in operation.
- The thickness of such a film is usually 0.29-0.32mm.
- Unlike polyethylene stabilized film, this material has 10 – 13% lower penetration of solar radiation.
If you will use this material on your site, you need to know that its service life is 2-3 years. In this case, the film must be washed during operation at least once a year. Otherwise, due to dust deposits, the light transmission of the film is significantly reduced.
Ethylene vinyl acetate copolymer film

Unlike the above films, the ethylene vinyl acetate copolymer film is much more elastic.
- It is lightfast, perfectly resists wind load and external mechanical stress.
- The transmittance of ultraviolet rays is about 92% and it protects plants well from thermal radiation.
- The service life of this material is 5 – 6 years.
- The low dustiness of this film is due to its surface properties, good antistatic properties and hydrophilicity.
Our reference - Hydrophilicity - increased surface wettability.
- The increased hydrophilic properties of the film are due to the formation of flat-drop condensate on its inner surface.
- The water layer is about 2 mm and is an excellent heat insulator at night.
EVA copolymer film from selected manufacturers is commercially available and has a service life of 8 years.
Film welding
Building greenhouses with their own hands under the film, many are wondering - how to connect individual panels?
In the distribution network, polyethylene film is sold in sleeves 1500 mm wide. Thus, when turning, a panel with a width of 3000 mm is obtained.
Our reference - polyethylene-reinforced film is sold with a width of 2000 mm.
Naturally, when building a greenhouse or a greenhouse under a film with their own hands, people are faced with such a problem as a discrepancy between the width of the existing film and the supporting frame of the structure being erected. This issue can be solved by welding individual panels of the film.
Weld with a soldering iron, iron

- For welding, we need a flat table or long boards. For convenience, you can install them on the goats and lightly grab them with a couple of nails.
- Next, we need to lay a rail on the surface of the impromptu table, which must first be wrapped with a dense, thick cloth.
- The width of the rail should be 30 - 40 mm with a thickness of 20 - 25 mm.
- The edges of the sheets of the welded film are laid to a width of 30 - 40 mm. The film must be overlapped, straightened and pressed with any load.
- In order to avoid welding of the film to the used welding devices, a layer of cellophane must be laid on the seam.

Our reference - for welding, you can use an old working iron or soldering iron. These tools are carried out along the combined edges of the film to be welded, while the heating of the tool should be 120 - 140 ° C.
When welding a film in this way, you may have a question about the speed of welding.
Our advice - before welding the main panels, practice on small pieces of the film you bought. Thus, you will accurately determine the temperature and speed of welding.
Blowtorch welding
When building film greenhouses with your own hands and welding individual film panels, you need to know that welding can be done without the use of an iron and a soldering iron.
After all, it is not always possible to resort to the help of electricity, and in some areas it simply does not exist. In this case, welding can be done with a blowtorch.
For this you will need:
- Blowtorch

- Putty knife. For this type of work, a rubber spatula is well suited, which is used in finishing work for applying, glue, mastic and sealing joints in tiles or parquet. If there is no rubber spatula, you can use a regular flat board.
- Flat rail or board.
- Smooth surface.
Welding is carried out as follows:
- The panels are laid on a flat surface and aligned along the edges.
- At a distance of 10 - 12 mm from the edge of the panels to be welded, a rail is laid, it should lie with an equal indent along the entire length of the seam. The rail is pressed against the cloths.
- After all the remnants of vegetation have been removed from the greenhouse, the film must be washed. In this case, the film is washed directly on.
- Remove the film only after it dries well. For this, it is best to choose a calm, clear day.
- First, the film fixed on the ends of the greenhouse is released.
- The ends of the panels must be thrown onto the roof of the greenhouse and left in this position for some time. This is necessary in order to ventilate the greenhouse and dry the condensate on the inner surface of the coating.
- If you plan to use the film in the future, remove it carefully. After complete drying of the condensate, the film is removed and rolled up. Next, it must be tied with twine.
- it will not be necessary to spend much money on the construction of a greenhouse; this is one of the cheapest greenhouses used in modern gardening;
- the film, which will cover the frame, is notable for its good resistance to moisture, it will not let water into the structure;
- this film material is very well stretched and even in this position can withstand significant loads;
- carbon dioxide and oxygen easily pass through the film. As for ultraviolet rays, they are not absorbed by this material. Another important advantage of it is that the sun's rays, passing through such a film, are scattered, which favorably affects the growth of vegetables and other crops;
- the use of such industrial material is absolutely safe, both for plants and for humans. The film is non-toxic, it does not absorb third-party odors, and fungus does not form on it.
- digging a pit;
- strengthening the foundation;
- erection of thermoblock walls;
- arrangement of special insulation;
- heating system wiring.
- Boards and beams impregnated with pre-antiseptic compounds that prevent putrefactive processes. It is possible to cover wooden segments with 2-3 layers of drying oil. Sometimes hot resin is used to impregnate the wood, or the surface of the wood is burned with a blowtorch.
- Polyvinyl chloride (PVC) pipes.
- Thick polyethylene film.
- Meter metal bars (reinforcement).
- Nails and screws; special hinges for doors and windows.
- Door and window locks and handles.
- Metal loops with which PVC pipes will be fixed.
Double frame.
If you have several greenhouses with a film cover on your site, you need to mark each rolled roll. In the future, it will be very easy for you to determine which cover is from which greenhouse.
Greenhouses made of Hungarian film are a good choice for those gardeners who prefer a simple design with minimal costs. All that is required is a frame, film and auxiliary materials. How to build a greenhouse from a film with your own hands, read on.
The greenhouse under the film has been used by domestic gardeners quite widely since the last century. This design has many advantages, among which it is worth highlighting the following points:
Arched greenhouses under the film have gained wide popularity among domestic gardeners. However, even material with such worthy reviews has its weaknesses. For example, due to the low atmosphere, the film wears out quickly, and the structure itself becomes fragile. Another significant drawback of the film lies in the fact that it is highly electrified, and therefore attracts dust. That is, it is recommended to wash the material regularly so that the light reaches the plants. In addition, sooner or later the film coating becomes cloudy.

A film greenhouse is a financially profitable solution. Nevertheless, before buying a material, take into account not only its advantages, but also its disadvantages.
Design features
In order to cope with the implementation of your own project to create a film greenhouse, no special efforts or knowledge are required. The main thing is to decide in advance on the material that you will use under the frame, as well as directly on the type of coating. The technology itself remains virtually unchanged. Another point that you should pay attention to is the installation location of the greenhouse. It is recommended to build a greenhouse on a small hill. Do not forget that the design should be in the open sun, and not in the shade.
How to choose film
Greenhouses under a dense film are increasingly being installed by domestic gardeners. This covering material has several basic types, which are best used for the purpose of sheathing the frame. It should be noted right away that cling film is not suitable for a greenhouse, because it cannot withstand strong pressure and stretch.

Very often gardeners prefer a hydrophilic stabilized film. What it is beneficial for is the absence of condensate during operation. Another popular type of film shelter is light-stabilized. Use this material, and your plants will be reliably protected from ultraviolet rays.
To purchase a quality covering material for your greenhouse, pay attention to the key recommendations for choosing it. For example, the density should be medium. This way, your greenery will not suffer from lack of lighting, but the skin will not tear.
Step-by-step instruction
Film greenhouses of the Hungarian type are becoming increasingly popular among domestic gardeners. Knowing how to choose high-quality materials for the construction of a greenhouse, you will be satisfied with the result. But it is the technology of building a greenhouse structure that is of great importance. You need to implement your plan step by step and taking into account the main recommendations from experts.

Preparation
First of all, any gardener needs to decide on the type of construction and materials that should be purchased in advance. When it remains only to prepare the territory chosen for the construction of the frame, be sure to clear it of debris, then make sure that the earthen surface is flat, without any recesses.
Remember: the site should not be skewed. Otherwise, you will not be able to make the greenhouse structure stable.
Frame assembly
The frame of the arched greenhouse under the film is assembled at the initial stage. The first thing you will need to do is assemble the box. If you use a tree, be sure to treat it with antiseptics. Metal bars and rebar are driven into the ground. Pipes that are put on from above must be carefully fixed. Then mount the supports, located diagonally.
Fixing and welding of the film
When the wooden or metal frame is ready for use, it's time to sheathe it with a film. Often, film strips have to be fastened together, and due attention is not always paid to this moment. Meanwhile, it is in the attachment zone that the film is torn most often. The reason can be both stretching when heated, and banal friction. To prevent this, you need to fix the film with all care.
Many summer residents who grow vegetables on their plots are not averse to learning how to build a greenhouse with their own hands from a film. It is difficult to find a person who would refuse such delicious greenhouse tomatoes, cucumbers and other goodies grown in his own greenhouse. Any owner of the site, having learned quite a bit, can build a similar structure on their own.
Arched greenhouse frame: 1 - arch, 2 - ridge beam, 3 scarf (4 pcs.), 4 - window leaf, 5 - spacer (2 pcs.), 6 - longitudinal beam (2 pcs.), 7 - jib (4 pcs. .), 8 - door, 9 - base sheathing.
When starting to create a greenhouse for a film, you need to find out more about them, decide on a lot of questions, such as: where is the best place to install it? What material should be used in the construction of the latter?
Varieties of greenhouses (greenhouses)
By definition, the design of greenhouses that are most popular with owners of country farms are:
Arched. Such structures are distinguished by an arched outline of the roof. Thanks to the curved silhouette, the streams of sunlight and heat are well dispersed inside them. In winter, snow falling on the roof rolls down safely. In other words, with a solidly reinforced frame and foundation, the greenhouse will not deform or collapse;

Shed. In this version, one wall of a similar design adjoins the body of a residential building. Many summer residents build their greenhouses as extensions on the south side of the house. In most cases, the construction of such greenhouses is relatively inexpensive. At the same time, the territory of the suburban area is saved. The best option is when a heated country wall is closely adjacent to the greenhouse. Then the greenhouse itself will have to be heated less.
This type of greenhouse has one drawback - the snow cover lingers on the roof, threateningly accumulating at the top. Therefore, the owners of such greenhouses have to carefully monitor the precipitation in order, as necessary, to periodically remove snow drifts that collect on the roof;
Gable. Such structures are the most common types of greenhouses. Their roofs repeat the triangle with their silhouette. There are summer and winter layouts. Their main advantage is the space for plantings growing inside.
In addition, there are versions of gable greenhouses combined with relaxation zones.
Back to index
About winter greenhouses
Such buildings must certainly be heated. Therefore, before erecting such a structure, it is necessary to carefully consider the place where the greenhouse structure will be installed. It is desirable that it be located closer to the central heating system, since the greenhouse will still have to be connected to a common circuit.

There are options for greenhouses, inside which the stove functions. This is not very convenient, since the owner has to constantly monitor the condition of the furnace, thus maintaining the required temperature. The winter greenhouse should stand on a solid foundation, have a securely reinforced base and roof. These are mandatory conditions. Otherwise, the construction of film greenhouses simply cannot withstand the weight of the snow, bend, or even completely collapse.
In addition, the so-called thermos greenhouses are known, deepened into the ground by 2 m. For the construction of such a greenhouse, it is necessary to carry out:
In other words, the construction of such an object is a rather laborious and financially costly work. As a result, such greenhouses, created by the hands of the owners themselves, appear extremely rarely.
Back to index
Regarding summer greenhouses
For sheathing such greenhouses, a dense polyethylene film is used. The simplest and cheapest type of shell. If such a film is applied carefully, then it can be used for two seasons. Traditionally, film greenhouses are built with a wooden frame. With the advent of spring, the sheets of plastic film are attached to a wooden base using ordinary nails with wide hats (sometimes special building buttons are used).
Back to index
Construction of plastic greenhouses

In some cases, the frame of greenhouses is assembled from flexible polyvinyl chloride pipes (PVC). A similar greenhouse is being built within one weekend. Even beginners can build a film greenhouse with their own hands.
After choosing a flat area on the south side of the site, a detailed greenhouse plan is drawn up with a calculation of the financial costs associated with the acquisition of materials needed for construction. This is about: