Closed hem. Types of seams. Types of seams Sample hem seam with open cut
Edge seams are used to process the edges of products: the bottom of the sleeves, the bottom of the products, i.e. if you need to process the edge of the product, then you can choose one of the proposed seam options. You can independently come up with other edge seams.
Seams in the hem
It is used mainly for light fabrics (in heavy fabrics, this seam can be pressed through from the front side), or in the absence of an overlock. With such a seam, the cut is well protected from shedding of the fabric. Used to process the bottom of skirts, trousers, shirts, cardigans, jackets, jackets, etc.
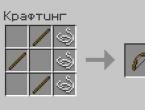
Seam in a hem with an open cut (picture No. 1).
Such a seam can be used when the fabric does not crumble at all.
Additional explanations if the fabric is crumbling:
Such a seam can be used with additional operations: if our completed seam is folded (line 1 in the figures), then we lay it on top of another fabric and sew this edge (figure No. 2, line 2). Often this is done when the product is then put on a lining, then it will completely cover all the ugliness inside.
Or, for example, such a seam can be used when the knot is designed in such a way that the cuts are not visible from the inside, because, for example, this edge is completely sewn (Figure No. 3).
Line number 2 can be laid anywhere, you can even clearly into line number 1.
But if you are not laying in line No. 1, you need to make sure that line No. 2 captures your folded cut of fabric so that the allowance cut does not come out on your face.

Hem seam with open cut (overlock cut). First, the cut is overlocked from the face, then tucked up, then ironed, and then attached. For use on heavier fabrics for processing the bottom of skirts, trousers, shirts, cardigans, jackets, etc. In the case of frequent use with wear of the fabric, the cut may crumble (for example, a towel).

Option 1. For processing jackets, jackets.

Option 2. For processing jackets, jackets, jackets. When laying the second line, the bottom is better fixed.

Hem seam with piping cut. But. - warp thread. It is used if it is necessary to process the edge in the absence of an overlock. From the inside, the seam will look very elegant and beautiful. It is rarely used and only for light fabrics. The edging is cut out at an angle of 45 degrees, otherwise the bottom will not lay out.
By adding a layer of fabric under the piping, before sewing stitch 2, the seam can be used for items made of heavy fabrics. So, for example, you can process the sides in a coat.

A variety of methods are used to process clothing parts and their connection. When threading the parts and their parts, machine or hand stitches are used. Stitch- a repeating element of the thread line between needle punctures (Fig. 56). A successive row of stitches forms a stitch. The seam- the junction of two or more parts with a machine line.
Between themselves, the parts are connected with seams of various widths. Seam width - the distance from the cuts of the part to the line (Fig. 57). slice- the contour of the cut part. All machine seams are classified according to their purpose (Fig. 58).
Rice. 56. Machine stitch formation

Rice. 57. Machine stitch

Rice. 58. Types of machine seams
Connecting seams are characterized by the fact that the parts to be joined lie on both sides of the seam. The most common and simplest of the connecting seams is the stitching (Fig. 59). To perform it, the parts are folded with the front sides inward, the cuts are equalized and grinded on the machine.

Rice. 59. Seam
The edge seams include a hem seam (Fig. 60). It is used to decorate the edge of parts by bending the sections of the part itself.

Rice. 60. Hem seam
Sewing operations in the manufacture of any product are performed according to certain rules. They include different types of work: manual, machine, wet-heat. For their technologically correct implementation, it is necessary to know special terminology, to comply with certain technical conditions.
Handmade

When performing manual work, the needle is held with the thumb and forefinger of the right hand, and its eye should rest against the thimble worn on the middle finger (Fig. 63). The left hand is placed on the fabric at the beginning of the seam, while the fingers should press the fabric against the table.

Rice. 63. The correct position of the needle in the hand
Machine work
When performing machine work, the following requirements must be observed:
- Before performing operations, check the absence of pins in the details of the product.
- Select the number of threads, machine needles, stitch frequency in accordance with the thickness and type of fabric, the purpose of the seam.
- Position the seam allowances to the right of the needle, the detail of the product to the left.
- Perform machine bartacks at the beginning and end of the stitch.
- Lay the machine line exactly along the intended line.
- Delete the threads of all temporary stitches.
Wet-thermal works
Before starting work, you should check the degree of heating of the iron.
When performing wet-heat work, the treated area of the product or part is located closer to the working one. Moisten and iron parts or products in the direction of the shared thread until completely dry after each machine operation.
There is a special terminology for designating various operations in the clothing industry (Table 7).
Table 7.1. Terminology of handicrafts
|
Term |
The nature of the operation |
Application area |
|
The connection of two parts, approximately equal in size, along the marked lines with temporary stitches |
Basting parts of the belt, etc. |
|
|
sweep up |
Securing the folded edge of the part with temporary stitches |
Overcasting the side and bottom sections of the apron |
|
Tack |
Temporary joining of a small part with large temporary stitches |
Taping the ribbon to the product |
|
Baste |
Temporary connection of two parts superimposed on one another with temporary stitches |
Basting the finishing tape on the apron |
Table 7.2. Machine work terminology
|
Term |
The nature of the operation |
Application area |
|
Thread connection of two or more equal or approximately equal in size parts along the combined edges |
Stitching product details |
|
|
stitch up |
Laying a stitch to secure the folded edge of a part or product |
Sewing apron cuts |
|
Sew |
Joining two or more parts of different sizes |
Attaching the ribbon to the product |
|
scribble |
Laying a line when applying one part to another to connect them |
Attaching trim tape to an apron |
Table 7.3. Terminology of wet-heat works
|
Term |
The nature of the operation |
Application area |
|
Sanforize |
Wet-heat treatment of the fabric with steam and drying to prevent subsequent shrinkage |
Decating fabric before cutting |
|
iron out |
Laying out the seam allowances in different directions and fixing them in this position |
Seam ironing |
|
iron |
Laying the edges of the parts on one side and fixing them in this position |
Seam seam ironing |
|
iron |
Reducing the thickness of the seam or edge of the product |
Seam ironing |
|
iron |
Removing fabric wrinkles on individual parts and the product as a whole |
Finished product ironing |
Before making a product, you need to master the techniques for performing machine seams. Technological maps 8, 9 will help you with this.
Basic terms and concepts
Stitch, line, seam, seam width, seam, seam
Questions and tasks
- What is called a stitch? line? seam?
- How are seams distinguished by their purpose?
- How to determine the width of the seam?
- What is the difference between stitched seams and edge seams?
- What do you think is the difference in making a seam seam and a hem seam?
- What do the terms “sweep”, “sweep”, “stitch”, “stitch” mean?
- Find out if there are seamstresses among your relatives and friends. Ask them to talk about their work.
Practical work 8. Making samples of machine seams
- Examine technological maps 8, 9.
- Prepare your study space.
- Perform samples of machine seams according to technological maps.
- Check the correctness of the production of samples of machine seams.
- Tidy up your classroom.
Technological map 8. Production of samples of stitched seams
Tools, materials and devices: pieces of cotton fabric, size 8? 10 cm, scissors, cotton thread No. 40 (50), bobbin, hand needle, pins, needle case, thimble, tailor's chalk (soap), ruler.
- Prepare 4 pieces of fabric measuring 8x10 cm.
- Set aside with a ruler 1 cm from the cut and dot with chalk or soap.
- Draw a straight line through the points, parallel to the cut of the fabric, using a ruler.
- Fold and chop two pieces right sides inward, matching the cuts.
- Sweep and grind details. Remember! The distance between the lines should be 0.1 cm. At the beginning and at the end of the line, bartacks should be made.
- Remove basting threads.
- Perform wet-heat treatment; iron the seam on one sample and iron it on the other.
Test yourself! The width of the seam is uniform along the entire length; the line is even; fasteners are made; wet-heat treatment is done carefully.
Technological map 9. Production of samples of seams in a hem
Tools, materials and accessories: pieces of cotton fabric measuring 8x10 cm, cotton threads No. 40 (50), bobbin, scissors, hand needle, pins, needle case, thimble, tailor's chalk (soap), ruler.
Hem seam with open cut
- Prepare 1 piece measuring 8x10 cm.
- Set aside 1 cm from the top cut of the part and draw a line with a ruler.
- Wrap the cut of the part on the wrong side by 1 cm along the marked line and stab.
- Sweep, the width of the seam is 0.5 cm from the fold.
- Stitch, observing the distance from the note line - 0.1 cm. Remember! Bartacks must be made at the beginning and end of the stitch.
- Remove sewing threads.
- Iron the seam.
Test yourself!
Hem seam with closed cut
- Prepare 1 piece measuring 8x10 cm (for the base).
- Lay the fabric wrong side out on the table, front side facing you.
- Set aside 1 cm from the top cut and draw a line with a ruler.
- Set aside 1 cm from the chalk line and draw a line parallel to the cut.
- Wrap the cut of the part on the wrong side by 1 cm and sweep (or iron).
- Wrap and stab again the fold of the part by 1 cm.
- Sweep, the width of the seam is 0.3 cm from the inner fold.
- Stitch, seam width - 0.1-0.2 cm from the inner fold.
- Remove sewing threads.
- Iron the seam.
Test yourself! The width of the seam is uniform along the entire length; the line is even; fasteners are made; the seams are neatly ironed.
Machine seams are divided into connecting, edge and finishing seams. In turn, each of these main types of machine seams has its own classification. For example, a connecting seam can be a stitch, overline, overhead, etc.
If for labor lessons you need to know how to perform one or another type of seam, or just for self-development you need a table of machine seams, then you can use the information in this article.
Please note that machine stitch and machine stitch are different concepts. A machine seam is a method of joining or processing the edge of a fabric, and a machine stitch is a method, a scheme for the formation of a stitch by a sewing machine.
In this video you will see how to fill the sewing machine, the purpose of the main legs of the sewing machine, what lines the sewing machine can do and more.
Connecting machine seams
Stitch seam
This machine-made seam is used when joining shoulder and side seams, joining a bodice to a skirt, sewing sleeves, as well as when sewing a sleeve into an armhole, etc.
The parts are folded with their front sides, we sweep and grind, stepping back from the cut to the width of the seam.
To perform an eversion seam, the parts must be folded with their wrong sides, equalizing the cuts, and stitched at a distance of 0.3-0.4 cm from the cut (A). Then bend the details along the seam line, turning their face to face and sew a second time, retreating from the edge 0.5-0.7 cm (B). In this case, the allowances of the first seam are closed inside the second.

This machine seam is used for sewing underwear, men's shirts, sportswear and overalls. It is performed as follows.
Fold the parts right sides, bypassing the lower cut by 0.5 cm from the cut of the upper part (A). Straighten the seam, go around the smaller allowance with a large allowance, turn the seam towards the smaller allowance, and stitch with a line at a distance of 0.1-0.2 cm from the fold of the allowance (B).
Edge seams
Turned seam
The facing seam is a kind of stitched seam and is used to connect such parts of the product, as a result of which the seam is turned out along their edge, and its stocks are inside, between the parts (collar with collar, sides with pick-ups, neck with turning, etc.)
The parts are folded with the front sides inward and connected with a seam. Then the parts are turned right side out, the seams are straightened and swept out to form a transitional edge, which makes the seam invisible from the outside. The transition edging is formed by the upper part, which goes 0.1-0.2 cm to the side of the lower one.
In cases where the overcast seam is performed without a transitional edge, after connecting the parts with a stitch, it is recommended to turn them inside out, iron the seam allowances, and then fold the parts back inside along the machine line and finally iron them.
When turning the sides and when processing collars made of non-shrinking fabric, the width of a regular seam is 0.3-0-5 cm. From crumbling fabric - 0.4-0.7 cm.
Machine hem seam with closed cut

A hem seam with an open cut is used for hemming the bottom of the product and sleeves in products made of raincoat and cotton fabrics, as well as in the manufacture of linen (A).
The cut edges of the product are folded to the wrong side by 0.7-1 cm, ironed, after which the entire allowance for hemming the bottom is folded to the wrong side and fixed with a machine stitch at the very fold. The width of the outer hem of the seam is determined by the purpose of the product and is taken within 1.5-5 cm.
a variation of this machine seam is the "Moscow seam" (B) - stitching the edge of the part with a double machine line. Such a seam makes it possible to obtain a narrow hem (hem) and is mainly used for hemming flounces, frills, and a strongly flared bottom of the dress.
Hem seam with open cut
A hem seam with an open cut (semi-Moscow seam) is used when processing the inner edges of the collars and all kinds of facings (necks, armholes, sleeves, and other parts). The seam allowance (0.75 cm) is folded to the wrong side and built up at a distance of 0.2 cm from the fold (see above - B).
When processing the edges of frills, ruffles, frills, the seam is made with a zigzag line 0.15-0.25 cm wide, laying it along the fold, and the excess fabric is cut off to the very line (see above - B).

This machine seam is sometimes called "Hong Kong" (A) and is used to process sections of parts, which are later adjusted to other parts (yoke, bodice, patch pockets, etc.). In addition, the edges of products made of dense fabrics are processed with this seam (the edge of the hem of the bottom, the edge of the selection of the coat).
We cut out a strip of fabric 2.5 cm wide (triple the edging width plus 1.5 cm) at an angle of 45 degrees to the direction of the warp thread (share).
We attach the facing to the processed section of the product, combining the front sides, stitch it, wrap the cut of the product with a facing, sweep and stitch it from the front side into the stitching seam.
We process the open section of the coat hemming, skirts made of dense fabric with a piping seam (from the lining fabric) and sew to the product manually for each stitch of the machine stitch.
Seam with closed cut
This machine seam is often referred to as a "handle" (see diagram above - B). It is performed in the same way as with an open cut, only the facing is cut twice as wide (5 cm).
Piping seam with tape
A piping seam with a braid is the same as a seam with a closed cut, but instead of a strip of fabric, a ready-made braid (oblique trim) is used. The braid is wrapped around the cut being processed, basting and laying a machine line, capturing both edges of the oblique inlay.
Baseball cap tailoring technology, from pattern to fastener. Subscribe to my channel and you will learn a lot of useful sewing tips from a professional.
Hello again! Milla Sidelnikova is with you, and today we will continue our acquaintance with the subspecies of marginal seams.
Hem seams.
Hem stitches are used very often. Because they can process both the bottom of the product, and the bottom of the sleeves, and the inner edges of the picks, facings, armholes, etc., as well as process the edges of the finishing parts on products sewn from light fabrics. For example, .
Hemmed seams come with open and closed sections.
Which seams in the hem - with open or closed sections, the product or its finishing details will be processed, depends on the thickness of the fabric from which the product is made, on the shedding of its sections, on the features of the sewn model of clothing, well, and, of course, on the desires of the person sewing it the product itself.
Hem seam with an open cut.
In order to make a hem seam with an open cut, the processed edge must be folded to the wrong side by the width of the allowance (according to the model) and a line should be laid at a distance L from the cut. L= 0.5 - 0.7 cm.
A hem seam with an open cut can be with a raw cut.
Hem seam with an open and not swept cut.
And with a swept cut.
Hem seam with an open and swept cut.
A hem seam with an open cut can be made using a special stitch, which is in the “set” of stitches for any “serious” sewing machine. Although I do not exclude that such a line on different sewing machines may differ slightly in the way it is performed, in the appearance of the finished line or with paws - special sewing tools for its implementation.
Hemming seam with an open, not overcast cut, made on a household sewing machine, with a special line.
Hem seam with an open, overcast cut, made on a household sewing machine, with a special line.
Hem seam with an open cut finished with a zigzag stitch.
A hem seam with an open cut can also be made with a zigzag stitch. Such a line will simultaneously secure the bent allowance and protect the cut from shedding.
Hem seam with a closed cut.
When making a hem seam with a closed cut, the allowance is tucked in twice. First, by L = 0.7 - 1 cm, the second time by the value provided by the model. The line along the folded allowance is laid at a distance equal to L1 \u003d 0.1 - 0.2 cm from the fold. The line can be laid both from the front and from the inside, but it should pass along at a distance of 0.1 - 0.2 cm from the top fold of the hem from the wrong side.
Hem seam with a closed cut, made on a household sewing machine, with a special line.
With a special line of a household sewing machine, you can also sew a hem seam with a closed cut. This is the same hem with a closed cut as the previous one, only in this case, instead of the usual machine stitch, a special one is laid.
Bending seam with a closed cut, finished with a zigzag stitch.
A hem seam with a closed cut can be made and. It can be laid at different distances from the inner and outer folds (according to the model, if desired).
Narrow seam or seam "semi-Moscow" and "Moscow".
In places where a narrow marginal seam is needed, “half-Moscow” and “Moscow” seams are used. For example, when processing the edges of flounces, ruffles, frills, the bottom of flared skirts, etc.
"Half-Moscow" seam.
When performing a “half-Moscow seam”, an allowance of the part, 0.5 mm wide, is folded to the wrong side and a straight machine stitch is laid at a distance of 0.1–0.2 mm from the fold (for fabrics with non-shrinking cuts).
or (for fabrics with fraying seams) zigzag stitch to the edge of the folded fabric.
Now you need to cut off the excess fabric close to the laid line. And the half-Moscow seam is ready.
When the product is also sewn with a lining, the hem seam can be made while securing the hem with the lining. This can be done by simply folding the raw and overcast hem section to the wrong side.
Hem seams with stitched lining.
Hem seam with an open, raw cut, with a stitched lining.
Hem seam with an open, overcast cut, with a stitched lining.
Or you can fold the lining at the same time as closing the hem.
Hem seam with closed sections, with stitched lining.
It was, if I may say so, a dry theory. By clicking on the links below, you can see the most important types of seams in the hem, so to speak, in action.
We got acquainted with the edge seams in the hem, we move on. Read in the next article seams, a subspecies of edge seams.
Good luck to all! Sincerely, Milla Sidelnikova!
Page 3 of 16
Edge seams
Edge seams include folded, overturned and edging seams (see Fig. 4.2).
The edging seams form the edge of the part with the help of a strip (inlay), as a rule, of a thinner material or braid. The part in the seam is not folded - this is the only seam for which allowances are not given, since during its processing the part does not decrease in size.
The edging seams come with open cuts (tape edging), one closed and two closed cuts.
The edging seam with braid (Fig. 4.10) is the least laborious and of the best quality. It is carried out in one line on the machine using a fixture. The seam can be sewn on a linear or zigzag stitch machine.
Rice. 4.10. Piping seams with open cuts:
a - on a grinding machine (code 3.01.01); b - on a zigzag stitch machine (code 3.01.02);
Edging seams with one or two closed sections are performed using a strip of material (inlay). A strip of material is taken 30 - 35 mm wide for a seam with closed cuts, 20 - 25 mm for a seam with an open cut. The strip is cut at an angle of 45° to the warp or weft threads.
An edging seam with one closed (open) cut (Fig. 4.11, a) is performed with two lines. A strip of material is stitched, then it is bent around the cut of the part and a second fixing line is laid.
Varieties of such a seam are seams made in one line using a fringer (Fig. 4.11, c) and on a zigzag stitch machine (Fig. 4.11, d).

Rice. 4.11. Open-cut piping seams:
a - code 3.03.07; b - code 3.03.06; в– code 3.03.02
The edging seam with closed sections is performed in the same way, only when laying the second line, the section of the strip is folded inward (Fig. 4.12, a). If the fixing line is laid along the strip, then the seam will look more prominent (Fig. 4.12, c). Such seams can be made in one line when using a fringer or if the strip is pre-ironed (there are ready-made blanks on sale) (Fig. 4.12, b). Less laborious and better quality is a seam made in one line on a machine with a device for bending and orienting the strip along the cuts of the part.

Rice. 4.12. Piping seams with closed cuts:
a - code 3.14.01; b - code 3.05.01; c - code 3.05.06; d - double stripe; e - with piping (code 3.21.01); e - on a two-needle machine (code 3.14.03); g - with lace (code 3.20.01)
Edging seams can be made with a double strip (Fig. 4.12, d), with a finishing edging, lace (Fig. 4.12, e, g) or on a two-needle linear stitch machine (Fig. 4.12, f).
Edging seams with closed cuts are used to process the edges of parts, the bottom of the product and sleeves, cut the neckline, armholes in sleeveless products, fastener cuts, the lower cut of peplums, flounces, etc. In insulated jackets, pajamas, bathrobes and other products, it is used instead of turning seam when making the edge of the side, collar, cuff. Two- and multi-layer parts are pre-fastened with a stitch.
The edge of the part is folded with folded seams by bending the sections of the part itself; the cut, as a rule, is folded to the inside of the part (bottom of the product, sleeves, etc.).
Folded seams come with an open, closed, edged cut and with a stitched lining.
In a hem seam with an open cut (Fig. 4.13), the cut of the product detail is under-

Rice. 4.13. Hem seams with an open cut:
a - code 6.02.01; b - code 6.02.02; в– code 6.02.06
bend once and fasten with a line. Such a seam is used when processing the bottom of raincoats, skirts and women's coats made of woolen non-shrinking materials, flying off the collars of jackets, cardigans, coats made of various woolen materials, the inner cut of the bands, the bottom of the product and sleeves. Fastening the folded edge of the part can be done with through (linear or zigzag) or blind stitches. In products made from easily crumbling fabrics, sections are pre-overcast with subsequent stitching or hemming with a hidden hem stitch.

Rice. 4.14. Closed hem seams:
a - code 6.03.01; b - code 6.03.02; c - code 6.03.08; d - code 6.04.01; d - code 6.04.02; e - code 7.23.01; g - code 7.24.04; h - code 7.26.03;
In a hem seam with a closed cut (Fig. 4.14, a, b), the cut of the part (product) is folded twice and secured with a stitch. This seam is used when processing products from easily crumbling materials (outerwear, underwear). The folded edge is fixed in different ways:
- underwear, outerwear made of cotton fabrics - with a linear line of a two-thread lockstitch;
- the lining of women's coats, raincoats that fly off along the bottom - with a zigzag stitch;
- outerwear of the coat and suit assortment and women's dresses made of woolen and silk materials - with blind stitch hemming lines.
Width of inner hem - 3 - 7 mm, outer - 4 - 10 mm.
Varieties of folded seams with closed sections are shown in fig. 4.14, c - h. Here are seams with a triple hem ("Moscow"), with braid, lace, cord.
To process the bottom of men's and women's coats, jackets and internal sections of the side, hem seams with a bordered cut are used (Fig. 4.15, a). The sections of the parts are preliminarily edged, and then the seam allowance is hemmed to the lining or the main part with through or blind stitches.
A hem seam with a stitched lining (Fig. 4.15, b) is used to process the bottom of the sleeves and the bottom of the product (in coats, suits, etc.).

Rice. 4.15. Folded seams:
a - with a bordered cut; b - with stitched lining
Obtachny seams happen in a split, in an edging and in a frame. They are used to decorate the edges of the sides, collars, flaps, pocket cuts, edging loops, etc.
The features of the seam in its sequential execution are: the connection of parts folded with the right sides inward, the subsequent straightening or ironing of the seam, its turning out and fixing the folds into a split or with the formation of an edging, a frame, fixed with a finishing line or in another way to prevent displacement during the wearing of the product.
The facing seam into a split is performed when processing turning parts: valves, collars, cuffs, sides, etc., mainly in products made of thin materials (linen, dress, overalls). In such a seam, the fold of both parts is located at the same level (Fig. 4.16, a)

Rice. 4.16. Turned seams:
a - into a split; b - in edging
The edging seam in the edging (Fig. 4.16, b) has the same purpose as the edging seam in the split, but when it is performed in products from thicker materials, they form an edging.
Kant, or frame, is called a part of one of the parts, limited by the stitch line and the inflection line of this part. Usually, a piping is formed from a part located on the front side of the product to cover the bottom part or turning seam. For example, when processing a collar, the piping is formed from the main material of the upper collar and is visible from the side of the lower collar. However, when slitting stitched loops or pockets, the edges and frames are visible from the front of the product. Such edges and frames are made of facings to close the hole formed after turning out the facings.
Sometimes a piping or frame is made from a part of a different color to obtain an effect for decoration.
The width of the edging in flaps, collars, sides - 1 - 2 mm, depending on the thickness of the material, in loops - 2 - 3 mm, when processing pockets - 3 - 5 mm.
Fixing the edge of the part when making a seam into a piping can be done:
- a finishing line of a through stitch, which is performed on the front side of the product at a distance specified by the technical description for the model from the edge of the part (Fig. 4.16, b);
- “to a clean edge” (Fig. 4.17, a) - in this case, the turning seam allowance is tuned to the lower part;
- blind hemming machine or hand stitch (Fig. 4.17, b) - for this, the seam allowance of the lower part is cut (already done by 2 - 3 mm) to reduce the thickness of the turned edge, the entire allowance is folded to the lower part and hemmed. This method is used to secure the edge of the side, collar, etc.;
- fluffing (Fig. 4.17, c) - the inner layers of the material are fastened with a fluffy stitch of a hand loop stitch or a machine blind stitch. Fastening is carried out after basting the edge of the part, most often in fur products, fur collars and cuffs in outerwear, etc.;
- adhesive methods - using an adhesive thread (Fig. 4.17, d), cobwebs (Fig. 4.17, e), mesh, film.

Rice. 4.17. Turned seams:
a - "to a clean land"; b - a secret hemming line; c - fluffing; g - glue thread; d - glue cobweb
There are simple and complex stitches in the frame.
A facing seam in a simple frame (Fig. 4.18, a) is used when processing slots in pockets and facing loops. It is performed in one line, fastening two layers of one part (facing) and one layer of the second part (for example, front) at the same time. The part from which the frame will be formed is folded inside out and ironed to a width equal to the width of the frame (3–7 mm) plus a seam allowance (4–7 mm). With a narrow side, the part is placed on the main part, orienting it along the intended line, and stitched, performing bartacks at the beginning and end of the line. Then they cut the entrance to the loop or pocket, straighten the frame and iron it.

Rice. 4.18. Framed seams:
a - in a simple frame; b - in a complex frame (code 1.10.01); c - in a complex frame (code 1.10.02)
A stitch in a complex frame (Fig. 4.18, b, c) is used when processing pocket cuts in men's coats made of thick drapes and cloth to reduce thickness, jackets and jackets made of thin fabrics to increase the stability of the frame, or if the pocket cut has a complex curvilinear shape. The seam is carried out in the following sequence: the facing is sewn to the main part, the seam is ironed or laid out, the entrance to the pocket is cut, the seam allowance of the facing is bent around the seam and fastened with a line along the seam of the connection of the parts (“in a picure”), from the front side or from the wrong side.