How to put a grid in photoshop cs6. Rulers, guides and grid in Photoshop. To place a guide
There is a tool with which editing graphics will be much easier. This is a grid. It helps with creating images and folding collages. Using it, you can estimate the size and distance, estimate how objects will be located relative to each other, and make markings. Find out where to place this or that part of the picture. It's a useful tool if you know how to use it. Learn how to turn on a grid in Photoshop, how to set its attributes, and how to remove it.
The grid helps you more accurately and symmetrically arrange elements in your composition.
Essentially, these are guide lines. Flat table. It is superimposed over the image, but does not overlap it. It makes it easier to calculate proportions, see symmetry, and correctly place individual elements.
As an analogy, let's take a school notebook in a cage. It built graphs and drew geometric shapes. On such a sheet it was possible to draw a straight line segment without a ruler, set an angle of 45 or 90 degrees, without using a protractor. From it, it was determined by eye how long the side of the rectangle is, and how many cells make up its area. In Photoshop, the table has about the same functions.
It can only be seen in the program. It will not appear when printed. There will be no cells in the digital version of the drawing either. It's not part of the image, but an editing tool.
Do not confuse it with the pixel grid. The last one is splitting the picture into dots. Useful for detailed editing. It can also be enabled and configured.
Even if you don't need these options, it's still useful to know about them. For example, to remove the table if it was accidentally activated.

How to turn it on?
- Open any graphic file or create a new one.
- On the menu bar, click on the "View" button. Usually it is between "3D" and "Window".
- Hover your cursor over "Show".
- In the drop-down menu, click on "Grid" ("Grid"). It will appear on the layer.
- You can also press the Ctrl + ' keys (in the Russian layout Ctrl + E).
How to setup?
You can make a different size of the cells (for example, so that they visually indicate segments 1 centimeter long), select the type or color of the lines.
- Open the Edit menu on the top bar.
- Hover your mouse over "Settings". He's at the very bottom of the list.
- Click on Guides, Grid and Slices.
- In the window that opens, set the desired cell size. This can be done in the "Line through every ..." field. Different units of measurements are available: inches, millimeters, points and so on.
- In the Style section, choose how you want the grid to appear: solid bar, dashed, or dots. This is not so important, since the markup will only be visible when editing the drawing.
- In the "Color" section, select a fill. The setting can be used when the table blends into the background.
How to remove?
You can get rid of cells in the same menu through which they were added. Here's how to remove the grid in Photoshop:
- Go to View - Show.
- Uncheck the corresponding box.
- Or use the keyboard shortcut Ctrl+E.
pixel grid
The pixel grid is only noticeable up close. To see it, you need to enlarge the picture and change the scale. But when working with graphics, it can interfere. Here's how to insert or remove it:
- Open the menu View - Show.
- Click on Pixel Grid.
Rulers
Another measurement method in Photoshop is rulers. They are outside the picture. With this tool, you can estimate the length and width of objects and the image as a whole. Rulers can be activated from the View menu. To select their options, go to Editing - Preferences - Units and rulers.

The table is useful when drawing diagrams. Or for any other job that requires precision. But this tool is also useful outside the professional sphere. After all, while drawing, a lot of things “pretend to be by eye”. If you enable markup, you can navigate to it. And in the end you get a verified, elaborate and beautiful drawing.
Article Rating:
Voted 9 people.
Rate the article: 1 2 3 4 5 6 7 8 9 10
Guides are lines that can be drawn anywhere on the canvas and are not visible when printed on a printer. Guides can be moved, deleted, or pinned to prevent them from being accidentally moved by the mouse.
in photoshop net the default is non-printing lines, but it can also be configured as dots. The grid is very useful for manually arranging elements symmetrically.
Guides and grids work basically the same way and for the same purposes: Selections, selection borders, and tools for snapping to a guide or grid (when an element is moved 8 screen pixels). The guides, in turn, also stick to the grid as they are moved. You can either leave this at the default, or disable this feature. Spacing between guides, along guide and visible grid, and anchors. Specific to one open image. Grid spacing, same for guides and grid color and style. The grid spacing is the same for all open images.
To show or hide guides or the grid
Perform one of the suggested actions: Menu View> Show> Grid (View> Show> Grid) Menu View> Show> Guides (View> Show> Guides) Menu View> Extras (Menu> Advanced). This command can also be used to show or hide: selection borders, paths, slices, notes. And in ImageReady for: selection borders, clippings (slices), text borders, text reference line and selected text.
To place a guide
1. If the ruler is not displayed, select the menu item View> Rulers (View> Ruler). (Note: for the most accurate and beautiful view of the image, view the image at 100% scale or use the palette Info (Information).
2. Create a guide in one of the following ways: Select View > New Guide (View > New Guide). In the dialog box, select landscape or portrait orientation, enter a position, and click OK. Select View> Create Guides (View> Create guides). In the dialog box, set up the future guide and click OK. To create a horizontal guide, you can also simply hold the mouse on the horizontal ruler and drag it up and down. Hold Alt, and holding the mouse on the vertical ruler, draw a horizontal guide. To create a vertical guide, you can also simply hold the mouse on the vertical ruler and drag left and right. Hold Alt, and holding the mouse on the horizontal ruler, draw a vertical guide. Hold Shift and, by holding the mouse on a horizontal or vertical ruler, create a guide that is sticky by default to the edges of the ruler.
The cursor changes to this - when you move the guide.
To move a guide:
1. Select the Move Tool or hold Ctrl to activate the tool (Ctrl does not work with the Hand Tool or Slice Tool ).
2. Place the cursor over the guide (the cursor will turn into a double arrow).
3. To move a guide: Holding the cursor on the guide, move it To change the guide from horizontal to vertical, or vice versa, holding Alt, click on the guide. Along the guide that runs along the edge of the ruler, hold down Shift to move the guide. The guide will snap to the grid if the grid is currently visible, and the View > Snap To > Grid option is enabled (View > Snap to > Grid).
To fix all guides
Select menu View> Lock Guides (View> Lock guides).
To remove guides from an image
Do one of the following: To remove one guide, move it outside the image. To remove all guides, select the menu View> Clear Guides (View> Delete guides).
To turn snapping to guides on or off:
Select the menu View> Snap To> Guides (View> Snap to> Guides).
To enable or disable snap to grid:
Select the menu View> Snap To> Grid (View> Snap to> Grid).
To set guide or grid options:
1. Do one of the following: Select the menu Edit> Preferences> Guides, Grid & Slices (Edit> Settings> Guides, grid and slices).
2. Color. For grid, guides or combined. If you choose Custom, click on the color box and select the color you want, click OK.
3. Style. Select the display option for the guide, grid, or both.
4. For Gridline Every, select the distance between grid cells. For Subdivisions, select a grid value.
If you want, change the units of measure for this option. The percentage option creates a grid that divides the image into equal parts.
When creating a site layout, the exact placement of its elements relative to each other is important. For this, it is convenient to use auxiliary: the use of a modular grid, rulers and guides. In this article, we'll look at using rulers and a grid in Photoshop.
In order for rulers to appear in the program window, you need to execute the commands: View - Rulers(Ctrl + R). Keyboard shortcuts that duplicate this command are indicated in brackets. The rulers can be graduated in different units: pixel, cm, mm, inch... To set the units, open the settings window: Editing - Preferences - Units and rulers
But it is much more convenient to do it in another way. You just need to right-click (RMB) on the ruler and select the desired units from the context menu.
When designing a web page layout, it is best to measure dimensions in pixels.
Now about the modular grid in Photoshop. To show it, run the commands: View - Show - Grid(Ctrl+').
The grid spacing can be adjusted: Editing - Preferences - Guides, Grid and Slices
Using the grid, you can place the individual blocks of your layout exactly along the lines.
Another small but very handy feature of Photoshop. If you work with a grid and draw rectangular shapes, then the cursor seems to “stick” to the grid lines. This makes it possible to make blocks with exact dimensions. However, this binding can be disabled:
And one more subtlety. By default, the origin is in the upper left corner of the sheet. But we can move it to any point convenient for us. To do this, place the mouse pointer in the square in which the rulers are connected, and drag it to the desired point.

To return the origin to the original point, double-click in the same box.
You can now use Photoshop's modular grid in your site layout work.
And how to make the site generate income, you can find out by joining.
bubble sky
The bubble sky is waiting for you in the new Bubble Sky. Yes, it is beautiful, but still not so practical. All these bubbles prevent the light from falling to the ground, which makes it difficult for people to live during the day. You will need to try to get rid of all the bubbles. How? Just shoot the ball so that three or more balls touch. Only then can they burst. Let's clear the sky, let's go!
Lesson on using guides, grids, rulers. Binding. A group of Lasso tools.
Let's get familiar with these interface elements as we work.
First, open the orange.jpg image in Photoshop.
guides are called auxiliary non-printing lines designed to align everything that can be aligned. You can enable guides as follows: 
On the menu view there is a checkbox Rulers(rulers). When this box is enabled, rulers are visible at the top and left borders of the window. If it is disabled, they are therefore not visible. The guide is "pulled out" from the rulers (press the left mouse button and drag to the center of the window with the document. When you release the mouse button, a blue line will remain in the figure - the guide). If the line is pulled out from the top ruler, then the guide will be horizontal; if from the left ruler, then the guide will be vertical. But guides wouldn't be called that if they didn't have the property of attracting selections and other Photoshop objects to themselves. By default, the selection you draw will snap to the guides. (When the selection path is in close proximity to a guide, it will "jump" onto that guide.) Guides have several settings, which are located in the View menu:
- Checkbox View > Show > Guides controls the display of guides. If it is enabled, then they are visible on the image, if it is disabled, the guides are not displayed.
- Checkbox View > Snap to > Guides toggles snapping to guides on and off.
- Checkbox lock guides- a command that prohibits the movement of guides.
- Clear Guides- remove all guides.
Some curiosity aroused the item lock guides. If you can disable the movement of guides, then they can be moved. But as? To move everything that can move, there is a special tool - move(movement). You turn on the tool and aim it at the guide. The cursor takes the following form: After that, press the left mouse button and drag the guide to its destination, where we release the mouse button. Paragraph Clear Guides removes all guides, but if you want to remove one guide, you just need to drag it back to the ruler. Set two guides in the form of tangents to the outline of the orange. Choose a tool Elliptical Marquee(Oval Selection) in the Tools Palette. Place the cursor approximately at the intersection of the tangents drawn to the top and left points of the orange outline. 
 Move the mouse to the right and down until the selection outline (blinking) covers the entire outline of the orange. If you didn't get a sufficiently accurate selection, then try to build a circular selection from the center. Place the cursor in the center of the orange. Press the keys at the same time alt And Shift. The first one puts the tool in the selection mode from the center, and the second one makes the sides of the selected area equal, i.e. makes the selection round. If the selection does not match, then it can be moved. Any selection tool must be selected to move the selection. Then, when the cursor is inside the selected area, it will take the following form: If all the above conditions are met, pressing the left mouse button will allow you to move the selection. If the selection does not fit the shape, then the shape of the selection can be changed. This will be discussed below. Now about the grid. Grid (grid) is a grid (sorry for the tautology :), as if consisting of guides. It can also be enabled/disabled with the command View > Show > Grid. You can drag to the grid with the command View > Snap to > Grid.
Freeform area selection: Lasso tool group.

The objects that Photoshop works with, namely, the objects depicted in photographs, as a rule, have an irregular shape. To select irregularly shaped objects in Photoshop, special tools are provided. Open the Ducky.psd file. (C:\\Program Files\\Adobe\\Photoshop 5.5\\Goodis\\Samples\\Ducky.psd). Choose a tool Lasso (Lasso). By pressing the left mouse button, slowly, try to circle the duckling along the contour. Release the button when the cursor returns to the starting point. It is highly doubtful that you got an exact selection. This is normal, because the mouse is not the most accurate tool for freehand drawing. World renowned Photoshop tutorial author Dick McClelland says that drawing with a mouse is like drawing with a bar of soap tied to a string. Therefore, if you get a fairly accurate selection, then you can be congratulated, because. this task is really not easy. A feature of using the Lasso tool is that when you release the mouse, the selection path closes automatically along the shortest straight line.
To achieve more accurate results when selecting, I advise you to use the tool Polygonal Lasso (Polygonal Lasso). First of all deselect the command Deselect Select(Highlight). Choose a tool Polygonal Lasso(Polygonal Lasso) in the Tools Palette. Again, place the cursor at the right edge of the document, on the border of the duck image and the background. Left click. Move the cursor along the outline of the duckling.  A thin line will be drawn behind the cursor, connecting the point at which the click was made and the current position of the cursor. Move the cursor along the path until the line describes it well. At the first bend of the contour, click with the mouse. This will fix the first segment of the selection outline. Now the point of reference will be the place of the last mouse click, and the tool will be ready to draw the next segment. Move the mouse along the outline of the duckling until the second segment describes it well. Make a mouse click. The second segment is completed, and you can move on to the next one. Repeat these operations until the entire selection outline is built. When the cursor returns to the beginning of the first fragment, a small circle will appear next to it. It means that now clicking with the mouse will close the outline of the selected area. Do this, and the thin line of the selection outline will turn into the familiar shimmery dotted line. The selected area is built. If during the construction of the selection outline you want to stop this operation, then just press Esc. You can close the loop anywhere double click(The path will be closed by the shortest straight line between the place where you clicked 2 times and the starting point of the selection.) Now the path is described more precisely. To make the outline even more thorough, use a large display scale in the document window. When the cursor leaves the document window while making a selection, the image in it will automatically scroll. The cube shown in the image is ideal for selection with the Polygonal Lasso.
How, when building a selection outline, did you distinguish the selected object from the background? Obviously, by the difference in the colors of the object and the background. The program is also able to "notice" this color difference, but it cannot determine which pixel belongs to the background and which to the object. If you combine your ability to distinguish objects in a bitmap image with the accuracy of determining the colors of the program itself, then the work will be greatly simplified and accelerated. Apparently, it was precisely these considerations that guided the developers of Photoshop, creating a tool Magnetic Lasso (Magnetic Lasso).  It is able to determine the places of the greatest color contrast and draw the border of the selected area along them. But the tool cannot itself determine whether the contrast area is the boundary between the object and the background or belongs entirely to one of them. Therefore, when using the tool, your task will be to guide it approximately along the object's boundary, and it will refine this boundary itself. Cancel the current selection with the command Deselect(Deselect) from the menu Select(Highlight). Select a tool in the tool palette Magnetic Lasso(Magnetic lasso). Place the cursor on the border of the duck image and the background. Left click. This will set the first control point (node). It looks like a small black square. Move the tool along the path. A thin line will be drawn behind the tool, marking the future border of the selected area. The tool itself calculates its position based on the highest color contrast. New control points will appear on the line at regular intervals. From the last control point, you can change the course of the path by moving the tool cursor. Guide the instrument until it satisfactorily describes the outline of the duck. If the contour line moves to the side, then immediately try to return it to its place by moving the cursor. If it is not possible to direct the line along the contour by moving the cursor, then move the cursor to the last successful point of the contour and click the mouse. This will directively create a new control point and fix a successful part of the curve. Repeat until the entire contour is described. When the tool cursor is at the point where you started the selection, a small circle will appear next to it, suggesting that you close the path. Close the path with a mouse click, and a flickering border of the selected area will appear in place of the outline line. The dog shown in the picture can be easily selected with the Magnetic Lasso, as it differs from the background in color. This selection method is much faster, isn't it? However, you may be frustrated by this constant struggle with the instrument not listening to your "instructions". Working with Magnetic Lasso (Magnetic Lasso) will be much more efficient if the tool is properly configured.
Palette View Options(Options) for tool Magnetic Lasso (Magnetic lasso):
 You can call it by double-clicking on a tool in the tool palette. Parameter Lasso Width(Lasso Width) specifies the area that is taken into account when calculating color contrast. The smaller it is, the more accurate the selection will be, but you will have to trace the path more carefully. Checkpoints are placed by the program at intervals specified in the field Frequency(Frequency). The more often control points are located, the more accurately the object will be selected, but the amount of manual work will also increase. The last parameter edge contrast(Border Contrast), defines the minimum amount of contrast between adjacent pixels that is sufficient to be considered an outline line. The general recommendation can be expressed as follows. If you want to select a large object with a simple outline, increase the parameters Lasso Width (Lasso width) and Edge Contrast (Border contrast), and reduce the value of the Frequency parameter. For small and complex fragments, do the opposite.
A high-quality camera is one of the absolute advantages of the iPhone over many other devices. Moreover, in terms of image quality, it is one of the absolute leaders among smartphones. In addition, we should not forget about some additional features (some of which are hidden).
1. How to enable camera grid
The grid on the screen helps to better navigate when taking a picture, that is, it is used for convenience. To enable it, you need to go to "Settings", select "Photos and Camera" there. Scroll down to Camera and turn on Grid.
2. Continuous shooting mode
One of the advantages of the camera in the iPhone is its "rate of fire". In burst mode, the smartphone can take a large number of shots in a short time. This is very useful when shooting fast moving subjects. To take a series of shots, simply press and hold the camera's shutter button. Approximately 25 shots can be taken at high speed, after which the shooting speed will slow down. Burst mode works best on the iPhone 5s with its more modern processor.
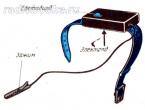
3. Using the headset as a remote control
Pressing the volume buttons on the headset takes a picture. This means that the headset can be used as a simple and quite convenient remote control for the iPhone camera. The only pity is that serial shooting in this case is impossible.
4. Taking snapshots from the multitasking bar
Just one of the fun things about iOS 7 is that if you have the Camera app running, you can take pictures from the multitasking bar that you double-click on the Home button. To do this, simply go to the Camera preview and you can take pictures using the volume buttons on the headset or the smartphone itself. This approach allows you to take pictures without switching directly to the application itself, which means saving a little time. Sometimes this can be helpful.
5. Lock the camera focus and zoom
The iPhone camera has excellent autofocus. However, its action can be corrected - for this, it is enough just to touch on the screen the object on which you want to focus. It can be someone's face or some object.
To digitally zoom, touch the screen with two fingers and spread them slightly apart, just as you do when browsing the web. Immediately after that, a slider will appear on the screen, which also serves to increase, but it is more convenient because it can be used with one finger.
6. Use photo filters
In the lower right corner of the screen there is a button that allows you to turn on a set of photo filters designed to produce unusual effects. For example, you can create a monochrome photo or a photo noir effect. That is, no further processing of the finished images is required. In standard mode, the "not selected" mode is applied. You can also use photo filters in burst mode.
7. Using HDR mode
HDR mode allows you to take more beautiful pictures. This is achieved by creating several shots in a row with different shutter speeds. Combining them into a single shot later produces a better result than when using the standard mode. To enable HDR mode, simply use the dedicated button at the top of the screen. Note that continuous shooting is not possible in this mode. When you try to use it, the smartphone will automatically switch to normal mode.