Painting bottles with paints - decorator's advice. Painting bottles with acrylic paints Templates for painting bottles with acrylic paints
Today, things made or decorated with your own hands are highly valued. They look good in the interior, can be a good gift for loved ones. Today, there are many materials that make it easy to get the job done. Paints can dry quickly. However, they do not smell. A thing painted with modern materials does not lose its appearance for a long time.
There are many interesting ideas on how to arrange glass vases, jars. However, bottle painting is very popular. This is one of the most convenient forms for drawing. How to paint a bottle with acrylic paints will be discussed later.
General job description
Many interesting stories, ideas and techniques can be chosen for painting bottles with paints. The decorator's advice will help you do this job well. They claim that it is easy enough to draw on the bottle. The container may have a different shape. Its advantage is good stability. The blank does not need to be fixed in order to apply the selected image.
Experienced designers say that everyone can cope with such a task. You don't have to have any special skills. It is enough just to have the desire to create an interesting, original thing. Ideas for design can be found in various sources.
To create an interesting and durable decor on glass containers, you can attend a master class on painting bottles with acrylic paints or read the advice of experienced designers. This will inspire you to create a real masterpiece. Finding a use for old bottles or other glass containers will be much easier.
Tools and materials
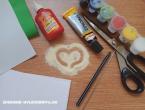
Painting bottles with acrylic paints for the New Year, birthday or other holidays can have a variety of subjects. To carry out the work, you need to prepare the appropriate materials and tools.

In addition to a glass bottle, you will need: a foam sponge, alcohol for degreasing the surface or acetone. You should also prepare a simple pencil and palette. Brushes will be required in different sizes. Acrylic paints must be selected in accordance with the selected pattern.
Painting can be done using other materials. However, acrylic paints are easier to use. They also have a number of other advantages. They are distinguished by an elegant, bright palette, and still do not have a specific smell. Acrylic paints do not spread over the bottle. After application, they do not smudge, as they dry quickly. This feature allows you to quickly apply several layers to the surface. Acrylic paints are durable. They are resistant to sunlight.
Preparation
After the necessary tools and materials are prepared, you can begin to consider the technique of how to paint a bottle with acrylic paints. First you need to prepare the glass surface itself. Soak the bottle in water overnight. This will remove all contaminants, paper (if a label remains), etc. from the surface.

In the morning you need to get the bottle out of the water and wipe it dry. Before direct application of paints, the surface is wiped with alcohol or acetone. This will help the paint adhere well to the surface. If there are fingerprints, small dirt and other foreign substances on the bottle, the paint in this place will quickly crack.
If necessary, the surface can even be primed. To do this, you can use ordinary white or light acrylic paint. Subsequent layers will already be applied to it. If desired, you can leave some places of the bottle unpainted. If the glass is transparent, it will look spectacular. For dark green or brown glass, it is recommended to paint over the entire surface with light paint.
Do-it-yourself painting of bottles with acrylic paints will be done efficiently and simply, if you read the advice of specialists before starting work. The first layer of light paint is recommended to be applied with a regular household sponge. It is dipped in paint and lightly squeezed. This will remove excess paint from the sponge. This results in an even, uniform base.

Brushes are better to choose synthetic. You don't have to buy a lot of them. Just three or four brushes are enough. In this case, it is worth giving preference to tools of flattened, round and oval shape. With their help, you can create any drawings. They also need to be different in thickness.
Instead of a palette, you can use plastic or glassware, which you will not be sorry to throw away later. Also, do not apply a sketch to the glass immediately. It is better to first draw it on paper with a simple pencil and paints. Only after that it is transferred to the surface. This allows you to practice, choose the best colors and test paints.
Features of working with acrylic paint
Painting glass bottles with acrylic paints usually does not cause difficulties. However, before starting work, you need to know the features of this material. Acrylic-based paints can be matte and glossy. The choice depends on the preferences of the artist.

Paints can be thinned with water or applied as a paste. Most often, their universal varieties are on sale. Such paints can be applied not only to glass. If desired, they can restore metal, wood, fabric surfaces.
Acrylic paint dries within an hour. Professional artists recommend not to proceed with the subsequent application of the layer within two hours after applying the foundation. The paint may darken a little as it dries. If for some reason the drawing needs to be removed before the paint has dried, it can be washed off with water. After drying, this becomes impossible. The layer can only be removed with sandpaper or a special type of solvent. If necessary, the colors of the paints can be mixed, achieving the desired shade.
How to transfer the drawing to the surface?
Often a preliminary sketch is applied to the surface with a pencil, and then it is painted. An experienced artist will cope with this task. For those who do not know how to draw, other ways of drawing a picture on the prepared surface of the bottle are available.

Stencils are often used for painting bottles with acrylic paints. They are fixed on the surface of the bottle and create simple geometric, floral or other patterns. You can create a stencil yourself. To do this, you need to pick up a picture and print it on paper. You need to make cuts along the contours. Paint is applied to the bottle through a stencil.
You can also create a sketch yourself on paper. You can transfer it to the bottle using a carbon paper or a bold marker. Next, the selected plot is painted along the contour.
If the artist applies arbitrary curls, this can be done without drawing a sketch. This method allows you to achieve a high decorative effect.
Instruction
When the preparation is completed, you can proceed to the direct painting of the bottle with acrylic paints. When the foundation is applied, you can speed up the drying process. To do this, you can use a hairdryer.

Next, the sketch prepared in advance must be transferred to the bottle. If a stencil is to be used, it must be firmly fixed to the surface. Next, you can start applying paint. First, they are applied in a certain amount to the palette. By mixing several colors, get the desired shade.
With the help of brushes suitable in shape and size, acrylic paints are applied to the bottle. If the contour turned out to be unsuccessful, you need to immediately wash it off with water and a sponge. Don't put too much paint on the brush. It should be an average amount on the pile.
When the drawing is created, it is allowed to dry. The application of a special varnish completes the staining process. It will increase the durability of the acrylic coated bottle.
simple drawings
You can create a beautiful painting of a bottle with acrylic paints using simple tricks. To do this, you will need to use adhesive tape, elastic bands and other improvised means. First you need to paint the entire surface in one color. You can not do this if the master so desires.
Next, tape is glued onto the bottle. From it you can make an even circle, which will pass at a certain distance from the bottom. The bottom of the bottle can be painted in a different color. Mother-of-pearl acrylic paints, varieties with sparkles look spectacular.
If desired, using this technique, you can make a few more straight lines. Electrical tape can be wound on a bottle and in a spiral. In this case, you get a simple interesting drawing. Using an elastic band worn on a bottle, you can create uneven shapes. In this case, you can experiment. The rubber band is put on the bottle at different angles.
Complex drawings
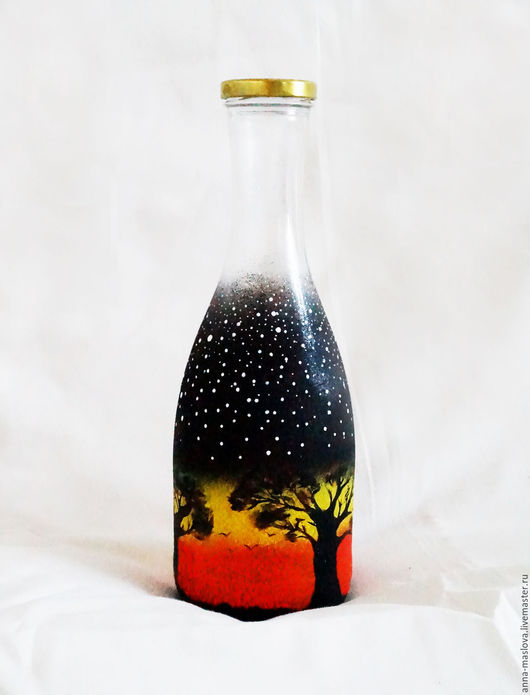
There are many interesting and beautiful techniques that allow you to create original drawings. For example, it can be a contour technique or dot painting of bottles with acrylic paints. In this case, dense varieties of materials are used. Lines or dots are voluminous.
A bottle painted using such techniques looks especially elegant. To draw points on a surface, you need to create a sketch with a pencil. Dots are applied not with a brush, but with a tube. In this case, you need to press on it with the same force so that the points are the same size.
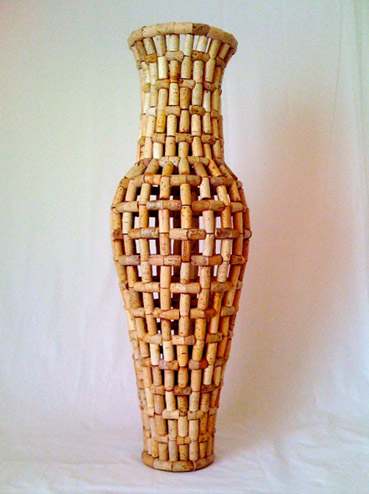
Using the dot-contour technique, you can create an openwork painting that resembles lace, chic drawings that resemble antique vases and other decor.
Having considered how the bottle is painted with acrylic paints, you can create an original gift with your own hands for all occasions.
Glass painting allows you to transform faceless glass into an elegant work of art. To achieve such a result, it is necessary to know the technology of this type of creativity, as well as its features. Work on painting any object can be carried out using various materials: for example, paints can be stained glass or acrylic.
Glass painting has many uses: for example, painted bottles are an excellent decorative element, or a gift option. New Year's painting on glass will decorate a window, a mirror, and a gift bottle of champagne. For children, you can make beautiful lanterns from glass jars. Pictures painted on glass will look very original in the interior - for example, on a stained glass door. The picture can be anything - from flowers and butterflies, to a drawing in the style of "children's carols", if you allow your kids to paint the door to their room on their own. What is the best paint to paint with? Acrylic, stained glass, or gouache?
It is very convenient to paint on glass with gouache - firstly, these paints do not flow on a smooth surface, and secondly, you can easily correct or even wash off an unsuccessful drawing. Paint for drawing should be diluted with water to the consistency of liquid sour cream.
Each material requires specific instructions.
Glass painting allows you to transform faceless glass into an elegant work of art.
In order for the finished work to be expressive, it is necessary to follow some general recommendations when performing it:
- in order for the product to have a finished look, it is necessary to apply several layers of paint;
- before applying a new coat of paint, make sure that the previous one is completely dry;
- so that stains do not appear on the painted surface, strokes must be laid smoothly and quickly;
- the pattern can be laid textured: for this you need to use a piece of foam rubber or a bristle brush;
- to obtain interesting shades of paint of the same type can be mixed with each other;
- You can make the painting brighter and more saturated by covering the product with a thin layer of varnish.
During work, you must follow the safety rules. There should be no open flame near the paints. When using odorous materials, it is necessary to use masks to protect the body and respiratory tract from their toxic effects.
Gallery: glass painting (25 photos)


Vase: painting on glass (video)
How to draw a contour on glass with your own hands?
Glass painting involves the use of special contours.
They should be applied according to a certain technology:
- A small hole is made in the neck of the tube, and then a small amount of paint is squeezed out through it. This is required in order to remove air from the tube.
- After a space forms in the tube, it is necessary to twist its tip so that pressure reappears inside it.
- Then the entire edge of the hand and forearm is placed on some fixed support. Such a trick will eliminate the appearance of trembling in the hand.
- The spout is placed in a slightly raised position above the glass, the body is slightly pressed with fingers.
- The paint is laid along the drawn line to its end. The drawing of one line cannot be interrupted.
- To complete the process of drawing the contour, you just need to stop pressing on the tube.
- After the contour is completely applied, the work should be left for 5-6 hours for the paint to dry completely.

Glass painting involves the use of special contours
When an influx forms, it should immediately be removed with a toothpick. To do this, the influx must be distributed on different sides of the line. Using a toothpick, you can move the contour, which lay "out of line", but this should be done immediately after application.
Painting on glass with stained glass paints: the secrets of craftsmanship
Most often, stained glass paints are used for glass painting. This is due to the fact that the products painted with such material acquire an interesting, finished and expressive look.
However, this material requires special conditions of use:
- large spaces should be filled with a pipette - this turns out a flat surface that looks like colored glass;
- small areas of the picture must be painted with a brush;
- the use of stained glass paints requires the presence of a contour on the product;
- you need to fill each element with paint from the middle, gradually distributing the liquid to the very contour;
- paint should not be entered on the contour itself, such flaws give the work a sloppy look;
- the background should be drawn last, this will preserve the texture of the fill and avoid the appearance of various defects;
- when bubbles form, they must be removed with a needle or simply transferred to the circuit;
- the soiled circuit should be cleaned with a stick soaked in water or solvent.
Some craftswomen complain that stained glass paints begin to thicken after several uses. To fix this, they should be diluted with a special thinner produced by the same company as the paints used.
We paint the jar with our own hands: a step-by-step instruction
The use of stained glass paints when painting cans is complicated by the rounded surface of the base. If the paint is applied incorrectly, smudges and bumps may appear. To avoid this, follow the instructions below.
First of all, you need to prepare materials:
- stained glass paints;
- contour on glass or ceramics;
- acrylic lacquer;
- cone brushes;
- palette;
- sketch;
- marker;
- jar;
- alcohol or acetone;
- toothpicks;
- solvent.

The use of stained glass paints when painting cans is complicated by the rounded surface of the base.
Master Class:
- First of all, the surface of the jar should be degreased. For this, alcohol or acetone is used.
- A stencil is cut out of the sketch, then it is superimposed on the surface and translated using a marker.
- A contour is applied along the drawn lines. Drawing should be done in a circle of cans: from top to bottom.
- After the contour base has completely dried, you can paint its fragments.
- For this, the bank is placed on the edge, fixed. Objects should be poured in small areas so that the paint does not flow down the sides. For filling, a cone brush is used. Before turning the can on its other side, the paint should be dried well. If bubbles appear, they should be pierced with a toothpick.
- The drawing made with stained glass paints needs to be covered with a layer of acrylic varnish.
Varnishing a jar will be more convenient with a spray varnish.
How to paint on glass with acrylic paints?
Painting on glass with acrylic paints is different from stained glass. It is worth considering that there are several ways to paint glass objects with this material. What? Firstly, traditional painting involves the use of a brush and acrylic paints:
- the painting is done with the help of strokes;
- the image may have a texture - when using brushes of different stiffness;
- when applying different colors of paint next to each other, it is possible to achieve a mixture of shades or the formation of a clear contrasting line;
- during work, the contour can be used as a decorative element in the last stages of work.

Painting on glass with acrylic paints differs from stained glass
Also, using acrylic paints, you can paint glass using the dot painting technique. In this case, acrylic contours are used, and drawing is carried out using the image of lines consisting of points of various diameters.
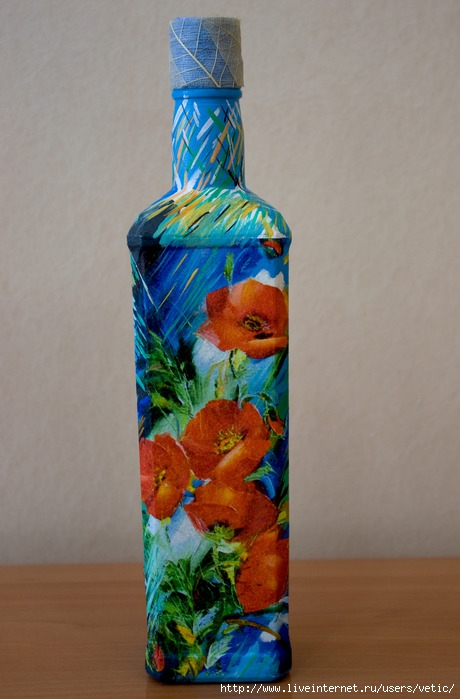
Bottle painting: a master class for beginners
Painted bottles can be used for different purposes. An empty container can be used as a vase for a flower, and a corked one can be used as a gift or decoration for a festive table. To paint a glass bottle with acrylic paints, you need:
- bottle;
- acrylic paints;
- brushes;
- alcohol;
- cotton pads;
- scotch;
- acrylic lacquer.
Outlines can be used as an additional element.
We draw patterns with acrylic in stages:
- The surface of glass bottles is degreased with a cotton pad soaked in alcohol.
- A pattern is transferred to the surface of the bottle. Many craftswomen draw patterns on bottles "by eye".
- The background is drawn first. If it has a large area, paint it over with a foam sponge.
- Then large details of the pattern are drawn with a brush.
- After all the large details have dried, you can paint the small nuances.
- The finished drawing is dried.
- If desired, you can decorate the drawings with the help of contours. In this case, acrylic should be applied only in some places, for example, in the core of a flower, leaf veins, glare in the eyes.
- After the pattern has dried, the surface of the bottle is covered with 2-3 layers of acrylic varnish. Each layer is laid only after the previous one has dried.
Bottles painted in this way can fit into almost any interior. This is due to the fact that the variability of the depicted patterns can be unlimited and is selected exclusively by the craftswoman herself.
Painting on glass with acrylic (video)
Glass painting is a technique that can be mastered even by beginners. This is due to the fact that in order to create a masterpiece with your own hands, you do not need to have certain artistic abilities, but it is enough to use a ready-made template and know the features of applying one or another paint to a glass surface.
(35
ratings, average: 5,00
out of 5)
Lena
There was a period in my life passion for such painting. She painted with stained glass paints and contours. A very exciting activity. It is necessary to ensure that the paints and contours are not expired.
Helpful Hints
If you want to make the holiday unforgettable or just want to decorate your home, then one of the easiest recipes is bottle decoration.
There are many ways to decorate a bottle, and each one fits. for a specific purpose.
You will learn about several interesting decoration options ordinary beer or wine bottles, as well as how you can prepare a bottle for a wedding.
DIY bottle decoration (photo)

Here is a simple photo tutorial with which you can quickly and beautifully decorate any glass bottle.
You will need:
Bottle
PVA glue
tassel
Old magazine with colorful photos
Jewelry (buttons, beads, etc.)


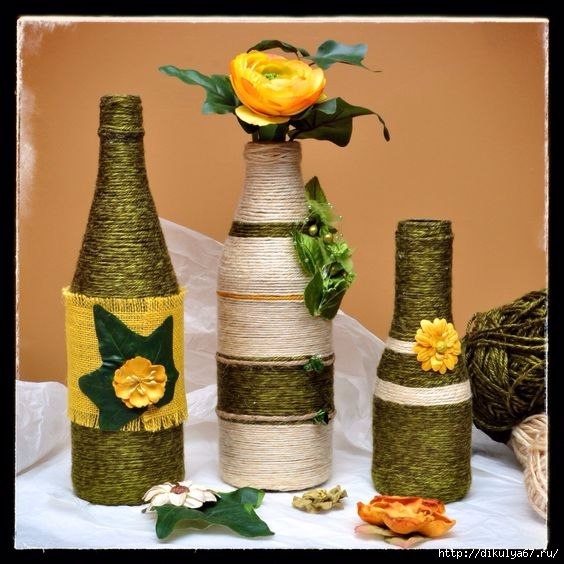
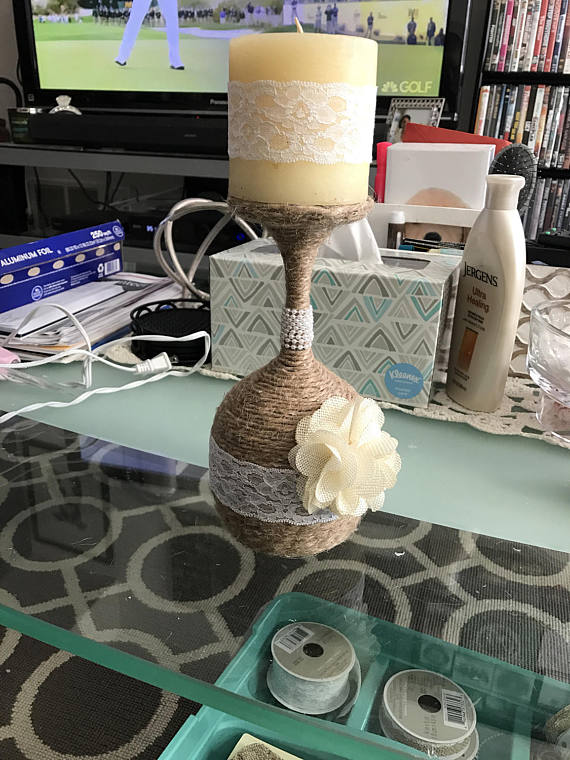
Bottle decor with threads

You will need:
Bottle of any shape
Scissors
Threads of any color and thickness
Double sided tape or PVA glue
Decorations
1. Apply PVA glue to the bottle or stick double-sided tape.


2. Start winding the thread around the bottle, starting from the neck.


3. Decorate the bottle however you like. You can use stickers in different shapes or designs cut out of paper or fabric that can be attached with glue.

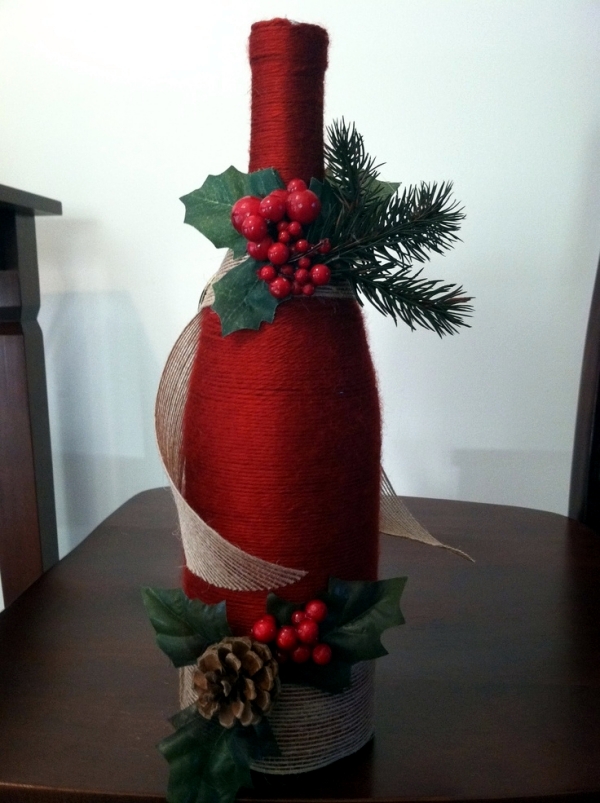
* You can wrap the bottle with a red thread and then decorate it in the shape of Santa Claus - this will be a New Year's interior decor.
* If you decorate the bottle with paper flowers, then you can use it as a spring decor, for example, on March 8th.
Decoration of beer bottles (photo)


You will need:
Empty beer bottles (or any other)
glue gun
Buttons of different colors (buttons of different sizes can also be used)
1. First, remove the label from the bottle. You can wet it to make it easier.
2. Start wrapping the bottle with thread, sticking it with PVA glue or a glue gun. Do everything gradually, no need to apply glue to the whole bottle at once - a little glue, a little thread, etc.

* Make sure that the thread is glued, evenly and tightly, so that no gaps and glue are visible.
3. The last stage includes decorating the bottle with buttons, pebbles, beads, shells and / or other details. All this is attached with a glue gun or superglue.

* You can also add braid.

Bottle decoration (master class). Wine barrel.

You will need:
Bottle
wooden clothespins
Wood beads
Artificial flowers (made of paper, plastic, paper string)
PVA glue
Glue gun.
1. Take apart the wooden clothespins. You will only use wooden parts.


2. Using a glue gun (you can just use a brush and PVA glue or superglue from a tube), glue the wooden parts of the clothespins in a circle to the bottle. You need to make 2 rows.
3. Take the twine and wrap it around the bottom and top of the bottle (the lid too). Secure everything with PVA glue.


4. Prepare decorations for the bottle (in this example, these are wooden beads and paper twine flowers - the flowers must be put on twine in advance) and glue them to the bottle.

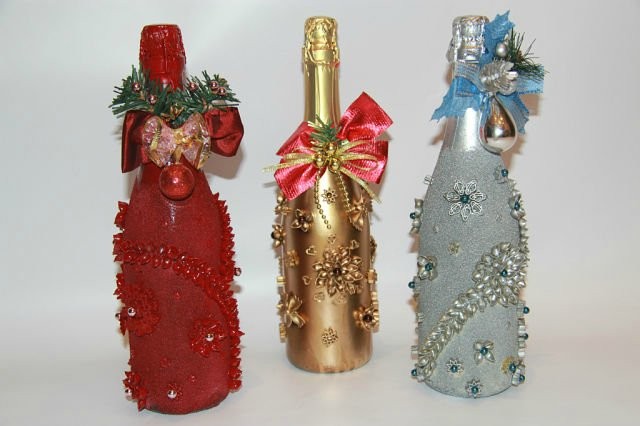
Decoration of champagne bottles. Christmas decorative bottle.
For the New Year, you can decorate not only the Christmas tree and gifts, but also the house with a festive table. One of the essential accessories of such a table is a bottle of champagne.


There are two options for the development of events: you can decorate a new, not yet opened bottle, or you can use an already empty bottle as an interior decoration.
You will need:
Needles from a natural Christmas tree (pine)
PVA glue
tassel
White spray paint
Gold acrylic paint
Cones - if desired
Hacksaw - if desired
Braid of gold color
* When applying spray paint, you need to arm yourself with gloves and a cotton-gauze bandage (you can also use a respirator or gas mask).
* You need to paint in a well-ventilated area, on a balcony or outside.
1. Randomly break the needles into smaller parts.
2. One side of the bottle must be covered with glue.
3. Pour crushed needles on top of the glue and press them a little. Wait a couple of hours for the glue to dry and the needles to seize.
4. On top of the glued needles, apply another layer of glue with a brush and wait a couple of hours again.
5. When all the needles are well glued, proceed to the other side of the bottle.
6. Prepare white paint and apply it to the needles.

7. After the white paint has dried, apply gold acrylic paint to the needles.
8. Prepare the bump. It can be simply hung on a bottle or glued. If you chose the second option, then you need to cut down one plane of the cone. You can use a hacksaw.


9. Paint the neck of the bottle with gold paint and wrap it with gold-colored braid.
10. It remains to decorate the bottle with cones. Paint them gold and add gold stars and bows. Hang the cones on the tree.
Decoration of bottles with ribbons

To decorate the bottle in this way, it took 36 meters of tape.
You will need:
Glue (glue gun)
Bottle


1. Roll the ribbons into rolls. Decide how many of these rolls you will need to decorate the bottle.
2. Start gluing each roll to the bottle, starting at the bottom of the bottle and moving towards the neck.


3. After each gluing, you need to tuck the tip of the tape from the inside with knitting needles to make more space for the glass of the bottle to shine through. In this way, you will save the ribbon and also make the decoration even more attractive.


4. You can decorate the neck however you like. In this example, it was covered with a silk ribbon and decorated with an artificial flower.
If you have chosen a New Year theme, then you can use coniferous ribbon and other details instead of a flower.
Wedding bottle decoration

You will need:
Satin ribbon 1-2.5 cm wide
Finished frill length 30 cm
White fabric 3x60
Bow fabric 25x25 cm
Dense white fabric (two pieces of 7x31 cm)
Glue gun (superglue)
Acrylic or water-based white paint
Brush or sponge
Cardboard pink or and golden color
Jewelry (beads, lace, artificial flowers, etc.)
1. Paint the bottle with white water-based or acrylic paint. To do this, use a brush or sponge.
Apply paint 2-3 times to get an even layer.

2. Start decorating the bottle. You can make a bride or a groom, or both - you need 2 bottles for this.

Bride
2.1 Making a dress corset
Prepare a light-colored tape, throw it around the neck of the bottle, cross the ends of the tape and secure with glue.
* To make the top turns, you will need 20-22 cm of tape, and where the girth is wider, about 25-28 cm.


In the same style, fasten the second tape under the first. You need to make 2-3 rows.
Now make 2-3 rows using a ribbon of a different shade (in this example it is soft pink).
* It is worth noting that all ribbons must cross in the same direction. Simply put, as you made the first tape, so do all the rest - in the end you should get a beautiful weave.


Glue a piece of bright-colored fabric to the sides of the bottle (in the example it is bright pink), and wrap the bottom part with a white fabric.
There should be a white frill at the very bottom of the bottle. You can make it yourself by gathering lace on a thread, but you can buy it ready-made.
Decorate the bride's dress with a bow and satin flower.

2.2 Making a hat
To make the top of the hat, you need to cut a narrow strip of cardboard measuring 1 x 12 cm, and glue it into a ring. The diameter of the ring should be slightly larger than the neck of the bottle.


To make the crown, cut out a circle 0.5 cm larger from cardboard. Make cuts along the circle (see picture) to make it easier to glue.
Cut out a circle of cardboard to the width you need - these will be the brim of the hat. Inside the circle, you need to make a hole a little larger than the neck of the bottle. Do not remove excess cardboard, but cut it and bend it inward.
2.3 Gathering all the details
* To make jewelry, collect lace on a thread and fasten them to the hat. Add small flowers and nylon ribbons to the hat.


Groom
1. Start with a pattern. You can decide on the length of the frock coat and trousers, as well as the height of the collar.
2. Prepare thin paper and wrap the bottle with it, then fix it with a thread. You also need to mark the midline, frock coat edges and cutouts.

3. To make trousers, prepare a piece of fabric, slightly larger than the girth of the bottle and about 5-7 cm wide. Connect the edges and hem the bottom edge, then turn the trousers inside out and put on the "groom".


4. Since the shirt will be almost completely "hidden" under the frock coat, you do not need to make it completely - it is enough to make an imitation of the collar and the upper part. Start at the neck, and then make 2-3 rows of light-colored ribbons. A little lower, add 2 rows of ribbons of a darker shade.


5. Take one piece of fabric or two halves to cut out a small frock coat (in this example it is dark lilac). For the hem and the seam, allowances of approximately 0.5 cm are needed.

6. Now you need to sew the parts and unscrew them. Also sweep the edges. In order for the upper part of the vest to hold tightly on the bottle, you can make 4 small tucks from the inside (2 in front or on the sides, 2 on the back).
Attach a light-colored ribbon, and put the frock coat on the bottle.
7. You can decorate the groom's suit with a small white collar, tie and buttons. Add a flower to the buttonhole and don't forget the hat.


8. You can tie the bottles with a bright ribbon.

Wedding bottle decoration
To learn more about how to decorate champagne for a wedding, take a look at our article:

You can also learn more about DIY wedding decorations by visiting the articles.
Let's touch on such a popular direction of creativity as glass painting. Today, she has many admirers, and many who want to learn this art.
What to work with
So, let's consider the technique of painting.

Applying contours
The bottle (washed, de-labeled and degreased with alcohol) will be decorated with decorative swirls. You depict them in any form you like, which your imagination suggests.
Using a white outline, draw the first curl on the bottle (the nozzle is not used yet, it will come in handy later). The hole in the contour will not allow you to get thin curls, but so far this is not required. Bold curls will "collect" more sparkles.
Without waiting for the contour to dry (and it dries for about half an hour), gently sprinkle it with sparkles. They should adhere well to a fresh contour. Part of the sparkles will inevitably be scattered around the contour, but you don’t need to remove them now - you can smear the borders of the curl. They are removed only after all the curls, made sequentially in the same technique, have dried.
When you buy contours, you may be advised to use ones that already contain glitter. But they are already mixed there with the main paint, so they will not shimmer and shine so brightly.
Thus, it is better to choose a contour without sparkles, and apply them in the process of work already from above.
Little by little, the pattern will cover the entire bottle. This will not happen too quickly - in several stages. After all, in order to turn the bottle over and start painting its reverse side, you should wait for the final drying of the already treated surface.

Applying paint
When the drawing is completely transferred to the glass, and everything is dry, under running water, you should wash off unnecessary sparkles and thoroughly blot the product with a rag. And only after that we start working with paints.
After picking up paint on a brush, fill in some of the curls on the bottle. Choose the color of paint according to your own taste - one or more. It is better not to paint over all the curls, because a monotonously painted bottle will not look spectacular.
Apply paint as gently as possible, evenly spreading over the surface. Explicit smears should not be visible. This process is also phased, with breaks for complete drying.
Finishing touches
At the final stage, the nozzle on the contour will come in handy. With its help, the final touches are applied, or rather the dots. They have to frame each curl around the edge. It is the bottles, the stencil of which is selected taking into account the unity of the overall composition, that gives elegance and extraordinary sophistication to the final result. You will immediately see how the product will play and become "voluminous".
Currently, acrylic painting is extremely popular, and it is the dots that are a fashionable and winning option.
In conclusion, I would like to say that this beautiful type of decorative art is gaining more and more fans from year to year. The most real masterpieces of applied art are created. And most importantly - their creators are provided with the joy of creativity and good mood!
In order to bring a little originality and creativity into the everyday atmosphere of life and your home, a little bit of imagination, free time and a small set of available tools are enough. Any kind of handmade is now at the peak of popularity - on the Internet you can find many master classes for making a wide variety of decor items that you can decorate the interior with. A masterpiece of applied art can literally be born from unnecessary remnants and scraps of various materials. In this publication, we would like to draw your attention to such a type of arts and crafts as bottle decoration. We hope that our selection of 100 different bottle decorating ideas will inspire you to be creative in decorating your home, making a gift or creating a practical yet beautiful household item.

Creativity has no limits
There are many ways to create a decor for a bottle, and the choice of each of them will depend on what kind of end result you need. Whether you want to decorate a bottle for a gift or need decor for a wedding table, maybe you will store spices in a bottle or use it as a vase, maybe you are just looking for an opportunity to decorate your interior, bring bright colors or original ideas to it. In any case, everyone can find their own optimal way to decorate bottles.
So, most often bottles are decorated for the following purposes:
- as a wedding table decoration (usually two bottles of champagne are issued, but options are possible);
- a gift for any kind of celebration;
- decorative element for living room, bedroom, dining room;
- in the kitchen space, a bottle filled with spices carries a functional load and plays the role of a decorative element;
- in the bathroom, a bottle of colored sea salt performs a similar function


Bottle decoration for various celebrations
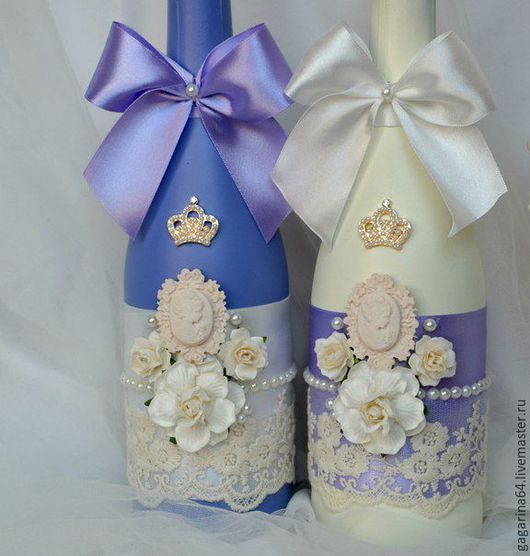
Wedding table decor
The wedding tradition of decorating the newlyweds' table with two beautiful bottles of champagne has been around for many years. After the wedding, the so-called "bulls" remain with the newlyweds and are kept in a place of honor. The first bottle is opened on the anniversary of the wedding, and the second - after the birth of the first child. Given such a long journey of wedding bottles, special attention is paid to their decoration. Recently, all wedding decoration has its own unique concept, based on which the color palette and decor of literally every piece of furniture, table setting and all kinds of decor are selected.


But there are also universal options for decorating bottles for the newlyweds' table. The best part is that you can do the transformation of simple bottles with your own hands, in a short time and without spending a lot on materials. Most often, bottles are designed similarly to the appearance of the bride and groom - this is what is called a "classic of the genre", time-tested.


bottle as a gift
The best gift is a handmade gift. Such a present not only keeps the warmth of your hands and carries positive energy, but also indicates the exclusivity of the relationship, the special care of the donor in front of the hero of the occasion. A beautifully designed bottle can become a decoration of the festive table, and bring originality to the interior of the home.


New Year holidays
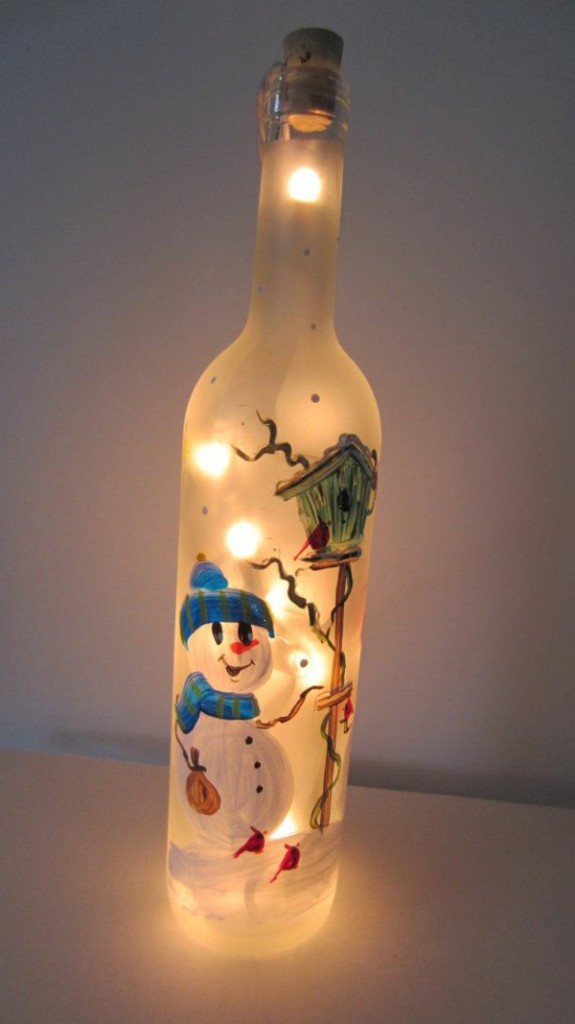
A bottle decorated in a winter, New Year's style can become both a decoration of a festive table and a part of the decor of a room where holidays will be celebrated. This can be as simple as painting the bottle white and coating with coarsely ground salt as an imitation of a snowy surface, or painting the product in the manner of patterns that frost leaves on the windows.

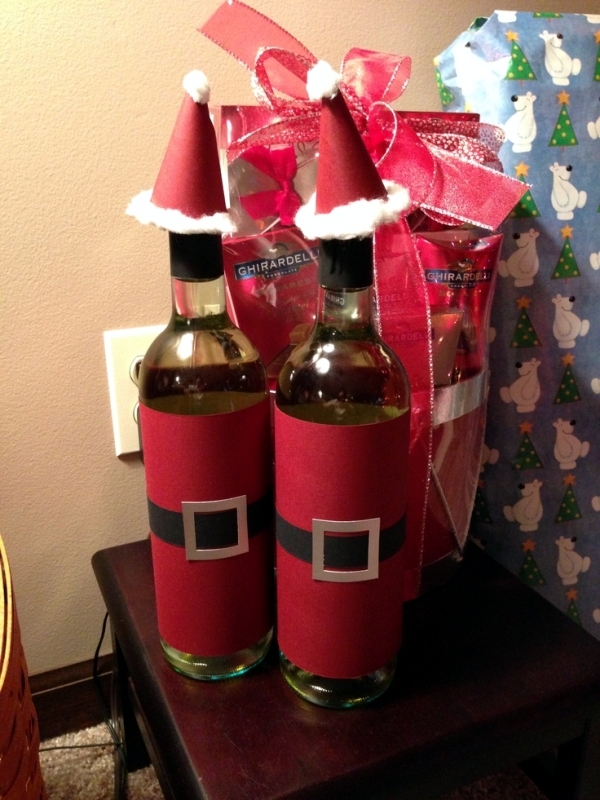


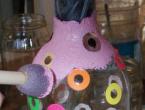
Not only glass, but also plastic bottles can be decorated in the form of a snowman or Santa Claus with a Snow Maiden. Here is an original version of decorating a plastic bottle in the form of a penguin - the most "winter" bird.


Gift for Valentine's Day or Wedding Anniversary
The main theme of the gift for Valentine's Day is the exploitation of images and crafts in the form of hearts, the active use of various shades of red, various ways of declaring love.


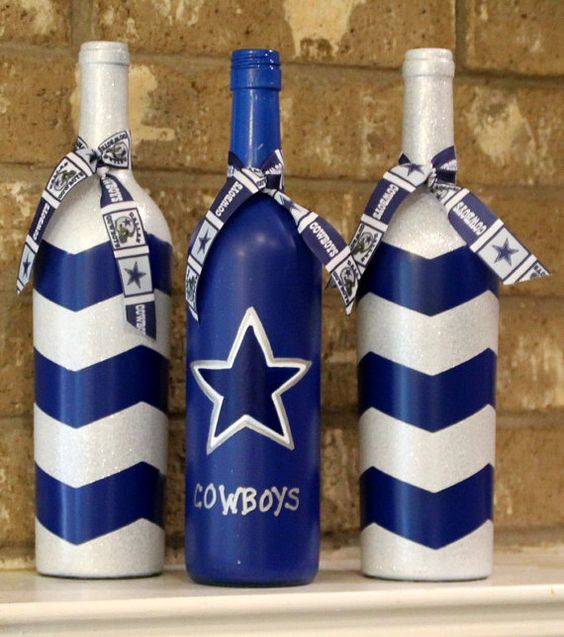
Bottles decorated to celebrate a wedding anniversary can be decorated with the first letters of the names of the spouses, the date of the wedding celebration or the number of years lived together. You can create a family coat of arms and use a stencil to apply it on the surface of the bottles.


No one will refuse a whole bottle filled with delicious sweets. Even a child can make such a gift. A funny inscription or a glued flower, beads or sparkles is enough.

Decorating bottles for the interior
Sea style
Decorating bottles in a marine style is one of the most popular options. And the point is not only that you can pour sea salt into a bottle and decorate the bathroom interior or collect a collection of sands brought from trips to various beaches. The marine theme invariably reminds us of relaxation, travel, pleasant emotions and new experiences.


To decorate bottles in a marine theme, you can use twine and pieces of fishing net, shells brought from travels and small pebbles. And, of course, no one canceled the images of waves, marine life, elements of ships and gear, the use of all shades of blue.


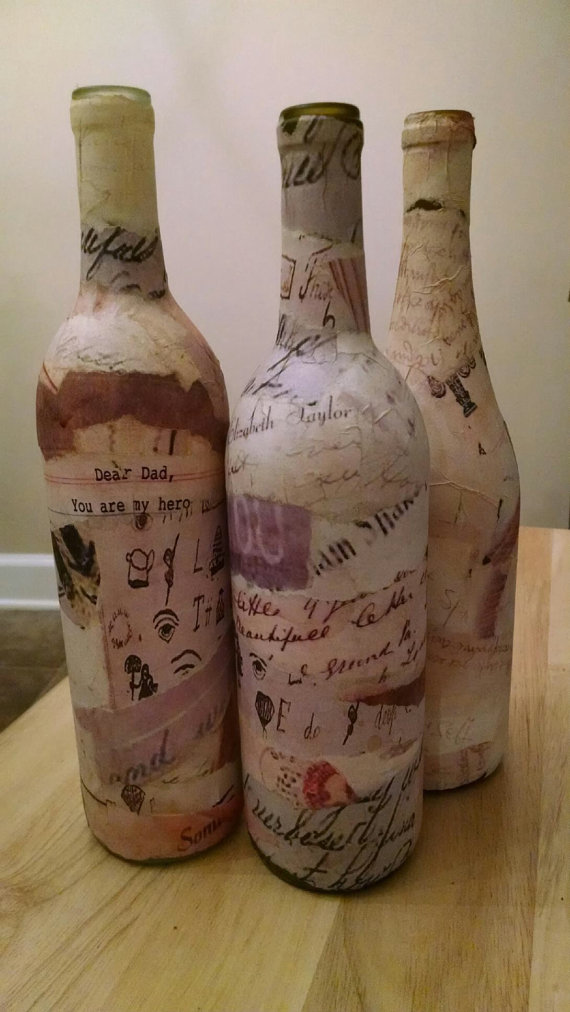
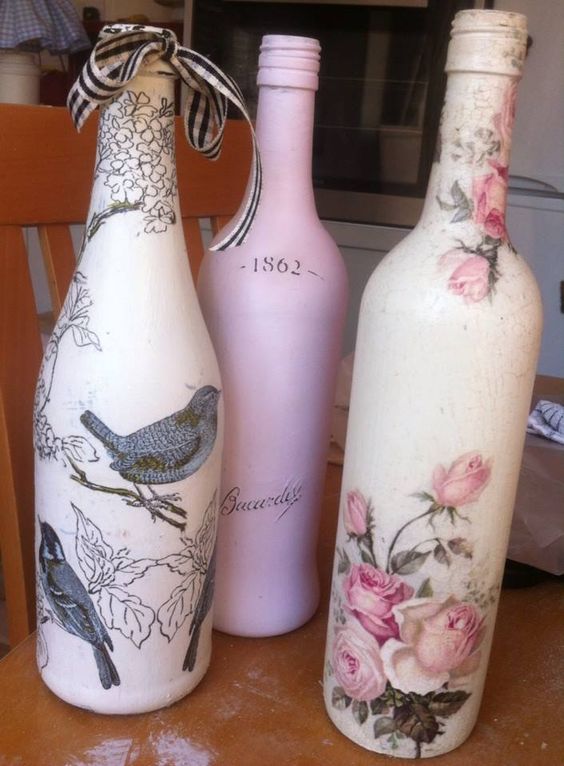
For an interior in the style of Provence and shabby chic
Most often, decoupage and artificial aging are used to decorate rooms decorated in the style of Provence or shabby chic. Not only are various images applied to the bottles (most often flowers and other plants, birds, insects), but also a coating is created that has cracks and even chips.


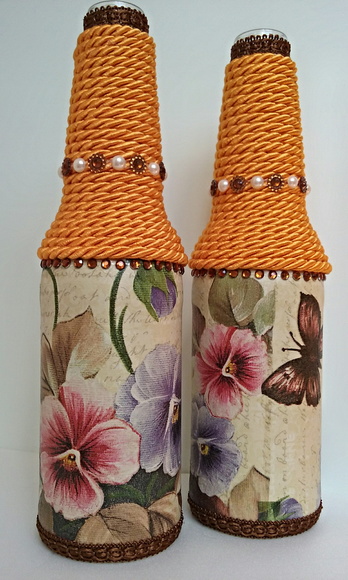

In the interior, decorated in the style of Provence and some other varieties of country style, bottles completely tied with twine or “twine” look great. Most often, such products are decorated with decorative elements - flowers, letters, an impromptu print.
Universal option
One of the easiest ways to decorate bottles is regular staining. You simply choose the shade you need and, after preliminary cleaning and disinfection of the surface of the bottle, paint it. Most often, various pastel shades, silver or golden color are used. A couple of such bottles can serve as a decorative composition or simultaneously play the role of vases.


If art painting is a simple technique for you, then a simple bottle can be turned into a work of applied art:


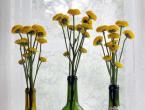
The composition of bottles painted using the amber technique looks beautiful. It is better to use the layout according to shades of the same color on all bottles (but they can be of different shapes).


On a painted bottle, you can apply a pattern using stencils or simply “freehand”, stick lace, create a texture with glue droplets, stick decorative elements - flowers, beads, rhinestones, pieces of colored glass, sparkles.


Very often, in combination with dyeing, decoration with twine, burlap and other types of fabrics (lace, hand-knit items, pompons) is used.


Black bottles are convenient because they do not need to be covered with paint. By itself, black is an excellent background for any decorative elements. A composition of several black bottles, decorated in one way or another, always looks contrasting, accentuated, advantageous.


The metallic glitter on the bottles is great for modern and high-tech interiors.


And finally: some creative and practical ideas
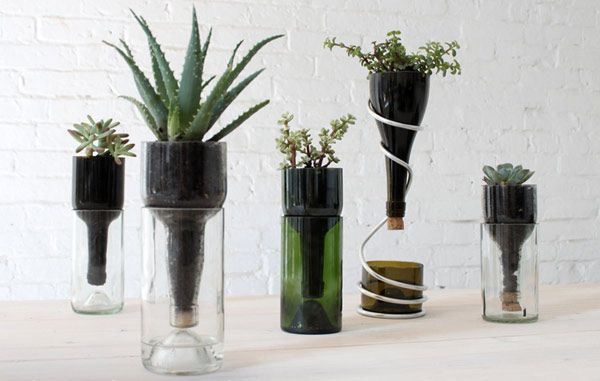
Bottles can perform the functions of not only a vase, but also a flower pot, or rather, a container. By cutting off part of the bottle in the remaining container, you can grow medium-sized plants and decorate both the interior of the home and the landscape design of the site or private courtyard.


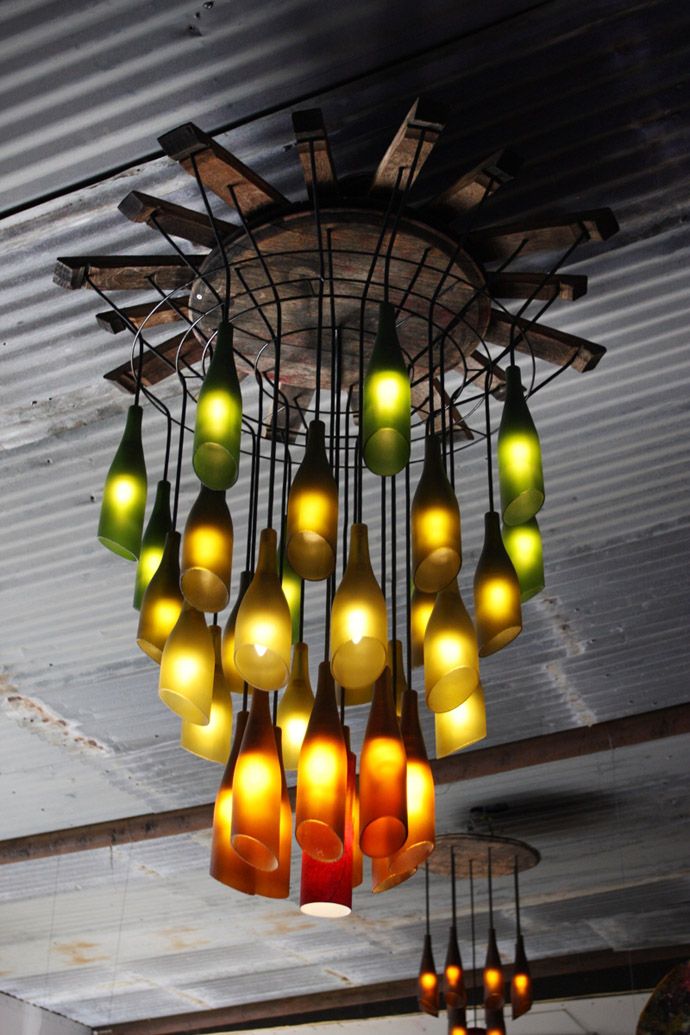
From the glass parts of the bottles, you can make a semblance of bells, a device for the so-called "wind music".


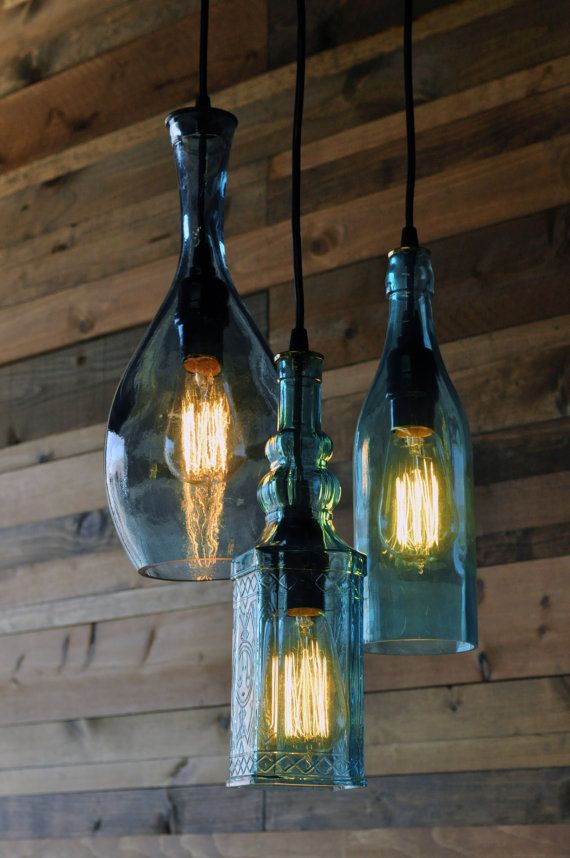
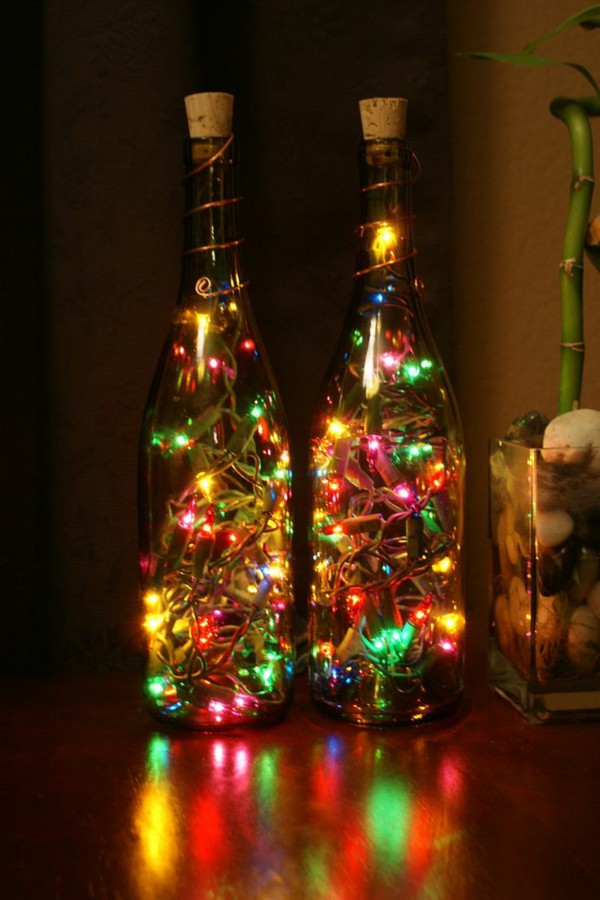
The bottle can be used as a stand for a table lamp if you make it yourself. The bottle can also be an independent decorative element for lighting fixtures in the room. You can lower a garland into a bottle painted in fragments or cut a “window” in the stele and put a small candle inside the bottle.


Bottles filled with rice dyed with food coloring can be a great addition to a kitchen or dining room. The color variety and originality of the design of the room will be provided.

A similar effect can be achieved when creating decor for kitchen and dining rooms. Colored cereals, beans and any other bulk products in transparent bottles look great. without requiring any additional decor.


For serving a festive table (with the obvious saving of countertop space), you can use bottles as a base for high coasters for plates. So on the table you can place more dishes and snacks, not to mention the originality of the approach to traditional serving.
Don't throw away bottle caps - they're a great crafting material. Of these, you can wish for coasters for hot dishes, lay out entire countertops, rugs and make such original decorative elements: