DIY autumn crafts for kindergarten and school: we look at all the new items. DIY topiary made from napkins
It’s impossible to stop admiring the beauty of autumn trees! Different shades of foliage flowers, splashes of red, black and dark blue berries, bark darkened by frequent rains and reflections of sunlight in droplets of dew and fog settled on the branches - you want to capture all this in your memory, in photographs, in drawings and crafts. Therefore, we suggest you make a miniature tree - topiary, preserving in it a piece of the autumn park or forest.
So, what do you need to make your own autumn topiary? We will build a master class using the most accessible and simple materials.
You will need:
- old newspapers or notebook sheets (A4 is less suitable because it wrinkles worse);
- ordinary sewing threads or thin yarn for knitting;
- glue gun;
- disposable cup (paper or plastic);
- water, plaster or alabaster (can be replaced with old plasticine, modeling clay, salt dough or sculpture mass);
- green paint;
- flat wooden stick;
- leaves, rowan berries, cones or acorns - in general, any gifts of the autumn forest.
All is ready? Let's start building the workflow step by step!

We crumple the paper into a dense, even lump, trying to give it a round shape. We fix the lump with threads, pulling it where it is needed.

We put the paper ball on a wooden stick. If you cannot insert it deep enough, fix it with glue for strength.

We dilute alabaster or gypsum in a glass to the consistency of thick sour cream. We immerse a stick with a paper ball into it. If you are using plasticine or sculptural mass, fill the cup, holding the stick inside.

Trim the free edge of the cup. Let the mixture harden.

Paint the cup and the top of the filler with green paint. If plasticine was used, you will need to put paper on the top layer, or use acrylic paint, which fits well on the plasticine. As an option, immediately take plasticine or green modeling clay. Then you only need to paint the cup.

Now you will need to start making the main decorative elements of the craft. Since topiary is autumn, with our own hands we will create miniature autumn bouquets from leaves, berries and other natural materials, and then we will paste these leaves over a paper ball. Bouquets look good in which some large element (berries, pine cone, acorn, etc.) is placed in the center, and bright foliage borders the edges. We fix the bouquet with threads.

Then we cut off the petioles.

We cover a paper ball with bouquets.

It takes on the appearance of an autumn tree!

Sprinkle leaves on the “soil” around the trunk.

And decorate the craft with a bright ribbon.

So we made our own autumn topiary! This craft is good for kindergarten because many children can take part in its making - for example, in forming bouquets.

Another amazing idea from the Internet is a fall topiary with a school theme.

And it is suitable for school because a student can easily cope with it without the participation of adults.
Resembling a growing tree, which is used to decorate any interior. This artificially created sculpture is also called " Tree of Happiness"or "European tree". The first topiaries were gardens made from originally trimmed shrubs, which prompted designers to make artificial trees with their own hands.
Autumn is rich in all kinds of natural materials, using which it is so easy to embody the most daring creative ideas. By using your imagination, you can create unique ones that will delight and delight the eye. always bring the aroma of autumn into the house, and autumn topiary will look original and bright. And if you've ever dreamed of trying to create a topiary, now is the time.
Autumn topiary can be made from leaves, acorns, rowan branches, fruits, autumn flowers and other materials at your discretion. Often such a decorative tree has a round shape, but there are also cone-shaped or bouquet-shaped topiaries. The main element is the crown, which can be decorated with anything: decorative ribbons or bows, acorns, fruits or. This craft will be a great decor for your home or.

To make your own autumn topiary, you will need:
- any autumn material: leaves, chestnuts, flowers, berries, branches;
- wooden stick for the trunk or thick wire;
- glue;
- foam ball;
- base container: empty flowerpot or flower pot;
- sand, stones, plaster, alabaster.
How to make autumn topiary with your own hands: step-by-step diagram
1. Pour a base into a flower pot to stabilize the autumn tree: sand, stones or other material. Pack tightly so that the topiary does not turn over in the future.
2. Then you should stick a wooden stick - the rod of a decorative tree - into the sand. It should be inserted until the stick rests on the bottom of the pot. Even crooked sticks are suitable for autumn topiary, because this will add even more uniqueness to your craft.
3. Place a foam ball on the top of the stick. And then it’s up to your imagination. Attach leaves, flowers, twigs and even berries to the crown with hot glue, pins or wire. If there is no natural material for crafts, autumn flowers and leaves can be made from paper or fabric. Don't forget about chestnuts, nuts, and acorns.
4. If desired, decorate the flower pot, stand and the autumn topiary rod itself. Choose items in fall colors.

Autumn topiary of flowers

Autumn leaf topiary

Autumn leaf topiary

DIY autumn topiary made from leaves

Autumn topiary made of leaves, chestnuts and moss

Autumn topiary made of nuts

Autumn topiary of chestnuts

Autumn topiary of apples in the form of a bouquet

Autumn topiary of apples: cone-shaped

Autumn topiary of apples
And topiary is a fascinating activity that will give you a lot of new positive emotions during the creation process. Stock up on everything you need, connect the children and feel free to get to work.
3 171 378
Today I want to tell you how you can quickly and happily build a topiary with your own hands for beginners - as always, I will give several master classes and explain in detail how even a beginner in needlework can create a topiary with their own hands. Topiaries are a great gift; they are also used for decorating and scenting rooms, and such an artificial tree can also be a wonderful gift - for example, a topiary made from money will attract wealth to the house.
Satin ribbons
Let's try to make topiary from satin ribbons. If you know how to do it, then it will be very easy for you, but even if this is your first time taking up ribbon topiary, you will succeed. So, I’ll tell you about the experience of making topiary from satin ribbons with your own hands.Required:
- about six meters of satin ribbon (no narrower than 5 cm, it’s better to take several colors);
- threads, beads, and ribbon for decoration;
- glue gun or regular superglue;
- a stick or a piece of plastic tube for the barrel;
- pot or bucket;
- material for the middle - a fabric bag, crumpled newspaper or a foil ball;
- earth, pebbles, crushed stone (I used colorful glass for an aquarium).
We make 12-15 roses from satin ribbon. You can use several shades of ribbon (for example, three or four), or you can get by with just one shade - when I made a topiary for my younger sister to decorate the wedding photo booth, I used a beautiful ivory-colored satin ribbon.
We make the middle - for example, we crumple up foil or old newspaper, wrap it with threads to make a dense shape. You can wrap it with ribbon, but there is no need - satin roses turn out quite lush.
The trunk can be made from a branch, a plastic pipe or any suitable stick. In extreme cases, dense wire, folded in several layers and wrapped with tape, is suitable. Wrap your trunk with tape, and then glue the trunk to the crown of the tree on one side and to the pot or bucket on the other.

We string a couple of beads onto a thread and “sew” the beads and a satin rose to the topiary. It should be sewn or glued firmly. When the entire ball is covered with roses, you need to prepare the trunk and pot.
You need to pour a weighting agent into the bucket, straighten all the flowers, and, if necessary, decorate with a decorative ribbon.

From coffee

We will also make a coffee tree with our own hands. To make topiary from coffee beans you will need:

- base (plastic ball, foam ball - sold in craft stores);
- trunk (branch, stick, tube);
- a pot or something instead (I had a beautiful clay jar last time, but now I have an ordinary glass);
- coffee beans (you shouldn’t skimp - good coffee has an indescribable bright aroma);
- solution for fixing (I use regular putty, plaster, alabaster, or even cement will also work);
- brown acrylic paint;
- glue gun and glue sticks;
- newspaper or scrap paper;
- burlap or other characteristic fabric;
- decor for decorating a coffee topiary with your own hands.

Money
By the way, using the same logic as using coffee, you can make a topiary out of coins with your own hands. Look at the photo to see how beautiful it is to make part of a topiary out of coins, and you will get a money tree topiary. You can use regular coins and paint them with gold paint, or you can buy special decorative coins (they will shine brightly).The manufacturing principle is the same as for a coffee tree - you need to take a base, cover it with paint, first cover it partially with coins (you can do it with a lock - as if coins are shining from an open wallet), and then cover it with coffee and fix it in a pot. Unbleached linen and burlap go well with this tree as decoration.
A topiary made from banknotes also looks very interesting, but I won’t lie - I haven’t yet created a beautiful topiary from banknotes, I’m still working on a tree made from banknotes with my own hands, so if you want to make a money tree from coins or a tree from banknotes that attracts wealth, then watch the master class on how to make a money tree with your own hands.
The kusudama-style tree is also interesting - see how to make topiary with your own hands following step-by-step instructions.
Video bonus: two master classes on how else you can make an original money tree from banknotes:
From napkins
A chic topiary made from napkins with your own hands is made literally from nothing, you will need:- several bright napkins;
- base ball (plastic or foam);
- branch or stick;
- gypsum (any mixture for fixation);
- titanium glue or any polymer glue;
- pot or glass;
- stapler and scissors;
- various ribbons and lace, decor and paper for the pot (can be replaced with fabric).

So, how to make a tree with your own hands from ordinary napkins:
- First, we make ordinary flowers from napkins and paper clips - we fix the napkin folded several times with a stapler, cut it out in a circle, and crumple it into petals.
- You will need 15-20 flowers, if there are not enough, you will make more, but usually this amount is enough for a lush and beautiful topiary tree of happiness.
- We cover the ball with a napkin, wrap the barrel with ribbon, and dry it;
- We cover the ball with flowers from napkins, skillfully weaving decor into your tree from napkins with our own hands - it can be lace, beads, bows and even plastic figures; small wooden letters or words on topiary look very attractive;
- We dilute the gypsum and “plant” our tree - we immerse the finished topiary with its trunk in a pot and fill it with gypsum, hold it until it sets.
Now you know how to make a tree of happiness with your own hands and you can decorate such products to your taste.
Cones
By the way, you can make a very beautiful topiary from cones, especially since it is quite easy to do. What is needed to make topiary from cones:- pot or glass;
- stick, branch, tube - trunk;
- a round base for topiary - you can take a foam ball, you can cut it out of polyurethane foam, in extreme cases, crumpled newspaper wrapped in threads will do;
- lumps (preferably bigger);
- brown acrylic (preferably glossy, dark);
- fabric for decorating a glass;
- decor to decorate your topiary made of cones - beads, threads, buttons and so on;
- gypsum or any building mixture for fixation;
- glue gun and rods for it;
- scissors, brushes.

We start making topiary from pine cones by decorating the glass - we cut the fabric diagonally (this way it drapes better), and we tighten it, gluing it with a gun. By the way, do you want to avoid unsightly glue marks? Glue it where it will not be visible (on the bottom and inside the glass, and the walls should simply be covered).
We prepare the base - fix the stick to the ball, paint everything with acrylic (it’s better to cover it with newspaper first).

We cover the ball with cones, let it dry and fix it in a pot - for this we dilute plaster, dip the trunk of our tree and hold it until the plaster sets.

You can decorate topiary from cones in different ways; I prefer beads in natural shades.

You can decorate your pine cone topiary with ribbons, hang artificial berries or even small figurines on the cones.

Beads and beads
You can also make a charming topiary from beads. It’s easier to understand how to make a tree from beads with your hands, so watch the video below on how to make a topiary from beads. By the way, a craftsman can make absolutely anything from beads - including decor, for example, berries that can be used to decorate a money tree made of beads.
Now you know how to make an artificial tree with your own hands step by step. I admit honestly, every topiary made by yourself is something special, and you will understand what it will be like only when you start decorating it. Try making festive trees and ordinary modest trees for the interior - those that are laid out with cones and coffee beans can not only decorate the room, but also flavor it (you can add a couple of drops of essential oil).
And my sister makes money topiaries with her own hands, which lure money into the house; I will publish a tutorial next time - for now I can only show from photographs what such products look like. Try making your own topiaries and surprise your loved ones with unusual gifts!
A few more original master classes + Video bonus
DIY shell tree:
From the tapes:
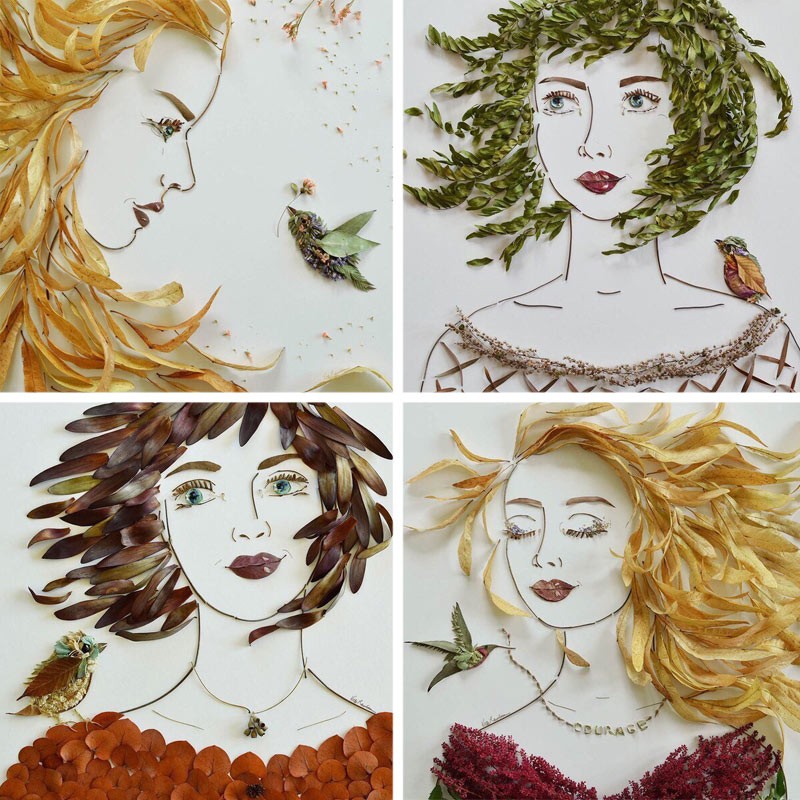
And one more lesson on creating a tree from petals with singed edges:
Ideas for inspiration:


Every year nature gives us a lot of natural materials suitable for creativity, completely free of charge. The process of creating with your own hands develops the child’s artistic taste, thinking, memory, and fosters perseverance. But the most important thing is that you can have fun and usefully spend time with friends, delighting yourself and others with crafts.
Preparation of natural materials for their further use
Nature is the best artist; she creates natural materials that, in skillful hands, turn into works of art!

Plant materials
Chestnuts
Chestnut fruits have a bright brown color and a shiny surface, so they make excellent DIY crafts from natural materials. The shell of a fresh chestnut is thin and can be easily pierced with an awl. Chestnuts are a fertile material for working with young children themselves. You can make many different dolls.


It is better to store in a cool place in boxes.
Acorns
Oak fruits ripen in autumn, in September-October. collected in various shapes and sizes.


At the same time, their cups (pluses) on which they rest are collected. Pluski are very often used separately from acorns, as an independent natural material for various crafts.

Acorn pluses and balls felted from wool
Watch the video to see how to felt even balls of wool. Olga Skibina:

Acorn tops and Christmas bells


You can store them for a very long time, after thoroughly washing and drying them. But why just store stones when the whole family can have fun playing with them?)


For another way to apply images to river or sea stones, see the video from You Can Do It Craft. You'll be surprised how easy it is!
Shells
You can collect shells on the banks of rivers, seas, and lakes while relaxing with your children. Many of them are original in appearance, shape - oval, scallop-shaped, elongated, etc.
Boil them for a few minutes to free them from living organisms. The shells are washed with a small brush (or a toothbrush), after which they are dried and sorted by type and size. Stored at any temperature.
You can also clean shells in a solution of bleach and water at a ratio of 1:1. The top layer will disappear after a while, leaving the shell with a beautiful shiny top.
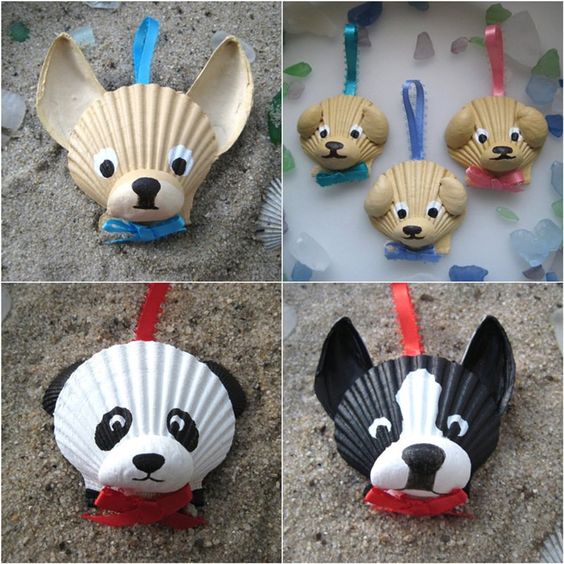
Animal figures are made from large shells.
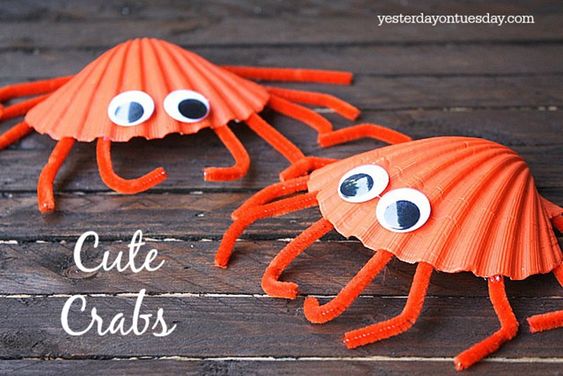

Small shells make wonderful applications and garlands:


Shells can be used not only as the main material, but also as additional decoration (bird wings, dog ears, flower petals, etc.)


Sand
Very accessible material that can be collected in any sandbox. It varies in structure. Before use, it must be rinsed and dried thoroughly. And then you can use it as decoration in your works:


Rules for storing natural materials
DIY crafts made from natural materials will be flawless if, after collecting, drying, and pre-processing, you properly store these natural gifts. To do this, you must adhere to certain rules.
- A dark, cool and well-ventilated area is the best place to store natural materials.
- You can buy plastic containers to store each type of material; use cardboard boxes for shoes, tea, sweets; take ordinary glass jars with a screw cap. For seeds, as for beads, it is better to have a container with many compartments.
- Dried flowers are fragile and break easily, so they are placed in a tight box or container. Petals are stored separately from flowers. Flowers with stems can be stored in a vase.
- Prepared leaves are also brittle. You can store them in large books. Also, for safety, put them in labeled candy boxes, secure them with a little tape so that they don’t accidentally open.
- The shells are placed in glass jars or plastic containers with a wide mouth to prevent them from crumbling.
Additional tools for crafts made from natural materials
To create a beautiful craft from natural materials, you will need additional tools and materials.

It can be:
- colored paper;
- cardboard;
- leather scraps;
- scraps of fabric;
- bird feathers;
- Styrofoam;
- plasticine;
- wire;
- PVA glue, “Moment”;
- gouache;
- stain;
- varnish, etc.
Paper very often used as a complement to natural materials. Children, bending and gluing it, make the work much more interesting.
Plasticine fasten individual parts of simple toys at the initial stage of work. It is not very durable, but as an addition it is often used in kindergarten and elementary school.

From wire most often the frame of a toy is made, the connection of its parts. Copper wire diameter 0.29-0.35 mm - soft, flexible and durable - most comfortable. And for the frame, wire of a larger diameter is used - 1-1.5 mm.
Threads It’s better to take thick, multi-colored ones (No. 10).
Glue it is better to use white PVA, BF, etc. However, in kindergarten it is better to use PVA glue.
They also use foil, pebbles, cherry pits, and bristles.
It is better to store additional material in a small box with compartments for each type of material.
The use of additional material depends on the plan, the skill of the children, and the degree of development of imagination! Offer your options, but rely more on children's intuition and desire.

It is also additionally necessary to have certain tools for making crafts from natural materials:
- art scissors;
- awl;
- jigsaw;
- tweezers;
- pliers and wire cutters;
- sewing needles;
- brushes for glue and paints;
- a cotton cloth for wiping off glue residue.
Scissors for children, they should have blunt ends, small, with rings that are comfortable for a child’s hand.
Awl must be made of durable material with a handle length of about 6 cm, a diameter of about 2 cm, the piercing part is 3.5 cm
Needle I need a large sewing machine. Be sure to store it in a pincushion with a thread threaded into it.
Attention! Only adults use pliers, pliers, and drills!
To draw the outline of the part to be cut out, a simple pencil. For example, a dress, hats for a doll, etc. It is better to take a soft pencil (2M).
Tassels(soft for drawing, harder for glue). It is better to buy squirrel tassels (No. 4 and 6). For glue, use brushes with hard bristles.
Stack- a tool necessary for processing a surface made of clay or plasticine. The length of the stack for children is about 12 cm. You can make the stack yourself from a worn-out brush: round it on one side and sharpen it on the other.
Crafts made from natural materials for kindergarten
Kids love it when in their hands chestnuts and plasticine turn into toys that they can play with. Crafts made from natural materials for kindergarten are not very complicated, so any child can do it with the help of an adult. Sometimes they are made from fruits and vegetables, but most often they are applications from leaves and animals from cones and acorns.
Crafts from leaves and maple “helicopters”
The easiest and most accessible job, even for kids, is leaf applique. If this is your first time making a composition with your child, offer him a picture that will serve as a template. Don't rush to do everything yourself. Invite your child to choose leaves as desired so that the work turns out similar to the sample. This will develop your child's creative abilities.
Material for application:
- colorful leaves;
- thick sheet A-4;
- glue brushes;
- PVA glue;
- scissors;
- sample.
To make a simple arrangement, you need even, dry leaves. Place them under a press or in a book. In two days the material is ready. Cut out the appropriate pieces with scissors and lay them out on a sheet of paper.
Now you can glue it. First the background and lower layers, and then the finer details. For example, if you want to make an elephant, then first make a body and head out of leaves, and then glue on the trunk, tail, and legs. If you don’t have enough eyes, you can add them in with a marker or make them from tree seeds.

You don't have to do everything according to a template. You can come up with a picture yourself and create an original composition from leaves.


Use colored paper, felt-tip pens, and paints as an addition, so your applications will be even more interesting.
Along with leaves, maple “helicopters” are also ideal as a basis for crafts made from natural materials for kindergarten. Just look at this miracle!

Fairy wings made from maple seeds

Dragonflies from maple "helicopters"
Now you have seen how beautiful and original leaf applications can be. Use these ideas for spending time with your children.
Simple master classes on creating children's crafts from acorns and cones
At the end of summer, acorns begin to ripen, and they make wonderful crafts from natural materials for kindergarten or school. They are well preserved, and on long autumn evenings you can do a pleasant and useful activity with your children that develops fine motor skills of the baby’s hands, imagination and perseverance.
The most common crafts made from acorns are little animals and various people. You can easily make legs, arms, horns and other small elements from toothpicks, matches, thin twigs. An adult needs to help the children poke holes in the acorns.
To attach small parts, you can use a glue gun or Super Moment glue, but only adults should do this. And the safest way for kids to fasten parts together is with plasticine.

Making fly agarics from acorns is even easier! To paint acorns, you need to remove the caps from them, and after the paint has dried, glue them in place.


Acorns are very beautiful in themselves, and if you also paint them with acrylic paints or nail polish, then such crafts will decorate any home.

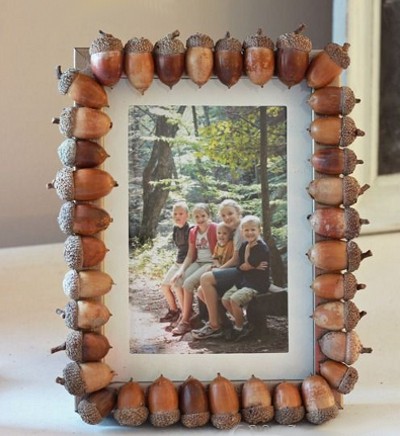
You can also make an original decoration for the New Year tree from hats painted with silver paint. The process of creating such an eco-toy is quite simple: we tightly glue acorn caps onto a foam ball (you can take an old Christmas tree ball). And it sparkled new.

We found another video for you, where Niki Junior
In addition to “edible” crafts, kids can choose any of the ones presented in this huge Krestika article! We tried to choose the best and easiest to implement ideas :) Good luck and creative inspiration to everyone!
Leaves are the simplest autumn material from which you can make various crafts with your own hands. So is topiary, that is, an artificial tree that serves as a beautiful decoration. There are several options for how to make a tree from leaves with your own hands; more than one master class is devoted to this. Some crafts will be discussed in more detail.
This craft does not require a lot of expensive materials, and the main elements are literally lying on the ground. So, collect a lot of beautiful, not very large, bright leaves. To make the color scheme impressive, take lighter sheets - as practice shows, brown and crimson ones do not look so elegant in topiary.

You will also need dry twigs and berries.
This master class also assumes the presence of:
- Pot-vase;
- Wooden stick;
- Foam ball blank;
- Spray paints;
- Hot glue;
- Thermal gun;
- Masking tape.
For this craft you will need two foam balls at once. You insert one of them tightly into the flowerpot, or better yet, secure it with hot glue. You need to stick a wooden stick into this ball and make it so that it touches the bottom of the pot.

- Surface of a foam ball, seal the one in the pot with masking tape. Paint the pot itself and the stick-trunk with spray paint. For example, golden, after all, the theme of topiary is autumn. Masking tape is needed to prevent the foam from becoming stained. Also protect the surface where you are working from paint.
- Place the second foam ball to the other end of the stick. This will be the basis for the crown. Leaves and twigs need to be inserted into the top ball to form a crown.
A very important point - you can make topiary from dry leaves, but its aesthetics will be in doubt. No, dry leaves also have their own beauty, but this master class still suggests processing the leaves with your own hands.
Maple leaf topiary: leaf processing
You can process the leaves with your own hands so that there is no need for artificial ones. It’s no secret that many autumn crafts are made from artificial leaves.

The master class suggests the use of glycerin:
- You need to make a solution from glycerin. To do this, take 2 parts boiling water for 1 part glycerin. Bring everything to a boil over medium heat, and then cool.
- The solution must be poured into a heat-resistant container, cover with a lid and shake well.
- Dip the stems into the hot solution so that it covers them by at least 7-9 cm.
- Place the container with immersed plants where it is cool and there is no direct sunlight. You will know that the glycerin has been absorbed when droplets of moisture appear on the leaves.
As you can see, the master class is not complicated, but the process of absorbing glycerin lasts at least 10 days, or even three weeks. From time to time you will have to check how the plants are doing. Glycerin penetrates into some of them faster. Sometimes dense stems are laid out with scissors so that glycerin penetrates into them more quickly.
When everything is ready, the leaves can be taken out for crafts; they need to be wiped with a dry cloth. True, you will have to dry the leaves. Some people force things forward by removing the leaves hanging on a rope after a couple of days; others dry them for two weeks.
The leaves can be coated with waterproof colorless varnish. And after drying, you can definitely use it.
Roses from autumn leaves (video master class)
Topiary from leaves step by step: master class for beginners
Leaves prepared with your own hands can decorate a tree. The main task is not to disturb the harmony of the craft. And this needs to be done in such a way that the crown is rounded, the color transitions are natural, and the berries only emphasize the autumn mood of the topiary.
The master class continues as follows:
- Without additional decor, the topiary will be faded. Openwork ribbons and braid in the color of wood will do. The flowerpot can be decorated with beads and red buttons.
- Fix a couple of leaves on the trunk - only small and neat ones.
- Place cut yarn threads in a pot to match the crown. They will imitate an autumn carpet. You can also throw miniature cones and acorns there.
- At the foot of such a tree there may also be a small pumpkin, as another attribute of the autumn atmosphere.

Just as appetite comes while eating, so here inspiration can come while working. You can complicate the master class with your own hands by adding different decor - bugs, dried flowers, artificial moss, etc.

How to make topiary from rose leaves
A topiary of autumn leaves can turn into a bouquet of roses. How, you ask, and just as easy as the previous master class.

How to make such flowers? Once again, you will have to discard dry leaves; leaves treated with glycerin look more aesthetically pleasing.
But to make roses with your own hands you need:
- You need to fold the maple leaf in half so that the front side is on the outside.
- The leaf is rolled up, this will be the core of future roses.
- Around the first roll you need to line up row after row of petals. This time the front side should be on the inside.
- Bend half the leaf away from you. The bend line should be about a centimeter higher than the core roll.
- Once again we bend the sheet outward, without smoothing the fold line. The roll wraps on both sides.
- This is how all rose petals are made. Below, at the base of the flower, they are secured with threads. And this is how every rose is made.

If you decide to use dry leaves for the craft, then after work, spray them with hairspray. When rosebuds dry, they will not crumble or break. Just spray the buds of maple roses thoroughly, sparing no varnish.
The buds are attached to the base of the crown with glue using a heat gun. Such a tree must be made very carefully with your own hands so as not to deform the elements.

Crafts from roses are not only topiary. More than one master class is devoted to bouquets of flowers, jewelry, and additional decor for other works.
Topiary “Green Roses” made of maple leaves (video)
The master class loves experiments, work, get inspired, offer your own decor options. Such a tree can decorate the house all year round, being an excellent addition to the bookshelf with the lyrics of great poets. Stylish and original, modest and unpretentious. Good autumn results, and skillful capturing of natural beauty!
Topiary of autumn leaves (photo)