How to make a tandoor with your own hands from brick, video. Tandoor do it yourself. Drawings and step-by-step instructions (50 photos) Scheme for making a tandoor
Today it is difficult to imagine a vacation in the country without juicy, delicious kebabs. However, not only the brazier attracts vacationers. Having your own tandoor in your backyard is fashionable, stylish, and convenient.
In fact, the design of the tandoor performs the same functional features as the barbecue.
A big advantage of this type of furnace is the possibility of self-assembly and installation.
In fact, a tandoor brazier is not much different from this type of oven. However, certain differences cannot be ruled out. These include external characteristics. As a rule, furnaces of the type in question do not have decorative finishes. In turn, it can be decorated with ceramic tiles. As for the type of fuel, wood, coal can be used here, brushwood is less often used.
According to external indicators, it can be compared with a large jug. Fuel, regardless of type, is laid directly into the interior of the structure. A characteristic feature is the location of the skewers. They are attached to specialized, pre-installed perches. The tip of the skewer must be pointing down.

What are the advantages of a tandoor over a barbecue?
Probably, everyone at least once faced with the fact that the barbecue was not fried enough. This is due to the fact that the meat is subjected to heat treatment with improper heat distribution. That is why a piece can have one side fried to coals, and the other will remain with blood. If the coals are unevenly distributed on the surface of the brazier, respectively, the heat to the products will do the same. Also, do not forget that each individual coal has its own heat supply temperature.
With a brick tandoor, everything happens quite differently. Its design is unique. It ensures uniform frying of meat of any size. Separately, I would like to note that not only meat is perfectly fried in this brazier. From time immemorial, corn cakes have been baked in such ovens, which are distinguished not only by their amazing taste, but also by their beneficial properties. This tradition, fortunately, has survived to this day. Try a flatbread or meat and you will feel the difference.

What is the tandoor made of?
As for the materials used, preference here should be given to a solution of clay. Such a design will not contain other types of materials, respectively, environmental performance will be on top. The clay tandoor turns out to be mobile, that is, convenient enough to move if the need arises. It is important to pay attention to the fact that the structure can only be installed during the seasonal period, in the fall it can be removed for storage. Another important factor is the need to build a foundation.
Do not forget about economic features. Tandoor comes from countries that were far from the use of fuel, gas. That is why there was a need to build a stove that would serve for cooking for decades.
The idea of building a tandoor did not arise by chance. This is justified by the fact that a small amount of coal is placed in the brazier, which is enough only to fry a certain amount of barbecue. But the brick tandoor, in turn, is able not only to fry meat, but also to bake bread (cakes). In addition, this heat is enough to heat several liters of water. Simply put, performance is striking in its functionality.

As practice shows, construction can cause concerns associated with the performance of pottery work. However, they can be avoided. How to do this - we will consider in more detail later. In fact, he does not put forward special requirements for the criteria of the material. Even from an ordinary brick, you can build an Uzbek oven.
Buy or make?
Once you have come to the conclusion that in the country you are missing exactly the tandoor, then you should come to the right decision: purchase the structure in a specialized store or build it on your own. Undoubtedly, the purchase of a finished furnace is the most simplified option. It is important to know that today for consumers there is a huge choice of models with guaranteed quality.
You can make a tandoor with your own hands, but there are certain criteria. It is imperative that you pay close attention to them. So, for example, in the middle latitudes, conditions are not quite suitable for the manufacture and operation of the structure in question. Do not ignore the fact that construction here without specialized equipment is simply impossible. The main problem, as a rule, is the formation of cracks in the structure during firing. In this case, the quality of the clay does not matter.

In this case, experts recommend buying a ready-made tandoor design. The cost will be several times cheaper. At the same time, in addition to the main structure, upon purchase, you will receive utensils, a lid (intended for heating the kettle, installing skewers). As a rule, all this is included in the factory package.
Self-assembly can only be done with certain skills. Moreover, it is impossible to completely build the oven yourself. Its internal component will have to be bought or made to order. The "heart" of the tandoor is in a different price range. The cost is determined depending on the size of the device, material.
It is a furnace, a brazier, presumably round in shape. The structure can be located both in the ground and above it. Increasingly, today, brick is used for construction. It is advisable to give preference to a specialized type for the brazier. You can build such a furnace without much difficulty and in a short time. But it will function for many years, delighting your family, friends, comrades with delicious food.
Important! The brick tandoor is an oriental type of brazier. The tradition of its installation originated from there. As a rule, in the countries of the East, the construction was erected in the central part of the house. It served not only for cooking, but also as a heat supply during the cold season.
How to make a brick tandoor with your own hands
A miniature oven is very popular, which can move around the summer cottage with the help of wheels built into the platform. Naturally, the construction under consideration can be met in the implementation already in finished form. However, its acquisition will require considerable financial investments.
If, nevertheless, it was decided to build a tandoor with your own hands, then here you should pay attention to the fact that the soil under the tandoor is always dry. To do this, it is best to use a coating of sand, stone.
So how to build a tandoor with your own hands? For this kind of construction, the following types of material can perfectly fit:
- stone blocks;
- clay ceramic brick;
- brick of white color, which steadfastly resists fire.

The main thing here is to remember that the structure in question will have a large mass. Hence it follows that a strong foundation must be erected under it. It is with its construction that work should begin.
According to external characteristics, the base of a brick tandoor can be compared with the foundation of a house. The only difference will be the opening, which will serve as a place for laying wood (fuel).
It is impossible to exclude the possibility of building a tandoor on the ground. In this case, the base will be a shallow depression (preferably round), covered with a thin layer of sand. On top of this, you can start building a well from any kind of brick. Do not ignore the masonry mortar. Experts recommend opting for a ready-made specialized mixture. The masonry itself can be carried out in two ways: horizontally, vertically. In the case of horizontal masonry, the heat in the oven remains for a long period of time. Vertical masonry, in turn, is an economical option. This is due to the minimum cost of bricks during construction.
In order to have a visual idea of what the final result will be, it is worth making a masonry without the use of a mortar (the so-called ordering). The required shape of a brick can be given with a "grinder" with a blade on ceramics. As long-term practice shows, laying out a tandoor in the shape of a circle is not an easy task, which is why it is worth modeling a drawing before starting construction work. It is preferable that it be made in real size, which will greatly facilitate the workflow. The made brick template will be the key to successful masonry.

It is important to pay attention to the fact that you should not save on masonry mortar, then the structure will turn out to be more durable. Do not forget to use the building level in your work, which will lead to the construction of an even furnace.
The base of the tandoor is always wider than its top. This is done so that the heat remains inside the brazier as long as possible, and is not wasted. As a result, the appearance of a do-it-yourself brick tandoor should look like a vault. Once the entire structure is ready, you should start disposing of the remaining solution in the inside of the product. The wall on the outside of the furnace must be treated with dry clay, especially for brick joints. If desired, the inside of the tandoor can be treated with a mixture of clay and grass.
After all the mixtures dry well, you can start firing. You should start with paper, then the temperature is increased by changing the raw material. The considered method is simple in its kind. If you want to give the design a pleasant appearance, then you can decorate it with mosaics, hand-sculpted.

Wooden barrel for tandoor
There is no doubt that a brick oven has more positive characteristics. However, the construction of this structure may not always be convenient. Here you can use other improvised means, for example, a barrel made of wood. In this case, a certain skill in working with clay is required.
Preparatory work begins with the impregnation of the inside of the barrel with sunflower oil. It is preferable to leave it to soak overnight. It is important to pay attention to the fact that the iron hoops on the barrel are not too tightly fixed. Next, the mixture is kneaded in the following proportions:
- wool of a sheep no more than 15 centimeters long;
- fireclay clay - 0.05 kilograms;
- fireclay sand 1 kilogram.

All components must form a mixture of special density. This mixture should stick around the inside of the barrel, thereby creating the shape of the future tandoor. The thickness of the walls should be at least 20 centimeters, but not more than 30 centimeters. It will take about seven days for the solution to dry completely. It is advisable to use incandescent lamps during this period to dry, which will help achieve a more effective result. As soon as the solution dries, the hoops are removed from the barrel, and the barrel itself is disassembled. There remains a finished frame, which should be fired.
Brazier from a plastic barrel
A standard-sized plastic barrel is filled tightly with liquid, as a result of which its sides increase slightly in size. From the outside, fireclay mixture should be applied. It is applied in a dense layer, rubbed well. Here it is worth “smoothing” the solution until the desired shape of the furnace is obtained. Drying is also carried out for seven days. After that, the liquid should be removed, the empty barrel should be carefully removed. Now the do-it-yourself tandoor can be considered completely finished.
On what principle does it operate?
Before you start making a tandoor brazier with your own hands, you should pay close attention to the principle of functioning of the structure itself. An example for this is the Armenian tandoor, made of bricks. Here it is worth paying attention to the drawings. In order not to spend a lot of time and energy on compiling them, you can turn to the Internet for help. There are ready-made schemes here, according to which you can build a tandoor with your own hands of absolutely any size.
Equally important is the option of the brazier itself. As a rule, the following are distinguished:
- conventional oven;
- underground tandoor;
- horizontal/vertical brazier

In more detail, you can consider the possibility of making a ground-type do-it-yourself tandoor. Here it is important to choose the right place for installation. It is most preferable if the structure is located under a roof, a canopy. It is important to pay special attention to the construction of the foundation. It is from its strength that the reliability of the entire structure will depend. Do not forget that concrete, mortar for laying bricks must be well dried. To do this, it is better to leave the finished product to dry for several days, only after that it is fired. Once all the required conditions are met, the oven-brazier can be used for its intended purpose.
Basic rules of use
As you know, there is a certain list of rules for the operation of the brazier (tandoor). Their implementation is mandatory. The time of year is of great importance. So, for example, during the cold season (in winter), the temperature in the tandoor should rise gradually.
The first step is to ignite the chips, only after they burn out the main part of the fuel is added. In summer, the ignition of wood chips can be excluded. It is important to pay attention to the fact that the fuel should fill 2/3 of the dimensions of the furnace. Of course, you can add a large part to the brazier, but do not forget that some of the heat will be wasted.

There are no restrictions for the temperature level, just as there are no restrictions in terms of operation. The main thing is to take into account time preferences.
Caring for the brazier is quite simple. All that is required of you is just the timely cleaning of the ashes. If fat accumulates inside the oven, you should not worry, because during the next use of the tandoor, the fat will simply melt.

Conclusion
However, one should not forget that the design has certain disadvantages. These include the inconvenience of cleaning. This is due to the fact that the ash will have to be removed through the upper part of the hole, which is not very convenient. It is important to note that the portable oven has a different cleaning method.
With a competent approach to the manufacture of the tandoor, the structure will be able to function non-stop for six hours. In this case, only one kindling will be used. Separately, I would like to note that experts refer the portable product to one of the types of barbecue. Pit tandoor, as a rule, is intended to a greater extent for heating the room. Cooking in it is a secondary matter.

Making a tandoor on your own turns out to be a simple, quite affordable and interesting activity. Therefore, the question of how to make a tandoor in the country with your own hands does not seem particularly difficult. However, it is very important to follow the rules of the technological process when building a brazier. If you follow all the recommendations, then the result of a high-quality oven will undoubtedly please you. Compliance with all the rules during construction work will allow the tandoor to function for decades.
You can build a tandoor with your own hands in the country in a few weeks, after which you can enjoy the dishes cooked in this unusual brazier.
After all, the tandoor oven allows you to cook food with a special exotic taste.
Over open hot coals, Asians have adapted to cook almost all national dishes, from donuts and flatbreads to pieces of juicy fried meat.
The ancient stove of the peoples of Asia, despite the advances in technology, has not been forgotten. On the contrary, her popularity grew outside her homeland and reached us.
To understand how to make a tandoor in the country with your own hands, you need to familiarize yourself in detail with the device and the principle of operation of the furnace.
Of course, you can buy an electric tandoor and not bother with construction.
But if you personally fold such a clay brazier, it will become the pride and original decoration of your summer cottage.
Only if the tandoor did not work out with your own hands, then you can think about purchasing its electrical counterpart.
The design and operation features of the furnace
A tandoor oven is an almost flat clay vessel narrowing upwards with a hole through which fuel is placed and dishes are placed for cooking.
The draft is provided by a blower with a shut-off damper specially arranged at the bottom of the base.
The increase in the thermal insulation properties of the stove occurs due to the brick, which is used to finish the clay base, and natural material that can accumulate heat.
As it is used clay, sand or salt.
Such a device of the tandoor oven allows the combustible fuel to heat the walls up to 400 ° C and subsequently keep the temperature for four hours.
This time is enough to prepare any dish.
Powerful heat transfer directed inside the tandoor and a stable temperature make it possible to evenly bake bread, fry meat to a crisp, and make pilaf fragrant and crumbly.
Creating a tandoor with your own hands in the country can be done in several ways. Consider three options at once, which differ in the level of complexity of the structure.
But in any case, laying down such a furnace on the ground will not be particularly difficult even for a non-professional.
Classic brick tandoor
If you build a brick tandoor with your own hands using ancient classical technology, then you will have an almost real national oven in your dacha that can glorify your culinary skills.
Why "almost" real?
As a rule, masters always keep their secrets to themselves, so it will not be possible to build an exact copy of a brick oven. By studying the ancient technology of building a tandoor, you can find out several important things.

Firstly, the manufacture of the base of the tandoor oven requires the use of kaolin clay from the Akhangaran source. It is she who has excellent thermal insulation properties.
Secondly, the addition of sheep or camel wool to the clay makes it possible to eliminate cracking of the inside of the furnace.
The knowledge of modern masters is limited to these facts, since none of them knows the exact composition of the kaolin solution.
The construction of a classic brick tandoor stove is as follows:
- Kaolin is combined and mixed with wool, at the output the composition should get a viscosity and look like thick sour cream. The prepared mixture is set aside for a week, in order to dry it evenly, for this the composition is periodically mixed. The water settled on the surface of the mixture is drained. The less water in the kaolin, the stronger the structure of the finish will become. A stove built from such material will not crack during the firing process. After the allotted time, the composition should acquire properties similar to plasticine, after which it will become malleable for modeling;
- From the prepared clay, flat strips with a thickness of 5 cm are formed. Moving in a circle, with their help, they begin to sculpt the tandoor with their own hands. The classical height of the vessel is from 1 to 1.5 m; neck with a diameter of 0.5 to 0.6 m; the diameter to the narrowing of the container is 1 m. A hole is left in the lower part of the base, which will be used under the blower;
- The half-finished tandoor is left to dry in the shade. It takes about 30 days for the vessel to do this;
- At the next stage, the furnace is covered with a brick casing. It is necessary to use fireclay bricks, specially designed for lining the internal surfaces of stoves and fireplaces. The space between clay and brick is gradually filled with any heat-retaining material (salt, sand, clay), ramming each layer;
- The inner walls of the clay vessel are coated with cottonseed oil;
- At the final stage, the tandoor oven is fired until a ceramic state is obtained. During firing, the temperature is raised gradually. The process lasts about a day, as a sharp heating of the raw clay will cause cracks.
A simplified process for creating a classic tandoor
You can make a simplified version of the classic tandoor in the country on the basis of a wooden barrel. This method was invented for inexperienced craftsmen.
And this was done, probably, by the same inexperienced specialist, who could not form an even vessel from clay strips.
Making an Asian stove will require the following materials:
- kaolin clay;
- wooden barrel with metal rims;
- fireclay sand (0.5 mm fraction);
- vegetable oil;
- wool of sheep or camel.
Step-by-step device for a tandoor oven based on a barrel
To create an Armenian tandoor from a barrel, you must use the instructions from this paragraph of the article.
A wooden barrel is completely filled with water and left for 24 hours to swell the wood. Sand, clay and wool are mixed in a ratio of 1:2:0.05.
The mixture is left for a couple of days until plasticity is achieved. After that, water is removed from the barrel, the tree is allowed to dry well.
The inner walls of the barrel are lubricated with oil, allowed to soak, leaving overnight.
The walls of the wooden container are lined from the inside with a plastic kaolin mixture, with a layer thickness of about 5 cm. Wetting the hands in water, the surface is smoothed until the walls are smooth and even.
To make the neck of the tandoor narrower, the thickness of the clay layer evenly increases upwards. At the bottom of the future vessel, a hole is left for the blower.

It will take at least a month for the tandoor to fully ripen, during which time the clay vessel will begin to gradually peel off the wooden walls.
After that, metal rims are removed from the barrel and the almost finished tandoor is freed from the tree.
For the purpose of firing, the kiln is placed on a layer of sand and the first firebox is produced. Having laid the minimum amount of fuel in the tandoor, a weak fire is lit, gradually adding combustible material.
For six hours, the tandoor should slowly warm up. Then the fire is made stronger, heating is brought to the maximum temperature increase.
The earthen vessel is covered with a lid and allowed to cool slowly.
To enhance the thermal insulation properties, the clay container is lined with bricks, an insulating layer is made as in the first version of the furnace.
Modern way of making tandoor
Having started the construction of a refractory brick tandoor in the country, you can be sure of getting a 100% result.
Unlike the classic manufacturing option, such an oven will not fall apart into pieces even at the beginning of drying.
Of course, such an oven will differ in appearance from the national Asian oven, but because of this, the taste of the dishes cooked in it will not become worse.
To build a brick tandoor, you need to stock up:
- oven refractory bricks;
- clay mixture for masonry;
- kaolin clay;
- sifted sand;
- reinforcing mesh;
- concrete mix for the foundation;
- template wooden frame.
Step-by-step device of a brick tandoor
Pouring the foundation for a brick tandoor:
- To build a foundation in the ground, make a round hole 40-50 cm deep with a diameter slightly larger than the base of the future furnace. Sand 10 cm thick is poured at the bottom of the pit, reinforcing material is laid on top of it;
- After arranging the pit, everything is poured with a concrete mixture, leveled with a building rule. At the same time, do not forget to control the horizontalness of the surface using a level. After the horizontal foundation has completely set and dried (it will take at least a week), you can start building brick walls.

Construction of refractory brick walls:
- Using a template-frame, the brick is laid in a circle of the foundation in an end way. The components of the refractory mortar for masonry are: fine quartz sand, plasticizers, a certain amount of clay;
- The second row of the end masonry of the tandoor provides a hole for a metal window, which will later play the role of a blower. For this purpose, you can use a chimney;
- For the construction of the walls of the tandoor, four rows of vertical brickwork are sufficient. Through the use of a wooden template, the rows will gradually narrow upwards. To achieve this, the final row of masonry must be performed with a noticeable inward slope. The result should be a tandoor with a height of 1 - 1.2 m;
- The outer and inner walls of the almost finished brazier are coated with kaolin clay, the layer thickness of which must be at least 5 cm. For an aesthetic appearance, the tandoor is lined with natural stone from the outside.
The firing of the kiln is carried out by making a weak fire inside the tandoor and gradually raising the temperature, as was done above for the classic versions of the kilns.
Of course, the construction of a tandoor is a troublesome and lengthy process. But the efforts expended will not be in vain, because as a result you will have a real Asian oven.
This is a great opportunity to surprise your loved ones and guests with dishes prepared in such an original way. Our building tips will help you with this.
Fans of country rest cannot imagine their pastime in the country without barbecue. Indeed, can there be anything tastier than fresh meat, richly flavored with spices and carefully roasted on charcoal? If this exists in nature, then it can only be meat that is baked in a brick tandoor. Who does not know, the tandoor is a special Turkish oven, thanks to which a shish kebab is obtained with simply incredible taste. And the whole secret of such an exquisite taste lies in the fact that the meat is baked extremely evenly, and only due to the fact that the distribution of heat in such a design is balanced. So, today we will find out how to build a tandoor with our own hands, get acquainted with the possible options and give detailed instructions for manufacturing.
How to make a tandoor on your own
Option number 1. Traditional clay tandoor
According to the ancient technology mentioned earlier, a true tandoor should be molded, not built. Moreover, kaolin clay (ideally, of Akhangar origin), which has excellent thermal insulation qualities, should be used for this. To prevent the stove body from cracking under the influence of high temperatures, wool of sheep or camels is added to the clay. It is extremely difficult to make an authentic tandoor, since Asian craftsmen do not spread much about the exact composition of kaolin clay. Simply put, you will have to perform all the manipulations "by eye", constantly conducting experiments.

An approximate manufacturing technology for the classic version of the described furnace is approximately as follows.
Step 1. To make a tandoor with your own hands, you need to mix clay with wool (the length of the fibers of the latter should be about 1-1.5 cm). The result should be a fairly viscous mixture, reminiscent of sour cream in its consistency.
Step 2 Next, you need to wait 7 days for the resulting composition to dry and acquire the required condition. During all these days, the mixture should be stirred periodically so that drying occurs evenly. All water accumulating on top must be removed immediately (it must not be mixed into the composition).
Note! The lower the moisture concentration in the composition, the lower the risk that the oven will crack during drying or firing. When the preparation period is over, the consistency of the mixture should resemble a dense plasticine suitable for modeling.
Step 3 From the resulting "plasticine" it is necessary to mold long sheets of oblong shape with a thickness of at least 5 centimeters. From these plates, gradually moving in a circle, you need to build a tandoor.

Traditional dimensions look something like this:
- the neck should be 50-60 centimeters in diameter;
- before narrowing, the diameter should correspond to 100 centimeters;
- the recommended height of the structure is from 100 to 150 centimeters.
From below, in the side of the case, it is necessary to leave a hole through which air will flow inside.
Step 4 When the oven is ready, it is transferred to the shade and left for another 30 days to dry.

Step 5 The walls must be overlaid with fireclay bricks, and the adhesive composition in this case can be either kaolin clay itself or a special clay oven mixture, which contains plasticizers and quartz sand. Sand or salt should be poured into the cavity between the formed layers, periodically tamping when backfilling.
Step 6 The inner surface is coated with cottonseed oil.
Step 7 After that, it remains only to perform the firing of the finished furnace, that is, to bring the material to the state of ceramics. The temperature should rise gradually and not very quickly. The duration of firing can reach 24 hours, this is explained by the fact that if raw clay is subjected to sudden heating, then it can crack.
Video - Traditional tandoor: technology and curious facts
Option number 2. Making a tandoor with your own hands from a barrel (simplified technology)
It's no secret that making such a furnace using the technology described above is extremely difficult, especially in the absence of special skills and knowledge. And many home craftsmen will confirm this. The surfaces are curved, and the clay often cracks when it dries. To avoid this kind of trouble, a simpler "recipe" for this design was developed, which is based on the creation of walls of clay around a barrel made of wood.

To create such an Asian oven, you must prepare in advance:
- kaolin clay;
- vegetable oil;
- fireclay sand (and its fraction should not exceed 0.5 mm);
- a wooden barrel with iron hoops;
- wool (one of the options listed above).
And now let's find out how a tandoor is made from all this with our own hands. First fill a full barrel of water and wait at least 24 hours for the wood to soak and swell. After that, mix wool (0.5 parts), sand (2 parts) and clay (1 part), wait a few days until the resulting mixture dries. The next step is to drain the water, the complete drying of the wood. The inner surfaces of the barrel are treated with vegetable oil, after which they are soaked overnight. Next, the inside of the barrel is covered with a 4- or 5-cm layer of the resulting clay mixture. The composition is leveled with wet hands so that the walls are as even as possible. When moving up, the thickness of the clay layer should increase, that is, the neck of the furnace should gradually narrow. Traditionally, it is necessary to leave a small hole at the bottom, through which air from outside will enter the case.

Note! For drying, the structure should be transferred to a ventilated, shaded and dry place. The process can take 3 to 4 weeks. Over time, the barrel will begin to lag behind the clay walls.
When everything is dry, the iron hoops must be removed, and the barrel itself removed from the tandoor. Next, the furnace is installed on a thick “pillow” of sand and fired, that is, it is first melted. Inside, it is necessary to kindle a small flame and maintain it for approximately 6 hours, periodically loading small portions of fuel. After this time, the stove is covered with something, the fire is made stronger and eventually brought to the maximum rate. It is important that the tandoor subsequently cools down slowly.
If desired, you can additionally insulate the oven to improve its thermal insulation qualities. To do this, you can build brick walls around it.
Option number 3. We make a brick tandoor on our own
So, making a classic version of the oven is quite difficult, we have already found out. What is already there, not all masters succeed in this! Therefore, in order to simplify the task and not take risks in vain, we recommend that you familiarize yourself with the manufacturing technology of a brick tandoor - this way you are guaranteed to get the desired result, despite the fact that the finished oven will be very different from the traditional version described above.

First you need to prepare:
- oven brick;
- wood pattern;
- masonry sand mixture;
- cement;
- kaolin;
- reinforcing mesh;
- sand.
The main thing is just beginning - the manufacturing procedure itself. The process consists of several stages, we will consider the details of each of them.

First stage. Base
Choose a suitable flat area on which the future tandoor will be located with your own hands. Dig a round hole there, the diameter of which should slightly exceed the planned diameter of the structure. Fill the bottom of the resulting pit with a “pillow” of sand (the thickness should be about 10 centimeters).


Cover the finished “pillow” with an iron mesh constructed from reinforcing bars or thick wire.

Fill the hole with concrete mixture, carefully level everything using an iron rule. Remember to check the levelness of the surface with a horizontal level. Now wait at least 7 days for the mortar to set and the concrete surface to regain its original strength.

Second phase. Brick walls
Start laying the brick in a circle, the diameter of which you indicated at the planning stage. As a rule, it is about 100 centimeters. Lay the bricks on the end and, using the frame as shown in the image below, begin to form a circle. For laying, use only an oven mortar consisting of fireclay clay, appropriate plasticizers and, of course, quartz sand. This will lead to the fact that the composition will not crack during firing, will quickly set and will generally be plastic.


Traditionally, leave a small hole at the bottom of the case, which during operation will serve as a blower. It can be either a small window equipped with an iron door or a chimney.
If the height of the furnace is 100-120 centimeters, then four rows of bricks will be enough. Tellingly, when laying the last row, a tapering neck should be formed in parallel, therefore, the brick at this stage should be laid with a slight inclination towards the inside.


Third stage. Carry out coating and cladding
Cover the inner and outer surfaces of the constructed furnace with refractory clay, the thickness of which should be approximately 5 centimeters. In addition, trim the body of the tandoor with natural stone - so the finished product will look more attractive.

Fourth stage. We make kiln firing
Immediately make a reservation that the firing procedure in this case is performed in the same way as in the previous two options. Inside the tandoor, it is necessary to kindle a fire, the walls of the furnace must gradually heat up to a high temperature (more precisely, up to 400 degrees), and then slowly - and this is very important! - cool down.

For a more detailed acquaintance with how to build a brick tandoor at home, we recommend that you familiarize yourself with the thematic video below.
Video - Making a tandoor with your own hands
Operation features
There are a number of requirements that must be followed when using a furnace such as a tandoor. Let's start with kindling. A lot depends on the season here. In winter, for example, the temperature should rise gradually - first kindle the wood chips, let them burn out, after which you can put the main fuel. In the summer, it is quite possible to do without preliminary kindling with chips. As for the volume of fuel, it should be 2/3 of the total volume of the furnace. You can put more, but a lot of thermal energy in this case will simply disappear without heating the walls of the case.

As for temperature restrictions, they are absent in relation to the tandoor at all. Use it whenever you want, the main thing - do not forget what was said in the previous paragraph.
Cleaning the stove is also not difficult: just take a shovel, a poker and collect the ashes. If fat gets on the walls, do not worry - with subsequent use it will simply burn out.
Benefits of using the design
The problem of poor roasting of kebabs is familiar to everyone: with poor-quality heat treatment, part of the meat is fried to a black crust, while the remaining pieces are almost raw. Why is this happening? The reason lies in the uneven arrangement of coals under the skewers, and also in the fact that they are coals with different temperature indicators. And the results of such roasting are described above.

But the brick tandoor is a completely different thing. Thanks to the unique design, such an oven allows you to completely forget about such an unpleasant thing as undercooked meat. Another advantage of the tandoor is that not only meat is baked in it, but also traditional oriental cakes - tasty, and at the same time very healthy for the body.

Tandoor - design features of the furnace
The device of such a furnace is very similar to most of the structures of this kind, however, some differences still exist. So, the inner surface is made of an unusual (at least for such furnaces) material - ceramics. But both wood and coal can serve as fuel (firewood can also be used).
Outwardly, the brick tandoor is very similar to a hypertrophied earthenware jug, which was overlaid with bricks. Coal or wood is placed directly inside the structure, after which it is set on fire. Then, when the fuel turns into coal, kebabs are put into the oven. Tellingly, the meat can be hung on a hook to a special pole, which should be taken care of in advance, and laid with a sharp end on the foundation.

Note! Another advantage that a brick tandoor has is that it retains heat for quite a long time. Thanks to this, you can have time to make several batches of baked meat at once.
An interesting fact: the described furnace first appeared in distant Mesopotamia, and soon gained considerable popularity among Asian peoples. It is for this reason that a number of oriental cuisines cannot be imagined without this wonderful oven.

Operating principle
To figure out how to make, you must first familiarize yourself with the principle of operation of this design. As an example, let's take a look at the classic Uzbek tandoor made of bricks. Outwardly, such a tandoor is comparable to a clay cauldron, but only turned upside down (the top seems to have been swapped with the bottom). In the lower part of the furnace there is a special hole, which is also called a blower.
The base, consisting of clay, is lined with bricks. What is important, between the inner and outer layers there is an insignificant air gap, which is subsequently filled with sand or salt (the latter option is more preferable).

Fuel is placed into the housing through a hole located on top. Although there are versions of the stove in which it is located on the side, however, in the classic Uzbek version, this arrangement is practically not found.
Note! The main disadvantage of the tandoor is that the ash is removed from the body through the upper hole, which for obvious reasons is very inconvenient (this does not apply to portable stoves).
And to make it more convenient to fry shish kebab, a special grate is provided in the oven of the Uzbek version. On such a grill, you can put not only meat, but also, for example, fish or vegetables. All these products are guaranteed to bake equally well.
Note! If the tandoor is built correctly and in compliance with the technology, then you can cook on it for six hours after a one-time kindling.
What is the secret of such high heat-saving properties of the structure? And the secret lies in the materials from which such furnaces are built. Such materials have simply incredible heat-accumulating properties: for example, if you try hard, then the walls of the tandoor can be heated up to a temperature of 400 degrees.

As for the varieties of tandoor, the classification in this case is based on the installation site of the device - according to this parameter, the described furnaces can be:
- pit;
- ground;
- portable.

In today's article, several options for creating a tandoor at home will be considered at once, however, special attention will be paid to making a brick oven. This is explained by the fact that, for example, a portable structure is, in fact, a type of barbecue, and a pit is used in most cases for heating small rooms. So let's get started.
Tandoor is a Central Asian stove in the shape of a jug. Folding such a "brazier" with your own hands is easy. A step-by-step description of the bricklaying process will be given below.
Today, urban residents mainly use a barbecue or barbecue for cooking. However, the tandoor, so common among the Eastern peoples, is in no way inferior to modern devices.
Inside the oven, you can cook a variety of dishes: pita bread, samsa, meat. Their exquisite taste is a strong argument in her favor. A distinctive feature of the Asian oven is the vertical arrangement of products. Thanks to this device, the juice from the kebab soaks the meat, and does not drip into the fire. The result is a juicy dish with a rich taste.
Operating principle
The work of the tandoor can be compared with the functioning of a conventional boiler, in which heat is accumulated and stored.
In the tandoor, heat is accumulated by means of fireclay clay. After the firing process, this natural material acquires the characteristics of ceramics.
First, firewood is laid in the structure and a fire is lit. The heat generated during combustion will remain inside the stove. When the firewood burns out and the heat weakens a little, they begin to lay the dough and food. To keep warm, the oven is covered with a lid of the appropriate size.
Note: the internal temperature in the tandoor after warming up is kept at 250 degrees. This is the optimum setting for tasty and healthy food.
Folding a brick structure is not difficult, because the masonry technology does not provide for the presence of special materials or tools. Everything you need for construction is sold in specialized stores. Full instructions and construction scheme are given below.
Advantages

- Due to the peculiar shape, the structure requires less fuel, which makes its construction economically viable.
- Simple and fast installation. It can be done by yourself, without the involvement of specialists.
- As the main building materials, only environmentally friendly materials are used that do not emit toxic substances when heated.
- The same dishes are prepared in the oven as on the grill or barbecue. In addition, you can bake delicious oriental dishes in it.
masonry materials
 The construction of the tandoor involves the use of the following materials:
- For the construction of the walls you need refractory fireclay bricks . Its quantity is calculated according to the wall thickness and dimensions of the furnace. The masonry will take about 700-1300 pieces.
- The masonry mixture can be prepared independently. To do this, take clay and clean sand. If there is no desire to knead the solution and calculate the ratio of components, you can purchase the finished mixture at any building supermarket.
- The constructed structure is coated with clay. If desired, mosaic decor or natural stone is used. If cakes are cooked in the tandoor, then the inside must also be coated with fire-resistant clay.
- For the construction of a reliable and durable foundation, cement reinforced with a bar is used.
- A mandatory attribute of the furnace is a blower, which is made of brick or a small piece of pipe with a cross section of at least 10 cm.
- In order for the circle with the top layer of masonry to be even, it is necessary to lay out a template of wooden bars and boards.
To work, you need the following tool:
- Bulgarian;
- spatula (width not less than 12 cm);
- a suitable container or bucket for mixing the solution (concrete, facing mixture);
- plaster rule;
- paint brush.
Preparatory stage
 Before you start building a tandoor, you need to decide on its location.
For safety reasons, the stove should not be located near buildings, trees and plantings.
It is desirable that the soil at the construction site be dry and the groundwater level low.
The selected place is leveled, then a layer of quartz sand 20 cm thick is poured. A small depression is made from an asbestos-cement or metal pipe for a blower.
Foundation
 To prevent the masonry from collapsing under the influence of seasonal movements, it is necessary to establish a solid foundation.
It is made from a concrete slab or a cement mixture is poured into a prepared pit.
Competent approach and observance of construction stages-the main criteria for long-term operation of the product.
- First of all, markup is carried out, including the designation of the dimensions of the future structure. If desired, a special platform is poured for a convenient approach to the furnace.
- Grass and debris are removed from the site. If the area is flat, then sand leveling is sufficient. On loamy soil, a layer of soil is removed and sand is poured into the recess, which is spilled with water and carefully tamped.
- When the site is located on a hill, the foundation can be made flush with the ground. It is advisable to raise a place with constant stagnant water 20 cm above the ground. In this situation, a special formwork made of wooden bars will be required.
- Further, a lattice of reinforcement is installed, with a cross section of at least 10 mm. The rod is knitted with wire. The optimal distance between the bars is 15 cm.
- The formwork is poured with concrete and leveled with a board. It is important to use high-quality cement, since the design of the furnace is quite massive and the base must withstand significant loads. Dry cement is sprinkled over the mortar, which will give the foundation moisture resistance.
- In the central part of the foundation, a recess is made for the template. Then the structure is covered with plastic wrap and left to dry. As the concrete dries, it should be moistened. Construction begins after curing. This period usually takes about 2 weeks.
Template installation and masonry
 The tandoor oven should have an even circumference.
In order to achieve the same radius when laying bricks, you need to use a template.
For its installation, drawings and preliminary calculations are used.
Note: the distance between the two template elements is calculated according to the height of one row of bricks.
The tandoor is laid out of refractory bricks, which are placed on the end part. Therefore, the height of one row together with the cement joint will be 26 cm. Therefore, it is better to lay out the height of the straight part of the stove from 2 rows.
So that the walls of the furnace do not turn out to be curved, a right angle is left around the perimeter of the lower part of the structure. The second row exactly repeats the first, however, for strength, each brick is shifted exactly by half. In the same row, they make a blower from a pipe. Why two blocks are sawn in the center.
Next, bricks with a pipe are covered with cement. Further, the narrowing of the structure will begin, corresponding to the height of the two rows. To build a slope, the blocks are sawn with a grinder at a given angle.
Master's advice: when equipping a blower, instead of a pipe, you can use a brick, which is left loose.
In subsequent rows, the amount of material will decrease, respectively, the dressing will be equal to 1/3 of the brick. At the end of the work, the tandoor oven is dried. In the summer, for uniform drying of the mixture, the masonry is constantly moistened.
 To mask all the seams formed between the bricks, you will need fireclay clay.
So that the bricks are not saturated with moisture from the liquid composition, they are moistened in advance. The mixture is kneaded from clay, quartz sand and salt. The proportions depend on the degree of fat content of the natural material.
The mortar is applied to brick blocks from 3 sides - two side and one bottom. As soon as the first layer dries, the bricks begin to be coated with a reinforcing layer. The main thing to remember is that the structure must be protected from rain with plastic wrap.
To increase the strength of the tandoor, a reinforcing metal mesh is mounted on the clay layer, and a layer of concrete mixture is also applied. It is prepared from cement, sand and granite screenings. The consistency of the masonry mortar should resemble plasticine. For decorative decoration, a mosaic or natural stone is laid out on the outside of the furnace.
The finished tandoor is dried for at least 2 weeks. After the first drying, the oven is heated. First, only paper is used, then sawdust and wood chips are added. Thus, the structure is dried every day for 2 weeks.
Burning
 After complete drying, the tandoor is fired. To do this, make a fire and maintain it for several hours.
The first firing should be long. When the oven has cooled down, it must be checked.
If the structure rings on impact, then the home-made brick tandoor is ready. In the future, it is periodically cleaned of soot and ash.
fixtures
 The oven can cook several dishes at the same time. For their placement, special devices are used.
For example, a metal portable rod on which skewers are fixed. Its dimensions should correspond to the diameter of the tandoor neck.
Another option is a pot lid. It is made from ordinary sheet iron. For cooking meat, vegetables and cakes, holes are cut in the lid.
Tandoor is used not only as a barbecue or barbecue, but also as a Russian oven. Vegetables are stewed in it, rich cabbage soup, meat stew are made.
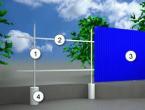
canopy
 The stationary tandoor is protected from precipitation with a canopy.
First, small recesses are dug from four sides, into which metal pipes or wooden beams are installed. The recesses are covered with sand and poured with a concrete solution.
When it dries, sheets of corrugated board or slate are mounted on the device. The canopy can be anything, it all depends on the imagination and possibilities. An interesting option can be seen in the photo.
A real brick tandoor is a functional oven that ensures even roasting of vegetables and meat. Such a device helps to save on the consumption of electricity and gas.
In addition, the oven is easy to operate and maintain. Its installation will not take much time, but it will allow you to enjoy fragrant dishes and delicious pita bread.
Watch the video, which shows in detail how to make a brick tandoor with your own hands:
© When using site materials (quotes, images), the source must be indicated.
Tandoor (tanur - Farsi; tone - Georgian; tono - Turkic; tandoori - Hindi; tandoor - English) is today a popular trend of country-stove fashion. However, it's not just about fashion. In the tandoor, you can cook everything the same as on or in, and many other dishes of oriental cuisine. And at the same time, it is generally easier to make a good tandoor with your own hands than any other country stove.
Another important advantage of the tandoor is that it can be made of clay, i.e. "True furnace", without the slightest admixture of metal in the design, and at the same time mobile. At the end of the season, it can be hidden indoors or taken with you when moving. Installation will require a minimum of work, and the foundation as such is not needed for the tandoor at all.
Finally, the tandoor is economical. He was born in places that never abounded with fuel, and the design was worked out not for centuries - for millennia. Bookmarks of fuel, in the brazier barely enough for a heel of kebabs, in the tandoor there is enough for a dozen of them plus cakes, and plus the tea will boil while the cakes are being baked.
Many who want to acquire a tandoor of their own making are frightened off by the complexity of pottery. But they can be simplified, see below. And the tandoor, in general, is unpretentious in the choice of material - you can even lay out an Uzbek brick tandoor. Ancient nomads in the expanses of Turan, Takla-Makan and Tsaidam at the next parking lot generally made tandoors from anything, and the food turned out to be licking your fingers. A galaxy of Russian travelers in Central Asia in the 19th - early 20th centuries. confirms unanimously.
Make or buy?

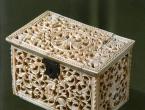
As for the tandoor for the dacha or just for the household, here you first need to decide whether to make it yourself or buy it ready. There is no shortage of proposals, and the quality of products, as a rule, does not require separate praise, see fig. on right.
The fact is that it is difficult to make a real clay tandoor in the middle latitudes, and without special technological equipment it is completely impossible. A special section will be further devoted to this issue, but for now we will only note that already during the initial firing, tandoors crack even from selected fireclay clay, which requires at least 1,500 rubles for each attempt, not counting work.

Meanwhile, the price of purchased mobile tandoors, such as shown in fig. above, ranges from 11,500 to 70,000 rubles. depending on the size. The smallest one is about the size of a large pot. It can be put on the table, and one person carries it without effort. And the same person, if necessary, can climb into a large one, for 60-70 thousand rubles. Here it is clear that it is better to buy: after all, the price includes a set of utensils, a lid with a hatch for a kettle and slots for skewers. Doing all this on your own will cost more.

But if we are talking about a stationary tandoor oven, then the cheapest work of a custom-made tandoor master will cost no less than 100,000 rubles, and he will not take this money in vain. At the same time, the heart of such a furnace, the actual tandoor (see the figure on the left above) of branded manufacture, properly fired and with a guarantee, will cost from 5,000 to 30,000 rubles. depending on the size and method of delivery (to the place, pickup). And the oven itself, framing it (see the figure on the right), is quite within the power of any artisan to lay down, even if before that he had only looked at the bricks. Materials are also the most common, see below.
Video: the basics of building a tandoor (1 channel)
About electric tandoors
Civilization with electrification did not bypass tandoors. In the end, it is simply impossible to heat wood in a city apartment or restaurant. The obvious solution is to place an air heating element above the hearth, left pos. in fig. below. The finished factory-made product looks elegant (middle pos.), And the price is not much higher than for wood-burning ones - from 14,500 to 80,000 rubles, again, depending on the size.

But an electric tandoor with an open heater is more of a prestigious gift than a culinary technique. Even an inexperienced grocery store will distinguish the taste of dishes from it from real ones. For the worse. The reason is that the heating element dries the air. Of course, it does not absorb moisture vapor, but as the temperature rises, the relative humidity of the air drops, the cakes dry out, and the taste of burning is clearly felt in meat, fish and poultry. If you heat with wood, then water, along with carbon dioxide, is one of the main products of combustion. It penetrates into the microporous body of the tandoor during heating, and then is gradually released, maintaining the desired microclimate inside.
Trying to humidify the air by placing a bowl or tray of water on the grate is useless. It boils away, the steam flies out, at the same time spoiling the food. Trying to saturate the tandoor with moisture during heating is also useless: in order for its vapor to penetrate the burnt clay, their temperature is needed at least 350 degrees, and not 100, as during boiling.
Therefore, a real electric tandoor is a device that looks like a stove (on the right in the figure), but inside is very complex and controlled by an on-board computer. The same clay tandoor is entwined with an electric spiral, coated with an additional heat-resistant dielectric lining, lined with heat-reflecting screens, and moisture is introduced into the baking chamber in precise doses using inserts made of nanomaterials, similar to those used in mobile air conditioners, only heat-resistant. The price is appropriate. Replace the above rubles with US dollars, there will be no big mistake.
What and how is cooked in the tandoor?
There are countless recipes for oriental dishes for the tandoor. In addition, bread is baked in it, barbecue is cooked. After removing the lid and placing a grate in the neck, the tandoor can be used as a barbecue. And putting there a teapot with a neck for a teapot, or a cast iron, we get tea no worse than the best samovar or daily cabbage soup without.
To describe at least the basics of tandoor cooking, you need not even a separate article, but a voluminous monograph. Therefore, we confine ourselves to the most general instructions.
First - if you cook any meat, especially lamb, you need to put a grate over the coals, and on it - a bowl into which the juice will drain. Without it, shurpa or tandoor-shurva will not work properly.

Secondly, if a barbecue or kebab is cooked in an Uzbek tandoor, the skewers are either simply inserted into its mouth (on the left in the figure), or first inserted into the slots of the lid, then the meat is strung, and the tandoor is closed with a lid. The second method is more economical (literally a handful of coals is enough) and guarantees uniform baking of pieces of any size.
If the kebab is cooked in the Armenian tandoor - tonir - then the skewers are hung vertically on the hanger (right pos.). Not every cook can cook kebab in the tonir, but in any case, you do not need to turn the skewers.

Thirdly, cakes in the Uzbek tandoor can be baked both inside and outside, see fig. on right. Which one - depending on the recipe. In general, lunch bread is baked inside, and muffins outside.
Fourth, by hanging a grate on hooks of adjustable length at the mouth of the tandoor, you can cook everything the same as in a Russian oven. At the cut of the mouth, the temperature will be approximately the same as in the cauldron, and right above the coals - as at the back wall of the crucible immediately after heating. An additional plus is that it is not necessary to cook in cast iron, it turns out just as well in ordinary pans.
Fifth, dishes in the tandoor cook much faster than similar ones in other ovens:
- Beef - no more than half an hour.
- Pork, lamb - 15-20 min.
- Fish, poultry - 7-10 min.
- Vegetables - 3-5 min.
Sixth - a little culinary secret. After cooking, when the tandoor has not yet completely cooled down (you can put your hand inside, but it burns), we put inside the pan filled with pieces of old, impossibly veiny beef. Close the lid tightly, wait until the morning. Now you can cook anything from this meat, and it will melt in your mouth.
About firewood and firebox
Tandoor is critical to fuel. At home, Central and Central Asia, it is drowned mainly with saxaul. Occasionally - elm or plane tree (sycamore). Of these, in the southern regions we have only plane tree, but here it is a valuable decorative tree and is not allowed for firewood.

Saxaul and ready-made saxaul firewood
In our area, tandoors are heated with wood of tree species, the same as barbecues. Charcoal and pellets do not fit well - they give too much heat, an expensive tandoor can crack, but cannot be repaired. Coal is absolutely unsuitable: the tandoor will be saturated with coke oven gases and forever become stinking and poisonous.
The fuel filling in the tandoor is small, about 1/5-1/6 of its height. It is specifically determined by the experience of use, so that there is enough coal for cooking. In general, a barbecue requires half or three times less fuel. Cooking begins when the fuel burns to coals. A prerequisite is that soot and soot on the walls must also burn out. With good-quality fuel, it is always respected.
In tandoors with a built-in firebox, the blower is not closed after heating, so that the coals smolder without burning. And in order not to create excessive traction, the mouth of the tandoor is not completely covered with a lid, if it is solid. In mobile Uzbek tandoors (see below), the lid is made double; at the end of the furnace, the smaller one is removed. Her nest in a properly made tandoor is made serrated, then you can put a kettle on it without disturbing the draft.
History and evolution
So how do you build such a wonderful culinary unit yourself? In order to approach construction with skill, let us dwell a little on its origin.
Initially, the tandoor is the same hearth, a fire in a fence or recess so that the wind does not blow the flame away. However, the heart of Asia, where the map is full of mountains, oddly enough, is poor not only in fuel, but also in stones. The reason is the strongest wind erosion in a sharply continental climate. N. M. Przhevalsky described how in the Gobi, right before our eyes, granite boulders were abraded to dust. The author of the article happened to be in those places, to see something himself in the summer, not in the winter, and he has not the slightest doubt about the veracity of the great researcher.
But the same terrible winds, combined with daily (!) temperature drops from +45 to -30 degrees, supply the Asian plains in abundance with loess - the smallest stone dust. She buries very quickly what the wind carrying her did not have time to abrade. Layers of loess on the plains of Asia reach a thickness of hundreds of meters. To see at least some pebble, you need to climb quite high in the mountains.
Actually, dust is not yet loess. Loess is obtained when dust is churned into a dense conglomerate by the wind that carries stones the size of a fist, periodically baked by the Sun during the day and frozen in dry air at night. Loess has incredible properties. It is exceptionally fertile, gives stable yields of wheat at 40 centners per hectare in monoculture and without any agricultural technology.
But it is more important for us to know something else: loess is heat-resistant, like fireclay clay. When dry, it is as strong as cement, but it is all riddled with microscopic pores, i.e. breathable and fairly easy to process. And if you soak it a little, then you can sculpt it like plasticine. True, if heavy rain pours, then the loess soaks into the mud, in which the tank gets stuck up the tower. But heavy rains where there is loess occur once every 10 years, and even then not every decade.
It is clear that in such conditions it is useless to simply enclose the fire with stones: they will simply be blown away along with the fire and food. But the same wind also gives a solution to the problem - loess. Ancient Asians sculpted their hearths from it 6000 years ago, and in some places they still sculpt, see fig.

The tree of the evolution of European ovens, from barbecue to Russian, is entirely made of stone. The Asians, settling outside the loess plains, everywhere looked for a replacement for such a wonderful material. They had three more allies - the hot Sun of low latitudes, the eternally cloudless sky and very dry air. As a result, various types of tandoors appeared, and culinary subtleties were added to them in the course of development.
earthy
The simplest tandoor is a hole in loess soil with a diameter of about 0.5 m and a depth of about 35 cm, to the bottom of which an inclined course is dug from the side - an air duct. Loess tandoors are still in use, connoisseurs say that only they produce real tandoor delicacies.
Where there is no loess, the pit is lined with dry bricks (see Fig.), and pipes made of fireproof materials are used to supply air. However, the same experts claim that such a tandoor is no longer a tandoor.

In the loess, you can dig a hole in the form of a jug without the danger of its collapse. This made it possible to significantly save fuel: due to the reflection of the IR, the heat was concentrated in the center of the chamber. In areas without loess (in Fergana, for example), you cannot build an earthen tandoor, but there are also many deposits of high-quality clay, and pottery has been developed since time immemorial. It was there that the Uzbek tandoor was born.
Uzbek

The scheme of the Uzbek tandoor is shown in fig. The fire under it is an ordinary one, made of masonry with slots for air access. But the main secret of the Uzbek tandoor is in the clay top placed on the fire. It is, as can be seen from the figure, two-layered.
The first, inner layer was made from high-quality clay with a small (1:1 or 1.5:1) admixture of sand and the addition of chopped wool; wall thickness - half a span. The solution was made very thick, the consistency of plasticine. To achieve its complete homogeneity, knead the solution with your feet.
Next came into force natural conditions. In the center of the Asian continent, the air is constantly saturated with the finest dust; The sun in a completely clear sky is seen as if in a haze. Meteorologists call this phenomenon pasnost. You can fully understand the degree of dustiness of the local air when you see a phenomenon common in those places - dry rain. Drops of water collect, flying, dust particles. The water evaporates due to the extreme heat and dryness, and dry spools fall to the ground.
Dust completely absorbs ultraviolet, even at an absolute height of 1800 m there is almost no ultraviolet in daylight. Caucasian Asians come to the sea in the summer with the same "cheese" tan as northerners from Olenegorsk, Naryan-Mar or Norilsk. But dust re-radiates all absorbed radiation (UV and upper visible spectrum to blue-green) in the IR range - the air is oversaturated with thermal rays. Asians seem to live in an annealing furnace.
Having molded the workpiece, they exposed it to the Sun. Unbearably hot light, combined with very dry air, literally expelled water from the workpiece in an hour or two in the morning, but drying (in fact, low-temperature firing; at noon, the workpiece was heated to the temperature of sand in the desert, 70-80 degrees) lasted two weeks. The preform turned out to be microporous. In the same way, the famous Bukhara sweating jugs were prepared for firing, keeping the water poured into them cool in any heat.
It is precisely because of the impossibility of organizing such a natural technological process in cooler and / or humid places that Uzbek tandoors do not work out for home-made people. During drying, a crust forms on the workpiece that does not release water from the solution. Gradually, it nevertheless evaporates, but the workpiece goes into firing with residual stresses, which is why it cracks during it. In middle latitudes, the maximum wall thickness of pottery is about 13 mm; for the tandoor, this is clearly not enough, and it is impossible to build up and dry in layers because of the same residual stresses.

But you can’t sweat in a tandoor, and the heat capacity of a vessel with a wall thickness of 40-50 mm is not enough for proper fuel economy. He must return the water received during the heating. Therefore, the first layer after drying was lined with a solution of ordinary white or gray clay without fibrous additives. After 2-5 days of drying, the product was fired. The top layer often cracked, see fig. higher, but this did not worsen the quality of the tandoor: the outer layer is just additional thermal insulation.
Over time, small portable single-layer tandoors appeared, with their own firebox and grate. They were no longer suitable for baking bakery products, but the meat in them was cooked perfectly. Such were more in use among the nobility and were richly decorated. Most of the modern tandoors available for sale (see the following figure) are from the Bai branch.

“Bay” tandoors
Uzbek tandoor oven
There is also a class of tandoor consumers in Central Asia, which require a very large heat capacity at a reasonable price. These are tavern-keepers (tavern-keepers) and teahouse-keepers. The stationary tandoor was supposed to provide continuous preparation of food for visitors within 3-4 hours from one heating. Asians are patient people when they have to pull up the sash, but if a few tangas on pilav or beshbarmak are wound up in the belt, they become very active. Yes, wood is expensive.

For catering tandoors of the old times, craftsmen began to make ready-made burnt inserts, which are still exhibited quite a lot in Central Asian bazaars, see fig. Most of them are in the form of a cap, they are cheaper, and the stove is also cheaper: ordinary brick, thermal insulation - bulk from unbaked clay. The scheme of the device of such a furnace will be given below.

In areas that are especially poor in fuel, starting from the 18th century. kilns with an insert in the form of a jug became widespread. The chamber was made relatively small (see the figure on the left), lined with a thick layer of fireclay bricks. The blower air duct was made long to heat the air from the furnace body. An elbow-length bundle of saxaul, which can be clasped with the fingers of two hands, was enough to bake a dozen cakes and boil a kumgan of water for five; Kumgan was installed in the neck of the tandoor instead of the lid. Such a tandoor oven is called tandoor-nan or tandoor-non.
Video: Uzbek traditions of building tandoors
Tonir
The second trunk of the tandoor evolution tree came from Transcaucasia. It's hot here too; in Shamakhi, perhaps, it is hotter than in Fergana. And the air is also dry, but clean and transparent. This alone was enough to prevent pottery tandoors from being made here.
But the Transcaucasian Highlands is perhaps the first region on Earth where people discovered deposits of fireclay clay and learned how to work with it. Armenians are considered jacks of all trades and the best artisans among the Caucasian peoples.

The Armenian tandoor, or tonir, is laid out of fireclay bricks on clay; in terms of properties, its body is equivalent to the Uzbek clay body with walls half as thick as bricks. Outside, the tonir is lined, like the Uzbek one, with clay, see fig. The purpose of the lining is the same - additional thermal insulation. It could also be made of brick, but it will turn out to be difficult and expensive.
On Uzbek tandoors, decorations are mostly glazed stucco: such a large “pot” without fittings is not very durable and may not withstand additional loads. Tonir, like a brick structure, is much stronger. Therefore, the external decoration of tonirs is much more diverse and richer: from simple coating with decorative colored clay with burnishing and facing with wild stone to the most complex tiled compositions, see fig.

Armenian tandoors - tonirs
It is much more difficult to build a brick vessel of a complex curvilinear configuration than to fashion it from hand-thick clay sausages, crushing them and pinching them. Therefore, tonirs are most often made in the form of a cylinder topped with a truncated cone, or even in the form of a straight pipe. At the same time, the IR can more freely flee outward to no avail. The high heat capacity of fireclay, combined with its negligible thermal conductivity, to some extent compensates for this shortcoming, but still, a tonir of the same capacity per unit of finished product consumes the same fuel by 15-20% more than the Uzbek tandoor, not to mention the nan oven .
Another (however, like the first, not significant) disadvantage of tonir is due to its “brick” strength: it also gives a “brick” weight. Mobile toners, if they are made, are on a stand with wheels. And horizontal tonirs, embedded in the wall, are found as an exception. Of the "Uzbeks", almost a third goes to the bricking up.

There is also a difference in soils: in Central Asia they are more alluvial, alluvial, i.e. weak, and in Transcaucasia - volcanic, durable, waterproof. Therefore, in Armenia (more for the sake of saving space and space) earthen tonir was revived. It is made in the form of a well (see fig.), and in terms of product quality it is not inferior to the earthen tandoor in loess. But trying to build the same in the black earth or loam of the middle zone is a waste of time, soil moisture will get inside through any lining and ruin the whole gastronomy.
About the cauldron
Tandoor is done quite simply: at the mouth, or on it, depending on the size of the tandoor / boiler, they put a boiler with water. If baking or cooking is being done and the skewers do not stick out, the water heater can be combined with cooking: the hot air above the mouth is exhausted, and the body will not give off more IR than it can emit, so the product will not spoil. It is only necessary to place pieces of something durable and non-flammable under the bottom of the boiler so that a gap is formed for the air to escape.
About form and mouth
The shape of the tandoor slightly affects the fuel consumption in it, but it does not noticeably affect the quality of the prepared dishes. Tandoor can be made spherical, oval, ogive (jug), in the form of an inverted cardioid, barrel, cylindrical-conical or in the form of a straight pipe. The usual diameter of the mouth of the Uzbek tandoors is 0.35-0.7 of the inner diameter of its lower back, and for tonirs it is 0.5-1.0 of its own.
Domed with a wide mouth, cylindrical-conical and cylindrical tandoors are better for baking: lumps of dough stick more conveniently and in larger quantities on the inner surface of a large area. Other tandoors are mainly meat and fish, but in general the specialization of tandoors is relative. When used by a skilled cook, it comes down to simply dosing fuel.
Making a tandoor
From the foregoing, it is clear that the manufacture of a tandoor on its own boils down to two options: a brick tonir or something like “Uzbek” from it. There is, however, a way to make a clay tandoor even in Murmansk, we will also dwell on it.
A brick tandoor can be erected by anyone whose hands have not grown into their pockets, are able to distinguish their wife’s chest from her own head by touch, lift a stationery folder with papers and bring a cup of coffee to their mouth without spilling, in the morning after yesterday. The sequence of works is basically clear from the figure, we will give only some explanations.

Materials - fireclay bricks (300-1500 pieces, depending on size), ready-made dry oven masonry mixture, which is diluted with water to the desired consistency, and ordinary building sand. The foundation is not needed: we dig a pit two diameters of the base of the tandoor and a depth of a shovel bayonet. We fill it halfway with sand, and fill it to the ground level with a liquid, creamy, furnace solution. Exactly in the middle we stick an even pole or rod and set it vertically along the plumb line. We fix it from the wind with temporary stretch marks on pegs. We also cover from the rain with a temporary canopy made of slate or galvanized steel. Film or fabric cannot be stretched for reasons that will be clear from what is described below.
While the clay dries (this is 1-3 weeks), we prepare the main working equipment: a rotary template according to the shape of the inner surface. In order to avoid undercutting of bricks during laying, we link its shape with the dimensions of the brick and the permissible thickness of the seams - 3-13 mm.
When the fill dries, we lay out the first row of bricks on a dry one. We lay the masonry with pokes (bricks across the masonry line; if along - the bricks are called spoons, or spoons; the emphasis is on the penultimate syllable) upright. Having expanded, adjusted the width of the seams and leveled by turning the template a full turn, we take out the bricks one at a time, dip them in clean water for a second, apply the masonry (dough-like) mortar, and insert them into place. At the end of the row, turn the template again and level. We work slowly, the clay solution hardens for a long time.
In the first row we leave an opening of two bricks, this will be a blower. The same brick will go to the beam above it, see the middle pos. in fig. We lay out the arc of the row above it from the halves of the brick. We put it and the subsequent rows, like the first one: first on a dry one, and with a double check with a template. If the template is calculated correctly, then by changing the width of the seams, it will be possible to lay out all the rows with full-bodied (solid) bricks, changing only their number in a row.
The third and all other rows will be solid. But already from the second row, you need to try to withstand the dressing of the seams between the rows: set the first brick of each subsequent row in the middle on the seam between the bricks of the previous one, as highlighted on the right pos. Here, at the stage of calculating the template, you also need to follow the rule: the protrusion of the row inward is no more than 1/4 of the width of the brick. The second option, but less durable, is to lay bricks with a slope of bricks in a vertical plane; then no inner lining is required.
A complete dressing will not work, because. row diameter changes smoothly. Therefore, we begin the laying of each subsequent row not from the same place as the previous one, but shifting by 1/5-1/3 along the circumference; it is convenient to navigate along the blower. This technique is called bandaging through the rows. So we bring the masonry to the top.
Video: an example of building a simple brick tandoor
Video: tandoor based on the finished insert
Commissioning
If the tandoor is also intended for baking, then after the masonry dries (2-4 weeks under a canopy), we line it from the inside with the same masonry mortar, but already with plasticine viscosity. Before lining, the tandoor is properly sprayed from the inside with a spray bottle.
After another 1-2 weeks, we begin the preliminary firing. First - paper, cardboard or shavings. We set fire to a handful and through the mouth we also toss a handful, until the outer wall becomes slightly warm. Then cover with a lid and let it cool completely, it will take about a day. We gradually increase the dose of heating for 2 weeks until the water dripped onto the outer surface begins to boil, shooting back and splashing. You can’t pour a lot, half a liter can be ruined by a tandoor that has not been annealed to the end!

Now it's time for the final firing. We fill the tandoor by a quarter with regular fuel, let it burn out to coals. We add fuel in the same portions until the tandoor is at least half full of embers. It is better to take firewood that burns quickly, but smolders slowly (cherry, apple), so that the level of coals approaches the mouth. Let cool, still covered. In this case, care must be taken and fire safety rules: a hot stream of air from the tandoor will beat with reactive force. Cooled down - we unload the ash, the tandoor is ready for work.
Tandoor ovens
The best tandoor oven is from a ready-made purchased tandoor-hood in a brick shell with thermal insulation, it is also an additional heat storage device. The scheme of its installation is shown in fig. The foundation is two rows of tongue-and-groove blocks (PGB) on a cement-sand mortar and a cushion of sand or crushed stone. Thermal insulation - the same crushed stone or vermiculite chips (more expensive, but better), mixed with clay oven mortar - "sour cream". Masonry - from ceramic bricks on a cement-sand mortar (walls) and clay oven (under and foot).

And here is another exotic option: a tandoor-barbecue oven. True, only the name comes from the tandoor: the authors of the design honestly warn that it is unsuitable for baking. However, this product has an undoubted advantage: a chimney, and it is suitable for installation not only outside, but also indoors. Therefore, it would make sense to lay out the firebox not with a cone, but as the brick tandoor described above.
The drawing and ordering of the "tandoor-combi" are given on the next. rice. Under it, you need a full-fledged furnace foundation, so this work is not for beginners. The 31st row is reinforced with a sixty steel corner. The smoke collector is made of steel from 2 mm. Chimney diameter - from 250 mm.

And yet - clay!
And now we will tell you how to make the clay tandoor yourself. They say that this method was invented by specialists from military-chemical and bacteriological enterprises of the USSR. This extremely dangerous production was concentrated in Central Asia - away from the center, closer to the then potential enemies with a dense population and poor medicine.
Already in the 70s, the production of this muck was completely discontinued, enterprises were redeveloped for agricultural chemistry, insecticides, and plant protection products. Specialists who served 8 years (the year there went for 2.5) received a severance pay, which allowed them to immediately buy a cooperative apartment in a regional city and, if they wanted, resign. Of course, they immediately pulled away from the terrible climate, deadly poison and plague at hand. But they missed the dishes from the tandoor in new places.
 The way out was found very simply: the usual, from under cucumbers or cabbage, a barrel. A very competent engineering solution: since the matter is in the unevenness of drying over the thickness of the material, it is necessary to make it uniform. Is there an industrial drying chamber? We will ensure uniformity from the opposite: not by heating, but by moisture. Will the process take longer? For myself, don't worry.
The technology is as follows: wash the barrel and fill it with water. We withstand 2 weeks until the wood swells completely. Then we pour out the water, thoroughly coat the barrel from the inside with vegetable oil. Linen is best, but refined sunflower or corn will also do.
Next, we tightly wrap the barrel with a rope, but so that it does not grab the hoops. We protect the coils from slipping with carnations. Now we cut the hoops, remove them. In the bottom we cut a hole along the diameter of the mouth of the tandoor.
By this moment, firstly, a temporary cushion should be ready, at least from bricks laid directly on the ground on a dry one. The furnace solution, which is described above, must also be ready, the consistency of plasticine. Nowadays, there is no need to trample clay with your feet to the point of exhaustion: a 1.5-2 kW perforator with a mixing nozzle at low speed will bring the solution to the desired homogeneity in an hour and a half.
Instead of wool, 25% by volume of fluffed asbestos was added to the solution for strength. It is necessary to work with fibrous asbestos in the open air with full protection of the respiratory organs, eyes, face and body, but those men for demobilization, just in case, dragged gas masks with OVZK with them.
The barrel was placed on a pillow, and from the inside it was covered with clay with a layer of 60-70 mm. Then they turned it upside down and put it on 4-6 bricks so that there was a gap at the bottom. After 2 weeks, the strapping was removed and waited until the rivets began to fall off on their own. The last one fell off - it dried out enough, you can burn it. Work began, a little warmer in the spring: drying continued for months.
Roasting was carried out as described above initial. Upon its completion, they were lined with clay without filler, like the Uzbek tandoor, dried again and finally fired. This method does not give a 100% guarantee, but with some ingenuity and observation, out of 10 blanks, 7-8 are fired without problems.
Finally
So what, do tandoor or buy? The cap insert is definitely a must buy. It also makes sense to buy a small family tandoor for meat and fish. An Armenian tonir, built independently, can be a source of pride, but in terms of time and labor it will cost more than a stove with a ready-made ceramic tandoor-cap.