How to solder with rosin solder. What do you need to buy for soldering with a soldering iron? How to solder a wire: the process
Before you solder or irradiate anything, you need to acquire the appropriate materials and tools. The main thing you need for soldering with a soldering iron is a soldering tool, tin and flux.
Soldering is the process of connecting elements by introducing solder between them.
In addition to them, you will need a stand for a soldering iron and all kinds of holders for parts that are to be soldered. You can not do without pliers, side cutters, a knife and a tape measure.
Choice of fixtures

To protect against fire when soldering, you must use a soldering iron stand.
The choice of fixtures for holding parts depends on the imagination and acquired skills. It can be all kinds of clamps, tweezers, vise, which are designed to ensure the desired position and immobility of parts. The stand for the soldering iron will prevent damage to the table on which they work and other surrounding objects from temperature. When soldering large structures, you will need devices for heating parts. To adjust the temperature of the soldering iron, you can use a dimmer - a dimmer.
If you have to do soldering work regularly, then the best option would be to use a soldering station. Such stations are equipped with a device for adjusting and maintaining the temperature of the tool tip within the specified limits. The package of such stations, as a rule, includes a large set of accessories. Often the solderer finds himself in such a position that he does not have enough hands. There is a “third hand” device that allows you to conveniently position and secure the parts to be joined. A foam sponge is used to clean the tip.
Back to index
Soldering iron selection
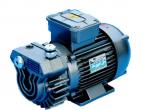
Soldering irons come in a variety of designs depending on the power, temperature and method of heating. The same parameters guide the choice of a soldering iron, depending on the object to be soldered. According to the heating method, devices are electric, gas, heated from an external source - a blowtorch, a fire, a forge. Electric soldering irons vary in power from 12 to 250 watts. The choice is made depending on the purpose of the work: desoldering microcircuits, working with thin or thick wires and large metal objects. For safe soldering, 12V or 36V soldering irons will work, but they will require the use of adapter hardware. The voltage will be 220 V. There are self-powered soldering irons. Charging the batteries will last for 2 hours.

For the convenience of soldering, soldering iron tips of various shapes and sizes are used. Forged copper is used as a material for the sting. It is more convenient to use a tool with interchangeable tips and adapted to change the length of the tip. When soldering thick-walled parts, a hammer soldering iron is used. Such a soldering iron restore car radiators
Some soldering irons use gas for heating. A small burner is built compactly with a gas container, refilled in the same way as a conventional lighter. Such a soldering iron can be used autonomously, as well as a rechargeable one.
In addition to a soldering iron and auxiliary tools, solder is indispensable. There are many types of solder. Most solders contain tin and lead. The difference between solders from each other in different melting temperatures and hardness of the composition. There are different configurations of the appearance of solders. It is most convenient to use solder in the form of a wire or rod. There are solder bars with flux inside.
Fluxes are necessary to remove contaminants and oxides from the surfaces of the parts to be joined and molten solder. The flux provides good solder wettability and diffuse penetration into the metal structure.
One of the popular fluxes is rosin.
This substance is part of many fluxes. Having a soldering iron, solder and flux, you can already solder. Everything additional that is needed for soldering is acquired simultaneously with experience.
Soldering is a method of creating a permanent connection by introducing into the contact zone a molten material with a melting temperature lower than that of the materials of the parts to be joined. You can learn how to properly solder with a soldering iron by mastering the technology in practice.
Purpose of the device
The electric soldering iron is produced with a supply voltage from 12 to 220V. It is difficult to manufacture a low-power structure for high voltage, since this requires many layers of thin wire, which leads to an increase in dimensions. In addition, it is chosen based on the conditions of work safety.
It is convenient to choose the power of the soldering iron using a simple table:

Optimum tip temperature is maintained manually or automatically. For this, thyristor regulators are used.
To increase the service life, the end of the soldering iron can be forged. In this case, copper will dissolve less in the solder. Before using the soldering iron, the tip is filed into a certain shape. The most common are angular and cut. A knife-shaped end is attached in order to simultaneously solder several contacts of a microcircuit or connector pins.

Tools
Before properly soldering with a soldering iron, the work area should be equipped with the necessary tools:
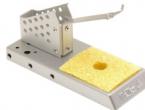
- Stand. The heated device is placed on a stand. It also serves as a place for flux and is a platform for working with wires. A “crocodile” is additionally attached to it with a piece of foam rubber for cleaning the sting.
- Tripod. It includes clips (“crocodiles”) that can be moved in height and rotated, a rosin tray, a soldering iron holder.
- Set of tools. It is needed to support parts, give wires the desired shape, and clean solder surfaces. These tools include tweezers, pliers, wire cutters, round nose pliers, files, a knife, and sandpaper.
Soldering secrets

How to use a soldering iron?
Foreign matter is removed from the surfaces of parts by grinding with sandpaper and degreasing with acetone or gasoline.
The sting is cleaned of oxides and burning with a file, bar or sandpaper.
The soldering iron is heated, its end is covered with rosin, and then tinned. To do this, the solder on the tip is rubbed with a wooden block. The entire work surface should acquire a characteristic silver color.
Solder heats up. Its small part in the form of a drop is applied to the junction and leveled. If necessary, it is added to the required amount until it closes the contact point. The connection area is warming up. How to solder wires? The contact of the tip with the conductor should be as large as possible, and not the tip, as inexperienced installers do. In this case, the rosin must still remain on the drop of solder so that its oxidation does not begin. The soldering process is carried out in one step. If you retract and re-press the tip against the part several times, the solder will turn gray due to oxidation, since the rosin evaporates earlier. During the cooling process, the parts must be motionless. When the wires are displaced, when the solder has not yet solidified, microcracks form in it, which worsen the strength of the connection and create additional electrical resistance.
The remains of rosin are removed with a brush moistened with alcohol.
Soldering wires
We will figure out how to properly solder the wires with a soldering iron. First of all, their ends intended for connection are released from insulation. It is important to warm up the connected wires with high quality. To do this, the dimensions of the sting must correspond to the dimensions of the parts. If the soldering iron is too large, then neighboring elements will be damaged during operation. With its small size, soldering will be unreliable, since the parts are difficult to warm up.
Wire preparation consists in removing insulation from its end. It is removed with a knife or wire cutters. The stranded wire should be twisted so that individual parts do not stick out, and tinned. To do this, it is lowered into a bath with rosin, a drop of solder is taken with a soldering iron and carried out several times over the copper wires. During the tinning process, the wire must be heated and rotated so that the coating is on all sides. To prepare for further work, the tinned end is dipped in molten rosin and thus “varnished”. Its excess can then be easily removed by hand.
Solder is a weak alloy and breaks under small loads. The wires to be connected are pre-stripped and twisted. To do this, they must have a common axis. Their centers should be combined, after which one wire is twisted along the length of the other. A similar operation is done with the second end. A molten rosin is applied to the junction, and then solder. The twist should be warmed up for 2-3 seconds.

If there is not enough solder, it must be added so that the coating is uniform and shiny. Many do not understand why the connection does not warm up even with a powerful device. How should soldering be done with a soldering iron in this case? The fact is that heat spreads from the bottom up. Therefore, the twist must be heated from below. When overheated, the solder spreads, and when there is not enough heat, the coating is loose.
Single-core wires are cleaned to a shine and dipped in rosin. Then they are connected, heated for 3-5 seconds. and apply solder. A heat shrink tube of a larger diameter is put on the bare wire, which decreases from elevated temperature, after which reliable insulation is formed. If the spike cools quickly, a lighter is used to heat it up. Having mastered how to solder wires correctly, you can proceed to more complex operations.
It is unacceptable to twist together copper and aluminum wires due to heat generation in the contact resistance. Their fixation is carried out through an intermediate element, which can be a bolted connection with separation by washers, a terminal clamp, a layer of another metal. Tin-based aluminum solder is also suitable for copper wire and can be a reliable intermediate layer for them.
Soldering radio components
Soldering with a radioelement is carried out by twisting or overlapping, using a heat sink, for example, with tweezers. Heating of many parts of electrical circuits should not exceed 70 ºС for a duration of more than 3 seconds.
On the printed circuit board, the mounting location along the perimeter of the hole is covered with a layer of solder. Then the tinned and rosin-coated end of the conductor is inserted into it. It is heated and moistened with an added drop of solder. The tip should touch the pin and track of the board at the same time. Excess solder is easily removed with a copper braid. The work is done with high quality when all soldering points are similar to each other. The conclusions of the radio elements are bent and inserted into the holes of the board. The ends on the reverse side are slightly bent so that the part does not fall out.
The soldering iron cannot be kept dry for a long time in a heated state. It is covered with a layer of oxides, and the sting will again have to be cleaned and tinned. At the end there should always be a layer of molten rosin, and in long intervals between work, the soldering iron should be turned off. Also, old solder is periodically removed from it with a sponge.
Elements of boards of various equipment can fail under the influence of static electricity. To prevent its occurrence, the body of the soldering iron should be grounded.
Working with microcircuits
Consider how to solder microcircuits correctly. The process has some peculiarities. Microcircuits cannot withstand overheating. There should be no excess solder at the joints. To do this, use a soldering iron for microcircuits with temperature control.
Simultaneous heating of the contacts is carried out using a hair dryer with nozzles. The area on the board needs to be cleaned. Acetone or universal lacquer thinner is suitable for this. Then the hair dryer is turned on, and its temperature is set at 330-370 ºС. At the minimum blowing speed, the chip heats up and is immediately removed with tweezers after the contacts are melted. Then the soldering zone is lubricated with flux, and a new microcircuit is installed in place of the faulty one. When heated with a hairdryer, it sags a little from the melting of the contacts, which is a signal of the end of the operation. The soldering area is wiped with acetone to remove flux residues. Sufficiently powerful contacts can be additionally heated with a soldering iron.
When the simple one is mastered, it is possible to switch to complex compounds, for example, dissimilar metals using gas, furnace or impulse heating.

Aluminum soldering
Difficulties in soldering aluminum are associated with its low melting point (660 ºС) and strong oxide film. The parts are heated in a furnace or gas flame burner. Their preparation consists in removing fats with a solvent and in mechanical cleaning with sandpaper, an abrasive wheel or a stainless steel brush. In this case, the oxide film is formed again, but its thickness is much less than the previous one. Then a flux is applied to the junction and it is heated to the melting temperature of the solder. The electrode rod is touched to the junction until it begins to melt.

Solder for soldering aluminum at a temperature of 150-400 ºС can be based on zinc, tin, cadmium (fusible). It poorly resists corrosion and requires additional coatings. Refractory solders, such as silumin (590-600 ºС), 34A (530-550 ºС) and others, are more reliable and are used more often. Aluminum alloys have a lower melting point. They are soldered with furnace heating, which is more precisely regulated.
Conclusion
How to solder wires and microcircuits with a soldering iron? The answer to this question implies, first of all, careful preparation of the tool and parts. In the process of creating a permanent connection, the layer of molten solder must always be protected by flux. For each operation, a soldering iron of the appropriate power and shape of the working surface of the tip is selected. With the correct connection of the parts and maintaining the temperature regime, the soldering is reliable and lasts a long time.
Anyone knows what a soldering iron is. But not everyone uses it often. How to learn how to use a soldering iron?
For home use, a 40W soldering iron will suffice.
Soldering is not a difficult process. This is a common event for almost anyone. The main thing is to know how to use a soldering iron.
Soldering technology

Soldering is the bonding of metals using a metal melt with a low melting point. This fusible metal is called solder. To carry out soldering, it is necessary to heat the metals to be joined in the joint area to the melting temperature of the solder. Only under this condition, the solder melt is able to fill the contact gap between the metals and penetrate into their volume. Thus, a sufficiently strong bond of metals arises, both mechanical and electrical.
In the soldering process, the most popular is the tin-lead alloy, in which the tin content can range from 20 to 90%. The best results are shown by solders of the POS-40 or POS-60 type (the numbers indicate the tin content in percent). These solders begin to melt at temperatures of 230 and 180ºС. In some cases, tin-lead solder with the addition of bismuth (POSV-33) is used, which melts when heated to 130ºС.

For soldering aluminum wires, special aluminum-based alloys with a significantly higher melting point should be used. Tin-based solders are sold in the form of rods or wires with a size of 0.5-2 mm. In the case of a small section or parts, solder wire is preferred, as it is easier to work with.
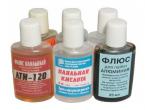
In most cases, soldering is impossible without cleaning the metal surface from the oxide film. For its destruction, a special substance is used - flux. For soldering copper products or products made of copper alloys, rosin is used as a flux. When heated in the soldering area, the flux protects the metal from the influence of the atmosphere. In solder wires, rosin is usually incorporated into the wire. Experienced solderers do without flux to speed up soldering, and use soldering acid to clean the metal surface. For convenience, the flux is used in various forms. For example, the flux may be a solution of rosin in alcohol. In especially critical cases, rosin brand LTI-120 is used.
Back to index
Soldering various metal products

Copper products or copper alloy parts usually do not cause problems when soldering. They can be easily soldered with tin and rosin solder. Silver and silver-plated products can be soldered in the same way as copper, however, in order to improve the reliability of the connection, it is recommended to use a special tin-lead solder with a silver additive.
Steel products and zinc-coated metals solder very poorly with rosin. The situation is corrected by soldering acid, which destroys the oxide film. Alloys for heating devices (including nichrome) can only be soldered using special fluxes. Among folk remedies, ordinary aspirin can become effective when used instead of a special flux. Aluminum products, aluminum-based alloys and stainless steels cannot be soldered with rosin. For their soldering, specific means are used (the use of concentrated phosphoric acid is effective) and special alloys as solder.
Back to index
Features of choosing a soldering iron

For soldering, the main tool is a soldering iron. Any soldering iron includes a body with a handle; heating element (most often a conventional spiral is used); copper sting and wire for connection to the electrical network. The heating element is covered with a casing, and inside it is located and fixed a copper sting. When voltage is applied, it provides heating of the entire sting. The sting has a cylindrical part, which is fixed inside the heater, and a working area (the tip of the sting).
The shape of the working part of the sting can be in the form of a blade, as well as a conical or needle-shaped shape. Usually a stinger is installed in the form of a spatula with a 45º bevel in one direction or with cuts on both sides. The working section of the tip can be straight or bent down, depending on the place of soldering.

The soldering iron is selected primarily by its power. Naturally, the higher the power of the heating element, the higher the heating temperature of the soldering area and the greater the volume of the heated material. Soldering irons for household needs are available from 20 to 125 watts. Under normal conditions, for the repair of household appliances, the use of 25 or 40 W soldering irons is considered optimal. These soldering irons are recommended for beginners.
The tip of almost all soldering irons is made of copper, which is associated with its high thermal conductivity. The diameter of the tip has a noticeable effect on the soldering parameters. There are mainly two types of sting: the usual one with a diameter of 4-5 mm and small-sized - 2-3 mm. Of course, when soldering small electrical circuits, it is advisable to use a low-power soldering iron with a small-sized copper tip.
Back to index
Preparatory work

To properly use a soldering iron, you need to prepare for soldering. First of all, you need to prepare your workplace. Working with a soldering iron involves the presence of high temperature and electrical voltage. Therefore, the socket for turning on the soldering iron should be located within arm's reach for quick disconnection if necessary. The soldering iron itself should be located on a convenient stand that provides quick installation and removal of the soldering iron. At the same time, it should not touch the table or other objects in the heated state.
Such a stand for a soldering iron of various shapes is sold ready-made. You can make it yourself. The self-made stand has a textolite base, in which two racks of steel wire or a bar with a diameter of 4-5 mm are fixed. Such a rack has an M-shaped appearance and is fixed with both legs at the base. The soldering iron is installed in the central recess of both racks at the same time, usually in a horizontal position.
For ease of use, small containers for solder and rosin should be provided. It is better if these are small metal jars of low height, but of sufficient diameter. Capacities must be fixed so that they do not move during the soldering process.
The tip of the soldering iron before work requires preparation. First you need to inspect the surface of the working area. If, after the previous use, flaws are noticeable on the surface of the sting, then it is necessary to eliminate all surface defects (sagging, notches, etc.) with a file. If the tip of the sting has lost its shape, then you should sharpen it with a file and restore the 45º bevel.

It is very important to cover the tip of the tip with solder (tin). This is done in the following way. The soldering iron is heated to the melting temperature of the solder. The tip of the soldering iron is placed on one side in rosin, and then in solder. Without turning off the soldering iron, remove excess solder with a rag. Even better, rub the tip with the melted solder on a flat wooden surface until the solder evenly coats the surface of the tip of the tip. A similar tinning is done by the second side of the sting. If the bevel on the working section of the sting is made only in one direction, then it is enough to tin only the beveled section of the sting.
In addition, it is advisable to prepare the metals to be soldered, especially if they are of a decent size. It is advisable to treat the metal soldering area with an emery cloth or file.
If the metal is contaminated, especially with fats and oils, it is necessary to clean its surface with a solvent.
Processing of steel parts should be done with soldering acid.
One of the most reliable ways to connect wires is soldering. This is a process in which the space between two conductors is filled with molten solder. In this case, the melting temperature of the solder must be lower than the melting temperature of the metals to be joined. At home, soldering is most often used with a soldering iron - a small device powered by electricity. For normal operation, the power of the soldering iron must be at least 80-100 watts.
What you need for soldering with a soldering iron
In addition to the soldering iron itself, solders, rosin or fluxes will be needed, it is advisable to have a stand. Even in the process of work, you may need a small file and small pliers.
Rosin and fluxes
To get a good connection of wires, it is necessary to clean them from contaminants, including oxide film. If mono-cores can still be manually cleaned, then stranded conductors cannot be cleaned normally. They are usually treated with rosin or flux - active substances that dissolve contaminants, including the oxide film.
Both rosin and fluxes work well, only fluxes are easier to use - you can dip the brush into the solution and quickly process the wires. It is necessary to put the conductor in rosin, then heat it with a soldering iron so that the molten substance envelops the entire surface of the metal. The disadvantage of using fluxes is that if they remain on the wires (and they remain), they will gradually corrode the adjacent sheath. To prevent this from happening, all soldering points must be processed - wash off the flux residue with alcohol.

Rosin is considered a universal remedy, and fluxes can be selected depending on the metal that you are going to solder. In the case of wires, this is copper or aluminum. For copper and aluminum wires, take LTI-120 flux or borax. Homemade flux from rosin and denatured alcohol (1 to 5) works very well, besides it is easy to do it yourself. Add rosin to alcohol (preferably dust or very small pieces of it) and shake until dissolved. Then this composition can process conductors and twists before soldering.
Solders for soldering copper wires with a soldering iron use POS 60, POS 50 or POS 40 - tin-lead. For aluminum, zinc-based compounds are more suitable. The most common are TsO-12 and P250A (from tin and zinc), grade A (zinc and tin with the addition of copper), TsA-15 (zinc with aluminum).

It is very convenient to use solders, which include rosin (POS 61). In this case, there is no need to pre-treat each conductor in rosin separately. But for high-quality soldering, a soldering iron must be powerful - 80-100 W, which can quickly heat up the soldering place to the required temperatures.
Auxiliary materials
In order to normally solder wires with a soldering iron, you also need:

Alcohol may be required to flush the flux, and electrical tape or heat shrink tubing of various diameters may be required for insulation. That's all the materials and tools without which soldering wires with a soldering iron is impossible.
Soldering process with an electric soldering iron
The whole technology of soldering wires with a soldering iron can be divided into several successive stages. All of them are repeated in a certain sequence:

That's all. In the same way, you can solder two or more wires, you can solder the wire to some contact pad (for example, when soldering headphones, you can solder the wire to the plug or to the pad on the earphone), etc.
After you have finished soldering the wires with a soldering iron and they have cooled down, the connection must be insulated. You can wind the electrical tape, you can put it on, and then heat up the heat shrink tube. When it comes to electrical wiring, it is usually advised to first screw a few turns of electrical tape, and put on a heat shrink tube on top, which is warmed up.
Differences in technology when using flux
If an active flux is used rather than rosin, the tinning process changes. The cleaned conductor is lubricated with the composition, after which it is heated with a soldering iron with a small amount of solder. Further, everything is as described.

Soldering strands with flux - faster and easier
There are differences when soldering twists with flux. In this case, you can not tin each wire, but twist it, then process it with a flux and immediately start soldering. Conductors can not even be stripped - active compounds corrode the oxide film. But instead, you will have to wipe the soldering points with alcohol to wash off the remnants of chemically aggressive substances.
Features of soldering stranded wires
The soldering technology described above is suitable for monofilaments. If the wire is stranded, there are nuances: before tinning, the wires are untwisted so that everything can be dipped in rosin. When applying solder, make sure that each wire is covered with a thin layer of solder. After cooling, the wires are again twisted into one bundle, then you can solder with a soldering iron as described above - by dipping the tip into the solder, warming up the place of soldering and applying tin.

When tinning, stranded wires must be “fluffed out”
Is it possible to solder copper wire with aluminum
The connection of aluminum with other reactive metals cannot be done directly. Since copper is a reactive material, copper and aluminum are not joined or soldered. The point is too different thermal conductivity and different current conductivity. When current is passed through, aluminum heats up more and expands more. Copper heats up and expands much less. Constant expansion / contraction to varying degrees leads to the fact that even the best contact is broken, a non-conductive film is formed, everything stops working. Because copper and aluminum do not solder.
If there is such a need to connect copper and aluminum conductors, make a bolted connection. Take a bolt with a suitable nut and three washers. At the ends of the wires to be connected, rings are formed according to the size of the bolt. They take a bolt, put on one washer, then a conductor, another washer - the next conductor, on top - a third washer and fix everything with a nut.

There are several other ways to connect aluminum and copper lines, but soldering is not one of them. You can read about other methods, but bolted is the simplest and most reliable.
My relationship with radio and microelectronics can be described by a wonderful anecdote about Leo Tolstoy, who loved to play the balalaika, but did not know how. Sometimes he writes the next chapter of War and Peace, and he himself thinks "trendy brandy trendy brandy ...". After courses in electrical engineering and microelectronics at my beloved Moscow Aviation Institute, plus my brother’s endless explanations that I forget almost immediately, in principle, I manage to assemble simple circuits and even come up with my own, good now, if you don’t feel like messing around with analog signals, amplifications, pickups, etc. you can find a ready-made micro-assembly and stay in the more or less understandable world of digital microelectronics.
To business. Today we will talk about soldering. I know that many beginners who want to play with microcontrollers are deterred by this. But first, you can use
So, we are almost there. I write everything in such detail, because, honestly, it was a breakthrough for me. As I accidentally discovered, all that is needed for soldering simple components is a soldering iron, the most common one with an awl-shaped tip:
And solder with flux inside:

It's all in the process. You need to do it like this:
- The part is inserted into the board and must be secured (you will not have a second hand to hold).
- A soldering iron is taken in one hand, a wire of solder is taken in the other (it is convenient if it is in a special dispenser, as in the picture).
- Solder on a soldering iron to take NO NEED.
- Touch the tip of the soldering iron to the place of soldering and heat it. Usually, it's 3-4 seconds.
- Then, without removing the soldering iron, with the other hand, touch the tip of the solder wire with the flux to the place of soldering. In reality, in this place all three parts come into contact at once: the soldering element and its hole on the board, the soldering iron and the solder. After a second, “pshshshshsh” occurs, the tip of the solder wire melts (and a little flux flows out of it) and the required amount of flux goes to the place of soldering. After a second, you can remove the soldering iron with solder and blow.

It is clear that the waiting time in each phase requires at least a minimum of practice, but no more. I am sure that any beginner using this technique will solder Maximite himself in an hour.
Let me remind you the main signs of good soldering:
- A lot of solder does not mean high-quality contact. A drop of solder at the point of contact should cover it from all sides, without potholes, but not be an overly huge bulb.
- The color of the solder should be closer to shiny, and not to matte.
- If the board is double-sided, and the holes are non-metallized, it is necessary to solder using the specified technology on both sides.
Planar elements (of course, not the smallest ones) are even easier to solder in some way, although for home-made devices you will already have to etch the board, since there will not be much convenience from using planar elements on a prototyping board.
So, a small, almost theoretical bonus about soldering planar elements. These can be microcircuits, transistors, resistors, capacitances, etc. I repeat, at home there are objective restrictions on the size of elements that can be soldered with a conventional soldering iron. Below I will give a list of what I personally soldered with a regular 220V soldering iron.
For soldering a planar element, it will no longer be possible to use solder on the go, since it can “come off” too much, “bay” several legs at once. Therefore, it is necessary to first in some way tin the patches where it is planned to put the component. Here, alas, you can’t do without a liquid flux (at least I didn’t succeed).
Drip a little liquid flux on the patches (or patches), take quite a bit of solder on the soldering iron (it is possible without flux). Very little solder is generally needed for planar elements. Then lightly touch the end of the soldering iron to each patch. There should be some solder on it. More than necessary, each patch "will not take."
Take the element with tweezers. Firstly, it is more convenient, and secondly, the tweezers will remove heat, which is very important for planar elements. Attach the element to the place of soldering, holding it with tweezers. If this is a microcircuit, then you need to hold on to the leg that you are soldering. For microcircuits, heat dissipation is especially important, so two tweezers can be used. You hold the part with one, and attach the second to the soldered leg (there are tweezers with a clip that you don’t have to hold with your hands). With the second hand, you again apply a drop of liquid flux to the soldering place (maybe it will get a little on the microcircuit), with the same hand you take the soldering iron and touch the soldering place for a second. Since the solder and flux are already there, the soldered leg will “immerse” in the solder applied at the tinning stage. The procedure is then repeated for all legs. If necessary, you can dig in liquid flux.

When you buy liquid flux, buy liquid for washing boards. Alas, with liquid flux it is better to wash the board after soldering.
I must say right away that I have never been a professional, and not even an advanced amateur in soldering. I did all this with a regular soldering iron. The pros have their own methods and equipment.
Of course, soldering a planar element requires much more skill. But still quite realistic at home. And if you do not solder microcircuits, but only the simplest elements, then everything is still simplified. Microcircuits can be bought already soldered into pads or in the form of ready-made assemblies.
Here are pictures of what I personally successfully soldered after a little practice.
This is the simplest type of hull. These can be put in pads that are the same in complexity of soldering. These are simply soldered according to the first instruction.


The next two are more difficult. Here it is already necessary to solder according to the second instruction with a neat heat sink and liquid flux.


Elementary planar components, such as the resistors below, are quite easy to solder:

But there is, of course, a limit. This kindness is already beyond my abilities.


In the end, a couple of cheap but very useful things worth buying in addition to a soldering iron, solder, tweezers and wire cutters: 
Successes in soldering! The smell of rosin is awesome!