Primer for sublimation on wood. Transferring an image to a tree is a feature of the technology. What is sublimation
In the variety of materials used for decoration, wood occupies a special place. This material is notable for its unique texture, environmental friendliness and natural origin. Wood itself, especially when varnished or otherwise decorated, is very beautiful. However, at the same time, it often becomes the basis for placing certain images. Moreover, the latter can be transferred independently. And there are several ways to do this.
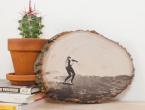
Unlike paper and canvas, a painting on a tree is something new and interesting in our design. Therefore, such paintings will attract attention, and those people who want to make an interior that can surprise can consider this particular option.
In addition, you can decorate the wood that is used directly in the decoration, making the interior familiar to many look completely new. In addition, in this way you can decorate a variety of wooden products, from caskets to furniture.
Finally, transferring an image onto a wooden surface can be a hobby for children and adults, and for some, a way to earn money. After all, handmade items are actively purchased today.
What needs to be done with the drawing and the tree before transferring
- Transferring an image to a wood surface, as well as to any other, is in some cases impossible without the effect of mirroring. In the case of an image, this is not so important, however, it is better to initially make letters and numbers mirrored, so that after transfer they take the correct form;
- Any drawing is best transferred in high resolution. In the process, blurring may appear, and if the image resolution was initially low, this can greatly degrade the quality of the final result;
- The quality of the transfer directly depends on how clean and even the surface will be. Any pollution is unacceptable, as are irregularities. In the latter case, you can use sandpaper;
- The color of the tree can also play a role in the transfer. It is best to use as light options as possible.
Sublimation paper transfer
A special type of paper that, when heated, can seize with a surface, while wood is a similar surface. Anything can be printed on such paper, and the process of transferring an image with it is as simple as possible.
Ironing paper
It is often used if it is necessary to transfer images to a tree for subsequent tracing with a special soldering iron and thus creating a pattern. Someone draws by hand, but someone prefers this method. However, the method is also suitable for creating final products, but because of its cheapness and simplicity, it is very accessible and popular.
To transfer, you need to print the desired image on a sheet of paper. The sheet itself is laid on a perfectly cleaned and even surface of the tree. In this case, the paper is wetted with a small amount of acetone, which will make the process of transferring the pigment from it to the wood when heated better.
Important! When working with acetone, all precautions should be taken. Remember that the material has a strong odor and actively evaporates. It is best to work in a ventilated area, and you should protect your respiratory organs with a respirator or at least a mask. It is also important to have a fire extinguisher handy and avoid static electricity.
Having stretched the paper soaked in acetone to the desired size, we begin to iron it with a hot iron, and after a while the image will be transferred.

Translation using decoupage film
Decoupage is becoming a very popular hobby, so many people know how to handle a film from it. After printing the desired image on it, also prepare white acrylic paint.
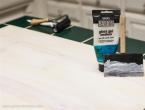
It is necessary to perfectly clean the wood, as well as give it a smooth surface. Next, we apply a pre-slightly thinned paint in two layers. Moreover, the application directions must be perpendicular to each other.
The paint must be allowed to dry. Once this has happened, dampened decoupage paper (approximately 30 seconds soak in room temperature water) is placed on the surface, removing the base and rubbing with a sponge to ensure a snug fit. After waiting for drying, you can treat the surface with varnish.
Translation using PVA or gel medium
Regardless of the material chosen, the process is about the same. However, in the case of the gel, the application takes place directly on the board, well, the glue is applied to the photograph. The photo itself can be a simple printout on plain paper. If it is important for the image, it is necessary to have a mirrored version in the photo, as subsequently the picture will take the correct form. Next, the procedure is as follows:
- The wood must be carefully cleaned and perfectly sanded to create a smooth surface. You can use 120 grit sandpaper;
- Photo processing with wood glue or gel. In the case of the latter, it is necessary to do everything as carefully as possible, without missing the slightest fragment;
- The sheet must be glued to the lubricated surface, and then walked over it with a roller for a better fit, the absence of wrinkles and air bubbles. The stage is extremely important, since it depends on how well the drawing will be translated;
- Leave the product overnight, after which, as soon as the gel is completely dry, wet the sheet and remove it with a sponge for washing dishes. The image is translated quite reliably, and it is not so easy to erase it. However, it is better not to be too zealous. At the same time, in the case of PVA glue, it will be more difficult to erase the paper layer;
- After all the paper has been removed, make sure that there are no traces of paper left on the surface, as they may interfere with the next step - varnishing. You can use waterproof or clear acrylic lacquer.

22.02.2018
In any modern interior there are a lot of wooden panels: doors and facades of cabinet furniture, parquet floors, countertops, partitions. All this can become an area for design solutions that will create a unique atmosphere in your room. This will help modern printing technology on wood.
Sublimation printing is the basis for the direct application of color images to a wood surface. It is suitable for both residential and office interiors. Sublimation printing prices are now at a level that allows mass application of this technology to create unique room design solutions.
For drawing the image on a wood surface the professional equipment is used. Printers for such work are available in three types: laser, inkjet and thermal sublimation. All of them provide high quality of the resulting picture, and the difference lies in the cost of maintenance and the cost of consumables.
Materials for printing on wood
Since different types of wood and wood products are used in industrial production, printing technologies are suitable for printing on various grades.
- Solid wood boards are the most expensive and most valuable option, creating a luxurious yet cozy environment.
- Plywood and various types of wood-based panels: chipboard, fiberboard, MDF, laminated chipboard and others - a more democratic version, which also lends itself perfectly to professional printing.
- Decorative tiles and panels, including for parquet and laminate, as well as veneer are finished wood products that can be used to create a complex pattern or pattern.
- Countertops, doors, screens, wall panels, wood panels and other wood items that can become the centerpiece of your interior.
The quality of the finished image may vary depending on what kind of material was used. However, modern technologies make it possible to reduce these differences to a minimum, which will not be critical and will not worsen the aesthetic merits of the product. Whether it's a solid wood countertop or a chipboard cabinet door, the image will come out colorful and printed in detail.
wood printing process
Before feeding the wooden base into the printer, its surface is treated, cleaned of grease and other contaminants, if necessary, covered with a primer layer to level and form the necessary background for applying the image.
- Then the wooden base is fixed on the frame-stand of the printer, the file with the required image is launched for printing, and the printing device, mounted on a movable mechanism (carriage), moves along the base, row after row, applying the desired print.
- During the operation of the printer, the paint penetrates into the upper layers of wood and is fixed in them under the influence of temperature or ultraviolet radiation. Powder (in laser printers) or liquid (in inkjet) color composition is sintered with the base.
After the image is applied, and the wooden base comes out of the printer, the product is varnished. This additionally fixes the paint in the wood structure and protects it from fading and other damage for several years.
UV printing technology
The most modern approach to professional wood surface printing is the method based on the use of ultraviolet radiation. Its essence lies in the fact that UV rays functionally replace a slight heating, which contributes to the penetration of the coloring matter into the wood structure and sintering with it. At the same time, the cost of the method using ultraviolet radiation is comparable to the prices of sublimation printing. UV technology also ensures high quality of the finished image, environmental friendliness and durability.
Recent Articles
The use of multi-color large format images for interior decoration is a well-known and familiar way of decorating a room.
All photos from the article
A distinctive feature of the age of high technology is the ease with which beauty is replicated and originality is put on stream. But if not everyone can become an artist and paint great canvases, then many can create unique images using simple technologies.
Wood is one of the suitable materials on which a photograph or favorite drawing will look great. In addition to the fact that the quality of the product will remain unchanged for many years, it will be a kind of masterpiece or piece goods, depending on how you dispose of it.

The essence of technology
Don't let buzzwords like sublimation printing technology or graverton scare you, because they are one and the same, therefore, there is less incomprehensible. The technology is based on the principle of sublimation, when a substance under the influence of high temperature “jumps” from a gaseous state immediately to a solid one, bypassing the wet stage.
Graverton technology allows you to transfer a pattern to wood, metal, glass, fabric, and the process itself takes place in a certain order:
- An image is printed on sublimation paper;
- The front side is applied to the object being processed;
- It is placed in a heat press for a certain time.
A huge number of things can be subjected to artistic processing - from shoes, dishes, fabrics to corporate symbols, puzzles and all sorts of other unexpected things.
The main disadvantage of the graverton technology is the need for special equipment and its high price:
- sublimation printer(starting from 500 thousand rubles with kopecks);
- thermal transfer press(from 9 to 30 thousand rubles).

And since you want to transfer a drawing to a tree at home from time to time, it makes sense to purchase expensive equipment only if you put things on a grand scale.
We create for ourselves
With a minimum of tools, you can also figure out how to translate an image onto a tree no worse than using high-tech equipment. Perhaps the most important thing is to decide on the topic, because erasing "nonsense" will be, oh, how difficult.
There are several rules that will teach you how to transfer a drawing to a tree so that it looks right:
- The work surface should be bright and clean;
- The direction of the wood fibers should not spoil the drawing, for example, oblique lines can add photos of extra wrinkles;
- A theme with words/numbers is printed in a mirror image (a photo editor will help rotate the image);
- It is desirable to have a photograph for scanning digital, with high image quality;
- In a wooden picture, the photo is always located with the front part to the tree, so we will not constantly remind you of this.
The first stage of work is to think about two questions - for what purpose and what you will "sketch". So, what happens can be presented, used for decoration, hung on the wall in the form of a funny maxim, used for practical purposes.
With an elegant vignette, composition or photograph, you can decorate not only a key chain, a small sheet of plywood / board, signs, but also doors, bed headboards, window sills, chairs - everything that makes sense to decorate. We present to your attention some simple but effective ways to transfer an image to a tree.

The first method is free
Free, because you can find it on a computer and make printouts on a laser printer at work or with friends. There you can also prepare the board by grinding it with fine-grained paper (P 220) or (there are always support staff in the staff - locksmiths and carpenters).
Let's start working:
- find a pattern and enlarge it to the required size, print;
- put the sheet on the board;
- iron with a hot iron.
You can moisten the sheet with acetone before transferring the picture to the tree so that the pigment comes off better, however, to the detriment of the homely atmosphere. It would be useful to cover the nose and mouth with a gauze bandage or scarf. Typically, this technology is suitable for the subsequent burning of the pattern with a special tool.

Note! Put the carbon paper on the board with the coloring side down, on top of the necessary drawing and circle it with a pencil. The main thing is not to move the paper and not carry it with your hand, otherwise the board will get dirty. It makes sense if the drawing is small.
Method two - glue
In addition to high-precision technology, source code and wooden canvas, you will need:
- ordinary PVA glue;
- solvent;
- fine-grained emery;
- varnish, for example, Dulux;
- roller;
- sponge/long knife;
- a lot of patience.
Note! Experienced craftsmen advise slightly lightening the image before transferring the photo to the tree, because the finished color will be more saturated.
- degrease and /plywood;
- cover the surface of the photo with a continuous layer of glue;
- put the dirty side on the tree;

- roll out the sheet with a roller in the manner of smoothing the wallpaper, or by swiping with the flat side of the knife;
- leave to dry for a day;
- moisten the sheet with a damp sponge;
- start slowly and carefully erasing the paper with your own hands, or rather, with your fingers;
- let the work dry;
- varnish.
Method three - gel
From it you will learn how to transfer a drawing to a tree using an acrylic gel medium. This modeling paste, used to create a relief surface, costs more than 500 rubles, but it’s not worth saving, just like using an expired one. According to the reviews of the masters, a good product is produced by the Rafael company.
Of the tools and supplies you will need:
- photograph and tree of the same size;
- gel medium and brush to it;
- roller / knife / ruler;
- paraffin / matte glue used for decoupage;
- another brush for paraffin.

The work instruction is in many ways similar to the previous one:
- Apply the gel to the board with a brush. The layer should not be thick, but without bald spots;
- a photograph is placed on the treated area and smoothed out, expelling air bubbles;
- leave overnight in a secluded place;
- roll up paper, let dry;
- cover with paraffin.
We indulge in translations
I wonder how to transfer a photo to a tree without gel and glue? An alternative would be a clean decoupage film on which the photo will be printed.
After getting wet, the substrate is pulled out from under the top film, leaving a juicy pattern in place.
To work, you will need a skin, white acrylic paint, a plate of water, cotton pads, paper napkins, brushes, a marker, patinating varnish.

- Sand the surface;
- Lightly dilute the paint with water and apply the first layer, brushing along;
- The second layer, respectively, transverse strokes. Let dry;
- Before transferring the picture to the tree, you need to lower it for half a minute in water at room temperature;
- Take out, attach to the surface and pull out the base;
- Remove excess moisture from the film with blotting movements;
- Let it dry and mask the flaws with a marker.
- Open with varnish.
Note! You can buy special napkins for decoupage. With them, the question of how to transfer a drawing to a tree will not cause any particular difficulties.
In conclusion
The new possibilities of the wood surface used as the basis for a painting or photograph are unusual and evoke a lot of emotions. Familiar images look a little different than on paper - softer, more mysterious. Branded consumables will help to immortalize your work, which may outlive the paper version.
The video in this article shows an example of transferring an image to a tree.
Any questions you have about translating an image into a tree, you can ask in the comments to this article.
Thermal transfer (thermal transfer) involves applying an image (print, application) to the surface of the product using a thermal press. Three factors play a major role in transfer: temperature, pressure, and time.
There are a number of materials for thermal transfer. These can be specially made thermal transfers (prints). Prints can be printed on special media and in various ways (silkscreen, digital printing, sublimation printing, etc.) images of any complexity, up to full-color photo quality images, or using special decorative effects - volumetric (3D), with imitation of various textures (embroidery , skin). In the design of thermal transfers, rhinestones, reflective materials, glitter (sparkles), metallized elements, velvety surface (flock) can be used.
Thermal transfer technology is used to apply images to almost any surface: textiles, knitwear, leather, leatherette, wood, glass, porcelain, faience, plastic, metal.
Separately, among thermal transfer printing, one can also single out the most common method for applying inscriptions, logos and branding various products such as "film transfer", also called thermal application.
The image (inscription or logo) is cut along the contours on special film materials for thermal transfer - thermal transfer films with the help of special equipment - a cutting plotter (cutter). Thermal transfer films are a special roll material made of PVC (PVC) or polyurethane, which, in addition to the actual color layer, includes a special adhesive layer, which is activated at high temperature and pressure and welded into the surface of the product to be applied. After cooling, the adhesive polymerizes and the thermal film in the form of the required image is applied to the product almost forever.

The image applied in this way has a number of indisputable advantages, such as: a high degree of resistance to various external influences (atmospheric phenomena, washing, washing, dry cleaning), the image is very bright (unlike applying with paints, in which it is sometimes possible for the paint to "fall through" for account of the structure of the product (most often this problem relates to textile products).
For thermal application, such types of films are used as: PVC flex (PVC flex), PU flex, luminescent flex, flex with a holographic effect, flex with sparkles (glitter), metallized flex, PU reflective flex, flock (velvety film).

Typically, thermal transfer of film applications is used to print logos or inscriptions on textile products: inscriptions or numbering on sportswear, logos on medical clothing (medical gowns, medical suits, medical caps), branding clothing for promotions (capes with logos, T-shirts with printed , baseball caps and caps) - at the same time sewn from almost any fabric of any thickness, because thermal films are ideally welded onto all types of fabrics, without exception, including fabrics with the most complex silicone impregnations.
Price list for thermal transfer printing of prints (digital full-color printing), USD per unit.
|
Circulation |
Up to A5 format |
Up to A4 format |
Up to A3 format |
|
Thermal transfer to textiles (white or light-colored fabric) |
|||
|
10 pieces. |
1,25 |
2,50 |
5,00 |
|
50 pcs. |
1,06 |
2,12 |
4,24 |
|
100 pieces. |
0,88 |
1,75 |
3,50 |
|
500 pcs. |
0,69 |
1,38 |
2,75 |
|
Thermal transfer to textiles (dark fabrics) |
|||
|
10 pieces. |
2,81 |
5,63 |
11,25 |
|
50 pcs. |
2,38 |
4,75 |
9,50 |
|
100 pieces. |
2,00 |
4,00 |
8,00 |
|
500 pcs. |
1,50 |
3,00 |
6,00 |
|
Thermal transfer to solid products (metal, plastic, wood, CDs) |
|||
|
10 pieces. |
1,25 |
2,50 |
5,00 |
|
50 pcs. |
1,06 |
2,13 |
4,25 |
|
100 pieces. |
0,88 |
1,75 |
3,50 |
|
500 pcs. |
0,69 |
1,38 |
2,75 |
For printing prints, thermal transfer materials of the FOREVER trademark (made in Germany) are used. Printing is carried out on a digital full-color printing machine Konica Minolta (Japan).
Price list for application by thermal application, taking into account plotter cutting and sampling, per 1 sq. dm. (10x10 cm) "flex" film, USD per unit.
|
Circulation |
1 color |
2 colors |
3 colors |
|
10 pieces. |
0,93 |
1,68 |
2,35 |
|
50 pcs. |
0,86 |
1,54 |
2,19 |
|
100 pieces. |
0,73 |
1,31 |
1,86 |
|
500 pcs. |
0,66 |
1,20 |
1,70 |
When using thermal transfer films such as flock (flock), electrician (electric), metallic (metallic), videoflex (videoflex), glitter (glitter) + 60% to the price list.
For this application, thermal transfer film SISER (Italy) is used.
Don't let buzzwords like sublimation printing technology or graverton scare you, because they are one and the same, therefore, there is less incomprehensible. The technology is based on the principle of sublimation, when a substance under the influence of high temperature “jumps” from a gaseous state immediately to a solid one, bypassing the wet stage.
Graverton technology allows you to transfer a pattern to wood, metal, glass, fabric, and the process itself takes place in a certain order:
- An image is printed on sublimation paper;
- The front side is applied to the object being processed;
- It is placed in a heat press for a certain time.
A huge number of things can be subjected to artistic processing - from shoes, dishes, fabrics to corporate symbols, puzzles and all sorts of other unexpected things.
The main drawback of the graverton technology is the need for special equipment and its high price:
- sublimation printer(starting from 500 thousand rubles with kopecks);
- thermal transfer press(from 9 to 30 thousand rubles).

And since you want to transfer a drawing to a tree at home from time to time, it makes sense to purchase expensive equipment only if you put things on a grand scale.
We create for ourselves
With a minimum of tools, you can also figure out how to translate an image onto a tree no worse than using high-tech equipment. Perhaps the most important thing is to decide on the topic, because erasing "nonsense" will be, oh, how difficult.
There are several rules that will teach you how to transfer a drawing to a tree so that it looks right:
- The work surface should be bright and clean;
- The direction of the wood fibers should not spoil the drawing, for example, oblique lines can add photos of extra wrinkles;
- A theme with words/numbers is printed in a mirror image (a photo editor will help rotate the image);

- It is desirable to have a photograph for scanning digital, with high image quality;
- In a wooden picture, the photo is always located with the front part to the tree, so we will not constantly remind you of this.
The first stage of work is to think about two questions - for what purpose and what will you "sketch". So, what happens can be presented, used for decoration, hung on the wall in the form of a funny maxim, used for practical purposes.
With an elegant vignette, composition or photograph, you can decorate not only a key chain, a small sheet of plywood / board, signs, but also doors, bed headboards, window sills, chairs - everything that makes sense to decorate. We present to your attention some simple but effective ways to transfer an image to a tree.

The first method is free
Free, because you can find it on a computer and make printouts on a laser printer at work or with friends. There you can also prepare the board by grinding with fine-grained paper (P 220) or a wood grinder (there are always support staff in the staff - locksmiths and carpenters).
Let's start working:
- find a pattern and enlarge it to the required size, print;
- put the sheet on the board;
- iron with a hot iron.
You can moisten the sheet with acetone before transferring the picture to the tree so that the pigment comes off better, however, to the detriment of the homely atmosphere. It would be useful to cover the nose and mouth with a gauze bandage or scarf. Typically, this technology is suitable for the subsequent burning of the pattern with a special tool.

Note! Put the carbon paper on the board with the coloring side down, on top of the necessary drawing and circle it with a pencil. The main thing is not to move the paper and not carry it with your hand, otherwise the board will get dirty. It makes sense if the drawing is small.
Method two - glue
In addition to high-precision technology, source code and wooden canvas, you will need:
- ordinary PVA glue;
- solvent;
- fine-grained emery;
- varnish, for example, Dulux;
- roller;
- sponge/long knife;
- a lot of patience.
Note! Experienced craftsmen advise slightly lightening the image before transferring the photo to the tree, because the finished color will be more saturated.
- degrease and sand the cut piece of wood / plywood;
- cover the surface of the photo with a continuous layer of glue;
- put the dirty side on the tree;

- roll out the sheet with a roller in the manner of smoothing the wallpaper, or by swiping with the flat side of the knife;
- leave to dry for a day;
- moisten the sheet with a damp sponge;
- start slowly and carefully erasing the paper with your own hands, or rather, with your fingers;
- let the work dry;
- varnish.
Method three - gel
From it you will learn how to transfer a drawing to a tree using an acrylic gel medium. This modeling paste, used to create a relief surface, costs more than 500 rubles, but it’s not worth saving, just like using an expired one. According to the reviews of the masters, a good product is produced by the Rafael company.
Of the tools and supplies you will need:
- photograph and tree of the same size;
- gel medium and brush to it;
- roller / knife / ruler;
- paraffin / matte glue used for decoupage;
- another brush for paraffin.

The work instruction is in many ways similar to the previous one:
- Apply the gel to the board with a brush. The layer should not be thick, but without bald spots;
- a photograph is placed on the treated area and smoothed out, expelling air bubbles;
- leave overnight in a secluded place;
- roll up paper, let dry;
- cover with paraffin.
We indulge in translations
I wonder how to transfer a photo to a tree without gel and glue? An alternative would be a clean decoupage film on which the photo will be printed.
After getting wet, the substrate is pulled out from under the top film, leaving a juicy pattern in place.
To work, you will need a skin, white acrylic paint, a plate of water, cotton pads, paper napkins, brushes, a marker, patinating varnish.

- Sand the surface;
- Lightly dilute the paint with water and apply the first layer, brushing along;
- The second layer, respectively, transverse strokes. Let dry;
- Before transferring the picture to the tree, you need to lower it for half a minute in water at room temperature;
- Take out, attach to the surface and pull out the base;
- Remove excess moisture from the film with blotting movements;
- Let it dry and mask the flaws with a marker.
- Open with varnish.
Note! You can buy special napkins for decoupage. With them, the question of how to transfer a drawing to a tree will not cause any particular difficulties.
In conclusion
The new possibilities of the wood surface used as the basis for a painting or photograph are unusual and evoke a lot of emotions. Familiar images look a little different than on paper - softer, more mysterious. Branded consumables will help to immortalize your work, which may outlive the paper version.
The video in this article shows an example of transferring an image to a tree.