Making panel doors step by step. Do-it-yourself paneled doors: manufacturing and installation. Step by step instructions for making
Graceful wooden paneled structures are an adornment of any home, especially if they are made soundly, with high quality, with love. If you work well with wood, and you have a hand router and a margin of patience, then it will be quite possible to realize plans for the production of a non-industrial version of a panel structure at home with your own hands. In the photo you can see an approximate technology of the process.
Properly assembled structures are made up of directly special wooden planks called panels and a solid frame that forms the basis of the structure. One is inserted into the other according to the tenon-groove principle. In principle, structures of this type can be made from any materials, but wood is the most grateful.
A paneled door is not the easiest option to make with your own hands. It would be much easier to take a monolithic shield. This is purely a matter of personal taste. If you feel the strength in yourself for such filigree work, then prepare the workplace accordingly. All necessary cutters should always be at hand.

In addition to a manual router (cutter diameter 12 mm, the parameters of the device, especially the collet, must correspond to this), in the manufacture of a panel structure, you will need:
- two end mills for the production of strapping;
- the figurine bevel of a high-quality panel is made with a special cutter;
- cutter connecting elements along its axis;
The following materials are also required:
- Strapping bars. Approximate thickness - 19mm., Length - 57mm. For each doorway, these characteristics are calculated separately.
- Furniture shield. The basis of the whole idea. Its thickness is standard - 16 mm.
- Wooden blocks are plentiful. This is necessary for the "margin of safety." Mistakes happen to everyone.
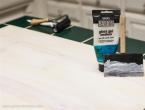
- Varnish. This element is optional. Perhaps you will varnish at another time.
- Glue. Mandatory material.
When making a paneled structure at home, there is a little trick: not all structural elements must be made of solid wood. For the internal parts hidden under the skin, you can take chipboard.

Manufacturing steps
- Strapping bars. A very important part is the profile cut along the axis. A trial cut is specially performed in order to verify the quality factor and accuracy of the connection of profile blocks and counter-profile blocks.

Each of the bars is laid face down. Further, on a manual router, longitudinal profiles are milled from all sides, and counter-profiles are milled with a special counter-profile cutter from the end part. More details about this process can be seen on the video. To give individuality to the work, the front part can be processed on a milling machine.
- Shield splicing. They think in advance the number of panels in the panel structure. How they should be located and how much space to take. Will there be slabs, a fan-shaped window, etc. at the top?
After the decision is made, they proceed to the manufacture of individual panels. The thickness of each element, of course, should be less than the thickness of the bars. In order to process the edges of the finished product, a hand mill is centered on the thickness of the part and I process each surface separately. In this case, some must be processed in the position face down, others - up. This will depend on which side of the structure the panel will be located on. When joining elements, their thickness is of paramount importance, since it is an indicator of how accurately the panel will sit in the desired groove. Good performance of each element is the key to success. Do not rush, with any uncertainty in the parameters, you need to turn to the rough workpiece.

The milled spike should enter the strapping groove easily, without pressure. It will not be superfluous to verify this using a rough part. With the above parameters of the edged bars, the tenon should have a size of about 8 mm.

When processing the edge of the panel, an edge is obtained, called figara. It is recommended to make two or three approaches on a manual milling cutter, removing not very significant layers of wood, each time checking the groove. During factory production, at this stage, a selection of cylindrical scans with a special corrugated surface is made, which allows you to speed up the process. At home, this cannot be boasted, so the process of cutting grooves and spikes will take some time and must be honed to the smallest detail.
- Bonding and varnishing. The last steps: inserting all the panels into the desired grooves of the bars, gluing the parts together and varnishing. It is important not to overdo it here. Grinding panel structures with this manufacturing technology is not necessary.

Installation of panel doors
To install a panel structure in a doorway, it is necessary to manufacture a box. If you have coped with the door, then making a box with your own hands will not be difficult for you. The box consists of four bars, in pairs of the same length: two racks, the upper and lower bars of the box. It is made in accordance with the parameters of the doorway. It is more logical to make it with the same tenon-groove connection as the door itself.
In the manufacture of the box, it is necessary to think over the overall design of the lower threshold, the upper part of the box. All decorative elements also need to be thought out in advance. Their manufacture at later stages is a big risk, since after the installation of the structure, they may be damaged.
So, after the box is assembled, hinges are attached to the paneled shield (after all, every jack of all trades has a drill and self-tapping screws hidden under the hollow). Wedges are driven into the grooves of an already manufactured and assembled structure for greater fixation.
Install in the right place the latch of the overhead cylinder lock, the latch of the mortise lock with the lining (usually both types of locks are used, but here everything remains at your discretion). You can limit yourself to a mortise lock. Further, the hinges of the structure are attached to the box and move to the side. If the paneled door has not fallen, then this is a victory. If the weight of the structure is too large, then you need to change the hinges, make them more massive and durable.
At home, making and installing a paneled door is not as difficult as it seems. It is important to have a manual router on hand, bars of the required thickness and not be afraid to experiment with grooves. Always use a rough stock for trial work.
Doors are made of boards, furniture boards or beams according to previously prepared drawings. To understand what and how wooden doors are made of, let's get acquainted with their varieties.
Types of doors by design
The box from the array has the following advantages:
At the same time, the wooden canvas has the following features:
- untreated raw materials quickly absorb moisture;
- the presence of cracks and knots;
- combustibility.
To reduce absorption, the board is dried, treated with hot steam and impregnations..
massive doors
Before manufacturing wooden doors, it is recommended to determine the features of the production process. The dacha can be protected from robbers by a massive canvas, for the manufacture of which thick tongue-and-groove or planed boards are used. The resulting structure is reinforced with horizontal or inclined lintels.
 For the manufacture of a massive door, a tree of dense structure is used.
 For the manufacture of a massive entrance door, cedar, larch or oak are used. Such wood is characterized by a dense structure and textured pattern.
If the project of the suburban area includes a bath, then linden, pine are used to equip the opening. The bath should be operated after wood treatment with an antiseptic.
Paneled doors
For the manufacture of paneled canvas, boards and beams obtained by gluing lamellas are used. Then the workpiece is covered with veneer. Before building a canvas, a drawing is prepared. It indicates the configuration of the panels. It can be the same or different. Glass can be used instead of wooden elements.
 Panel doors are most often installed indoors.
 To equip the vertical and transverse elements, you will need to glue the timber. For the manufacture of the canvas, a floorboard of the appropriate thickness is used. Spikes are used to fix individual elements.
 Door Assembly Diagram
 If a panel is used to make the canvas, you need to consider:
- the reliability of the product is directly affected by the number of transverse;
- a home-made box is formed from a bar, and a rail or plastic is used to make a panel;
- bead is used to fix the panels.
Since the paneled door has a small thickness, it is considered the best option to equip an interior doorway.
Panel doors
The shield box is made of fiberboard, veneer or laminate. The frame is assembled from boards. As a shield, sheets of fiberboard, MDF or chipboard are used.
 Shield door design
 The canvases under consideration are classified into the following types:
- solid - filled with bars fastened together;
- hollow - made from side and transverse bars. Lining is used for sheathing;
- small-hollow - have different filling.
To independently create a high-quality canvas, the frame is pre-coated with plywood. The material is laid in 2 layers. The size of 1 layer is 24 mm. This technology prevents deformation of the coating.
Tools for the job
From the tools you will need:
- to create grooves and holes, you need a milling cutter;
- hacksaw;
- to grind the ends of the doors, you need a planer;
- chisels;
- hammer;
- screwdriver
 Standard set of tools for making a door
 To assemble the doors, you will need the following materials:
- sheet pile boards;
- self-tapping screws;
- glue.
The acquired wood is additionally dried. The boards are laid so that they do not touch each other.
Choice of lumber
Before assembling the canvas, an individual plan for the upcoming work is drawn up. Particular attention is paid to the choice of boards. The following criteria are taken into account:
- financial opportunities;
- acquisition of “commercial wood;
- residual moisture - 15%;
- checking the evenness of the material;
- board thickness - 25-50 mm;
- array is polished.
Step by step instructions for making
Any step-by-step plan for the manufacture of the door provides for the assembly of the shield. If it is planned to install the canvas in the bath, then a simple assembly of the shield is carried out. To fix the boards, transverse and longitudinal elements are used. The warm box for the house is made taking into account aesthetics. The assembled shield is polished.
Production of solid wood doors
The step-by-step web assembly plan includes the correct choice of consumables. To make a shield, you will need grooved boards with a thickness of more than 25 mm. Then the consumable material is sawn into segments.
 Tongue-and-groove boards must be even and without grooves on the front sides
 When assembling the shield, it is recommended to take into account the direction of the annual rings. To connect the tongue-and-groove boards, a tongue-and-groove lock and wood glue are used. If the consumable is non-groove boards, then they are assembled with glue.
Work is done on a large area. The assembled coating is pressed with clamps. If the shield is dry, it is processed with a milling cutter. In order to have good sound insulation, it is recommended to assemble a shield from several layers of boards. The resulting structure is clamped with clamps.

 Traditional ways of dressing boards in solid wood doors
 For strapping, crossbars are used, installed at the top, in the middle and at the bottom of the cover. On the canvas, markings are made for the grooves. The recesses to be made should be ½ the thickness of the consumable.
 Assembly diagram
 Holes are cut using a router. It is more difficult to cut grooves by hand. This will require a chisel. A rubber mallet is used to insert the cross member. If it is planned to apply a drawing to the resulting shield, its contour is first outlined with a pencil according to the template. A cutter is used for cutting.
 Cutouts are milled according to a drawing previously applied with a pencil.
 Then the canvas is painted with pre-treatment with an antiseptic. On the canvas and the box make markings for mounting loops. Similarly, markings are made for the handle and lock. The last stage is the canopy of the canvas in the opening.
 Treatment with antiseptic and varnish
 Panel door manufacturing
The instruction for the manufacture of a thyroid sheet allows the use of finely filled boards. Experts distinguish 3 methods of assembling such a design:
- pre-assembly of the frame with subsequent filling of its internal space. Using this technology, you can create a solid or finely filled shield;
- separate production of the shield with its subsequent fixation in the frame. The last stage is sheathing with finishing material;
- the manufactured shield is mounted in a frame, lined.
To assemble the canvas according to the first method, primary strapping is carried out. She will determine the size of the future door. For the construction, a bar with a section of 30 × 120 mm is used. Consumables are cut according to the dimensions of the future structure.

The next step is to select the type of connection in the corners. Experts advise using the "half-tree" method. Accurate marking of future grooves is an important stage in the assembly of the shield.
 Scheme of connection of frame elements
 All grooves are coated with glue. The connection of the beam is carried out on a flat, but large area. If the glue is dry, the joints are fixed with dowels. For this, through holes with a diameter of 8-10 mm are made..
For facing the frame, plywood or fiberboard is used. Marking is carried out, the frame is removed. The frame returns to its original place. It must be pressed against the facing material treated with glue.
 For cladding, plywood or fiberboard is used
 To fill the interior space, MDF is used. It is glued to the bottom sheet of the finishing material. But first, the glue must dry well. In parallel, it is recommended to prepare consumables for the outer lining of the canvas.
 Internal filling gives the canvas rigidity
 If you need to glue 2 sheets, then the first sheet is fiberboard, and the second is laminated material or SHF. The resulting design is sent under the press.
You can sheathe the door with natural wooden slats. They are fixed to the frame. The holes made are filled with a mixture of glue and sawdust. If the surface is dry, it is treated with sandpaper. All corners and ends are machined with a cutter. In the finished door leaf and,. The door is mounted in an appropriate box.
A frame door is made using a similar technique - the interior space is additionally reinforced with bars. But before starting work, accurate calculations are carried out, a drawing is prepared.
Panel door manufacturing
To make a paneled door, you will need special carpentry tools and experience. The constituent elements of the structure are made of plywood, massive boards. A drawing is preliminarily prepared, on which 4 panels are marked.

The frame is made from timber. It is pre-treated with a cutter. Then a groove is made on one side of it. Spikes are cut out on the crossbars, and the edges are processed with a milling cutter. Panels and mullions are inserted into the grooves.

The end part of the coating, which will go to the end of the canvas, must be even. Slots are made in the vertical elements to assemble the structure.
To make panels, plywood or chipboard is used. Some panel elements are replaced with glass. In this case, glazing beads are additionally used. Panels with a flat plane are mounted and framed with a glazing bead.
Otherwise, the panels are processed by a milling cutter. In this way, a relief configuration is created. Plywood is used to make panels. Each element of the future canvas is treated with an antiseptic and dried.


All parts are assembled into a single structure on a flat surface, and each spike is coated with special glue. Door assembly step by step:
- gluing the crossbars into the grooves of the vertical bars;
- installation of mullions;
- installation of the remaining panels;
- gluing a vertical beam;
- fixing glazing beads for finishing.
To install the spikes in the grooves, a rubberized hammer is used. The canvas is lined from the sides. To check the corners, a building corner is used. The cover is compressed with clamps.
Markings are made on the canvas for installing hinges and handles with a lock. Installation of fittings is carried out after completion of finishing work. For finishing, acrylic paint is used either. To get a dark finish, stain is used.
Warming and soundproofing
 door insulation scheme
 Painting
At the next stage, processing and decoration of the manufactured structure is carried out. In this case, it is recommended to adhere to the following plan:
- processing the coating with sandpaper or a grinding machine;
- impregnation of wood with an antiseptic. The first layer should dry well. Then the processing is repeated;
- the canvas is covered with a special putty, which can be replaced with a primer. In this case, the canvas is processed 2 times. But each applied layer must dry well. This will take about 2 days;
- for finishing the coating, paint, varnish, stain are used. The stain must be applied over the primer. Taking into account the desired shade, the appropriate number of layers of stain is applied. It will take 4 hours for each layer to dry. To fix the result, the stain is covered with two layers of varnish.
 For finishing the door, paint, varnish, stain are used
 Nothing decorates cabinet furniture like doors with embossed panels. The profile edges of the uprights and rungs further emphasize the contours of the infill, while the counter-profile connections provide strength and durability. You can easily form the elements of such a connection, consisting of a profile on the inner edges of the frame and a corresponding counter-profile at the ends of the rungs using a set of special cutters.
Learn the anatomy of a door
Before you make your first cut, be familiar with a few terms related to panel construction. A panel is a panel that is inserted into the tongues of a frame consisting of vertical posts, between which horizontal crossbars are installed. The profile cutter selects the tongue on the edges of the uprights and crossbeams and at the same time forms a decorative profile (photo A). The counter-profile cutter makes a short spike (comb) that enters the tongue, and a cutout is formed that exactly matches the relief formed by the profile cutter. Despite the fact that one of the surfaces to be bonded is formed by end fibers, the joint has good strength, since it has a significant bonding area.
First, carefully calculate the dimensions
Overhead doors usually protrude 9-10mm from the edges of the opening, so if you choose this style, the finished door should be 18-20mm higher and wider than the opening. Mortise doors fully fit into the opening flush with the front side of the case, and around them it is necessary to leave uniform gaps 2-3 mm wide. Therefore, the height and width of such a door should be 4-6 mm less than the height and width of the opening. The length of the uprights is usually equal to the height of the door, and the length of the crossbars depends on the width of the uprights and the set of cutters used (see the figure "How to calculate the length of the crossbars"). If the profile cutter selects a 9mm deep tongue, add this dimension twice (18mm) to account for the tongues at both ends of the crossbar.
Prepare material for frame parts
To make the connections tight, all the crossbars and racks must have the same thickness. After processing the boards on a thicknessing machine, saw them lengthwise into blanks of the desired width and give the uprights and crossbars the required length. Save a few cuts for making test joints. Then determine which sides of the parts will be front, and mark them (photo B).
Brief advice! For crossbars with a length of 150 mm or less, it is better to first mill the profile on a long workpiece, and then saw it into separate crossbars of the desired length.
How to mill a profile
Having fixed the milling cutter on the table, insert the profile cutter into the collet and adjust its overhang by placing a scrap from the blanks for the frame parts next to it. Position the cutter so that the full contour of the profile is formed on the front side (facing down), and at the same time there is a sufficient amount of material on the other side of the tongue (photo C).
After adjusting and fixing the overhang, use a ruler to align the longitudinal stop of the milling table with the bearing of the cutter (photo D). Fix the combs on the stop and the table, which tightly press the workpieces and ensure uniform processing (photo E). Mill the profile on all the rungs and posts, as well as on a trial cut, with which you will then adjust the overhang of the second cutter.
Learn how to correctly mill a counter-profile
Set the posts aside and replace the profile cutter with a counter profile cutter. Using the trim on which the profile is formed, adjust the overhang of the cutter (photo F). Then align the rip fence with the bearing in the same way as in the previous step.
The counter profile cutter cuts material across the grain, so to feed the test cut at right angles to the stop, use a pusher from the board cut to help prevent chipping (photo G). Make a pass and adjust the overhang of the cutter more precisely (photo H).
When the front sides of both parts of the trial connection coincide in the same plane, mill the counter-profile at both ends of all the rungs, placing them on the router table with the marks down.
Determine the panel dimensions
If the panel is made of plywood or wooden board, its dimensions should be 2 mm less than the distance between the bottom of opposite tongues in the door frame.
This will allow the frame joints to be tightly tightened and provide free space for the expansion of the shield. To determine the width of the infill, simply subtract 2mm from the length of the crossbar. And to find out the length of the panel, dry-assemble the door frame, measure the distance between the tongues of the crossbars and reduce it by 2 mm.
Door assembly
Having dry assembled the door together with the panel, make sure that all the parts are made correctly and the joints are tight. Dismantle the door, apply glue to the counter-profile of the rungs on one side and connect them to the post. Insert the panel into place without gluing it, then glue the second rack to the crossbars and tighten the frame with clamps (photo I).
How to make a relief panel
Flat panels made of plywood or plank board are also suitable for doors with counter-profile joints, but embossed panels (sometimes called volumetric), such as those shown in the photo in this article, look much more interesting. If you have a powerful router with a speed control, make embossed panels with a horizontal router. Due to its large mass, it easily copes with the work, removing material with carbide cutters, leaving a clean and smooth surface. These cutters are available with different profile options, and they
work better at a relatively low speed (usually no more than 10,000 rpm). For good results, work the edges of the panel in several shallow passes, as shown in the photo. First, mill the end edges of the panel, and then the longitudinal edges.
Do-it-yourself paneled doors with counter-profile connections
Profile cutters allow you to choose one of several profiles - from the traditional ledge ("nail") rounding, characteristic of country-style projects, to the more sophisticated "heel".
THE BEST SHOULD BE OUTSIDE
To correctly orient the parts when milling the connection elements, mark the front side of the posts and crossbeams.
INSTALL LONGITUDINAL STOP
The steel ruler, pressed against both parts of the longitudinal stop, should just touch the bearing of the cutter. Rotate the cutter by hand to make sure it does not hit the stop.
ADJUSTING THE PROFILE CUTTER OVERHEAD
Lay the scrap from the frame parts nearby and raise the cutter so that the profile is fully formed, and at least 5-6 mm of material remains above the tongue.
SUPPLY MUST BE EQUAL
Pressing the workpieces to the table with the marked edge, mill the profile on all racks and crossbars. Feed them smoothly at the same speed so that the finished surface is smooth.
SET UP THE COUNTER PROFILE CUTTER
Align the bottom edge of the top incisor with the top edge of the tongue so that the crossbar tenon is flush with the tongue.
REMOVE A LITTLE BIT
Adjust cutter reach and stop position for first shallow pass. Start with two end edges to reduce chipping, and work all four edges before moving the fence back for the next pass.
GRADUALLY APPROACHING TO THE RESULT
When the stop is flush with the bearing, raise the cutter in several steps, making small passes until the desired edge thickness is achieved.
THE PUSHER SERVES SEVERAL PURPOSE
To form a counter-profile at the end of the crossbar, press the end of the trial cut against the longitudinal stop and the rectangular cut of the board that serves as the pusher. The retaining board also helps prevent chipping.
CORRECT CUTTER SETTINGS
If excess material is left on the top face of the tenon after a test pass, lower the cutter. But it needs to be raised if you see excess material on the bottom edge.
ASSEMBLY WITHOUT PROBLEMS
Properly made counter-profile joints close tightly with little clamp pressure required and help to achieve a square assembly.

So that the panel does not rattle
If the infill is too small, or its thickness is less than the width of the tongue in the frame parts, the door is more likely to rattle and rattle. If you hear a knock during dry assembly, put elastic pads into the tongue to fill the gap.
Any door carries not only a utilitarian load, but also performs a decorative function. The paneled door successfully combines both of these elements, being both a reliable and attractive design element.
The paneled door combines elements of not only decor, but also the reliability of structural elements.
Varieties of paneled doors
Since panel doors are very reliable, provide excellent sound insulation and perfectly complement the decor of the room, they are always popular, especially as interior doors. A distinctive feature of a paneled door is the presence of a rather massive frame, as well as inserts, which are called panels. Panels can be made from various materials:

- one of the most beautiful options is glass inserts, which can be made using transparent or frosted glass, but stained glass looks especially attractive;
- plywood or chipboard are often used as panels; this is a fairly light and budget option for panels;
- for the manufacture of inserts, solid wood can be used, which makes the door more expensive, but also more durable.
The panels are fastened both with the help of the groove-thorn system and with the help of a special glazing bead, which makes it easy to replace the inserts if necessary.
Advantages of a self-made panel door
Having decided to install a paneled door in the room, it is not necessary to use its purchased version. If you have a little skill and desire, you can make such a door yourself. If made, then at a price they will turn out to be much cheaper than a similar option sold in a store.

Do-it-yourself panel doors eliminate the need to adjust them to the size of the doorway, since they are initially made to certain measurements.
Due to the peculiarities of manufacturing, self-made doors are less susceptible to destruction due to the effects of temperature and humidity differences. Among other things, you can independently make exclusive doors at a more than affordable price.
Preparatory stage for the manufacture of a paneled door
To make a paneled door with your own hands, in addition to desire and certain skills in working with wood, you will need a relatively small set of tools:
- tape measure and pencil;
- wood saw;
- sandpaper with coarse and fine grain;
- chisel;
- screwdriver.
As the materials necessary for the manufacture of the door, you need to stock up on the following:

- to create a box, you need thick boards, the width of which should be up to fifty millimeters, you can use a special beam, you only need three pieces: two for the manufacture of the vertical part and one for the upper transverse part;
- to create a frame, fairly strong bars and slats are needed, reliability depends on their strength;
- for the manufacture of panels, you need to purchase chipboard, plywood or glass;
- in some cases, you need to purchase a glazing bead to secure the panels, in particular, this is necessary if the panels are made of glass;
- for fastening you need glue and screws;
- you need to stock up on accessories (door hinges, handles, locks);
- do not forget about finishing materials (paint, varnish, various specialized coatings), which are selected depending on the operating conditions and design concept.
Having decided to make a paneled door with your own hands, you first need to decide on the materials from which it will be made.
For the manufacture of the door frame and frame, it is better to choose durable wood species that are quite resistant to changes in temperature and humidity. It is the right material that will help make the door resistant to various external influences and reliable. As a rule, it is better to stop the choice on durable woods, such as oak or ash.

Pine is the most inexpensive and affordable breed that is resistant to temperature and humidity changes, which is why it is often chosen as a material for making doors. For the optimal choice of a particular wood, you can consult with a consultant in the store.
For the manufacture of panels, you can use plywood or chipboard, they make the design easy and inexpensive. If desired, for the manufacture of panels, you can buy a more expensive solid wood, this will make the door stronger and more solid. Glass inserts are often used for interior panel doors. Glass can be transparent, frosted, corrugated or patterned. The options with stained glass inserts look very nice.
Real stained glass is quite expensive, so glass painting is sometimes used, usually double-sided, to create the full stained glass effect.
Panel door manufacturing
The initial stage of door installation is the manufacture and installation of a doorway, or door frame. In order for the door to look attractive and not spoil the design of the room, it is important to make the door frame correctly and evenly. It should be without distortions and differences in width.
After installing the door frame, you can begin to make the paneled door itself with your own hands.
Initially, you need to draw several sketches of the future paneled door on paper, taking into account personal preferences and common sense in terms of the complexity of execution. A paneled door can be quite tricky to make, so it's best for beginners to start by making a door with six panels. The selected sketch is detailed, all dimensions are marked on it. Based on the selected sketch, the necessary materials for the manufacture of the door are purchased.

In order to make a door with your own hands, first of all, a frame is made - the basis of the structure, which is responsible for its strength and on which the panels are fixed. The more securely the frame is made, the more secure the paneled door itself will be.
Using a tape measure, the size of the doorway is measured. To design a door, you need to take into account that in the end it should be four to six millimeters less than the width of the door frame, which must be left for a normal fit. In accordance with the dimensions obtained, the basis for the future door is made from the timber purchased for the manufacture of the frame. To do this, on the beam, which should be even and without mechanical damage, the required length is marked with a pencil. Then, with the help of a hacksaw, the excess part is sawn off on a tree. If possible, you can cut the bars to the desired size in the store to facilitate and speed up the process of making the door. Such sawing will be of higher quality, since the use of modern equipment allows you to get the best result. In this way, two side main posts are obtained, two crossbars that are fixed at the bottom and top of the structure, as well as internal crossbars and slats that serve as jumpers.
To tightly fasten the parts to each other, grooves and spikes are made in the right places, which should fit perfectly in size. For additional fastening, the parts are smeared with special wood glue, which connects them more tightly. Special chamfers are made at the points of attachment of future panels.

After making the frame of the future door, you can start making panels. If wood is used for the panels that will be inserted into the door, then it is better to use a solid board to avoid the need to create a prefabricated chamfer. From the array according to the size of the chamfer that will decorate the door, the finished part is cut out, special cuts are made along its edges, which allow the panel to be securely fixed with a chamfer.
If it is impossible to make panels from a single piece of solid wood, but there is a desire to use wood, then panels are made from pieces of wood that are fastened to each other using a system of spikes and grooves, additionally smeared with wood glue to give greater strength. After the panel, assembled from parts of wood, is ready, cuts are made along its edges for fastening with a chamfer.
Panels made of wood can be additionally decorated by processing with special tools, but for this you need to have certain skills.
If the panels are made of chipboard or plywood, then they are cut from the selected material in accordance with the required dimensions.
Glass inserts are also cut, if necessary, to the size of the door, or initially, in the manufacture of lintels and rails, they proceed from the available dimensions of glass inserts.
If glass with a painting imitating a stained-glass window is used as an insert, then such a painting should be done in advance, before fixing it to the door.
Glass panels are fixed with a glazing bead, which makes it quite easy to change the glass if necessary.
After the door is made, processed and covered with paint or varnish, all the necessary fittings are attached to it. After that, the door is installed in the opening.
Making wooden windows with your own hands in the photo
Windows must be airtight and reliably protect the room from dampness, wind, etc. in winter. Therefore, all cracks and openings in windows must be carefully sealed. If homemade windows are installed, where the glass is attached to the frames with nails, they should be sealed with putty, as well as all the gaps between the frame and the window sashes - this way wooden windows will last longer. In addition, reliable waterproofing will protect the entire structure from dampness and destruction.
To prevent fogging of windows, the frames must be tightly fitted to the bindings, while the dimensions of the glasses must strictly correspond to the dimensions of the frames.
In severe winters, it is better to use double or even triple glazing. Double-glazed windows must be very tight, and in the summer, for good ventilation, they can simply be completely torn off or windows can be used.
As for the front door, it must necessarily open outwards. This is a general requirement for all premises in terms of fire safety. The front door can be on either side, but it is better that it is located opposite the barbecue or stove - it will be more convenient to bring in firewood or coal and monitor the firebox.
The door, like windows, must be tightly fitted to the door frame without cracks. To prevent the door from jamming in the box when opening, it is necessary to provide it with special overhead seals.
Making wooden windows with your own hands requires precision and accuracy. The window profile has a rather complex configuration, so all its parts must be made with exact dimensions, otherwise the window will be leaky.
At home, you can make a simple version of the window. For the manufacture of wooden windows, spliced boards will be required, and in order to avoid warping and deformation of the window during operation, they must be well dried. First of all, a window frame is made, which is attached to the window opening, and then a window frame with glass already inserted is attached to it.
For the manufacture of a window frame, wooden bars 5 X 15 cm will be required, for the frame - bars 5 x 5 cm. The dimensions of the box and frame depend on the selected dimensions of the window opening. The following is a technology for the manufacture of wooden windows, which will allow you to quickly and easily master this production process.
In the manufacture of the box, you need to select a groove on the bar, while its end should take the form of the letter "G". For a board measuring 5 x 15 cm, the groove should be 13 cm long and 1.5 cm deep. As a result of choosing a groove, a comb should be obtained, which will allow the window to close tightly. Next, 4 parts for the window box are cut out of the boards with a groove, observing the exact dimensions. These parts are fastened together with a dovetail spike connection.
To make the connection more rigid, you can drill a hole in its end and insert a wooden pin, pre-coated with glue, into it. The metal window corners at the ends of the box will further strengthen the fastening.
Then, according to the same scheme as the box, a window frame is made. Here, in order to make the connection more reliable, a pin and a corner are required. Since the window frame is a moving element and will constantly close and open, it must be especially strong.
When making a window frame, it is important to pay special attention to the end part of the bar. To do this, in its lower part, you need to make a groove 2 cm wide and 1.5 cm deep, which will be in response to the window box. Depending on the number of upper grooves inserted into the frame, there can be 1-2. For a bar 5 X 5 cm, the width of the upper grooves should be 1.4 cm, and the depth - 1 cm. In this case, you will need a bead with a section of 1 X 1 cm with a glass thickness of 0.4 cm.
The profile for the window frame is made using an electric planer or a manual cutter. It must be sawn into pieces for mounting the frame, the dimensions of which must take into account a gap of 1-2 mm between the frame and the box.
Watch the video of making a wooden window so that all the stages of assembling this design become clear:
On a note!
The finished parts of the structure are interconnected with a spike, after which glass is attached with the help of glazing beads, hinges are screwed to the frame and onto the box. All wooden parts of the window must be pre-treated with an antiseptic, and when it is mounted, varnished or painted and allowed to dry.
Technological process and technology for manufacturing a paneled door with your own hands (step by step video)
Wooden doors are paneled, panel, with dowels and solid (made of solid wood). The simplest version of a wooden door - with dowels - can be made by any beginner who does not have skills in working with wood. Making panel doors with your own hands is the primary skill of anyone involved in summer cottage construction.
Such a door is made up of boards that are fastened together with dowels - transverse bars that can be placed horizontally or in the form of the letter “Z” in the structure. To make the door more durable, quarter or half-board grooves are made in its canvas, in which dowels are also installed. Doors of this type are often installed in various utility rooms, including closed summer kitchens. They are quite strong and reliable, and at the same time, making them with your own hands is not so difficult.
The manufacturing technology of paneled doors suggests that they are made from a frame and panels sewn onto it, which are attached to each other and to the frame with a tongue-and-groove connection system. The frame is usually made of wood, while the panels can be made of wood, glass, etc. and atmospheric events.
For the manufacture of panel doors, not only wood is used, but also boards - chipboard, wood fiber, MDF. The slabs cut to the specified dimensions are then simply sheathed around the perimeter with wooden planks to reinforce the door structure and insulate. In addition, the base of the sheet with slats can be sheathed on top with plywood, and then finished with veneer.
The panel door can be made on the basis of a framework from bars. For greater structural rigidity, the frame must be reinforced with three transverse ribs, and then fill the voids with fine-mesh material from paper or cardboard honeycombs. The finished door is additionally sheathed with plywood and veneer.
The most expensive doors are made of solid wood, i.e. a single piece of wood. The technological complexity lies in the fact that for the manufacture of doors with a standard width of 90 cm, you need to have a tree with a trunk of no smaller diameter. Since this is not always possible, and the cost of the material is quite high.
To make the cost of doors more “democratic”, the modern furniture industry uses the method of making them from solid wood based on glued material. In this case, not only the price becomes more affordable, but also the doors are more practical. For the manufacture of this material, wood of beech, cherry, oak, walnut, ash, etc. is used. True, the manufacture of such doors requires the use of high technologies, which is possible only in the factory.
The technological process of manufacturing a panel door allows you to produce the required number of units in artisanal conditions. This is a fairly easy-to-make door that you can make with your own hands for a “home-made” summer kitchen. As an example, a door insulated on one side will be considered. It will be possible to additionally deal with its design, and then, in addition to the main function, it will also perform a decorative one, especially if the design of the door and the kitchen is designed in the same style.
With a standard door frame size of 200 x 90 cm, the dimensions of the door leaf are 192 x 82 cm. To make the door, you will need boards 5 x 11 cm, as well as 5 solid wood or glued solid wood panels. The first step is to make the door frame. To do this, you need to saw off two sidewalls 192 cm long and two crossbars 72 cm each, taking into account 5-6 cm for the tongue and groove connection when choosing the width of the sidewalls. It is necessary to cut grooves and spikes on the blanks and, having connected the finished parts on them, assemble the frame.
To enhance the strength of the door structure in the vertical sidewalls, it is necessary to drill holes for the dowels, which must pass through the spikes of the crossbars. Then, on the frame canvas, it is necessary to cut out grooves for mounting the panels with a cutter and make the panels themselves, preferably from solid pieces of wood, so that the front side of the door looks more attractive. Finished panels are inserted into the door frame so that they are flush with it on the reverse side. This is important because on this side the door will be sheathed with a sheet of fiberboard, which should fit snugly against the door leaf. A sheet of fiberboard can be nailed to the door or screwed with self-tapping screws.
Watch the production of panel doors in the video, which shows all the production steps:
When all the details of the door block are ready, you can begin to assemble it. First, a wooden box is installed in the doorway and tightly nailed or screwed to its sides. Then, on one of the side surfaces of the box, flat grooves of the same size as the hinges are selected, the depth of which is equal to the thickness of the hinges. The hinges are inserted into these grooves and screwed with self-tapping screws, and a door is hung on them. In the box, you also need to select a groove for the latch of the lock, and install a lock and a handle on the door. This must be done very carefully so that the door does not jam and it freely closes and opens. Lastly, the door needs to be painted or covered with a transparent varnish in 2-3 layers to emphasize the texture of the wood and protect the wood from moisture, temperature changes, fungus, insects, etc.
To make the manufacture of panel doors a simple step-by-step video will only help if you carefully study it and disassemble it in all stages:
Wizard's advice
The floor covering in the kitchen must be non-slip. It can be a wooden floor made of boards 20-30 mm thick, varnished or painted, which is an excellent alternative to parquet. If such a floor does not suit you, you can lay linoleum on top of the boards with a pattern that imitates, for example, marble tiles or precious woods.
Practical non-slip floor tiles with a high coefficient of friction or special natural stone for the floor will look no less interesting in the design of the summer kitchen. Since the kitchen is quite likely to accidentally slip and get injured due to spilled water or fat during cooking, you can use a special tile with an anti-slip fine-grained surface or a rubber tile that has a pleasantly rough and elastic surface that excludes this possibility. The same tiles can lay out the path from the house to the kitchen and in general all the paths on the site.