Wooden ceiling in a brick house. Ceilings on wooden beams in a brick house. Arrangement of wooden floors in a brick house
Building a house with your own hands is always a very laborious and difficult process. One of the crucial moments is the correct choice of the ceiling. There are several options for how to make a ceiling in a private house. It is necessary to take into account all the features of structures of different types.
ceiling requirement
- The ceiling overlap serves to separate the floors of the room and separates the rooms from the attic. The load on these structures is significant, so the high strength of the structure is very important.
- The material should contribute to the preservation of heat in the room and block sound vibrations.
- The ceiling covering must comply with fire safety conditions.
Note! The coating must necessarily have sufficient rigidity so that deflections do not occur under any loads.
What is the ceiling
In order to start making a ceiling slab with your own hands, you need to study what ceiling slabs can be and understand their advantages and installation methods.
Ceilings are:
- interfloor,
- attic,
- basement,
- basement.
The ceiling can be beamed, while using beams of different materials, and beamless - built using slabs and solid panels.
Slab floors

Such a ceiling covering is practically not used for private houses due to the large weight of the material. Plates are mainly used in the construction of large high-rise buildings or industrial buildings.
Sometimes tiled ceilings are used in the construction of brick private houses. It is distinguished by a number of significant positive qualities: a long service life, the ability to achieve a perfectly even coating, structural strength and fire resistance.

Various types of slabs are used: hollow or solid. Hollow products, which have less weight and increase the level of sound and heat insulation, are more often used in the construction of ceilings for private houses.

Slab ceiling can be monolithic and prefabricated. Prefabricated slabs differ in the connection method: some are connected with wire, others - welded - are connected by welding.
The disadvantage of using solid panels is their significant size and weight. Their installation requires the help of special equipment.
Note! Such slabs have a certain size, and it is necessary to build a room for it, or order individual production of slabs of the desired size.
Wood floor installation

In individual construction, most often they use a ceiling made using wooden beams. A wooden bar for flooring in a private house is used because it has a number of advantages:
- such a ceiling does not weigh down the structure,
- no need to use special equipment,
- has durability and environmental friendliness,
- material cost is moderate.
The only significant drawback of wooden beam ceilings is the limitation of the span width when overlapping, up to a maximum of 6 meters.
Note! When using a chimney in a private house, the beams are installed in such a way that there is no intersection with the pipe, a distance of 40 cm must be observed.
In the manufacture of beams, deciduous and coniferous varieties of trees are used. The wood should be sufficiently well dried and checked for rot or cracks. Rejected beams cannot be used in construction.
Installation order

- Before use, the wood must be treated with an antiseptic to avoid further damage from the fungus. The ends of the beams are tarred and wrapped several times with roofing material.
- A nest is preliminarily prepared for the beam, a prerequisite is that the end of the beam must be bevelled. To align the beams along the plane, boards of different thicknesses are used. The void that inevitably remains in the nest is filled with mounting foam.
- Next, a roll is created from the bars, which serve as the basis for the future ceiling. Usually, for cranial bars, pine timber is used, pre-treated with an antiseptic. Floor boards are laid perpendicular to them, which are also treated with an antiseptic.
- After that, a layer is constructed that provides sound and heat insulation. For these purposes, different materials can be used: sand, expanded clay, slag, sawdust can be used. The use of mineral wool is ideal, it has the ability to breathe and is light in weight. Before laying the thermal insulation, a layer of vapor barrier film is laid.

Due to the fact that wooden interfloor ceilings do not have a large mass, they allow you to save on the construction of a foundation of increased power.
In order to properly perform the ceiling, you need to study all the nuances of this process, you can watch the video.
With the correct performance of the work, it is possible to ensure high indicators of the strength of the structure, comfortable conditions for heat and sound insulation.
metal cover

When building a ceiling with metal beams, one should take into account low heat and sound insulation, as well as the possibility of corrosive changes at high air humidity.
The advantages of such an overlap are in the high strength and durability of the structure, in the possibility of overlapping over a larger span area.
For the ceiling you will need:
- metal beams,
- reinforced concrete slabs, lightweight concrete or wood,
- plaster mesh,
- waterproofing material,
- plaster,
- plank flooring.
Concrete floor

With the help of reinforced concrete beams, it is very rare to make a ceiling in private houses. This is due to the very high weight of the material. For such work, special equipment is needed, you can’t manage it with your own hands.
With such beams it is possible to block spans of 3-7.5 meters, between the beams the empty space is filled with concrete or hollow blocks.
14866 0 8
Ceiling in a private house: 13 steps to comfort and practicality
This article is about how to make a ceiling in a private house. In it, I am going to touch upon the problems of choosing the height of the ceiling, its structure and the selection of materials for its installation and design. Let's get started.
Height
Minimum
- What is the minimum possible ceiling height in a private house?
2.4 meters. By reducing the height even more, you will make the living rooms frankly uncomfortable: the ceilings will literally put pressure on the inhabitants of the house, forcing them to constantly bend down.
By the way: already at a height of 2.4 - 2.5 meters, a person above average height will cling to hanging chandeliers and lamps with his head. Personally verified: with a height of 186 cm, it is rather difficult for me to move freely in a typical Khrushchev or Brezhnevka with hanging light sources.

Optimum
- What is the optimal ceiling height in the house?
If we talk only about the subjective perception of the room - the more the better. A high room, even with a relatively small area, looks spacious. However, with a significant ceiling height in full height, sorry for the involuntary pun, the problem of heating arises.
Warm air tends to rise, and in order to ensure a comfortable temperature at floor level, it will have to be heated up to +30 + 35C under the ceiling. Excessive air heating under the attic floor means an unjustified increase in heat loss: they are always proportional to the temperature delta with the street.
The problem can be solved in two ways:
- With convection heating (using or convectors) - limiting the height of the ceilings to a value of approximately 2.7 meters. In my opinion, this height represents a reasonable compromise between comfort and heat savings;

Hint: the standard ceiling height in new buildings is just that - 2.7 meters. In most houses of Soviet projects, it is noticeably smaller - 2.6, 2.5 and even 2.45 m.
- In addition, the distribution of heat in a high room will be optimal in the case of a warm floor - water, cable or film. It will provide a comfortable temperature at the level of human growth, without overheating the air near the ceiling.
By the way: in houses with a second light, underfloor heating and infrared heaters are generally the only heat sources that can provide a comfortable temperature regime. When using convection heating, either heat at the level of the second floor, or severe cold below will be inevitable.

House with a second light. The only reasonable way of heating is underfloor heating.
Higher, even higher
- How to increase the height of the ceilings in the house?
If you have panel or monolithic reinforced concrete floors, you can only change the visual perception of the height of the room using tools from the designers' arsenal.
What exactly?
- Light colors make objects appear more distant than they really are. The effect is emphasized by the contrasting coloring of the surrounding objects. Simply put, if you paint the ceiling white and make the walls dark, the room will look much larger than its actual size;

- The same effect can be achieved by playing with lighting. To increase the visible height of the ceiling, its hidden illumination with spotlights or spotlights is organized.
Ceilings on wooden beams give much more room for a real increase in the height of the premises.
If the ceiling is hemmed from above along the bottom of the beams, it is worth removing the filing (usually a board shield) and laying the flooring between the beams, along the cranial bars, or on top of them. Yes, and here the effect will be largely visual, since the beams will be only two or three centimeters higher than the old filing; however, the room will become much more spacious.

A more radical way is to physically increase the height of the floor. To do this, alas, it is necessary to remove the roof, so the work should be timed to coincide with the overhaul of the roof. The height of the walls is increased due to several additional rows of masonry or new log crowns laid on top of the walls.

The log house can also be raised on jacks by starting under it additional one or two crowns.

Finally, in houses with a floor on wooden beams, it is often practiced to dismantle them with the laying of an insulated screed on the ground. The disadvantage of this method is that the windows and thresholds of doorways will rise noticeably relative to the level of the finished floor.
How to raise ceilings in this way?
- The floor is opened with the complete dismantling of the flooring and insulation;

- Beams are cut;
- The soil is removed and leveled;
The subfloor must not be deepened below the level of the foundation. This is fraught with subsidence of the soil and deformation of the walls.
- A sand or sand and gravel cushion with a thickness of at least 10-15 centimeters is formed on the ground. It will provide drainage and the absence of freezing of the soil under the floor;
- A layer of waterproofing is spread over the sand with an overlap on the walls (as a rule, dense polyethylene acts in this role);
- Concrete preparation is laid out on top - a pillow 8-10 centimeters thick from low-quality (M-100 - M150) concrete;

- After gaining strength, a layer of insulation is laid on top - polystyrene foam or foam plastic with a density of C-35. Thickness is determined by local climatic conditions. Usually it is 40-50 millimeters;
- On top of another layer of waterproofing film on stands 15-25 mm high, a galvanized reinforcing mesh with a cell of 10-15 cm and a wire thickness of 5-6 mm is laid out;
- It is poured with a screed 8-10 cm thick. After gaining strength and leveling the surface in any convenient way (self-leveling floor, plywood, etc.), you can lay the finish coating.

Concrete should come into contact with the wood of the walls only through the waterproofing. In its absence, the lower crowns of the log house or the frame of the walls will quickly rot.
Materials and Solutions
Reinforced concrete floors
- What finishing options are used for slab and monolithic reinforced concrete floors?
The simplest (but not the cheapest) way to make the ceiling perfectly flat is to order a stretch ceiling. In Crimea, where I live, it will cost from 400 rubles per square meter. It is useful for the future owner to know several features of this solution:
- The minimum distance from the ceiling to the web of the tension flow is about 4 centimeters. Accordingly, the room will become albeit slightly, but lower;

- The tension force of the canvas is about 70 kgf per linear meter of the baguette, which is attached to the walls. Accordingly, all walls must have sufficient strength in relation to the horizontal load. Plasterboard partitions are erected with a reinforced frame, and boxes of multi-level plasterboard ceilings for attaching a baguette are reinforced with profile slopes;

- Glossy ceilings are made from the thinnest vinyl film. For its tension, the air in the room is heated by a gas heat gun to 65 - 75 degrees; after cooling, the canvas stretches and becomes perfectly even.
Gloss visually makes the room taller due to the ghostly reflection of its interior, which is a definite plus. However, a thin film is not durable: it can be damaged even by a shot of a champagne cork;
- Matte fabric ceilings are cheaper and more durable than glossy ones. However, due to the peculiarities of the connection of the canvases, the seams remain visible on them;
- If you plan to hide hidden lamps under stretch ceilings, the platforms for them and the electrical wiring must be installed in advance. At the location of the lamp, an intensifying ring is glued to the canvas, after which the fabric or film inside the ring is cut out.

The ceiling under the stretch ceiling should be pre-treated with antiseptic primer. An airtight sheet will restrict the ventilation of the surface of the slabs or monolith, and it is desirable that fungus does not take advantage of this.
How to finish the reinforced concrete floor if stretch ceilings are undesirable for some reason (for example, due to the small height of the room)?
The most obvious way is to level the ceiling with gypsum plaster (Rotband, HP Start, and so on), followed by puttying on the fiberglass mesh.

In this case, do-it-yourself finishing is done like this:
- The ceiling is cleaned of whitewash and old plaster (of course, if any). This work is easiest to do with a hard steel spatula, having previously moistened the surface abundantly with water two or three times with a small interval using a spray gun or a wide brush;
- At the slab floor, the seams are cut (cleaned from the cement mortar of the old seal). Tools - a chisel and a hammer or a small pick;
- The entire surface of the overlap is primed with adhesive primer (concrete contact) with the addition of an antiseptic;
- Beacon profiles are attached to the ceiling according to the level, in one horizontal plane. For their fastening, it is better to use not plaster or putty, but building gypsum - it seizes in 3-7 minutes, and not in 30-40;
- The plaster is thrown or smeared on the ceiling with a medium spatula or a rectangular trowel. After the section between the profiles 1 - 1.5 meters long is filled, the excess is removed with a long rule. As a rule, you will have to go through each section several times, with re-filling the gaps;

The plaster layer should not be thicker than 3 cm. If the differences between the floor slabs exceed this value, it is better to prefer a suspended or stretch ceiling.
- After the plaster has dried, we move on to puttying. Gypsum putty (I personally liked ABS Saten the most) is applied with a narrow (10-12 cm) spatula on a medium one (30-35 cm) and spread on the ceiling with sliding movements as thin as possible.
After puttying a section 1–1.5 meters long, a sheet of reinforcing glass mesh with a cell of about 2 mm is pressed into the putty with the same spatula. The second layer of putty covers the fiberglass, completely hiding its texture;


- The last step is sanding. I use an inexpensive vibrating sander for this purpose with #80 and #120 sanding meshes for the first and second pass, respectively.
It is necessary to grind the ceiling with oblique lighting, emphasizing the slightest irregularities, and with the obligatory use of personal protective equipment - glasses and a respirator or gauze bandage. Gypsum dust strongly irritates the mucous membranes of the eyes and nasopharynx.
- Which ceiling is better to make in a room with high humidity - a bathroom, toilet or combined bathroom?
Here are the types of finishes that are most resistant to moisture:
- Stretch ceilings already mentioned by me;
- Plaster ceilings using cement mixtures. The technology of their application is fundamentally no different from gypsum. If gypsum at high humidity soaks and becomes plastic, then the cement completely retains its mechanical properties;
To level the surface on the plaster, use putty on white cement. It will show through the paint much less.
- Suspended - from wall and ceiling plastic panels.

- How to build a panel ceiling?
For this you will need:
- Ceiling guide profiles UD (27x28 mm) with a total length equal to the perimeter of the room with a small margin for trimming;
- Ceiling profiles CD (60x27 mm) with a length equal to or greater than the length or width of the room (they come in 3 and 4 meters). Their number should allow mounting the crate with a step of no more than 60 centimeters - with a larger crate step, the plastic panels will sag after 1 - 1.5 years;

Hint from Captain Obvious: the batten is mounted perpendicular to the panels. The maximum length of the panels can reach 6 meters, so they are usually oriented parallel to the longer wall of the room.
- Direct suspensions are mounted along each ceiling profile with a step of no more than 80 cm;
- For their fastening and for mounting the guide ceiling profile, a dowel is used - screws 6x60 - 8x80 mm;
- The profiles are connected to each other and to the hangers with self-tapping metal screws 9 mm long. The same self-tapping screws, but already 25 mm long, are hemmed to the panel profiles;
- The suspended ceiling itself is assembled from PVC wall or ceiling panels of the maximum available width with seamless tongue-and-groove locks;
Stop your choice on white glossy panels. They visually almost do not differ from the glossy stretch ceiling; at the same time, they are much stronger and extremely easy to clean: the surface can be wiped with a damp sponge and any non-abrasive detergent.

- For edging the ceiling and in order to hide its connection to the walls, you can use a vinyl, polyurethane or foam baseboard. The latter is the cheapest and most easy to install: it can be glued to walls and ceilings on any universal adhesive, sealant or acrylic putty.
The preparation of the floor surface is reduced only to treatment with antiseptic soil: a suspended ceiling, like a stretch ceiling, will drastically impair its ventilation and can lead to fungal infection.

The construction of the ceiling is carried out in the following order:
- A ceiling guide profile is attached to the wall along the perimeter of the room in a horizontal plane. Mounting step - 50 - 60 cm;
- Perpendicular to the panels on the floor, the position of the ceiling profiles is marked;
- Along each of them, with a step of 80 cm, direct suspensions are attached with dowel-screws;
- Ceiling profiles, cut to size with metal scissors, are inserted into the guides and pressed against the ceiling with the ears of the suspensions bent inward;
- Several threads are stretched between the guide profiles, which will serve as guidelines for mounting the ceiling profiles in the same plane. Each of them is lowered until the thread touches, after which the ears of the suspensions are attracted to it with metal screws. The free part of the ears is bent up;
- Ceiling profiles are screwed to the rails;

- Parallel to one of the walls, the first panel is attached, cut to fit the ceiling.
Hint: PVC is most conveniently cut with a grinder with any abrasive disc. And in this case, eye and respiratory protection is important: fine plastic dust evenly fills the entire volume of the room and settles very slowly.
- The panel is attached to the profile at a minimum distance from the wall with self-tapping screws passing through. On the other side of the panel, self-tapping screws attract the protrusion of its tongue-and-groove lock to the profile;
- The next panel is inserted into the lock first, after which its protrusion is also attracted to the ceiling profile with self-tapping screws - and so on across the entire width of the room;
- The last panel is again fastened with self-tapping screws passing through it at a minimum distance from the wall. The fastener caps will be hidden by the ceiling plinth;
- The plinth is glued last, after the fine finishing of the walls is completed.

Beam ceilings
- What is the rough ceiling made of on the beams?
Here are the main materials for filing a draft ceiling:
- Edged and unedged board. A board shield is usually used for laying insulation on it. The board can both be hemmed to the beams from below, and fit between them, on the cranial bars;

- grooved board;
- Plywood 10 - 18 mm thick (depending on the step between the beams);
- OSB of the same thickness.
- What to make a finishing ceiling?
Here are the finishing materials that can be used for this purpose:
- Gypsum board and gypsum fiber sheet;
It is better to use not GVL, but GKL. Even if the sheet breaks during transportation or installation, it can be used: the fragments of the gypsum core will be held in one plane by a kraft paper shell. It is enough to securely fix the GKL in the area of damage.
- Wooden lining;
- Already familiar to us plastic wall panels;
- Plywood. Yes, yes, it can serve as a decorative finishing coating. Plywood cut into squares is varnished; the gaps between adjacent sheets are covered with strips of lath, painted in a contrasting color.

Ceiling with flooring for insulation on cranial bars.
- How and with what to sew up the flooring along the cranial bars from below?
Drywall can be screwed directly to the boards with self-tapping screws 32 - 45 mm long. Junctions to the beams are puttied; horizontal sections of the ceiling and beams are usually painted in contrasting colors.

With the same success, you can hem the flooring with wall panels. They are attracted to the boards with self-tapping screws through the protrusions of the locks or sit on glue. The starting profile or a plastic corner acts as a edging.
- How to hem a plank shield along the beams from below?
Each board is attached to the beam at the point of their intersection with two nails hammered apart (at an angle with an inclination in different directions). This method of fastening will not allow the weight of the ceiling and insulation to pull out the fasteners.

- How to make a wooden ceiling with your own hands from lining on beams?
The lining is fastened through kleimers - galvanized steel curly plates. It is better to fasten them to the beams with self-tapping screws. Kleimers allow, if necessary, to disassemble the ceiling without damaging the lining.

Galvanized kleimer - a simple device for fastening the tongue-and-groove lock of the lining to the crate.
The ceiling edging is traditionally done with a wooden plinth. The transverse gaps between the boards connected along the length are hidden by thin slats.
- How to fix drywall?
It is attracted to a solid board shield with self-tapping screws in increments of 20-25 centimeters. But when installing on beams or rafters (in the attic or in the attic), under the GKL or GVL, you will have to assemble the crate. I mounted it like this:
- A vapor barrier film was hemmed along the rafters with insulation laid between them (5 cm of mineral wool and 5 cm of foam plastic with a density of C-25). The goal is to prevent wetting of the insulation and rotting of the rafters. A furniture stapler was used for filing the film;

- The UD ceiling guide profile was fixed to the gables. In my case, they are panoramic windows, so the profile had to be attached directly to the plastic frames;
- Along the attic to the rafters, a ceiling profile was hemmed on direct suspensions. At the joints of the inclined and horizontal sections of the ceiling, two profiles were mounted next to each other;
- GKL sheets were fastened across the profiles of the crate. I used 12.5mm wall drywall instead of the thinner ceiling drywall because the bottom of the sloping ceiling sections are only 1.9 meters high and can be mechanically stressed. For fastening, phosphated self-tapping screws 25 mm long with a step of 15–20 cm were used;

- The seams were puttied with ABS gypsum putty and glued with rolled fiberglass, planted on PVA glue, after which they were covered with another layer of putty.
Special mention deserves how the ventilation of the space above the ceiling is arranged. From there, air is taken by an exhaust fan through one of the gables of the attic; at its corners, four supply ventilation grilles are installed in the finished ceiling.
![]()
In the photo - lattices for ventilation of the space between the ceiling and the roof of the attic.
For painting the drywall thread were used:
- In dry rooms - an office and a bedroom - latex water-dispersion paint, resistant to dry abrasion;
- In the bathroom - water-based waterproof rubber paint. It reliably protects the GKL from water splashes and can be washed with any cleaning agents, except for abrasive ones. The texture of the painted surface is semi-gloss, with a slight sheen.

Conclusion
Of course, in a relatively small article, I did not mention all possible solutions. To learn more about how to sheathe the ceiling in a private house, the video in this article will help the dear reader. I look forward to your comments and additions. Good luck, comrades!
October 3, 2016If you want to express gratitude, add a clarification or objection, ask the author something - add a comment or say thanks!
When most of us think about decorating a ceiling in our home, the first thought that often comes to mind is “white and flat”. Decorating the interior of all other parts of the house, while applying all sorts of ideas, innovations, fantasies, we usually forget about the ceilings, leaving them, as the lightest detail, at the very end of the work.
However, the original design of the ceiling, no matter in which room - living room or dining room, kitchen or nursery, bedroom or office - is able to give the room a unique, inimitable, individual character that will make an indelible impression on those who see it.
The design of the ceiling will be different in each house, it will depend on:
- available space;
- the style of finishing the surrounding walls (do-it-yourself wall decoration -);
- general style in the house.
In any case, the number of color options and finishing materials is huge.

How to make the ceiling in a private house unique: designer ideas
Modern ceilings are much more than just a flat white surface. With so many ideas and ways that architects offer to decorate ceilings, playing with form, construction and decoration at the same time, you can certainly choose the right one for your private home.
ceiling lighting
One of the ways to give the ceiling an original look is the installation of LED spotlights, which will become part of the exquisite design of the ceiling and give it a complete look.

With a properly organized lighting technique, the ceiling in the house can be decorated both in an elegant and stylish modern style, and in a classic style, using and combining different types of lamps:
- chandeliers (exquisite and luxurious Mechini chandeliers are described in);
- candelabra;
- spots;
- LED strips.
Depth game
One of the reasons why designers love to play with ceilings so much is that they can change the perception of height and overall dimensions of a room.
For example, giving the ceiling the shape of a vault or arch, you make the interior more spacious and free.
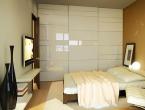
![]()
This form makes the ceiling higher and visually enlarges the room.

A sloping ceiling will make the room more compact and modern. By the way, this is one of the most fashionable trends in the arrangement of ceilings from foreign designers.

Coffered ceilings (their construction is beams criss-crossing so that many rectangular sections are formed on the ceiling, beautifully decorated from the inside) can also create a sense of height and air in the house, while at the same time giving it the charm of "old England" - something that dream of many designers today.


To make the room more spacious and fashionable, you can use drywall and the technique of "inverted or recessed tray" (Tray Ceiling). Such ceiling structures are more suitable for rooms with high ceilings, however, they can also look luxurious in standard rooms.

Plasterboard constructions in the form of an "inverted tray" are still relevant
Combination of different techniques and styles
Combining in a certain order (or, conversely, disorder) spotlights on the ceiling, you can create the effect of sunshine in the room.
Many correctly located spots over the entire surface are capable of:
- harmoniously and unobtrusively illuminate the entire room;
- create a cozy environment conducive to relaxation;
- evoke the feeling of natural sunlight.

A lot of spots scattered over the ceiling and the absence of an overall chandelier creates a feeling of sun glare on the ceiling
In addition to a highly aesthetic spectacle, this solution is also ergonomic, as it saves energy.
Materials for finishing ceilings in a private house
Now, knowing how you can finish the ceiling in your house, let's see how you can do it.
Of the main materials that the masters use to embody design fantasies on the ceilings, these are:

How to make a plasterboard ceiling will tell the video:
Now you have seen what an important role the ceiling plays in the house, so think over its design in advance. With beautiful ceilings, the interior of your home will be perfect!

Individual construction is gaining more and more popularity. Indeed, who does not dream of doing the construction of all the elements in the house with their own hands, the embodiment of their own dreams? The construction process has a lot of subtleties that must be considered. So, for example, the question of choice alone can confuse a novice builder.
The ceiling must be rigid as well as strong, and its design depends on the magnitude of the expected load.
In many ways, the choice of the type of ceiling depends on the type of house, the amount that the owner is willing to pay for materials and work, and the installation technology.
Design requirements
The overlap is a structure designed to separate the height of adjacent rooms. In other words, the ceiling forms the floors and helps to separate the rooms from the basement or attic.

The design of the ceiling must meet certain requirements. So, without fail, it must be durable, because a load in the form of furniture and people will be placed on it. There are certain payload limits: for attic floors, it should not exceed 105 kg / sq.m, interfloor and basement floors must withstand a load of up to 210 kg / sq.m.
Among other things, one of the mandatory qualities of the overlap is rigidity; during the impact of loads, the slightest deflection should not occur.
During installation work on the installation, it is necessary to take care of its sound insulation in accordance with the standards. The level of sound absorption can be increased by sealing all possible gaps at the joints of the material.
Ceilings designed to separate rooms with different temperatures (basement and room, room and attic) need an additional layer of thermal insulation.
Types of ceiling
The overlap, which is designed to separate residential floors, attic, attic, basement and basement floors, is called interfloor. Very often, builders opt for a wooden floor. It is rational to use it for attic spaces due to the small load on the surface.

It is necessary to build a ceiling from a beam only with a span width of not more than 5 m.
Depending on the design solution in terms of the bearing part, the floor can be beamed (consists of beams, which are the bearing part, and a certain filling), beamless (consists of panels or flooring slabs - completely homogeneous elements).
The beam ceiling for a private house consists of several equidistant beams with filling elements laid on them. Beams can be either metal, reinforced concrete or wood.
During the construction of housing with their own hands, they often use a floor made of wooden beams. Most often used for a frame or wooden house. When using a wooden beam, certain restrictions should be considered. So, it is allowed to use a beam if the span does not exceed five meters and six meters in the case of an attic. Metal beams can be used for any span width.
To create a ceiling with your own hands, you can use hardwood and coniferous wood. Often the upper side of the structure is made in the form of flooring, which can serve as a floor.

The ceiling is arranged with the help of beams made of coniferous and hardwood.
Materials needed to create a wooden ceiling:
- wooden beam;
- ruberoid;
- solution;
- insulation.
Wood flooring has a number of advantages. So, installation work is not difficult and does not require the use of special skills or special equipment. Another advantage is the low price and low weight of the structure.
This design also has some disadvantages: an increased level of flammability and the possibility of infection with a bark beetle or wood decay.
If in a private house with a wooden floor the design assumes the presence of a chimney, it is necessary to install the beams in such a way as to avoid crossing with the vertical course of the pipe.
After installing the attic floor, it is necessary to cover the entire structure with a waterproofing layer. Otherwise, the wood will absorb excess moisture and swell. The insulation layer in conditions of high humidity will lose its properties. In the case of the construction of a chimney, it is necessary to once again take care of the fire resistance of materials.
Installation of a wooden structure

To install the ceiling in the house with your own hands, you must first treat the wood with an antiseptic solution. If wooden beams rest with their ends against a wall of concrete or stone, it is advisable to wrap them in several layers of roofing material. Previously, under the beam, it is necessary to prepare a nest in the wall. A mandatory point is the beveled end of the beam. All free space in the nest must be filled with mounting foam.
When creating a ceiling in a private house, it is necessary to create a roll - bars that serve as the basis for the future ceiling. The exact size of the beams with a wooden floor is determined depending on the desired distance between the elements of the beams. Usually, for the construction of ceilings with their own hands, they use bars with a section of 15x15 centimeters. In order to give the structure additional rigidity, a number of additional and main racks are often installed on top of the frame walls of the beams.
One of the important elements of the floor for the house is the construction of an insulating layer. Its main functions are sound and heat insulation. For this role, dry sand, expanded clay, slag, polystyrene, sawdust, mineral wool, in extreme cases, straw or tree foliage are suitable. The best option is mineral wool, which, unlike polystyrene, is able to breathe and has a relatively low weight.
Thermal insulation is laid on top of the fixed reel. First of all, you need to lay out a layer of roofing paper, a vapor barrier film or glassine with your own hands, and only then heat-insulating materials. During construction, it is planned to create an insulating layer with a thickness of at least 100 mm.
In the case when the ceiling slab serves as a partition between rooms with different temperatures, the thickness of this layer should be doubled.
metal cover

Metal floor beams are made from low-alloy or carbon steel.
Metal beams are more durable than wooden beams and have a longer service life. Due to their strength, you can save space by reducing the thickness of the floor itself. It is worth noting that the floor using metal beams is used extremely rarely, more often builders stop at a wooden floor.
The openings between the beams are filled with a mixture of lightweight concrete or wooden shields. By weight, one square m of such an overlap exceeds 400 kg.
With the help of metal beams with your own hands, you can block spans of large sizes, from four meters or more. Metal flooring is a non-combustible material and exhibits a high degree of resistance to various biological factors such as rot or termites.
The disadvantages of this overlap include the tendency to form corrosion in places with a high level of humidity. The overlap of such material has low sound and heat insulation properties. This situation can be corrected if the ends of the beams are wrapped with felt.
In most cases, a rolling profile is used as a bearing element: corners, I-beam, channel. During installation work, reinforced concrete slabs up to nine centimeters thick are laid between the beams. A layer of reinforced concrete screed and slag is applied on top.
For this type of overlap, the following materials will be needed:
- metal beams;
- precast concrete slabs;
- plaster mesh;
- waterproofing materials;
- boardwalk.
In rare cases, reinforced concrete beams are used to cover a private house. Their disadvantage is that the work cannot be done by hand. A mandatory point is the use of lifting equipment.
An overlap is a horizontal load-bearing structure that divides a building vertically. Its upper surface, as a rule, is the floor of the overlying floor, and the lower side is the ceiling of the underlying one. This article selects floors for a one-story house.
Conventionally, overlaps are divided into:
- Attic, separating the attic and floor;
- Attic, separating the attic from the floor;
- Interfloor, separating adjacent floors;
- Basement, separating the first floor from the basement.
Requirements for floor structures
Since these structural elements are one of the most critical components of the entire building, there are a number of requirements for them, the fulfillment of which is mandatory:
- The bearing capacity must meet the operational loads;
- The design must have the necessary rigidity and the least deflection;
- The presence of sound and heat insulation characteristics, in accordance with current building codes;
- The fire resistance of the ceiling must correspond to the class of the building.

Choosing the type of floor for a one-story house
The type of overlap depends on its location in the structural scheme and the type of building. Ceilings for a one-story house with floors on the ground are made only attic. If there is a basement or attic in such a building, interfloor ceilings are made that carry a large load.
Often, in the construction of one-story country houses, a system of wooden beams and decking is used to cover the attic and basement spans. In more permanent structures, as a rule, floors for a one-story house are made of monolithic or precast concrete.

Each type of flooring is suitable for structures of a certain type. Wooden structures are the most inexpensive and least labor-intensive. They can be used for any type of vertical separation exclusively in wooden houses and small cottages.
Monolithic reinforced concrete can be used in almost all buildings, except for wooden ones. Such floors are stronger, fire resistant and durable than wooden structures. But they are also more expensive. For their device, much more labor is required. In one-story houses, this technology is used for the construction of basement and attic floors.

The easiest to perform, but also the most expensive type of flooring is prefabricated reinforced concrete slabs. In addition, they cannot be used in wooden structures and buildings with a load-bearing structure thickness of less than 200 mm. They are used in one-story construction mainly for basement and attic floors.