Connecting wires to each other. How to make reliable electrical connections for home wiring. Screw terminal blocks
Electrical energy has firmly entered our lives. Without it, human existence is unthinkable, electricity will disappear and civilization will collapse. Factories, transport, information networks, in a word, everything is based on it. And one of the most important points in all electrical science is knowing how to connect wires reliably and correctly. To an ignorant person it will seem like - well, what nonsense, twist it somehow and it’s done. But no! So we’ll talk about the correct connection of wires for different cases of installation of electrical networks.
About the main types of wire connections
In this article we will try to consider almost all types of wire connections that are encountered when installing an electric lighting network, when creating power and switching networks. All methods of connecting wires have both their advantages and disadvantages. The most important thing is that there is reliable contact at the joints. If it turns out to be bad, then the joint will heat up and burn off over time, but that’s not so bad. It can even cause a fire! So the correct connection of wires must be taken seriously and responsibly.

So, what are the main ways to connect wires:
- twisting;
- soldering;
- slip-on terminal;
- threaded connection;
- terminal blocks;
- crimping;
- rivets;
- welding
Let's look at each of them separately.
Connecting wires by twisting
Several years ago, connecting wires by twisting was almost the most important type when installing internal networks of buildings, and even now they do not refuse it.
Features of creating this connection:
- A knife and pliers are enough for the job.
- It is strictly forbidden to twist a copper wire with an aluminum one, or to twist one wire around the other.
- When you still need to twist a copper wire with an aluminum one, you need to tin the copper wire with solder. Use TOC as solder, and rosin as flux. No acid-based fluxes!
- When installing internal networks in distribution boxes, it is allowed to connect up to six wires with different cross-sections in one twist.
- When you need to twist a stranded wire, the place where it connects also needs to be tinned.
- It happens that there is a need to extend the wires, then they do this: they strip each one by two or three centimeters and twist it, wrapping it around one another. Each wire must have at least two turns. If possible, you can solder the twist. And in the end, the whole thing is insulated with three layers of electrical tape.
- If you need to twist wires with a cross-section of less than a millimeter (switching wires), then the ends are stripped to two to three centimeters and twisted into five or six turns. After twisting, it is bent in half to reduce dimensions and increase strength.

But at high power, connecting wires by twisting does not support the load. The twist will heat up, because of this the wires will oxidize, and the contact on the twist will disappear.
Connecting wires by soldering
During the soldering process, metals in a solid state are joined by solder, which flows in molten form into the gap between them. Connecting wires by soldering is considered one of the most reliable methods.
Consider soldering single-core copper wires:
- The insulation is removed from the ends of the wire and the surface is cleaned of varnish, if the wire is covered with it.
- Next, a simple twist is made, two wires are twisted around one another or a branch is made.
- Then flux is applied with a soldering iron and the joint is soldered with solder.
- Use rosin or solder oil as a flux, and TOC lead-tin solder or tertiary as a solder.
- If you are soldering stranded wires, then after removing the insulation, you need to fluff them up, insert one into the other and wrap them with thin wire, and then everything is exactly the same.
- After soldering, insulation is applied.

The process for connecting aluminum wires by soldering is as follows:
- Soldering of aluminum wires occurs after the ends of the wires are connected by double twisting. There should be a small gap between the wire strands.
- The wire connection is heated with a blowtorch or gas torch. The heating temperature should be such that the solder begins to melt.
- Solder is heated in a flame and rubbed into the wire joint, filling the gap with solder.
- Use F-64, FIM or FTBf-A as a flux, and TOS or Braze Tec as a solder.
Connecting wires with snap-on terminals
Connections with slip-on terminals are usually made on wires that have a cross-section of less than one millimeter. This is a very common method. Almost all electrical wiring of vehicles is connected in this way. And there are plenty of similar connections in household appliances. Now there are a lot of different plug terminals on sale, such as “U” 3.7 - 4.75, “P” 2.8 - 6.4, “B” 2.8 - 6.4, “O” 3.7 - 5.
It is easy to attach the terminals to the wire:
- You need to strip the end of the wire - five to seven millimeters, put the insulator that comes with the terminal on it, and crimp the wire with special tendrils.
- There are two pairs of antennae on the terminal, the first one crimps the wire core, and the second one crimps the wire with insulation.
- An insulating cap is placed on the crimped terminal to connect the wires. If there is no special crimping, then you can use pliers.
- To be on the safe side, you can solder the wire to the terminal, but this is not necessary.

Slip-on terminals, only large sizes (1.25 - 3А.О, 1.25 - 3YS.U, etc.), are used to connect wires in industrial electrical installations. They are crimped using special crimps. You can’t invent “gags” there, because poor-quality contact can create big troubles.
Wires on threaded connections
Although soldering is a reliable method of connections, it is labor-intensive, so it is better to use threaded connections. Wires in sockets and switches are connected in a similar way. Making a screw connection of wires is simple: you need to remove the insulation from the wire, about a centimeter or one and a half, make a ring if necessary, then tighten the wire to the connection point with a screw with a washer and a screw.
If you need to connect two wires, then perform the following steps:
- First, remove the insulation from the ends of the wire and clean the metal core until it shines (you can scrape it with a knife).
- Then the rings are rolled up. Their diameter should be slightly larger than the diameter of the bolt that connects them.
- We put a washer on the bolt, then two rings and a washer again, then a screwdriver and tighten it with a nut.
- This way you can connect wires of different sections.

And if you want to make a connection between copper and aluminum wires, then insert a steel washer between the rings. Copper and aluminum come into contact and oxidize. And if there is no steel washer, the contact on the twist will disappear.
This method also has a drawback. Bolted connections must be tightened from time to time. Especially if the twist contains a wire with an aluminum core. Aluminum has a certain fluidity, and no matter how reliable the contact is, it will weaken over time, and if it is not tightened, the twist will heat up, the wire will oxidize and the contact will disappear.
Connection with terminal blocks
Connecting terminal blocks are used mainly in electrical installations where it is necessary to connect many wires at once. For example, you can connect aluminum and copper wires without any problems.
They come in different types and sizes, made from different materials:
- The base of the carbolite terminal block is made of an insulating material - carbolite (does not burn, chars at high temperatures), and brass tires are inserted inside. The wires are fixed with steel bolts, and through the transparent cover you can always observe the quality of the connection.
- There are terminal blocks with spring contacts; they are used for small cross-section wires, mainly for switching wire connections. When clamping the wires, the spring plate will prevent the thin wire from breaking. The block body is made of non-flammable polyamide material.
- Terminal blocks for connecting wires, the body of which is made of polyethylene, are convenient for installation; they are easily cut into separate sections. True, they cannot be used where there is even slight heating. Polyethylene begins to melt at low temperatures.

Terminal blocks have two types of fastenings: screw and DIN rail. Connecting wires through the terminal block is very simple:
- The insulation is removed from the ends of the wires - about ten millimeters.
- Unscrew the screws on the terminal block, insert the wires on both sides and tighten the screws back.
- When clamping screws, you must work carefully so as not to crush the wire with the screw and not to break the thread from the screw.
Wire connection by crimping
There are times when it is necessary to connect wires in a permanent way. Then they use pressure testing. The very essence of crimping is that under the action of compression force, simultaneous deformation of the sleeve and the wire that is located in it occurs. There are several types of crimping work - this is either local indentation or complete crimping.

The connection of wires by crimping is carried out as follows:
- When it is necessary to crimp aluminum wires, due to the fact that they are covered with an oxide film, the wires are cleaned to a shine and treated with a special lubricant. You can use quartz-vaseline lubricant. It will prevent the formation of an oxide film, and the conductivity will be better.
- Copper wires are lubricated only with technical petroleum jelly. This is done to ensure that the cores are not damaged during operation. During compression, the lubricant will be squeezed out, and there will be no increase in contact resistance due to the lubricant.
- For crimping, special sleeves are used. The wires are inserted into the sleeve, and the joint should be in the middle. Making two indentations, we crimp the sleeve on both sides.
- It happens that you need to connect the wires only on one side, then they insert the wires into the sleeve and do everything the same way. After crimping, the connection is isolated.
- If you need to connect copper and aluminum wires, use a copper-aluminum sleeve.
For proper crimping, it is best to use hand-operated PMU pliers, and for high-quality connections, use sleeves GA, GM, GAM, GML.
Connecting wires with rivets
Connecting wires with a rivet is very similar to a threaded one. Only if the bolt can be tightened or unscrewed, then in the case of a rivet the connection is disposable. Working with rivet joints is done with a special tool - a riveter. There are different models of riveters: 001, 0050, 0400 reinforced, 004 with a 90-degree rotation, two-handed Master 0710.

A rivet connection is made like this:
- Special blind rivets are used for connection.
- The insulation is removed from the wire, two or three centimeters, and rings are made.
- Then a grommet, a washer and wire rings are put on the rivet, then the washer again.
- The whole thing is inserted into the riveter and the riveting process is performed.
- If you connect aluminum and copper wires, then you need to put a steel washer between them.
- Always leave a supply of wire so that if the connection fails, it can be redone without any problems.
Connecting wires by welding
Every electrician with experience knows that connecting wires by welding has the most reliable contact, or rather not even a contact - a single monolith. Having melted, the wires turn into one whole.

Connecting two wires by welding is not particularly difficult:
- First you need to remove the insulation from the ends of the wire, optimally - about five to seven centimeters. Then we twist the strands into a twist and bite off the end with side cutters.
- Direct welding occurs with carbon electrodes. If you were unable to buy original ones, then they can be easily made from carbon-graphite brushes from a commutator motor.
- Apply the mass to the twist (you can use an alligator clip) and touch the end of the twist with an electrode. The touch will create an electric arc, which will fuse the wires into a single whole.
- If a ball appears at the end of the twist as a result of melting, then the connection is made qualitatively.
- The arc burning time should be no more than two seconds, otherwise the heating temperature will damage the wire insulation.
- When choosing at what currents the welding will take place, take into account the cross-section of the wire and the thickness of the twist. The thicker the twist, the higher the current.
- When welding wires, use a welding machine or inverter. The latter is preferable, since the inverter has a fairly large range of smooth current adjustment.
Connecting wires with bandages
Connecting wires with banding is used both in combination with other types of connections, and independently. The procedure for connecting the wires is simple. The insulation is removed from them and these sections are connected to each other. Next, the connection is tightly wrapped with soft wire made of the same material as the wires being connected.

That's probably all about the basic wire connections. Let everyone choose what they like. Some need to connect faster, others need to connect more reliably. But remember one more thing: before you start working with the wires, make sure that they are disconnected and there is no voltage on them. When working, use proper tools and protective equipment!
Content:
Connecting wires is most likely the most common task in electrical engineering. Since for one reason or another there is a lack of length of conductors in electrical circuits, it is necessary to connect their parts together. Obviously, this creates contact, which is the root of many electrical problems. And it is not the electrical connections at a specific location on the conductors that are implied in this case.
If the contact is made correctly, the electrical circuit will function properly. But, nevertheless, the phrase “electrical engineering is the science of contacts” has long sounded like a byword. Later in the article we will talk about how to correctly connect the wires so that this connection does not create problems for as long as possible. As well as a number of other issues that are essential for twisting wires and covering other types of their connections.
Twisting, which the PUE is silent about
In addition to the frequently mentioned words about contacts, among electrical workers there is another common phrase that the work performed by electricians and miners is often very similar in its lethal consequences. In particular, for this reason there is a PUE - essentially, a set of laws for everything that has to do with electrical networks. Let's take an interest in the Electrical Installation Rules about how the wires should be connected.
On the one hand, everything is clearly stated:
- crimping;
- welding;
- soldering;
- squeezes -
and these are the four officially acceptable ways to connect the ends of conductors. But they all require something additional from tools or equipment, and in some cases quite complex, because:
- for crimping you will need a special tool that matches the conductors being connected;
- welding is impossible without a welding machine;
- for soldering, you must have a soldering iron, as well as the suitability of the material of the connected cores for soldering;
- clamps require the use of a special electrical wire connector designed for this purpose.
However, to ensure the connection of electrical wires, you can simply twist their wires together, thus obtaining electrical contact. And, despite the fact that twisting is not specified in the PUE, the compressible reliable connection of the wires itself, especially if approved in the prescribed manner, fully complies with the letter of the electrical law of the PUE.
In order for the wires to be twisted reliably, the following conditions must be met:
- the length of twisted conductor strands from the edge of the insulation to the ends is 40–50 mm;
- electrical wires, or rather their contacting conductors, are cleaned with fine-grained emery or a file in order to remove oxide films or insulation residues. You can also use a knife. In this case, movements must be made along the vein. After stripping, it is recommended to evaluate the quality of film removal using a magnifying glass. This will create the best electrical connection;
- In order to properly connect wires without soldering, the twisted ends of the wires must be formed using one of the generally accepted methods. They should be pressed against each other as tightly as possible anywhere in the twist.
- The types of twists used are shown below. These images will help our readers understand how to properly twist.

What is wrong with twisted wire connections and why is it not explicitly mentioned in the PUE? After all, other methods of connecting wires are noticeably inferior to it in ease of installation and minimal cost, for which such a connection of two wires with one core, as well as twisting multi-core wires, is ahead of all. Other methods of connecting electrical wires remain far behind it.
- The main disadvantage of twisting is its weakening over time as a result of repeated thermal expansion of the conductors.
Gradually, due to temperature deformations of the cores, the force pressing them together weakens, and the contact resistance increases. For electrical circuit wires containing low-power consumers such as energy-saving and LED lamps, weakening the contact force will not be dangerous. But for twisting wires in a circuit with electric heating devices with a power of several kilowatts, from a certain moment an avalanche-like process of deterioration of contact between the twisted conductors can begin. Moreover, if such a wiring connection is not noticed in a timely manner, in the best case, either copper wires or aluminum wires, the cores of which are twisted, near it will suffer from damage to the insulation due to high temperature.
- For this reason, the use of twisting in areas with increased fire hazard is prohibited. In these rooms it is necessary to use a more reliable connection of wires.
- Twisting of copper wires with aluminum conductors is not permitted. Just as in any other connection, direct contact between the copper and aluminum cores is not allowed in twisting due to the occurrence of electrochemical processes leading to rapid deterioration of the connection and increased fire hazard.
- It is not recommended to reconnect two wires that have been twisted. Only straight strands are twisted after stripping the insulation, and straightening usually breaks even the strands of a stranded conductor.
- Correct twisting can only be achieved for relatively thin conductors. It is not recommended to twist thick single-core wires. To connect wires to each other with a significant thickness of wires, it is better to use crimping them with a sleeve.


Starting from a certain core diameter, it is not possible to twist the wires at all. An example would be a power cable. Therefore, twisting of a cable containing 2, 3 or more cores is done with thin copper wire as a preparation for a “clean” connection. Then each pair of fixed wires is soldered.


Twisting is half the battle
However, the experiment, which was carried out with twisted stranded conductors, showed the high quality of contact of all wire connections immediately after installation was completed. A hundred twists of sections of stranded copper wire with a cross-section typical for ordinary apartment wiring showed very low contact resistance, which is confirmed by the images below.


Consequently, after twisting, you do about half of the installation work of connecting two conductors. It still remains to refine the resulting connection so that it does not deteriorate over time. And to do this, you need to either create a force that compresses the twisted wires from the outside, or use one of the methods of merging the wires. Merging of conductors is, of course, the best way to ensure minimum resistance at the junction of two, three or more conductors.
The connection of wires by merging the cores is done either by melting them or by soldering them. In any of these options, the lowest value of contact resistance is achieved. But these methods also have significant drawbacks. Both during welding and soldering, the conductors are heated to a temperature that is dangerous for the insulation.
- In order not to spoil it, it is better to hold the twist with pliers immediately behind the edge of the insulation to dissipate heat during welding or soldering and for some time after completion.
- Although there is technology for welding and soldering aluminum conductors, it is still better to deal with copper. But before soldering or welding, the copper core is also cleaned of foreign deposits and degreased.
Welding and soldering eliminates the very concept of contact at the end of the twist, making in this place either a body in the form of a drop (when welding), or filling all the cracks with solder. When connecting wires intended for powerful electrical appliances, welding and soldering are the most correct way to connect conductors. However, the experiment, which was carried out on hundreds of twists already shown, did not demonstrate a significant decrease in contact resistance. This is evidenced by the images shown below.


The images provide clear evidence of the same joint properties between conventional and welded stranded wires. But with increasing thickness of the cores, as well as for thick single-core wires, soldering and welding will have an advantage over twisting. If the wires can be connected by twisting, and there is no powerful electrical equipment connected to them, it makes no sense to solder them, much less weld them.
Detachable connections
The experiments discussed above testify in favor of mechanical fixation of twists. For this purpose, along with sleeves, there are special PPE caps. They make it possible to splice wires, compressing the twist and maintaining the compression force. These are two types of compressions mentioned in the PUE. The first is the sleeve, and the second is the cap. It is screwed all the way onto the stripped conductors. The device, as well as possible types of PPE caps, are shown in the images below.

The abbreviation SIZ reads as:
C – connecting;
I – insulating;
Z – clamp.
Number 1 (SIZ-1) indicates a cap with grooves, and 2 (SIZ-2) indicates the same part with protrusions. Numbers separated by a hyphen indicate the range of wire cross-sections connected to the PPE. The cap is very convenient in that with its use, not only good conductivity of the connection is achieved, but also the ability to separate it. If you need to choose how to connect the conductors to each other, PPE is the best option for home and office electrical networks.
A quick and convenient device that complements separable types of conductor connections is a terminal block. However, its convenience is limited by the load current characteristics. In comparison with the PPE cap, which improves contact resistance, the terminal block worsens it. And it’s very noticeable. To obtain relevant data, a third experiment was made, information about which is shown below. The welded twists were cut off. The ends of the wires are inserted into the terminal blocks.


- The contact resistance of the terminal block is an order of magnitude greater than that of the twist.
But it is not only the most acceptable solution for connecting low-current electrical wiring in an apartment and office.
- The terminal block is a connecting element between wires with copper and aluminum conductors.
- It is convenient to use for connecting wires with different cross sections.
- For copper conductors, it is recommended to apply contact paste before inserting them into the terminal block.
- Aluminum conductors must be cleaned of oxide film before inserting into the terminal block.
Three types of these connectors are used:
In order for the wire to be inserted into the terminal block without effort and, if necessary, just as easily removed from it, a design with a lever is used, which creates a force in the connection to fix the core. WAGO terminal blocks and their analogs are made on this principle.
A very common type of compression is the screw connection. The designs of many terminal blocks, connecting blocks and sleeves are based on this connection. The screw connection allows you to obtain the greatest force compressing the connected cores. But in order to ensure that such a connection does not weaken over time due to vibrations and temperature deformations, a force is applied to it using a spring, which creates a holding voltage.


- Screw clamps are the most effective connection of a single-core wire with a stranded wire, wires of different diameters, including aluminum and copper.
- Since screws, nuts and washers are always available to everyone who has connected their profession or hobby with technology and works with their own hands, if necessary, connecting two wires with their help will not be difficult. However, this is done according to the rules that are illustrated in the image below.

- When using screw clamps, it is necessary to remember that the quality of contact is primarily determined by the area of the contacting surfaces. And it decreases as the core diameter increases. In this case, no efforts of screw clamps will help. For large core diameters, contact pastes and gels must be used. But in this case, soldering and welding will still provide more reliable contact than a screw connection.
Correct connection of wires is the key to safe operation of the electrical network. We must not forget how to twist correctly, choose the optimal type of connection, and also perform it correctly.
The answer seems simple, but nevertheless, often when connecting wires, electricians and people who do electrical work themselves violate the basic requirements for electrical contacts. What does this lead to? In the best case, the wires burn at the connection point, in the worst case, it leads to ignition and a large fire. To prevent this from happening, the rest of the article will discuss the main methods of connecting wires when carrying out electrical installation work.
Connection methods: - twisting; - through a terminal; - through a clamp; - bolted connection; - soldering; - through lugs.
Connecting wires using the twisting method. This is the fastest and easiest way to connect one or more wires, so it is used most often than others. If the wires are twisted correctly, then when used on a home network with a light load, they will last a long time without any reminders. Frequent mistakes when connecting wires using the twisting method.
The most common mistake that installers make is twisting wires of different metals (copper and aluminum). With such a connection, a complex process of electrolysis occurs in the twist, which leads to the destruction of the metal itself. It becomes covered with oxides and potholes. All this leads to poor contact at the junction, and subsequently heating.
At the end, fold the excess onto this twist.
The copper is now in direct contact with the aluminum through the tinned wire. And this will prevent electrolysis from occurring on different conductors. Connection through a terminal. The presence of terminals can also facilitate this work and ensure a high-quality connection. There are many types of terminals, but they have the same principle. The photo shows two types of terminals, which can often be seen in different devices.
For example, in fluorescent lamps, at the junction of the power wires. Also, these terminals are freely available for sale and can be supplied in quantities of 10 pieces. and more in length. Having purchased such a block, you can simply cut off the required number of elements with a knife. Connecting conductors of different metals in a terminal is not difficult. First you need to remove the insulation from the end of the wires by 3-4 mm so that the exposed area does not extend far beyond the terminal.
We unscrew the screws until the wire strands pass freely, and after inserting, we clamp them.
Do not apply too much force, otherwise the fragile threads will “break”, which will require replacing the terminal. This connection is quite reliable. With a current of up to 1.5 kW, it can easily cope with its task. It all depends on which terminal to use. Here we consider the weakest one; using a more powerful one, the flow current can be increased.
In addition to the option of connecting wires made of different materials, terminals can be successfully used to increase the length. This can be useful in cases where the wire in the box is so short that it is not long enough to make a twist. This is where the terminal will help. The same applies to a broken wire coming from the ceiling to the lamp.
Then the problem with the connection can be solved with its help. How to do this is clear from the photograph.
After the screws are securely clamped, this entire exposed area must be insulated with adhesive PVC tape. Bolted connection. Bolts, nuts and washers are always at hand. Therefore, in the absence of clamps and terminals, they will also work. By the way, large-sized bolts are used to make fairly high-quality connections for powerful large-section cables, and this method is still successfully used in industrial enterprises. So, you will need: - a bolt of the required length; - a nut; - three wide washers.
You need to bend according to the movement of the thread. That is, so that when the nut is tightened, the loop does not open to the sides. The washer between the two conductors will prevent them from touching and will prevent the effect of electrolysis, which destroys metals.
Soldering. A soldered connection is considered to be of the highest quality, since the resistance in this place becomes minimal. Some people solder the twists in the boxes themselves, thus improving the connection. But it can be done with copper. And aluminum doesn't solder very well. Yes, you can use various acids and additives, but they, as a rule, destroy the compound themselves over time.
Tips. If you find such tips, it will be very good. This is one of the most reliable types of connection. We insert the wires into the lugs and clamp them with pliers, and then press them with a hammer and a clamp.
The lugs must be tinned, or you need to wrap the aluminum conductor with tinned wire before inserting it into the hole in the lug. Afterwards, the terminals should be compressed with a bolt and nut, and everything should be insulated with tape. Conclusion: Of course, now there are more advanced methods and devices for connecting wires, but they need to be purchased and mastered, which takes extra money and time. The good old methods described above will be used for a long time, and will also serve faithfully for a long time. So why pay more?!
Quite often it is necessary to connect wires of different cross-sections; this can be seen in the distribution boards of residential buildings, when branches go from the supply core to each of the apartments.
The difference in cross-sections, and sometimes significant, primarily implies a very tight connection in order to avoid heating in this place.
The most commonly used connection method in this case is twisting. Despite the seeming backwardness of this method, many experts can confirm that if the twisting is done well, it can withstand a much greater load and temperature than a clamp.
It is advisable to do twisting in the case when it is necessary to make a branch from the main line that does not have a break. In this case, in a selected area, the insulation layer is simply removed, and the end of the connected wire is wound around the core of the line.
When a wire break does occur, mechanical clamps, or terminal blocks, or any other device that is structurally designed to connect such cross-sectional sizes can be used.
If, for example, you need to connect wires of different cross-sections (they are also suitable for the same cross-section) and the same material (copper or aluminum), then in this case the special connecting blocks presented below are well suited.
They have different numbers of inputs: in the figure, respectively: 2, 4, 6.
That is, this is a “sort of” twist for 2, 3, 4, 5 or 6 wires.
You need to understand that after connecting the wires in this way, they can no longer be removed from the block. Therefore, if you have never tried to work with such devices, buy a few of them in a store with a supply and practice at home. They cost pennies.
For a chandelier, the option of using wago type terminals, especially if the wires coming from the ceiling are short, will not be very good, since, as already mentioned, in this case the wires cannot be removed (for example, you will need to change the chandelier or wash it) and you will have to cut them off. In the case of terminals with a screw connection, it will be enough to simply unscrew the fastening screws and release the wires.
Connecting wires of different sections requires care. However, by twisting or soldering, you can only connect cores of adjacent sections, for example, 4 sq. mm and 5 sq. mm.
- Conductors of different sizes are connected using screw-type terminals (SCI). This device allows you to insert a core of one cross-section into one entrance, and a different cross-section into the other. A reliable clamp will ensure perfect electrical contact. Each wire is clamped with a separate screw.
- Universal self-clamps Wago. This tool has been used for quite some time. It is easy to use. They are intended not only for connecting conductors with different cross-sections, but also create good contact between conductors made of different raw materials.
- A bolted connection can be made from an unlimited number of conductors. They use both different sections and different materials. Installation of washers in such a connection is mandatory. In addition, it is important to tighten the bolts tightly so that they do not quickly become loose.
- It is common to use tinned copper tips in combination with a bolted connection. Tips alone are not enough; you also need to purchase a hydraulic press or special pliers. To achieve a tight connection, the insulation must be removed in accordance with the PUE. Similar to the previous method, flat metal washers are used.
All types of wire connections described above are used when laying electrical wiring, but the specific type is selected based on several characteristics:
- type and material of the core (copper/aluminum and single-core/stranded);
- number of connected wires;
- operating conditions (indoors, outdoors).
Removing the insulating layer from the wires
I would like to immediately dwell on a question that will be common to any method. Before connecting the wires into a common electrical unit, they must be stripped of the top insulating layer.
This can be done using a mechanic's knife. This method is simple, but there is a high probability of damage to the conductor. To do everything correctly, you must strictly follow the step-by-step instructions:
- Place the wire on some flat surface (such as a table).
- Press it with your left index finger.
- With your right hand, take the knife and lightly press it into the insulating sheath of the wire. To avoid snagging the metal core, position it towards the cut at an angle. If the angle is right, there is a possibility of a circular cut in the core, as a result of which it may subsequently break.
- Hold the knife in this position. Using the index finger of your left hand, slowly twist the conductor one full turn, thus cutting the insulation around the entire circle.
- All that remains is to pull off the cut piece of insulation.

Professional electricians now necessarily have in their arsenal such a device as a stripper. This is a multifunctional tool that can be used to strip insulation from a wire or cut a cable. It can be simple, semi-automatic or automatic. The most important thing is that when stripping the insulation with a stripper, the conductor is not damaged. For each standard core diameter, such a tool has a calibrated hole with a cutting edge.
The length to which wire cores need to be stripped is different for each connection method.
Twist
Let's start with the simplest and most well-known method - twisting. It can also be called the oldest; it’s not for nothing that electricians call twisting the “old-fashioned method.”
First, let's define what a distribution box is? This is a hollow device made of polymer, round, rectangular and square in shape with a lid and special cable entries. Used to connect conductors together.
Today, a variety of conductor connections are made. This diversity depends on various factors:
- wire section;
- core material (CU, AL);
- number of conductors;
- operating conditions (temperature, climate).
Knowing all these factors, connections are selected in such a way as to comply with certain electrical and fire safety requirements. In addition, you need to consider in which places such boxes with conductor connections will be used:
- dry rooms;
- wet areas;
- especially raw.
To determine which connection method to choose under certain conditions, you need to refer to the PUE (Electrical Installation Rules). According to paragraph 2.1.21, from PUE -7 of the main document on electrical installation, all end connections of wires and cables must be carried out by means of:
- crimping with sleeves;
- clamps (using a bolt, screw);
- welding;
- adhesions.
Connecting wires using crimping sleeves
Connecting wires using a sleeve followed by crimping is the most reliable method and has good electrical contact.
How to connect wires:
- strip the insulation from electrical wires of a certain length;

- take a sleeve of the appropriate length and diameter;
- insert bare wires into the sleeve;
- crimp (press) the sleeve in two or three places with a special power tool (press pliers);

- Apply insulating material (heat-shrink tubing) to the sleeve.
If you don't have heat shrink tubing, you can use insulating tape.
You must take into account that the sleeves are selected in such a way that the diameter of the twisted wires matches the inner diameter of the sleeve. You should not use a sleeve that is not the right size.
How to connect wires using clamps - nut or bolt type
The most common way to connect wires is with a Walnut clamp. This clamp received this name because of its external resemblance to a nut. They are produced in different sizes for connecting both thin and thick wires.
The inside of the “Nut” consists of two main and one intermediate metal plates. There are 4 screws along the edges of the plates. The plates themselves are placed in an insulated carbolite housing, consisting of two parts.
The design feature of Oreshok is that aluminum and copper wires can be connected into one circuit using an intermediate plate.
A bolted connection is also used to connect wires. For a certain cross-section of wires, the size of the bolt is selected. For example, for a wire cross-section of 1.5 - 4 mm², a bolt with a diameter of 6 mm is suitable, for a cross-section of 6 - 10 mm², a bolt diameter of 8 mm, 16 - 35 mm², a diameter of 10 mm.

To connect aluminum to copper using a bolt, a washer is also used - a gasket.
After carefully compressing the wires using a nut, this connection is isolated.
Advantages:
- low cost;
- good insulation for "Nut"
- It is possible to connect aluminum conductors with copper conductors.
Flaws:
- loosening of the threaded connection in the “Oreshok”;
- plenty of insulation for bolted connections;
- The connection dimensions are suitable for large junction boxes.
One of the best ways to connect wires in a box is welding. How is this all done?
To begin with, the insulation is removed from the ends of the wires. Then the wires are twisted together. The ends are ready for welding.

Welding of wires is carried out with a special welding machine with a voltage of 12 - 36 V. The welding current is regulated depending on the cross-section and number of wires, from 70 to 120 A and the power of the device is sufficiently 500 - 600 W. The work can also be carried out using an inverter welding machine.
For welding I use special graphite electrodes for aluminum and graphite-copper electrodes for copper. The work is carried out in special glasses to protect the eyes from the electric arc.

One cable of the welding machine with a clamp or pliers is connected to the twist, and the second to the electrode holder (holders). The electrode is brought to the tip of the twist and when touched, contact occurs and an arc appears, with the help of which copper or aluminum wires are melted so that a droplet appears. This is enough to make the most reliable contact.
The only drawback of this connection is that when disconnecting the wires, if necessary, you will have to bite off the tip of the twist (welding site).
Soldering wires with solder
An equally wonderful option for connecting wires and ensuring good contact is using ordinary soldering. To use this method, you will need a little soldering skill using an electric soldering iron.
It is best to take a soldering iron with a power of 80 W or 100 W - this is what you need. With this soldering iron you can quickly heat the place (twist) where you will apply the molten solder.

For soldering, POS-30, POS-40 solder is best suited. For such solder you will need rosin or SKF flux (alcohol-rosin flux), which is applied to the soldering area before heating.
In addition to the material listed above, specialists use a so-called solder tube for soldering, which contains rosin inside. This tube is sold in almost every electrical goods store.
And so, to solder wires you will need inexpensive material and an electric soldering iron. This connection by soldering is a more affordable and simpler method.
Connecting wires with terminals
One way or another, connecting wires using twists will eventually disappear into summer. And their place will be taken by those materials and devices that will meet the requirements of modernity and a more professional approach.
Today, terminals are increasingly being used to connect wires. One of the nice features of the terminals is the quick connection of wires of different metals, which avoids direct contact between metals.
Existing terminal requirements:
- information about permissible voltage;
- information about the cross-section of the core;
- increased heat resistance;
- reliable fixation of the wire core;
- corrosion resistance.
The terminals are: knife, spring and screw.
Mainly used for grounding or grounding. They are convenient because you don’t need a power tool, you can quickly connect and disconnect the contact, which saves time.
Gained great popularity. Such terminals include products from WAGO. Using WAGO terminals you will receive: simple and quick installation, reliable connection of conductors.

(terminal blocks) are housing cells, each of which contains a metal tube with screws.
Installation work with this type of terminal is not difficult; you just need a screwdriver to tighten or unscrew the screw that presses the exposed wire core inside the tube.
What to do if there is such a need to connect wires on the street, in the open air?
Street connections are made in different ways: using a “nut”, bolted connection, twisting. For some time, such connections perform well, but then oxidation of the wire cores, weakening of the bolted connection, and rust occur. The problem begins.

You need to understand that such a connection will be negatively affected by precipitation, summer heat, and frost. To minimize this impact and make a good connection, you first need to prepare a set of materials:
- IP65 junction box;
- sleeves for crimping;
- conductive paste;
- Heat-shrinkable adhesive tube.
Lead the cable or wire into the junction box. Place the sleeves on the bare wires using conductive paste and crimp them.
If you have one aluminum wire and the other copper, then use copper-aluminum sleeves.

By exposing the tubes to high temperature, we casing the sleeves. To apply high temperature to the tubes, use a gas burner, a blowtorch or a professional electric hair dryer.
After the thermopipes have cooled, carefully place the finished connections in the box and close the box tightly with the lid.
This connection will provide you with high reliability for many, many years.
Conclusion
In this article you looked at all types of correct connection of wires that do not exist today. Choose the type of connection that is suitable for your operating conditions.
You may not be able to perform some types of installation work due to lack of skills, tools, or you doubt the correctness of your actions. Then resort to hiring a specialist who, due to his experience, will do everything right.
Don’t forget that proper installation of electrical wiring is the key to your electrical and fire safety.
In a field such as electricity, all work must be carried out strictly, accurately and without a single mistake. Some people want to figure out such work on their own, not trusting third parties to carry out a responsible mission. Today we will talk about how to properly connect wires in a junction box. The work must be done efficiently, because not only the performance of electrical appliances in the house, but also the fire safety of the premises depends on it.
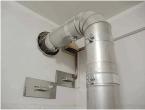
About the distribution box
In an apartment or house, wires from the electrical panel are routed to different rooms. There are usually several connection points: switch, sockets, and so on. In order for all the wires to be collected in one place, distribution boxes were created. They carry wiring from sockets, switches and are connected in a hollow housing.
So that during repairs you do not have to look for where the wires are hidden in the walls, electrical wiring is laid on the basis of special rules prescribed in the PUE (Electrical Installation Rules).
Distribution boxes are classified according to the type of fastening. So, there are boxes for external installation and internal installation. For the second option, you need to prepare a hole in the wall into which the box will be inserted. As a result, the box lid is located flush with the wall. Often the cover is hidden with wallpaper or plastic during repairs. As a last resort, an outer box is used, which is attached directly to the wall.
There are round or rectangular junction boxes. In any case, there will be at least 4 exits. Each outlet has a fitting or thread to which a corrugated tube is attached. This is done to quickly replace the wire. The old wire is pulled out and new wiring is laid. It is not recommended to lay the cable in a groove on the wall. If the electrical wiring burns out, you will have to dig into the wall and disturb the finish in order to carry out repair work.
What are distribution boxes for?
There are many factors that speak in favor of the existence of junction boxes:
- The power system can be repaired in a matter of hours. All connections are accessible, you can easily find the area where the wires have burned out. If the cable was laid in special channels (corrugated tube, for example), then the failed cable can be replaced in an hour;
- Connections can be inspected at any time. As a rule, wiring problems occur at the connection points. If the socket or switch does not work, but there is voltage in the network, first check the quality of the connection in the junction box;
- the highest level of fire safety is created. It is believed that dangerous places are connections. Using a box will keep them in one place.
- minimal time and financial costs when repairing wiring. There is no need to look for broken wires in the walls.
Connecting the wires in the box
There are several ways in which conductor connections can be made in junction boxes. Note that there are simple and complex methods, however, if executed correctly, all options will ensure the reliability of the electrical wiring.
Method number 1. Twisting method
It is believed that the twisting method is used by amateurs. At the same time, this is one of the most reliable and proven options. PUE do not recommend using twisting, since the contact between the wires is unreliable. As a result, the conductors may overheat, putting the room at risk of fire. However, twisting can be used as a temporary measure, for example, when testing an assembled circuit.
Read also:

Experts say that even with a temporary connection of wires, all work must be performed according to the rules. It is worth noting that regardless of the number of cores in the conductor, the twisting methods are approximately the same. However, there are some differences. If multi-core wires are connected, then you should adhere to the following rules:
— it is necessary to clean the conductor insulation by 4 cm;
— untwist each conductor by 2 centimeters (along the veins);
— a connection is made to the junction of untwisted cores;
— you only need to twist the wires with your fingers;
— ultimately, the twist is tightened using pliers and pliers;
- exposed electrical wires are covered with insulating tape or heat shrink tubing.
It is much easier to use twisting when connecting solid wires. After the conductors have been stripped of insulation, they must be twisted by hand along their entire length. Then, using pliers (2 pieces), the conductors are clamped: with the first pliers at the end of the insulation, and with the second at the end of the connection. We increase the number of turns on the connection with the second pliers. The connected conductors are insulated.
Method number 2. Mounting caps - PPE
Very often, special caps are used for twisting conductors. As a result, it is possible to obtain a reliable connection with good contact. The outer shell of the cap is plastic (the material is not flammable), and inside there is a metal part with a cone-shaped thread. The insert increases the contact surface, improving the electrical parameters of twisting. Most often, thick conductors are connected using caps (no soldering required).

It is necessary to remove the insulation from the wire by 2 centimeters, slightly twist the wires. When the cap is put on, it must be turned with force. At this point the connection can be considered ready.
Before making the connection, you need to count the number of wires. Based on the data obtained (cross-section), a specific type of cap is selected. The advantages of twisting using plastic caps are that you do not need to spend a lot of time, as with conventional twisting. In addition, the connection is compact.
Method No. 3. Connecting conductors by soldering
If you have a soldering iron on your household and you know how to work with it, then the wires can be connected by soldering. Before connecting the wires, they need to be tinned. Soldering flux or rosin is applied to the conductor. Next, the heated tip of the soldering iron is immersed in rosin and passed along the wire several times. A reddish coating should appear.

After the rosin dries, the wires are twisted. Using a soldering iron, tin is taken and the twist is heated until tin flows between the turns. The end result is a high-quality connection with excellent contact. However, electricians are not very fond of using this connection method. The fact is that it takes a lot of time to prepare. However, if you are doing the work for yourself, you should not spare any effort or time.
Method number 4. Welding cores
Using an inverter welding machine, you can connect wires. Welding is used over twisting. You need to set the welding current parameters on the inverter. There are certain standards for different connections:
- conductor with a cross section of 1.5 sq. mm - 30 A;
- conductor with a cross section of 2.5 sq. mm - 50A.

If the conductor is copper, then a graphite electrode is used for welding. The grounding from the welding machine is connected to the upper part of the resulting twist. An electrode is brought from below the twist and an arc is ignited. The electrode is applied to the twist for a couple of seconds. After some time, the connection will cool down, then it can be insulated.
Read also: Hidden electrical wiring in a wooden house
Method No. 5. Terminal blocks
Another option for connecting conductors in a box is using terminal blocks. There are several types of pads: screw, with clamps, but the principle of the device is identical. The most common is a block with a copper plate for attaching wires. By inserting several wires into a special connector, they can be reliably connected. Installation using a clamp terminal makes the connection very simple.

In screw terminals, the terminal blocks are placed in a plastic housing. There are open and closed types of pads. Closed pads are a new generation invention. To make a connection, wires are inserted into the socket and clamped with a screw (using a screwdriver).
However, terminal connections have a disadvantage. It lies in the fact that it is inconvenient to connect several conductors together. The contacts are arranged in pairs. And if you need to connect more than three wires, then several branches are squeezed into one socket, which is very difficult. At the same time, such connections make it possible to operate branches with high current consumption.
Another type of terminals is Wago terminals. Today two types of terminals are in demand:
— terminals with a flat-spring mechanism. Sometimes they are called disposable, since it is impossible to reuse the terminals - the quality of the connection deteriorates. Inside the terminal there is a plate with spring petals. As soon as the conductor is inserted (it should only be single-core), the petal is pressed out and the wire is clamped. The conductor cuts into the metal. If you pull out the conductor by force, then the petal will not take its previous shape.

Some terminal connections contain wiring paste inside. This connection is used if you need to connect copper and aluminum wires. The paste protects metals from oxidation, protecting conductors;
- universal terminals with a lever mechanism - this is the best type of connector. The wire, stripped of insulation, is inserted into the terminal and a small lever is clamped. At this point the connection is considered complete. And if you need to reconnect, add contacts, lift the lever and pull out the wire. The pads can be operated at low current (up to 24 A - with a cross-section of 1.5 sq. mm) and at high current (32 A - with a conductor cross-section of 2.5 sq. mm). If wires are connected through which a current higher than that specified will flow, then a different type of connection must be used.
Method number 6. Crimping

The wires in the box can only be connected by crimping using special pliers and a metal sleeve. A sleeve is put on the twist, after which it is clamped with pliers. This method is suitable for connecting conductors with a large load.
Method No. 7. Bolted connection
Connecting multiple wires using bolts is a simple and effective connection method. To complete the work, you need to take a bolt and several washers with a nut.

It is not enough to know how to connect the wires in a junction box. You need to know which conductors are connected to each other. So, a washer is put on the bolt thread. The core is screwed on, the second washer is put on, and then the next core is put on. At the end, put on the third washer and press the connection with a nut. The node is closed with insulation.
There are several advantages of bolted connection of conductors:
- ease of work;
- low cost;
- the ability to connect conductors made of different metals (for example, aluminum and copper).
However, there are also disadvantages:
— fixation of wires is not of high quality;
- to hide the bolt you need to use a lot of insulation;