How to make a swimming pool at your dacha. Swimming pool on a country site. How to build a pond at your dacha with your own hands. Instructions and photos How to make a pool with your own hands at the dacha
Rest and recreation are now only a dream for many people, because not everyone can afford a train to the sea. The reason for this is simple - there is little money. This is not happy, but the situation can be corrected if you are the happy owner of a house. If the sea is unattainable, then you can make an indoor pool at your dacha, which will also please you and your family.
You just need to make a little effort, and your summer cottage will become a wonderful home resort. Just a few years ago it was almost impossible to create an artificial pond on the site.
Today, everyone can afford this luxury item. Yes, yes, and all because swimming bowls in their variety of types and prices have expanded so much that choosing a pool that suits your means will not be difficult.
 Build a swimming pool on the site– a great way to relax in the summer heat. If it is of decent size, then you can not only splash, but do swims in the mornings and evenings. And how much joy the children will get! Excellent well-being is guaranteed to you.
And the dachas of the 21st century are no longer so similar to those they used to be. Now I’m going out of town not to starve myself of planting cucumbers and tomatoes, as well as many other household chores. works. Exhausted by the pace of city life, residents of large cities turn their plots of land into recreational areas designed “to suit themselves,” and in this case a swimming pool will be an excellent addition.
Artificial pond in the country- this is not only a new comfort zone, but also a place for a special microclimate and even a reservoir of water for emergencies when there is nothing to water the flower beds with. In general, the benefits of a pool are obvious if you install the container correctly and operate it strictly according to the instructions.
Which pool should you choose?
On the modern market you will find three popular categories of pools:
- Collapsible.
- Stationary.
- Inflatable.
They all differ in shape, design and size. These are the main parameters that will influence your choice. You will choose what to choose based on the size of the plot, conditions and preferences. But it should be said that each of the options is good in its own way.
Stationary
The name speaks for itself. Such containers are installed turnkey. Such pools are either medium or large. According to the type of installation they are divided into:
- Frameless
Frameless structures built into the ground
To operate such a model, it will have to be equipped with some systems, at a minimum, this is a water supply, drainage and cleaning system. If you don’t take care of this in advance, within a couple of weeks you will be swimming not in clean water, but in dirty slurry. You can refuse the purification system, but think for yourself - where will you drain 14 tons of water, and how much will it cost you to fill the pool every 2 weeks with clean water? These costs will be more expensive than it would cost you to purchase and install the purifier once.
It looks great, and if you are mentally prepared to endure all the difficulties with installation and arrangement, then you should not refuse this option. If not, give preference to a frame container, since installation problems (and costs) will be much less.
But many summer residents are seriously concerned that they will have to spend a lot of time on cleaning, so they decided to make an indoor pool in their country house with their own hands. This is the right decision, since the pool will only need to be cleaned once every six months.
When choosing the type of container for your dacha, do not forget about the climatic features of the region. Most containers, even without water, simply will not withstand local frosts, so you will have to invest in frost-resistant models.
Collapsible
 Such pools are classified as small and medium in size. The thing is that it is almost impossible to assemble it yourself, and the procedure is quite expensive. But the advantage of the model is that it is ideal for unguarded areas. It can be assembled, filled with water upon arrival, and dismantled in the fall and sent to the barn.
This type of pool also needs filtration, but there is no need to install complex systems. For small volumes, you can limit yourself to disinfection with reagents that are harmless and of high quality.
Inflatable
Naturally, such pools cannot be large, which is great. Due to its size, the pool is suitable for those owners whose plots are not so large, and the advantage is that storing such models is not problematic - you can even fold them into a sofa. You can also take the pool with you on a picnic. For large models, a metal frame is provided - it is assembled from hollow tubes (made of aluminum).
What are indoor pools for cottages made of?
When choosing a pool, you should remember that they can be made of any materials. This is especially true for stationary models. Manufacturers have fallen in love with materials such as plastic and other composite materials.
Products made from polypropylene have good characteristics and can withstand temperature changes well. They can be used all year round.
Plastic containers are more fragile and may burst when the temperature drops. It is not used to create large tanks, but is not uncommon for medium-sized tanks. It is also used for folding structures and decorative colored pools.
More practical models are made from composite. The material can transform, but the body does not break through. The walls cannot be scratched or broken. Such a pool will be durable, which is why it is used to create an indoor pool.
But all types have one drawback– they have a standard appearance, so if you want a unique pool, you will need to build it yourself. Yes, it’s expensive, but it’s the way your heart desires.
Separation by filling type
According to the filling methods, pools can be:
- Overflow.
- Skimmer.
In the first models, a grate is made in the tank, through which overflowing water enters the storage tank. This system visually increases the size of the container and allows you to always maintain a certain water level.
In skimmer models everything is somewhat different. They cannot be filled to the brim of at least 15 cm, since there are no storage tanks. The water that enters the tank is purified through a skimmer. This is an inexpensive option, which is why it is very popular in the private sector.
Finishing materials
An indoor swimming pool at your dacha can be decorated with the following materials:
- Polypropylene.
- Mosaic.
- Tile.
- PVC film.
The film is sold in rolls and can be of any color. The most popular are blue, white, light blue shades. The role of such finishing has a dual meaning: waterproofing and aesthetics.
Polypropylene is a polymer that has high strength, is easy to weld and is resistant to aggressive climate conditions. Usually they buy blue polypropylene.
But mosaics and tiles are chosen with a low level of water absorption. Ceramics are used to decorate a public pool, and mosaics will fit perfectly into a summer cottage. A pool with this finish will appear visually deeper.
Location
It’s not enough to choose a pool, you need to think about how you will care for it, so we suggest planning everything in advance.
Important: If you have clay soil on your site, then this is an ideal option for installation.
When planning container placement, consider the following points:
- If your soil is clay, you don’t even have to choose a location for installation. If the waterproofing fails, it will stop water leakage.
- The area where you plan to place the pool should have a natural slope. In this case, it will be easier for you to dig a pit and choose a place to install the drainage system.
- You should not place an indoor pool in your dacha where there is shade from tall trees. Plants sense moisture and can easily damage the waterproofing. The most aggressive trees are willow, chestnut and poplar.
- If the pool is located near a water supply, this will make it easier to fill the container with water.
Dimensions
The ratio of length and width is correlated with the general purpose. If you want to do swims, give preference to a rectangular shape. For a simple “splash”, it is better to make a round shape. Depth will also be important. If you are a fan of jumping from the side, then the bottom should be at least 1.5 m deep. To place a tower or springboard, you will need a greater depth - at least 2.5 m. But you can make the bowl deeper in the place for jumping, and then bring it to standard depth.
The biggest difficulty in creating an indoor pool with your own hands will be the combined type, which is suitable for both children and parents. The zones will have to be separated by partitions that will go from the very bottom. This way, children will be protected from falling into deep water.
Attention! In this type of pool, you should make a flat bottom that will smoothly descend. Sharp jumps are unacceptable for safety reasons, because walking along the bottom you can inadvertently miss the line and choke. Don't ignore this advice.
Design of an indoor pool at the dacha
 When you come to decorating, do not forget that you have a pool, not a pond, and you should decorate it accordingly. This is done using paving slabs or wood decking. The pool bowl can be hidden behind a stepped deck. If you are planning a large stationary pool, entrust this matter to professionals.
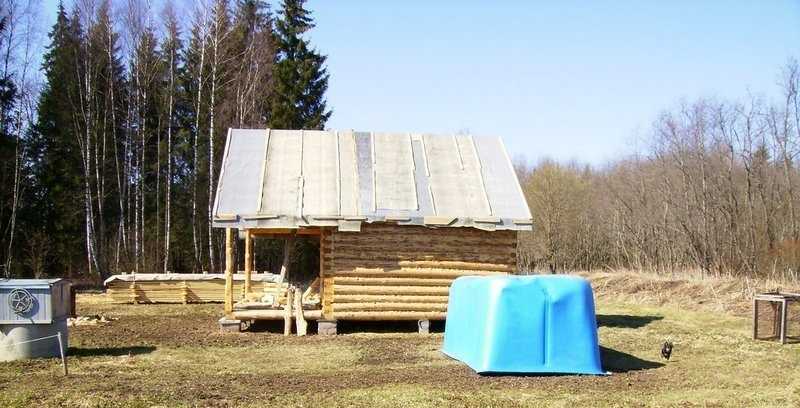
A distinctive feature of a pond will be the presence of a cleaning system, drainage, for example, heating/counterflow. To do this, you will need a utility room, which can be made in the form of a beautiful house. The design of the pool room or roof does not require any frills.
Plants as decoration
If the indoor pool at your dacha will be located outside, decide what you want to see around it. When drawing up a plan and choosing an idea for plants, do not break the main rule:
“There is no need to plant plants near the pool or on its shore. The water with the chlorine it contains will kill them, and you can forget about comfortable swimming among beautiful plants.”
To do everything at its best, the plants will need to be planted in tubs or containers. In this case, there will be no interaction with the treated water. Regarding the plants themselves, choose those that can withstand all weather conditions. These include juniper, Chinese rose, oleander, agapanthus, yucca gloriousa, and southern cordyline.
Add-ons
Making an indoor pool at your dacha with your own hands is not that difficult, but decorating it and making it a full-fledged recreation area is not easy. Pool lighting will help you with this. This way, you can enjoy swimming in the evenings. A fireplace or fire pit will also look impressive. Such elements will relax and add coziness.
Long gone are the days when a swimming pool on a plot of land was considered a sign of luxury and prosperity. In the modern world, any family can afford such a water feature, regardless of financial resources and the size of the dacha. Older generations visited country estates with the aim of growing healthy vegetables and fruits; now these goals are fading into the background.
Dachas become a place of relaxation and pleasant time with family and friends. Accordingly, there is a desire to improve and decorate your site, to equip it with all possible benefits for a cozy and comfortable stay.


What is it needed for?
A swimming pool can be not only a delight for eyes strained by city landscapes, but also an excellent way to relieve fatigue and improve the health of the body as a whole. Water helps to calm down and relieve nervous tension, resulting in better sleep. After a swim in the mini-pool, a healthy appetite appears; the workouts involve almost all muscle groups, while minimizing the load on the musculoskeletal system.
In addition, an artificial pond is a good supply of water for watering the garden, of course, if chemicals are not used to clean it.
There will be more advantages than disadvantages from building a pool on the site, and some negative aspects, for example, material costs, can be reduced by building the structure on your own.

Selecting a location
In order for the pool to not only please the eye and relieve fatigue, but also require less maintenance, you should seriously consider the issue of choosing a place under the pond. First you need to decide which pool is suitable for your site. If you can be content with temporary structures, for example, an inflatable analogue or a frame one, choose a sunny place close to the water supply so as not to have to pull the hose to fill it.
If the size of the dacha allows, you can build a permanent pool. Of course, construction will take more time, but the satisfaction from the work done will be many times greater. In addition, inflatable and frame analogues have a significant drawback - even with the most careful handling, the former tend to tear, and the latter tend to decay.


So if your choice is a permanent pool, pay attention to its location. Choose a site away from both tall and short trees, because the roots of large plants are attracted to moisture and can damage the foundation of your structure. Not to mention that their crowns shade the place and interfere with the heating of the water. And small branches and leaves constantly fall from low ones, so cleaning will have to be done frequently.
For owners of clay plots, nature itself hints at building a swimming pool: clay does not allow water to pass through, which is very important in case of accidental damage to the base. The slope of the ground and the wind will help determine the location of the drain. It is better to arrange a pond along a constant wind direction, this will make it easier to keep it clean.

Materials
Human imagination knows no bounds. Country pools are made from all kinds of materials: from old tires to custom-made bowls. Some examples can be given.
Craftsmen use tires from large household and construction equipment. The tire should be washed and painted to your taste; the bottom should be made, for example, from an old rubber pool or poster. The base for a frame homemade pool is constructed from wooden pallets. The mesh is used as a material for the pit, and stones are laid on top of it. This option is suitable for a decorative pond as a decoration for the site.
Somebody even uses plastic bottles for construction, using them instead of bricks. Of course, you will need a lot of this material for a good pool. So this method will be used by those who have accumulated a lot of plastic. Or you can buy bottles in bulk.


Ponds for swimming are also built from concrete rings. The disadvantages of this construction are that the rings are heavy, meaning additional costs will be required for their delivery and installation. But such pools are distinguished by their strength and long service life.
Those who have chosen to build a stationary pool need to decide what raw materials to use for lining the inner bowl. It can be tiles or mosaics, polypropylene, PVC film or fiberglass.
It is important to mention that stationary pools can be divided according to the method of their installation into partially and completely in-ground. Making a pool using available materials is not at all difficult. It can also be built from building blocks. If, of course, you have the necessary skills in construction.


Preparatory work
The first thing to do when a place for a pool is chosen is to clean the area. It is necessary to remove debris and foreign structures that may interfere with construction. After this, all vegetation is removed from the site, any holes or depressions are removed and any unevenness is filled with earth or sand and compacted. Thus, the construction site is leveled.
Be sure to decide on the shape and size of the pool. Do you need space for swimming or will it be a family-friendly place with a splash pad for the kids? Depending on the purpose of the reservoir, determine its depth. Safe space for younger family members is limited to half a meter, the optimal depth for adults is at least one and a half meters, and for trampoline lovers it’s worth adding another meter.

Preparatory work includes developing a plan and creating a drawing of the pool. The plan must show the laid pipes, indicate the dimensions of the bowl and draw the placement of devices for moving and purifying water.
So, the location, shape and purpose of the pool have been determined. The area has been cleaned and prepared. You can start marking the area to create a pit for the bowl.
If you have a purchased container, or “bathtub” for the pool, you can mark the place along its edges. Turn the container over and place it in your favorite area. Mark the boundaries of the reservoir with stakes and rope. If there is no “bathtub”, measure the edges using a tape measure. Next we dig a pit.


You can create a pit manually or using construction equipment (which, of course, will require additional material costs). Make sure that the walls are at a slope of at least 20 degrees. The size of the pit for the finished bowl should be larger in size.
The depth needs to be increased by several tens of centimeters (for example, 30) for waterproofing. Digging a pit is not at all difficult. When the foundation pit is ready, you can begin construction directly.


Manufacturing step by step
We offer for consideration the step-by-step production of several types of pools: a frame outdoor pool made of wooden pallets, a pond made of plastic (polypropylene or fiberglass) container and a monolithic concrete structure.
So, the cheapest option is a frame pool made of wooden pallets. The basic material can be purchased at construction bases or stores, or you can accumulate it in your barn. If you feel sorry for throwing away good pallets, but you can’t sell or give them away, feel free to put them to use.


Materials and tools you will need:
- PVC film;
- means that protect wood from decay processes;
- a pipe of the required diameter and length for draining water;
- shovels;
- buckets and basins for bulk materials;
- hammer, screwdriver;
- hacksaw;
- sandpaper;
- plane;
- roulette.

So, all the necessary preparations are completed, you can begin construction:
- Walk over the wooden blanks a couple of times with impregnation agents (antiseptic or antifungal solution)
- Pallets allow you to choose the shape of the pool depending on their location. Based on this, dig a niche up to 30 centimeters deep; along the perimeter, the hole should be slightly wider than the perimeter of the pallets.
- Place crushed stone or small stone at the bottom to a height of 15 centimeters and distribute it evenly.
- Inside the pit, assemble a base from pallets. To connect wooden equipment, use self-tapping screws, small boards or corners.


- If necessary, make a hole for the drain pipe and insert it with the drain facing out.
- Secure the structure with tie straps.
- Wedges in the form of bars will provide additional strength. Drive them outside the pool at a distance of 40 centimeters from each other.
- Pour cement 10-15 centimeters high inside the frame and level it.


- After pouring the concrete, leave it for two weeks. Once done, cover the inside with PVC film and secure it over the top edge of the pool.
- You can make the cladding based on your preferences, for example, using PVC panels or other materials that are resistant to getting wet.
- Remember that the concrete will dry completely only in a month, so postpone the ceremonial filling of the reservoir until then.
The next type of composite pool requires more careful and labor-intensive work, but it is much more like the beautiful pictures from glossy magazines.
Let's consider two options for installing a plastic bowl: using wooden formwork and strengthening the sides with cement.


Installation of formwork:
- As in the previous case, it all starts with digging a pit. Dig a hole of the required depth, around the perimeter larger than the width of the formwork boards.
- You need to fill in a drainage layer of sand and level it. To make the bottom more dense, it is recommended to fill the sand with water.
- While the water dries, assemble boards from boards to the size of the pit. Be sure to treat wooden parts with an antiseptic.
- Lower and install wooden walls in the hole.
- Place the PVC bowl inside the wooden rig.
- If there are gaps between the shields and the earthen walls, they must be filled with earth and compacted thoroughly.
- Compact the soil around the pool. Next, you can safely fill your man-made pond with water.


Strengthening the bowl with cement:
- Dig a pit, following the same rules as used in previous cases.
- Strengthen the bottom with a concrete base up to 20 centimeters thick.
- Prop the container from the inside and partially fill it with water.
- After this, pour cement between the bowl and the ground.
- A month after the concrete has completely hardened, you can refine the edges of the pool.

If you want to have a solid and durable water feature in your garden plot, and are also patient and full of energy, start building a monolithic concrete pool:
- Carrying out preparatory work: drawing up a plan, cleaning the site, marking the territory, digging a pit.
- Place a drainage layer of crushed stone, gravel, small stone and sand at the bottom. The layers of stone and sand must be equal in thickness and at least 15 centimeters. Carefully level each layer.
- Spread two layers of roofing felt on top of the waterproofing. Its edges should extend to the surface no less than 20 centimeters.
- Build in the necessary structures for draining water.
- Make a sheathing of reinforcement over the roofing felt.

- After this, proceed to concreting. The ideal option is to pour concrete at once. But for an inexperienced master this is too labor-intensive a task. Therefore, first fill the bottom with a slight slope of a couple of degrees towards the drain hole.
- When the pool floor has hardened, proceed to the walls. Make the formwork at a distance of at least 40 centimeters from the earthen walls.
- If you decide to fill the pool in two approaches, remember that the reinforcement should also be done twice. The second layer of reinforcement is laid to strengthen the vertical and horizontal parts of the reservoir, that is, the bottom and walls.
- Treat the concrete surface with waterproofing material. If the walls are uneven, plaster them. Be sure to use reinforcing mesh for this.
- Finish the inside of the pool. To do this, you can use PVC film, mosaic or tile. The decorative layer will serve as another protection for concrete from the destructive effects of water.

Water purification system
One of the factors that stops a person from building a pool on the site is that the container itself and the water have to be cleaned at certain intervals. It is important to note that modern technologies can significantly simplify this process, so you should not deny yourself the pleasure of soaking up some refreshing water on a hot summer day and dismiss the idea of beautifying your summer cottage with an attractive body of water.
Pollution can be divided into two types: material and bacterial. An open-air pool will not avoid small debris or garden accessories from getting into it. But even a roof over it does not guarantee its crystal purity. The entry of bacteria and microbes into the water provokes flowering and the appearance of a slippery coating., such oily stains on the surface, not to mention the unpleasant musty stench or rotting smell from natural debris. If you heat such water, the smell will be even worse.
A cover, if we are talking about small bodies of water, or a film that can be spread over the surface when the pool is not in use can protect a country pool from leaves and other objects.


Using a net, the pool should be cleaned of debris daily or once at a time convenient for the owner. If an unpleasant coating forms on the walls, use a brush. However, these actions will not protect against the influence of small organisms, so water should be purified in other ways.
It is best to completely change the water every 1-2 weeks. To avoid wasting precious liquid, you can water your garden with warm water. This product is good for small pools that fill and warm up quickly.

For large containers, other methods are used: filters, electrophysical disinfection and chemical treatment.
Filters can be divided into three types: sand, cartridge and diatomite. The latter use several layers of cleaning and are able to clean the pool down to the smallest particles. Cartridge ones are often placed in medium-sized containers, while sand ones, working on the basis of coarse sand, remove contaminants up to 20 microns.

Electrophysical purification is the use of ozonizer devices and systems that saturate water with silver ions. In addition, this also includes ultraviolet equipment that disinfects the water, ridding it of germs and mold.
Pool owners do not like to resort to chemical cleaning due to the high risk of drug overdose. It requires care and scrupulousness. However Chlorine perfectly disinfects water and helps get rid of blooms., despite the fact that large amounts of it can lead to poisoning and damage to the skin and mucous membranes. Bromine reagents have a low odor, unlike chlorine. Active oxygen is the safest and at the same time effective cleaning agent from a number of chemicals. It is added to the water after filling the pool according to the instructions, based on the total volume of liquid.

Finishing
Finishing a pool is a matter of taste, and sometimes financial capabilities. You can use PVC film, mosaic tiles on a mesh, just tiles and special acrylic paint with added color. It should be remembered that when gluing mosaics you need to use glue that can withstand temperature changes.
Mosaics or tiles that are laid with glue serve as an additional means of protecting the pool walls from moisture. Water bends the walls of the pool with its weight, so laying the tiles should be done with some difference from the classical method. A little more distance is left between the tiles in order to avoid deformation and cracks in the material.
When I thought about how to make a pool at the dacha, I saw that Internet resources mostly display expensive objects that are not always affordable even for a person with average income. The fact is that the models offered have built-in heating, skimmer or overflow filtration, various lights, and so on, which is much more expensive than the bowl itself.
Let's look at a budget option that almost every summer resident can do if he understands what a concrete solution is. And for a more detailed understanding of the process, we will show you a video in this article.
Budget pool
Note. Below we will look at how to make a pool at your dacha yourself using the pit method, since there is also a composite and frame method. But the second and third options are usually sold ready-made, they are more convenient to install, but their price will be higher than what we will offer you now.
Preparatory work

- The very first stage of construction can be called determining the required dimensions of the bowl and its shape.. And if the average depth varies between 120 cm and 160 cm, then the cross-section of the perimeter is not affected by any instructions. It all depends on the size of the area and the number of people who can be in the pool at the same time.
- If everything is clear with the dimensions, then you should take into account that homemade pools in the country should be located in such a way that there are no trees nearby and it’s not even a matter of the root system, which can damage the concrete bowl. The problem is that the trees create a shadow over the water, making it cooler (we won’t have heating) and, besides, falling leaves are garbage that you don’t need at all.
- If yours, then you should choose the highest place so that when it rains, water does not flow into the pool bowl.
- When choosing any bowl shape, you will have to install wooden formwork with your own hands, but for rounded shapes this is somewhat more difficult to do, although it is quite possible. So the easiest way to do this is in a pit with straight edges at any number of angles.
Installation work

After marking, we begin constructing a pool at the dacha by digging a pit, only you will need to make it about 40-50 cm deeper and the same width in each direction - this will be the place to pour concrete.
But if you want to make double formwork, then you will have to leave such a distance at each wall so that it is possible to install an external shield. But you are unlikely to like this option - it is more expensive, and there are more labor costs, but the end result is almost the same.
When the foundation pit is ready, you can begin filling the sand and crushed stone cushion and installing waterproofing made of thick cellophane film. This film is best laid under the pillow, or rather, as part of it - first pour, level and compact a layer of sand 2-3 cm high and lay cellophane on it with a fold over the walls. This turn should be at least 30-40 cm above the bottom of the pool.
Pour another layer of sand of the same height on top of the film - it will serve to ensure that pebbles do not damage the cut-off waterproofing. Then lay a layer of crushed stone 5-7 cm thick on the sand (the larger the fraction, the thicker the layer).
Before pouring concrete, lay a plaster mesh on the cushion, but you can also make a lathing from wire rod with a cross-section of 6-8 mm with a cell of 200×200 mm or 150×150 mm.

Now you need to prepare concrete and for such a structure M300 or M350 (corresponding classification B22.5 and B25) is suitable - you can see the proportions in the table above. The screed layer should be made from 70 mm (more is possible) to completely eliminate the possibility of cracking.
During pouring, you will need to slightly lift the plaster mesh or steel sheathing so that it is approximately in the middle of the concrete layer; make the level itself with a slight slope, using beacons for this.
While the concrete is hardening, do not waste time - dig a trench for laying pipes for drainage and water injection and you can immediately lay the pipes (polyethylene brazed pipes with a diameter of 32 mm are suitable here). Try to ensure that the pumping pipe is as close to the floor as possible at the deepest point of the pool and install a filter on it, only so that it can be changed later.

After about a week, when you can walk freely on the floor, installing a swimming pool in your dacha involves installing formwork to fill the walls, with the preliminary installation of a shut-off waterproofing. Shields can be made from edged boards, fitting them tightly at the joints so that there are no scars left on the monolith, which will then have to be removed.
But it would be even more convenient to make such panels from thick plywood or OSB, fixing them with timber and slats so that the sheet does not sag.
Recommendation. If you are planning to build a swimming pool at your dacha in rounded shapes, then you will have to make the panels from plywood or OSB. You can easily bend such sheets to a certain extent and fix them with timber and slats.

It is possible that you and your neighbors have country houses made of block containers that are mounted on a columnar base, but you could still see how a strip foundation is poured and how a metal frame is made for it, such as in the top image.
To do this, you will need reinforcement (preferably with a variable profile) with a cross-section of 10-12 mm and steel binding wire. Knit the structure in such a way that all parts of the metal are immersed in the solution by at least 50 mm - this prevents rusting.
Now all you have to do is install the frame and fill the formwork with concrete, only if you don’t have a vibrator, be sure to tamp the solution with some kind of lath - this way you will remove possible voids and increase the density of the mixture. It will be much better if the walls of the pool are a few centimeters higher than the ground and such a “basement” can be made later, but better - right away, making the internal formwork a little higher, and installing a side made of timber on the outside.
Advice. There will be a cold seam between the floor and the wall through which water can leak. To prevent this from happening, use special sealing products, for example, KT Tron-2.

We learned how to build a swimming pool in a country house, but it is advisable to have a concrete area around it where you can lie or change clothes. This design should be rigid and easy to clean, so you can cover it with tiles, as in the photo above.
Conclusion
In conclusion, it should be said that if your site is not electrified, then you have a choice: renting a diesel generator for your dacha or buying it. And for additional water purification, you can use ultraviolet disinfection lamps ().
And dive into cold water. To make this a reality, you can make a small pool with your own hands. Certain types of structures can be easily assembled independently in the yard of a country house or home. This article will help the owner make his family happy; you just need to make the most of the materials that are already available.
Types of pools
In order to have plenty to choose from, you need to know about the features of various solutions and their relevance for specific conditions.
Inflatable pools. These products can be installed in less than an hour. The pool is usually a container made of PVC film. To ensure that there are no breakthroughs and that the pool lasts long enough, it is reinforced with additional polyester fibers. Only one part is inflatable - the top edge. The whole circuit operates on the float principle. Water begins to fill inside, the side floats up. As the level rises, the walls are leveled and a full-fledged bowl is formed. The kit usually includes a pump, filter, ladder and assembly instructions. Among the positive qualities we can highlight:
- high assembly speed;
- relatively light weight;
- affordable price;
- the ability to deploy in any conditions (the only requirement is sufficient rigidity of the base and its evenness).
An inflatable pool usually meets all the expected requirements. But it is worth knowing about certain disadvantages: a high probability of water contamination, the relative fragility of the material (a fallen heavy branch or sharp object can damage so much that a complete replacement will have to be made). The price of such products cannot be called low; for some samples you will need to pay 30 thousand rubles or more.

Frame. Among pools of this type, there are a large number of different solutions. The support can be metal tubes, which are assembled into a closed structure, and a PVC bag is placed inside. When it fills with water, the walls rest against the racks and their expansion is limited. Panel frames are assembled from separate sheets of metal, which have an anti-corrosion coating, which prevents its damage. The internal space is organized in the same way as in the previous version.
Installing a frame pool usually takes a full day. At the same time, it also needs a good foundation so as not to deform it with the weight of the flooded water. Seasonal containers will have to be dismantled in the fall and installed again closer to summer. There are those who can easily spend the winter. Usually they have additional stiffening ribs mounted, and the main racks are large. This is necessary to resist the action that will occur when water freezes. Such pleasure will cost more than inflatable analogues.

Made from fiberglass. In most cases, this design is a ready-made cast container. It has specified parameters: depth and capacity. There is no need to invent anything. You only need to dig the appropriate pit, install the container and provide the required communications. One of the advantages is the high strength of the product. In some respects, it even surpasses concrete. Due to the properties of the components, the bowl is not subject to linear expansion due to temperature fluctuations. This means that the service life can be very long with proper maintenance. Fiberglass is highly repairable. The walls are so smooth that debris simply cannot linger on them, which means they are very easy and simple to clean. A large amount of additional equipment is available, for example, you can purchase a variety of slides or diving boards. This will delight not only children, but also adults. The low level of thermal conductivity prevents rapid cooling of the heated liquid.

With polypropylene bowl. By itself, this polymer material has sufficient strength. It does not need an additional layer of waterproofing, which will impede the outflow of liquid. Most often, blanks in sheets are used to make such options. They are blue or cyan in color. You can do the assembly yourself, but this will require certain tools. Most often this is entrusted to professionals. The construction of the entire structure can take from several days to weeks. Such pools have a recessed design, so large-scale excavation will be required, as well as the laying of a concrete base slab. The material is resistant to ultraviolet radiation and chemically active substances. Thanks to this, it can be safely placed outdoors.

With concrete base. To put it simply, this is a pit of arbitrary length, width and depth chosen by the user. It is filled with mortar. The walls and bottom can be lined with special ceramic tiles or mosaics. Almost anyone can implement such a project in any suitable location. For such a pool, it is important to think through all the required communications so that it lasts as long as possible.

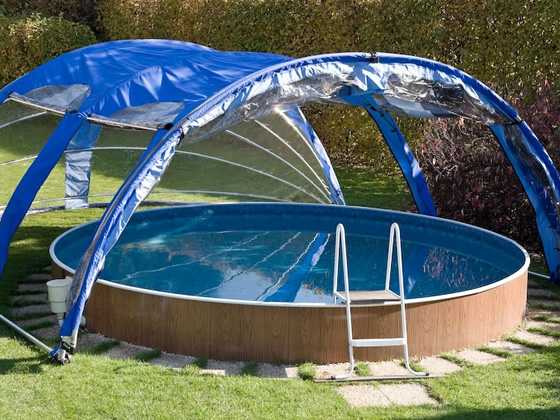
Dome. This could be any of the options listed. The special thing is that they all have a roof. It can be made from various materials. The main highlight is that the bowl is closed on all sides, which prevents wind from blowing through and also contributes to the rapid heating of the water inside.
In addition to differences in the method of construction, subtypes are also distinguished according to the filtration option. It can be:
- Skimmer. In this case, water is drawn from the pool through technological holes located on the side walls. Moving through the channels, it enters the filter device. There it is cleaned, disinfected and partially heated. Return to the container is carried out through nozzles.
- Overflow. This method is more effective, but is also somewhat more expensive in construction. The water mirror reaches the very top of the pool. Water flows through the drain hole or the top side and enters a special gutter, and from it into the tank. The latter contains a pump with a water sensor, which pumps the liquid into the filter, where it is cleaned. The liquid flows back through the holes located at the bottom of the pool.


Selecting a location
In addition to choosing a pool and even before creating its drawing, it is important to think about where to place it on your property. To make this easier to decide, here are a few rules to consider:


Assembly of the frame version
This option can be very cheap to manufacture. In order to implement it, you will need timber 100×100 mm, edged board 100×30 mm or 50×30 mm. You will also need a material that has good waterproofing and can withstand high tensile pressure.

- The site is selected as described above.
- A pit is dug 40 cm deep. Its dimensions should be 20 cm larger than the dimensions of the planned pool.
- The bottom is well compacted.
- A slight slope is created towards the middle, where a small hole is dug with dimensions of 50x50 cm and a depth of 20 cm. It will serve to collect water, which may overflow over the edges.
- The entire space is filled with medium or fine crushed stone. The layer should be 20 cm.
- Sand is added another 20 cm. It is very important to compact it well so that the pillow is sufficiently rigid.
- The plane is displayed using beacons. This will prevent the pool bowl from becoming distorted. The role of guides can be metal pipes or wooden beams, which are laid using a building level.
- Racks are made from the wooden beams mentioned above. Their number should be such as to install every meter. The total length is equal to the height of the pool plus 50 cm, which must be immersed in the ground.
- The part that will be in the ground is treated with bitumen mastic or wrapped in roofing material. In addition, it is necessary to coat the wood with an antiseptic composition to prevent rot from constant exposure to moisture.
- At the installation site of each column, a hole is dug to a depth of 50 cm.
- Corner posts are installed. They are leveled using a building level in the horizontal and vertical plane.
- The space around them is filled with sand and soil, which are compacted well to securely fix the element.
- The diagonals are checked to ensure that the design is symmetrical.
- Fishing lines are stretched between the posts. One should be at the bottom, the second at the top. They are necessary in order to facilitate the installation of other reference points.
- The remaining parts are mounted with the indicated step.
- The supporting walls are filled using edged boards. It is better to place the elements closely to create a uniform plane.
- After making the frame, a material is placed inside that will serve as a receiver for water. This can be thick polyethylene film. It is important that it be in one piece, because... A leak will certainly appear at the seam site, and water will seep into the ground. The edges must be folded over the top edge so that the material does not slip during use.
- If you wish, you can make a more durable version. To do this, you will need a PVC base, which is used for sewing awnings on trailers, eyelets, a rivet gun, a hair dryer and a rubber roller. The blanks are placed inside the frame and markings are made of what bends will need to be made in the corners, how much should be left for the fold, and where exactly the seam will be soldered. The individual sheets are connected to each other using hot air. They are laid with a slight overlap. Using a hairdryer, heat until almost completely softened. Rolling a roller forms a joint. This should be done on a flat surface free of debris and dust. The upper edge is bent by 5 cm. The eyelets are installed using a riveter. The distance between them should be 15 cm. The awning can be fixed to the inside. To do this, it is simply pressed with a self-tapping screw and washer to a wooden base. Either the edge is bent over the top level, then a rope is pulled through the eyelets and it clings to the prepared elements.
- The finished pool is filled with water.

To make the structure easier to fit into the surrounding exterior, it can be partially or completely immersed in the pit. In this case, the bottom is organized in the same way as described. The drainage system can be improved. To do this, a sewer pipe is connected to the hole, which is located in the middle, the second end of which goes into a drainage basin or channel. This way, the water will drain much faster.
Making a concrete pool

The main task for this option will be excavation work. Having decided on the location and marking the territory, a hole of the required depth is dug. The bottom is formed in accordance with the recommendations listed above.

Installation of a polypropylene pool

If you have certain skills, installing such a pool will not take too much time. We will need sheet polypropylene (wall thickness from 8 mm), material for joining, a technical hair dryer, and a plane.


To install such a structure, a pit is prepared; its dimensions should be 10 cm larger than the product itself on each side. The bottom must be filled with solution and allowed to stand. The vessel is immersed in the middle. Gravel is poured into the space between the walls of the vessel and the pit and compacted well.
The technology for making a polypropylene pool is shown below:
Filter system
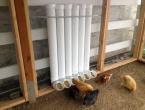
A pool filter is an integral device that must be present. Without it, it will be impossible to use water for a long period of time. It will need to be replaced frequently. The device can be installed either near the pool itself or in a specially prepared place. There are a large number of ready-made options. For a small pool there is no need to take a filter that is too powerful. If desired, you can assemble it yourself. For this you will need a 100 liter plastic barrel. The main condition will be the presence of a lid that can close hermetically. You will need a centrifugal or drainage pump, plastic pipes, fittings and a filter flask cartridge.

- A hole is drilled below the neck of the container.
- A threaded nipple is inserted into the hole. Sealing rubber bands are put on both sides and locknuts are screwed on.
- The same exit is made 5 cm above the bottom diagonally.
- A pipe is connected to the upper adapter, which will draw water from the pool.
- A filter cartridge is placed on the bottom from the inside. A pump is connected to the external one. The pump leads to the pool.
- Coarse sifted sand is poured halfway into the barrel.
- The installation must be below the water level in the pool. The liquid will flow by gravity into the container. Passing through the sand, it is cleaned and fed back into the bowl using a pump.
With the right approach to the matter, the pool will last for many years. A concrete or polypropylene structure can easily be made in a bathhouse or basement of a house. But this should be planned at the construction stage in order to avoid unpleasant consequences from uneven load.
Video
Below you will see video instructions for building a concrete pool:
Photo


For many summer residents, a swimming pool is a dream. But, as practice shows, it is quite possible to do it on your own and with small funds. Sometimes very small. But the pool at the dacha is useful for both children and adults: the water perfectly relieves fatigue and nervous tension.
Swimming pool for a summer residence: types and features
All pool designs can be divided into two large groups: stationary and temporary. Stationary structures include all structures partially or completely dug into the ground, which cannot be moved without destruction. The bowls of such pools are made of monolithic concrete, brick, and sometimes concrete blocks are used in construction. They can use a polymer liner (plastic bowl) or provide waterproofing using film or coating waterproofing materials.
Temporary pools are mainly inflatable and frame. They differ in that they are installed in the spring, and in the fall they are rolled up and hidden.
Which swimming pool is better for a summer residence? If you are not yet sure whether you need such an “attraction” on your site or not, buy the cheapest and fastest to install: inflatable. It holds water due to the inflated ring. The disadvantage of such a pool is that it is not very deep: 1.2 meters including the sides is its limit.
But, if you want it for children, then you can’t think of anything better, and adults can “hang” on the wall and relax after “relaxing” at the dacha. Depending on the quality and intensity of use, it can last from a couple of years to four to five.

A frame pool is a little more expensive and a little more difficult to install. It already has a frame in the form of pipes, on which a special film in the form of a bowl is hung. The depth of such a pool is up to 1.8 m.
Stationary swimming pools are for those who have decided that they simply need a swimming pool at their dacha. Construction and maintenance are not cheap. First, a pit is dug, then a monolithic slab is poured, and in the second stage, the walls are erected. It is necessary to take measures to waterproof the walls outside - so that underground and melt water do not penetrate into the bowl. Next comes insulation of the walls. If this is not done, heating the water will be problematic. After this, a set of measures begins to waterproof the walls inside the bowl, and then finishing work begins.

But the finished bowl is not the entire permanent pool. It is necessary to clean the water: leaves, dust and debris fall into it, bacteria and algae multiply. To bring the water into order, you need a pump, a filter system, chemical reagents, and also means for “scooping out” leaves and sediment from the bottom. Some equipment is also needed to maintain a temporary pool, but since the volumes are smaller, you can often get by with manual cleaning or water replacement, or you can use improvised means. And if there is at least 5-6 tons of water in a stationary pool (this is a small 2*3 bowl with a depth of 1.4 meters), then even such a volume is problematic to manually clean.
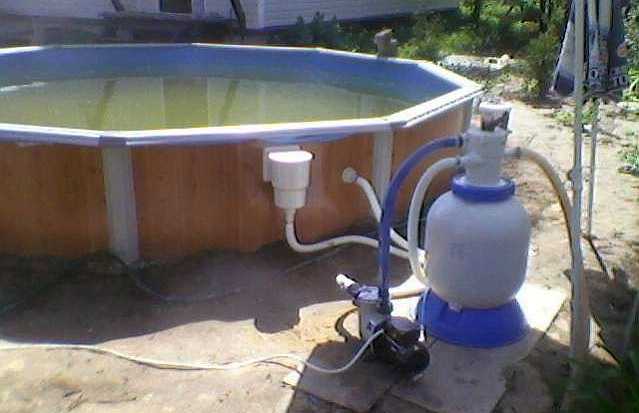
Installation of a frame pool at the dacha
Regardless of whether you are going to install an inflatable or frame pool, you need to prepare a site for it. These pools can be buried a little in the ground, or they can be placed on a prepared site. It doesn't matter. It is important that the surface is level and a lawn is not the best option, even if it is level. The grass under the bottom begins to decompose, and the appearance of the area after the pool is removed is very pathetic.
At the dacha they installed an Esprit Big swimming pool with a diameter of 450 cm and a wall height of 130 cm. It was decided to bury it almost halfway. So what did they do? We started by preparing the pit:

A frame or inflatable pool can be placed on such a base. This pool design has a metal frame wall and support posts that are attached from the outside. It is advisable to insulate the part of the walls buried in the ground. You also need insulation on the bottom: so that the water heats up faster and does not cool down.
First, we lay out a U-shaped profile at the bottom into a ring. Then we take out the metal side, lower it into the pit (one person can’t handle it - it’s hard), unwind it, put the bottom edge into the unfolded profile, and connect it. The operation is simple, everything is clear: in the right place the sheet is connected into a ring.

Next, we take the EPS and lay it out on the bottom of the pool, cutting off the edges, trying to keep the gaps minimal. After laying out the polystyrene, the joints and edges were sprinkled with sand (according to the instructions). Why was polystyrene foam chosen rather than the much cheaper foam? The foam will be flattened under the weight of water, and the effect of such insulation will be zero. EPS can withstand heavy loads, although it is expensive.

Next, we bring the film liner inside, more or less straighten it, and temporarily attach it to the sides with tape. Next, we start swimming))) Pour a little water to the bottom - 10-15 centimeters, straighten the folds on the bottom, trying to keep everything even. Then gradually adding water. We level the film on the walls.

Note - it is better to carry out the work on a sunny, warm day, and not only because the “swimmer” is cold. In the sun, the film softens, making it easier to straighten. We worked without the sun - wrinkles remained, although this did not affect the pleasure of swimming.
After the water procedures, stiffening ribs were installed on the outside, installing fixing strips along the upper edge of the pool. Next we started insulating the walls. In the photo above, laying of one layer began, but in general they laid two - 3 cm each. Thicker slabs are difficult to bend, but thin slabs are easy to bend. Therefore, the installation of polystyrene did not take much time.
Having installed the insulation, they began to fill the pit. Since ours is clay, we used native soil to prevent water from leaking under the walls. They poured a small layer, tamped it down, and so on until the top. One point: the bowl must be filled with water.

The instructions include a recommendation to make external supporting walls. In this case they were not made. The staircase was half buried, as it was designed to reach its full height, but here 65 cm was buried. They buried it to this depth from the outside. All that remains is the installation of equipment.
As recommended, the included filter and pump were installed. After connecting, it turned out that there was a small leak at the connection point. After partially draining the water and drying, the area is coated with sealant (neutral silicone moisture-resistant). The problem has disappeared.

Where was it dripping...
That's it. The swimming pool at the dacha is ready for use.
The model was chosen to be frost-resistant, so as not to put everything away for the winter. The bowl is covered with wooden shields.
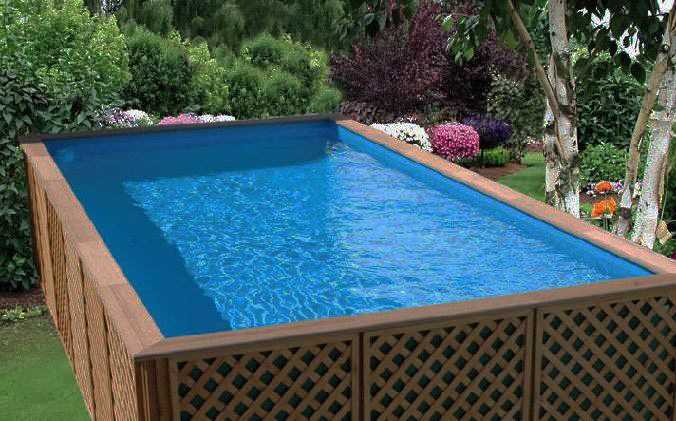
If leaving something on the site is dangerous, you can buy another design. It's just a system of stands and a film liner hung on it. A pool looks like the one in the photo below; it is never buried, but installed on top.
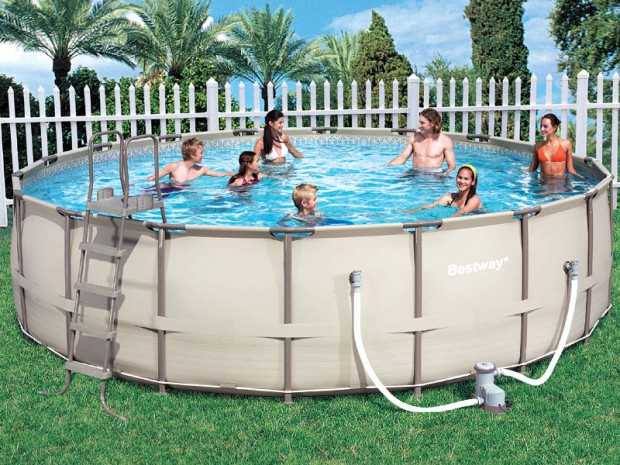
Although in the photo he is simply standing on the lawn, this “feat” is not worth repeating. In addition to turning the lawn into a dirty mess, the soil sucks out all the heat. The swimming season with this setup is extremely short. Moreover, even in the heat in the morning the water is cold; children can swim only from lunch. In general, it is better to make an insulated deck under the pool. Its installation does not take much time and money, but using the pool is much more convenient.
The beginning is the same as described: a pit is being dug. Its depth is about 20-25 cm. First, pour crushed stone into the pit in a layer of 10 cm, compact it well. Lay out geotestile. It will prevent sand and gravel from mixing. On top of it is sand, which is also compacted. You can already install a pool on sand, but this is also not the best option. sand drags around the whole dacha, and cats also love to walk in it. Therefore, it is better to lay at least homemade concrete slabs, paving slabs on top, and sprinkle with pebbles, as in the photo.

You can also knock down a shield from wooden boards, but the boards must be sanded and treated with antibacterial impregnation. You can use WPC - wood-polymer composite. They definitely do not rot and are not afraid of water or frost. A swimming pool can be placed on such a base. But even in this case (except for a wooden platform), it will be difficult to warm up the water.
Insulation required. This is at least 10 cm of EPS, laid under the bottom and covered with geotextile - as a temporary option. For a permanent insulated platform, a deeper pit is required: increase the depth by 15 cm. The sequence of layers is as follows: crushed stone, geotextiles, sand - 10 cm, EPS - 10 cm, geotextiles, sand - 5 cm, paving slabs or slabs.
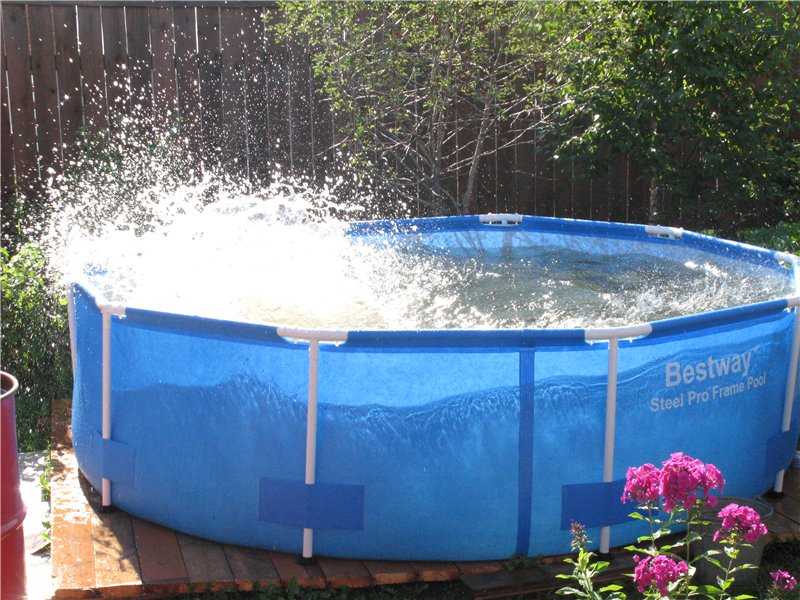
Inflatable pool at the dacha
Inflatable pools are placed on the same base. Only they are installed quite simply: take the pump and start pumping up the ring. When it is filled with air, water begins to be poured inside. The ring gradually floats up, raising the edges of the pool. When the entire wall is level, the pool can be considered installed.
Plastic pool: DIY installation
The easiest way to make a stationary outdoor pool at your dacha is from a plastic or composite (fiberglass) liner: a ready-made cast bowl. This is one of the easiest ways to make a stationary pool in your country house or near your house. A pit is dug under it, into which it is installed. One of the installation options is in the photo report.
The size of the selected plastic bowl is 183*415*140 cm. The simplest shape was chosen for easier installation. It all started with marking out the area for the foundation pit. The bowl was turned upside down, the contours were outlined, and 5 cm was added to the boards (the plan was to install it in a wooden frame). So they nailed down the pegs, pulled the twine, and started digging.

It was decided to leave part of the side outside, so the depth of the pit is 1 meter. A layer of sand about 15 cm is poured onto the bottom, everything is filled with water to compact the substrate.

While the water is draining, the sand dries up, and boards 2.5 cm thick are assembled to fit the dimensions of the pit. A 50*50 mm beam was used as a frame, and it was also placed on top of the boards. The upper edge of the plastic bowl was attached to this beam.

All boards are treated with an antiseptic for direct contact with the ground. The manufacturer promises 10 years without rot...

When all the walls were assembled and secured, the bowl was inserted inside. The bottom lay tightly, the height was calculated correctly.

There should be a reinforced concrete edge around the perimeter of the pool. To tie the bowl more tightly to the concrete, corners are installed around the perimeter. They are attached to the beam and the edge of the bowl through and through, with stainless bolts and nuts.

To prevent the plastic from “walking” during operation, we grab the edges with a clamp.

The fittings are attached to the installed corners. We used 15 mm, placed 4 rods: two on top and two on bottom. Knitted with special wire.

Formwork is installed around the perimeter. First, sand was poured under the reinforcement, so external shields were installed. The inside of the boards is covered with a thick film to make it easier to remove the formwork. Mortgages were also installed: overflow pipes. They will be placed outside the pool and will protect the bowl from overflowing.

Before pouring the concrete, they began to fill the bowl with water. This is necessary so that the concrete does not crush it. At the same time, the gaps remaining between the walls of the bowl and the plank frame were filled with sand. This means that the bowl is fixed in a better position. When it was almost filled, concrete was poured into the formwork and treated with a vibrator to increase strength and uniformity.

Four days later the formwork was removed. The side turned out to be 40 cm wide and the same height. Next, we begin to prepare the foundation for finishing the adjacent area.

Since the site is slightly sloping, soil had to be removed from one side. Sand is poured and compacted around the perimeter. Roofing material is rolled out over the leveled surface.

Another layer of sand was poured onto it, into which the paving slabs were laid. The cracks between the tiles are also filled with sand.


To prevent leaves from falling into the pool, debris and other contaminants from getting into the pool, a polycarbonate greenhouse was purchased, assembled and installed as a cover for the pool. It turned out that it was very convenient: warm and light.

You just need to fasten it firmly; a strong wind moved it from its place. I had to make adjustments. The pool at the dacha is also used in winter, but only after the bath - the ice hole is cut down)). For winter, empty bottles with screwed caps are thrown into the water. When water freezes, they serve as a damper, taking most of the load from the ice onto themselves.

And until late autumn we swim just like that, we just installed a water heating system to make it more or less comfortable.
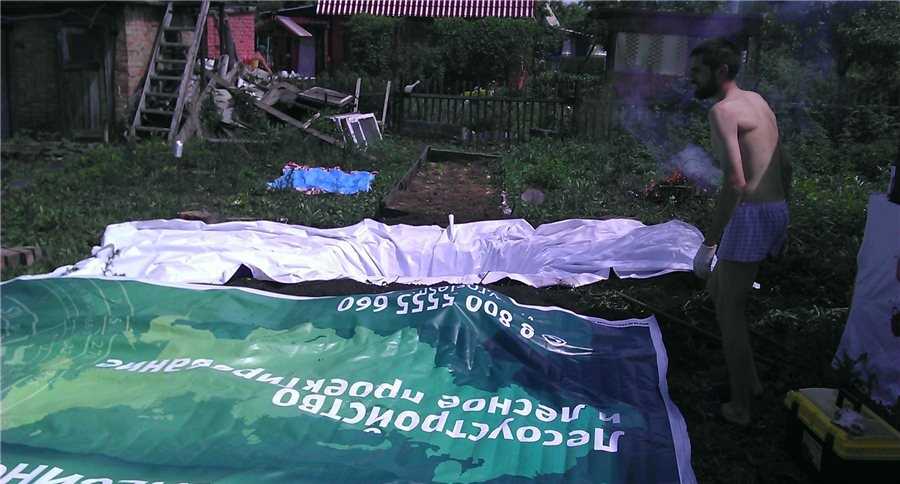
Economy option: swimming pool from a banner
If you need an express option for a pool at minimal cost, you can get by with a thick film. For example, an old banner. The fabric used for them is thick, and you can buy an old one at an agency for mere pennies. If you need a pool in your garden, this is exactly the material: the costs are minimal.
So, armed with a banner, we dig a pit, which is significantly smaller in size than the canvas.

We lay the film in the dug pit and straighten it. For testing, a small pit was dug in case it wasn’t to his liking. Since the banners were old, after all, they laid two. They also tried to straighten the second one.
To prevent the edges of the film from being blown away by the wind, they were pressed down with bricks and a hose was thrown in to collect water.

While the water was being collected, a little earth was poured around the “bowl” under the film, forming sides. They were lined with bricks.

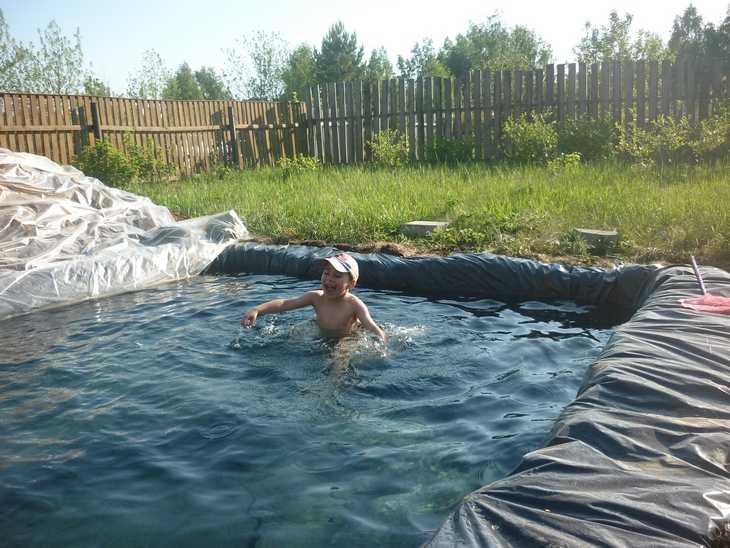
We left the “pool” to bask in the sun. Three hours later the tests were carried out. I liked the result. It was decided to expand the “swimming” part.

This, of course, is not a great option, but you can freshen up. It took 2 hours for “construction”. The main thing is to dig a pit. And what happens next is a matter of several tens of minutes. The photo below shows the same idea implemented on a larger scale. We bought the film for swimming pools and soldered two pieces together to create a more voluminous “sea”.
Here, by the way, are several country pools made from scrap materials: an excavator bucket and a huge tire.
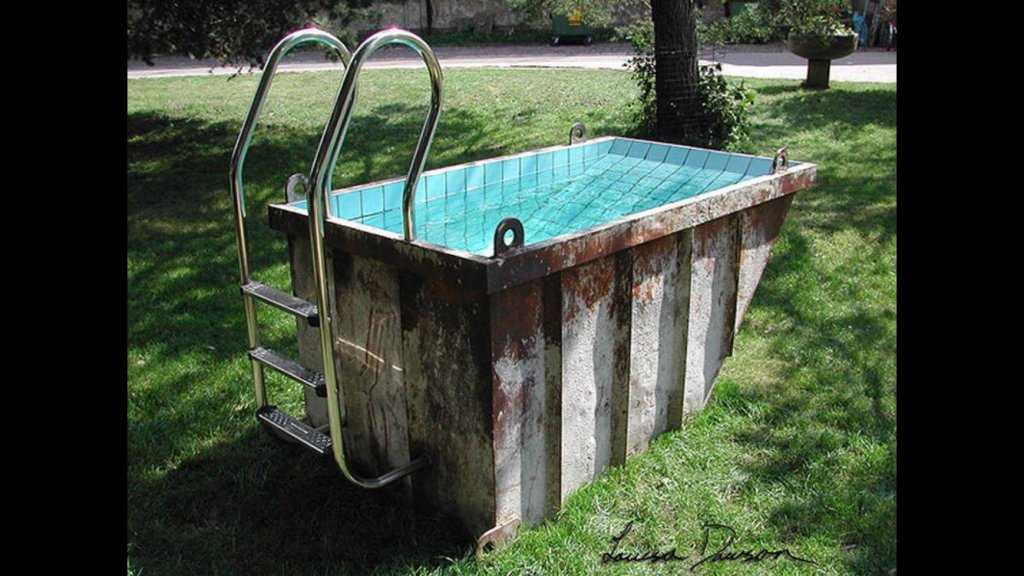
A long-lasting pool at the dacha is easy))

Photos of country pools


An inflatable pool is a great option for children

Another option for a polycarbonate pool cover. Built using the same method as