Make a photo frame with your own hands at home. How to make a vintage frame with your own hands from cardboard. How to make a frame out of cardboard: instructions
In this thematic section you can find hundreds of interesting ready-made solutions for creating original photo frames and frames.
How to create a truly exclusive frame for a bright shot from life or a worthy work of art with your own hands is shown in illustrated step-by-step master classes. Table and wall frames, classic shapes or in the form of flowers, suns, hearts, boxes and other things. Made from cardboard, salt dough, pasta, plastic dishes, and other improvised and waste materials. And also unusual decorations that will help turn any, even the simplest frame into an exclusive one.
Author's frames for photos and drawings.
Contained in sections:Showing publications 1-10 of 379.
All sections | DIY photo frames and frames
C spruce: make together with moms photo frame"Pussy" made of napkin lumps. Tasks: to cultivate love and respect for the mother, a feeling of gratitude. Promote the rapprochement of children and parents, the development of positive emotions, a sense of mutual assistance. Move Events: The word “mother” is one of...
 Children of older preschool age like to make functional gifts (Christmas tree decorations, pincushions, decorations for a flower pot, etc. Such things are visible, they are actively used and it brings joy to the child. This year, for Mother's Day, we...
DIY photo frames and frames - Master class “Photo frame “Musical note” made from wooden clothespins with your own hands
Publication “Master class “Photo frame “Musical note” made of wooden clothespins...”  Really interesting things can be made from wooden clothespins. These crafts will delight children every day or they will come in handy as a beautiful gift. The main thing we need to master is the decor of clothespins, and our imagination will do the rest for us. What do we need...
 Image library "MAAM-pictures"
 In December, as part of the weekend club "Tsvetik - Seven-Tsvetik", the group "Rainbow" visited the Fire Station. The children were met by the unit duty officer. Under his leadership, the children walked around the territory of the unit, examined a fire truck and the necessary equipment for extinguishing a fire. Getting to know...
 I wanted to make something like this for a long time with a frame for congratulating children on their birthday, since the established tradition of placing congratulations on children’s birthday in the locker room, in full view of their parents, and writing the name of the birthday boy seemed wrong to me. Rather, in relation to...
Master class for parents “Making a photo frame from pasta” Master class for parents “Making a photo frame from pasta.” Goal: teach parents how to make a photo frame from pasta. Objectives: to develop knowledge about the technology of making photo frames from pasta; show ways of coloring pasta; Do you think they can...
Do-it-yourself photo frames and frames - Photo report “Do-it-yourself photo frame”
 Our group is located on the second floor. We decided to decorate the flight of stairs leading up to it with photographs of children. To make it look bright and beautiful, parents and children were invited to the DIY photo frame master class. We prepared the necessary materials for them, told them about...
 "Play. Explore. Learn" Didactic games are played with kindergarten children, starting from a very early age. There are a large number of exciting games through which teachers introduce little pupils to natural objects and objects, their color, shape...
When you are engaged in cardboard creativity, sooner or later the question inevitably arises of how to make a photo frame from cardboard with your own hands. We have already touched on this topic more than once in our cardboard workshop, but it would be premature to consider it exhausted.
Today we bring to your attention another version of a photo frame made of cardboard using the 3D applique technique. This will be a real boyish frame in the shape of a car, and in a desktop version.
You can make such a photo frame together with your children, especially since the presence of templates will greatly facilitate the process.
Materials and tools:
office paper (for printing templates);
micro-corrugated cardboard 1.5 mm thick, cardboard for children's creativity or thick paper;
standard (stationery) knife or scissors;
creasing tool;
double-sided tape (for attaching templates to cardboard);
glue “Moment Crystal”;
acrylic paints (optional).
Download templates for making a photo frame in the desired format:
Our “Car” photo frame is made of micro-corrugated cardboard (its thickness is 1.5 mm). This cardboard is quite easy to cut, even small parts can be cut out.
And micro-corrugated cardboard itself is a completely affordable material: you can use used confectionery boxes, for example, or buy sheet cardboard from a factory or in craft stores.
But if you wish, you can replace corrugated cardboard with cardboard for children's creativity (white or colored) or thick paper (it is better if the density is above 200 g/m²). True, in this case the photo frame will not be as voluminous, but this is not critical. The main thing is that its functionality will not suffer from this.
By the way, when using thin cardboard, you can add additional volume by lifting the layers using double-sided foam tape or cardboard spacers (see example).
The principle of making this type of photo frame from cardboard is extremely simple: we cut out several layers of parts according to templates and then glue all the layers one by one.
To cut out parts, use a standard (stationery) knife.
At the same time, to cut out round parts of headlights, it is very convenient to use punches of different diameters (see example). Or for such small things you can take thin cardboard and cut it out with scissors and/or a hole punch.
As a result, the product acquires relief and volume. It looks very impressive and realistic!
If you look at it from afar, it may even seem like it's a real three-dimensional model, until you look at it from the side. This is an optical illusion.

Since our photo frame is tabletop, we also need to make a special support.
It can also be made from cardboard. To do this, you need to prepare 2 parts: one is glued to the back side of the frame, the other (part P-1) is inserted into the first one.
Support detail P-1 it is necessary to pre-punch (for example, with the tip of a compass, the end of scissors or a special creasing tool) so that the fold lines are accurate and neat.

Pay attention to the direction of the lines on the back of the corrugated cardboard. When cutting out parts, it is advisable to follow approximately this direction.
When gluing the fixing part of the support, I recommend doing the following:
- Mark with a pencil the place of fastening of the fixing part of the support (consisting of elements P-2, P-3 And P-4); use a special template for gluing parts for this P-2, P-3, P-4;
- assemble the entire structure of the support fixing part and apply glue to the elements P-3 And P-4;
- attach the assembled support to the back side of the photo frame and, placing the entire structure on the table, determine a stable position, then press the fixing part and wait for the glue to dry.

This photo frame is easy to disassemble and assemble. This means it is convenient to transport it if necessary or pack it in a box to present it as a handmade gift.


Painting a cardboard photo frame
The easiest way to do this is before gluing, when each part can be painted separately.
For corrugated cardboard, use acrylic paints (aerosol paints are also possible). In this case, on the parts of the lower layers it is enough to apply them only to visible areas.
Alternatively, you can use colored thin cardboard, and the issue of coloring will disappear by itself.
Or you can leave the frame in natural cardboard colors. This, as they say, is a matter of taste.
So, our photo frame is ready. All that remains is to insert a photo in size 6×4 cm. For example, like this:


That’s actually all the wisdom on how to make an original photo frame out of cardboard with your own hands.
If you know how to draw, I think you can easily draw an interesting layout and divide it into layers according to the same principle.
Or you can find a suitable picture on the Internet and, based on it, prepare templates in a graphics editor or with a pencil by hand.
Such photo frames “work” perfectly both in desktop, so wall-mounted performance. And in the second case, make entire thematic collages from photo frames. For example, a rocket and space composition.
Or this cardboard castle for 11 photos 9×13 And 10×15 cm:

You can insert photographs of all family members into the frames - you will get a kind of family castle, an alternative to the family tree. This is a worthy decoration for a child’s room, and maybe not just a child’s room...
In addition, a cardboard castle can no less successfully serve as an information stand in a kindergarten or elementary school. The dimensions of the frames allow you to place both photos and sheets with useful information in them.
And the stand itself will not get lost on the wall of a large room; its dimensions are: 80×86 cm.
An excellent budget alternative to factory-made plastic stands or ordinary boring bulletin boards. Can you imagine the kids’ impressions?..
Of course, even we would not undertake to make such a large-scale product from scratch. But for this cardboard castle we have it, drawn and prepared for easy use by our team.
There are no difficulties with templates! In fact, making a castle is no more difficult than making a “Car” photo frame, there are just more details.
Do you need a new original stand or collage of photo frames (for example, as a birthday gift)? Order templates from the KARTONKINO Store.
And that's all we have for now. See you again in KARTONKINO!
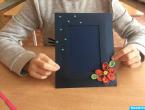
There can never be too many photographs of children. You always want to capture bright moments in the lives of children and keep vivid memories. We offer simple Master Class on production children's frame from scrap materials. You can cut and glue it together with your child. He will like this activity.
Material for work:
How to make a frame with your own hands
The size of the cardboard and fabric we need will depend on the size of the photo for which the photo frame is being made. We attach the photo to thick cardboard so that there is 2-3 cm left from the outline of the photo to the edges of the cardboard. We make marks at the vertices of the photo to make it easier to trace the outline of the photo.

Use a ruler to connect the marked vertices. To prevent the photo from falling out of the frame, you need to make an internal outline. To do this, step back 5–7 mm inward and draw an internal contour.

Using a knife, cut out a window along the inner contour. It is very convenient to cut thick cardboard with a regular knife or one designed for cutting paper. It will not be easy to cut out such a window with scissors. This is what should happen.

From thin cardboard we cut out a part with a size equal to the outer contour of the frame. We will need this part to make the back pocket in which the photograph will be placed.
We apply the cardboard blank for the photo frame to the wrong side of the fabric. The fabric must first be ironed well. Using a pen, trace the inner and outer contours of the workpiece along the fabric.

We retreat 2 cm from the outer contour along the entire perimeter and draw another contour. Cut it out. From the inner contour we retreat diagonally 1.5 cm from each vertex and draw another contour inside.

Cut to the smallest internal diameter. We make cuts along the diagonals. Apply heated glue to the cardboard blank.

We attach the part to the fabric. We begin to wrap the fabric and glue it to the cardboard. We glue the fabric along the entire perimeter of the smallest contour.

We also do the same with the fabric along the outer contour. We attach it to a cardboard blank. We turn the cardboard part with the front side facing us and get the finished base of the photo frame.

From the remaining colored paper we cut strips 1.5–2 cm thick and 15–20 cm long, depending on the number of petals you need. We fold each paper strip several times and draw the outline of the petal. Carefully cut out colorful leaves.

We decorate the frame with flowers in the upper corner and in the lower part. Using hot glue, attach the red petals first. We attach pink leaves to them.

We place green leaves under the flower petals. We form all three flowers as a decoration for the frame.

Place a large bead in the center of each multi-colored flower. We glue strips of self-adhesive glitter along the inner contour.

Let's return to the thin cardboard part. To easily and quickly insert or change photos in the frame, we will make a semicircular cutout.
Apply hot glue along the edge of the outer contour on the wrong side of the frame and attach a piece of thin cardboard. Remember that you only need to glue the cardboard on three sides.

You can also make a holder to place the frame on a table or cabinet. For the holder, cut out a rectangular piece from thick cardboard. The red line shows where the cardboard part is folded. We attach one edge of the cardboard piece with glue to the back of the photo frame.
All that remains is to place the photo in the finished photo frame.

Photo frame made of cardboard ready!

Beautiful photo frame made of cardboard.
The best design for children's photographs are those taken DIY photo frames with the participation of the child himself.

Original children's photo frame.
Cardboard is the most common material for crafts. A beautiful idea, careful implementation, and you will get an original thing.
Especially for the site
Each thing in the house, made independently, brings a special mood and flavor to the design of the rooms.
Therefore, if you want to create a unique interior, do not be lazy and create original masterpieces to decorate your home.
This kind of thing includes do-it-yourself photo frames, which today can be made from the simplest materials.
Someone will say, why make frames with your own hands if you can buy almost the same thing in a store.
We, of course, cannot disagree with you, but we still remind you that by making cute crafts for the home with the whole family, you put a special aura into them, which will always emit positivity and wonderful memories.
The Ideal Style team will offer you amazing ideas on what kind of frames you can make for photos with your own hands, surprising you with unexpected solutions.
The presented photo frames will not only enrich your interior, but will also preserve the most valuable thing - the memories associated with a particular photograph.
After reading our review, you will see 50 examples of photo frames, representing different ways to design this item.
Original and unusual do-it-yourself photo frames 2020-2021: ideas, design, current decor trends
In order to make frames with your own hands, you will need a base, auxiliary materials in the form of tools, glue, etc., and of course, materials with which you will decorate the photo frames.
Human imagination is limitless, which gives us the greatest opportunities in any business.
When making photo frames with your own hands, you can use cardboard, colored paper, fabric, vinyl records, matches, ceiling plinths, tree branches and dried plants, window frames and much more.
It all depends on your idea and desire to create a unique thing for a unique interior.
Let's take a closer look at the great ideas on how to decorate your own photo frames, and which DIY frames will successfully complement your captured memories.
DIY frames: photo frames made from shells - ideas and finishing options
 For many, going to the sea is a dream that may never come true. Some people, on the contrary, go on vacation to the sea every year, bringing amazing shells of different shapes, sizes, and types from the resort.
If you don’t have shells collected from the sea, but you really like this decor, you can easily purchase shells at a decor store, creating wonderful frames with your own hands from shells in different interpretations.
In order to make frames with your own hands from shells, you will need a base (cardboard, wood, plastic) and shells.
You can also make frames with your own hands, using not only shells, but also other decor that harmoniously combines with seafood, for example, rope, pebbles, twigs, etc.
It is noteworthy that the more chaotically you lay out and stick the shells, decorating the frames with your own hands, the more interesting your product will be.
Making a DIY photo frame with embroidery or beads
 Truly masterpiece examples include do-it-yourself frames decorated with hand embroidery or beads.
Beautiful photo frames of this type can be made using special stencils, which determine what kind of thread or bead embroidery will decorate your creative frame.
DIY frames with embroidery can be bright and multi-colored, or they can be made in a single color, laconically complementing the shades of your interior palette.
You can improve embroidered photo frames with your own hands by adding buttons, old jewelry, pearls, etc. to the craft.
If you choose beads for decoration, you can not only embroider with them, but also stick them in the shape of a photo frame.
Original do-it-yourself frames made of wood, twigs, dried flowers
 Each interior has its own characteristics, so DIY frames can be completely different, and sometimes very unexpected.
Wood products are one of the elements of many types of interior, so if you make frames with your own hands from rough and uneven pieces of wood, old boards, dry branches, tied together with a thick rope, or carefully glued and varnished, you will get something incredibly interesting .
Also, a do-it-yourself frame for a frame is often made from vine branches using a special weaving technique.
DIY frames look no less creative when dried branches are glued to the base of the photo frame in combination with pebbles, ropes, burlap, etc.
DIY frames look tender and sensual when you glue dried flowers or leaves onto the finished base.
Beautiful do-it-yourself frames made of fabric, thread, burlap
 We have already named many interesting ways to decorate a frame with your own hands. But that, of course, is not all.
The next unique ideas for decorating your interior will be DIY photo frames made using different pieces of fabric, burlap, coarse threads, and yarn.
Our collection shows do-it-yourself photo frames made of denim, photo frames made of fabric flowers, exclusive do-it-yourself frames made of several types of fabric.
Of course, to make such a frame you will need a little patience and time, but the result is worth it.
Also, do-it-yourself frames made of thread, burlap and other types of fabric can be supplemented with pebbles, twigs, shells, and unexpected objects found somewhere in a box of trinkets.
Super fashionable DIY frames using decoupage, quilling, origami techniques
 Using colored paper and paints, ribbons, etc., you can create truly unique frames with your own hands that will remain relevant after a long time.
These include photo frames made using the decoupage technique, which involves painting the surface of the frame in a certain style.
Using the decoupage technique, you can create frames with your own hands in a vintage style, draw flowers and pictures on the frame, and cover the frame with special decoupage paper.
Frames made in the style of origami and quilling are not far behind in originality. Both techniques involve the creation of certain details from paper, with which photo frames will be decorated, or rather pasted over.
Cute curls, delicate flowers and leaves, strict figures and unusual shapes - these are exactly the kind of frames you will get with your own hands by using these techniques.
Unusual DIY frames made from coffee, cereals, pasta
 When you need to create cool frames with your own hands for a gift to a friend, but you don’t have any special materials in the house, pay attention to coffee, cereals, pasta, which incredibly interestingly transform from cooking products into material for a photo frame.
In our review you will see beautiful DIY coffee frames. See how unusually you can arrange coffee beans and what you can combine them with.
Play with buckwheat, peas, pasta, rice, etc. You can create unique frames with your own hands.
In addition, these materials can also be combined with other types of finishes. Let us note that pasta, due to its variety of shapes, is a godsend for those who want to surprise everyone with their product.
How to make frames with your own hands: extraordinary photo frame ideas
 You can only create something unique if you approach this process in the same way.
You can make your own photo frames unconventional if you cover the base with keys from a calculator or an old keyboard, take colorful pencils for decoration, and use parts of an uncorrected watch mechanism as material.
Professionals also suggest gluing multi-colored skeins of thread, old newspaper, corks from wine bottles, buttons and old keys onto the base for the frame, or creating frames with your own hands in completely unusual shapes.
But that is not all. How do you like DIY frames made from jewelry? As they say - expensive and angry.
50 DIY photo frame ideas
As you can see, every idea is unique. If you bring at least a few ideas to life, you may end up with a unique collage that will decorate and transform your room with pleasant memories.
Dare, because everything impossible is possible!


It's always nice to look at photographs that capture memorable moments from your life. Be it a wedding celebration, the birth of a child, or just a photo on a bench in an autumn park.
And in order to prevent valuable shots from disappearing, we try to carefully preserve them; a photo frame may be suitable for this. You can buy it at the store, but making it yourself is much nicer.

Recommendations for making a photo frame with your own hands
In order to make a frame you do not need expensive materials; most likely, you have everything you need at home.

Initially, you need to decide what the base of the frame will be made of.

Suitable for this:
- Paper colored or plain;
- Durable cardboard;
- Fibreboard, wood, etc.
For those needlewomen who have more experience, it will not be difficult to make a base for a photo frame from an old watch case, a box of matches, branches, twigs, plastic forks or spoons, and disks.

The greater the variety of available materials, the more interesting the work will be. The most popular materials are wood and cardboard.

Paper photo frame
If you have wallpaper scraps on hand, they can serve as a good basis for making a three-dimensional photo frame. Plain colored paper is also suitable, which, if desired, can be painted in the color you need.

Newspaper can also work for this. Using knitting needles, twist it into a tube, weave a frame, then form a frame and paint it with bright colors.

Cardboard photo frame
Cardboard will serve as the most reliable base for a photo frame. Draw out template details for the future frame. If you plan to hang the photo frame on the wall, attach a small loop made of thick thread to the back wall.
If you want to admire a photo on your desktop, take a step. Decorate the cardboard with flowers, stars, hearts, butterflies, which are prepared in advance from multi-colored paper.

Do not forget that excess design may look unsightly. If the paper contains a beautiful design, then there is no need to add decorations.

Wooden photo frame
If you decide to make a wooden frame, then for this you will need twigs and branches. First, think about what size the photo frame will be, because the width and length of the source material will depend on this.

The fastening element will be organza or rope. The work will not take much time, and the manufacturing process will be entertaining and interesting.

Weaving from willow, willow or vine branches requires certain skills, so this work is not for everyone.

An excellent material for a photo frame can be ice cream sticks. With their help you can create your own unique creative masterpiece.
Photo frame from other improvised means
Save colorful cards, they are great for decoration. Master the quilling technique and your bright works will delight you for a long time.

Note!

You can also use multi-colored napkins, cut them into small squares, roll them into small balls, and attach them to the base with glue. This work is not difficult, but even a child can do it painstakingly.

Various pieces of fabric are also suitable for decoration. For example, if you decorate a cardboard frame with denim, it will look very stylish and creative.

You can also attach puff pastry figures to the photo frame. Unnecessary markers, plastic tubes, pencils, fragments from a broken vase, disks and much more can be used for decoration.

Natural materials (dry leaves, flowers, pine cones, nut shells, wood shavings, multi-colored small stones, shells) look more natural and natural; they are perfect for decorating photo frames.
Experiment with food items, decorate the frame with rice, buckwheat, peas, beans, corn or sunflower seeds.

Use pasta (corns, stars, vermicelli or spaghetti) when decorating. To make the frame look more colorful, you need to paint it with colored paints.
Note!


From everything that has been said, we can conclude that in order for the photo frame to turn out beautiful and unique, for this you will need any available material, your imagination, idea and desire.

DIY photo frames


Note!