Workshop at the dacha: design, materials. Features of construction and communications. How to equip a carpentry with your own hands: tips and recommendations Do-it-yourself country workshop
Preface
Many home craftsmen are interested in how to equip a workshop. After all, the quality of the work performed, the speed, and the convenience of the technician will largely depend on this. And today we will talk about the main aspects of making a workshop in your garage. Start of work on setting up the workshop.
Required tools and materials
Self-tapping screws Construction vacuum cleaners Dowels Crafting tableFirst of all, you need to immediately tidy up your garage, remove everything unnecessary, all the garbage - don’t be Plyushkin, who collected everything you need and no longer need. After this, install the large equipment and workbenches that you will use in your work. Small tools can be stored in separate drawers or on hooks driven into the wall. By the way, such storage is very convenient, since you will always see what tool you have, and you will save a lot of space. If desired, you can hang the tool according to its functional purpose. It is advisable to store dowels and screws in separate boxes, selecting them according to size.
Many people use special carts for tools, so you will always have everything you need at hand. Using a trolley, it is also possible to equip a mobile workplace in cases where the main work will be carried out outside the workshop walls. If you decide to make a workshop not only for yourself, but also for others, offering repair services, it is advisable to take care of the possibility of connecting various equipment, such as, for example, for which you need to think about the location of sockets. In some cases, setting up a workshop involves creating a hood, especially if you work with wood. Or, if you don’t have this option, just buy a powerful vacuum cleaner.
But it is also important that you think in advance about what equipment will be located and where. In general, you can sketch out a simple layout of the equipment - this will make it easier for you to visually perceive the information. By incorrectly organizing free space in the workshop, you will achieve a sharp decrease in the efficiency and effectiveness of your work. Just calculate what area will be most suitable for you for your workplace, how much space you will need to place the tool.
Also, when equipping your workshop, do not forget about the winter period - you will need a device for heating the room, otherwise the work can be postponed during this time. To do this, you can use modern insulation materials and, in addition, install an electric heater. By the way, instruments will be stored better in a warm room, since humidity and low temperatures can lead to a deterioration in their properties.
Advice: don’t forget about the first aid kit, which must contain the cotton wool, bandages, brilliant green and antiseptics necessary for first aid.
In the process of building a summer house or a country house with your own hands, a desire arises to make it so beautiful and individual that your friends and neighbors will be jealous. But even you have the ability and desire to carpenter, you need a tool and a room in which masterpieces of wooden art will be born. We invite you to consider building a carpentry workshop as the embodiment of your hobby. Although maybe later it can become your small business.
In this article we will look in detail at how to equip a carpentry workshop on your own using a ready-made example. The area of the workshop presented below is approximately 400 m² (but you can make it small). The entire workshop is divided into two rooms where the working processing machines are located.
Which is better: building a new one or using an old one?
The carpentry shop will look much more functional in a new free-standing building for a number of reasons:
- Noise. The operation of the machines can hardly be called silent production, plus the operation of ventilation systems.
- Smell. It is not easy to get rid of the smell of paint products even with a good ventilation system.
- Garbage. Even with thorough cleaning of the workshop, dust will involuntarily enter the living quarters.
- Safety. The presence of cutting tools on machines and the use of three-phase power supply is considered high-risk equipment, and access to it by unauthorized persons is prohibited.
- Production area. It is unlikely that there will be a room in the house of sufficient size to comfortably accommodate all the necessary equipment for a full-fledged carpentry workshop.
- Auxiliary area. It is necessary to choose a place for storing tools, as well as for storing blanks and finished products.
There is an opinion that a workshop for carpentry work at home should occupy up to 6-7 m2, but this is catastrophically not enough. In such an area it will not be possible to fit the maximum amount of equipment. Moreover, the recommended length of the room should be at least 4 m. Even if, by a lucky chance, you fit everything you need, you will not have any room left for normal work. There is nothing to say about storing material and finished products.
 DIY carpentry workshop
It won't work with a garage either. This is a specialized place for the machine and risking its integrity during operation is not a suitable option. In addition, the workshop requires normal temperature conditions, which are difficult to maintain in the garage. It is also necessary to allocate space for storing car parts and tools.
The barn is closer, but still unlikely to fit. Rather, such a solution will require radical redevelopment and reconstruction, commensurate with new construction.
Carpentry requires a reliable foundation made of slabs. If the equipment is installed unstable, it will vibrate, which will ultimately lead to its failure.
Having considered all the options, we decide to place the workshop in a newly built building.

Place for building a workshop
When determining a location for a future carpentry workshop, it is necessary to take into account some axioms of its placement:
- As far as possible from residential areas and buildings with domestic animals, if any. The noise produced by work equipment will have an adverse effect on the nervous system of your household.
- It is advisable to choose an open space. The absence of shadows will allow you to save a little on heating the workshop in winter and on lighting throughout the year. Solar radiation will heat and illuminate the room.
- To avoid flooding of the building during rains and snowmelt, there is no need to build it in places with a low general level. This can lead to problems with the building itself and even to emergency situations, such as electrical short circuits.
- It is advisable to ensure ease of access in all weather conditions in order to avoid constant snow clearing in winter, and to prevent flooding of the building during spring snowmelt.
- A plot of soil not suitable for farming will be an excellent place for a future builder
Workshop project: where to start
The first step in designing is to determine what specific workshop work you will be doing. It is advisable to think through and write down all planned work, both in the near future and in the future. Based on this list, it is necessary to compile a list of auxiliary equipment necessary to complete the assigned tasks.
Next, determine the availability of the necessary tools (from a chisel and hammer to a drill and jigsaw), nails and screws, blanks and finished products. Don't forget to complete your list with a powder fire extinguisher and a first aid kit. Then determine how to arrange all the above things, what cabinets, racks and shelves are needed for this. Let's move on to the list of main equipment. The list must be completed:
- workbench;
- machines, according to the list of works;
- advanced equipment;
- industrial vacuum cleaner;
- heating radiators;
- a box of sand;
- washbasin;
- container with water;
- locker for special clothing;
- a stool.

workshop equipment
After this, you need to add cabinets and racks with items from the first list to the second. Next, we determine the place for future blanks. The recommended minimum size of such a rack is 1 m × 6 m; it also needs to be added to the second list. Such a detailed list will allow you to calculate the dimensions of the future joinery.
Subtleties in drafting projects

When all preparations are completed, it is time to design. The result of your efforts should be a document that is a project for the future workshop. For construction, there is no need to draw up construction drawings according to all the rules; detailed sketches indicating the actual dimensions of the future premises and the dimensions of the main and auxiliary equipment specified in the second list are sufficient.
There should be several sketches. It is difficult to indicate all the elements of a structure on one projection. Therefore, your sketches should include all the details down to the smallest detail. External and internal dimensions of the room and its elements are indicated without observing scale, but must reflect the actual position of objects and building elements.
An approximate calculation of the required area for a workshop will be the product of the area of all equipment, shelving and cabinets and a coefficient equal to 1.5-2.
Still, if computer graphics looks like unplowed virgin soil to you, then the visual layout of the carpentry can be done using the old-fashioned method. Take a sheet of graph paper, draw on it the premises of the future carpentry on a scale of 1:20, agreeing with the approximate calculation and pre-made drawings.

From the same paper, cut out rectangles of equipment and auxiliary structures to scale, but according to real dimensions. This will make it possible to correctly place them in the workshop, taking into account workplaces and aisles. If necessary, you can move the rectangular layouts to determine the perfect workshop layout:
- On a sheet of graph paper, draw two lines perpendicularly, indicating the walls.
- We draw the door of the room. The size of the doorway should be slightly larger than the largest equipment. Then there will be no problems during its transportation. We arrange the equipment;
- We draw the remaining walls;
- We determine the location of the window openings and put them on the drawing. It is advisable to equip the eastern and southern walls with windows. This will allow you to get more sunlight and heat;
- Measure all dimensions and, taking into account the scale, apply them to the workshop layout.
This will be your guide to further actions.
Completion of the project: finishing touches

A few more necessary actions that must be completed in order to get a project that has the right to life.
It is advisable to provide several rooms in the workshop:
- The main area where carpentry work is directly carried out;
- Auxiliary, where additional work not related to woodworking is performed, for example painting and drying finished products;
- A utility room intended for household needs, such as changing clothes and rest, equipped with a locker for clothes, a table, a kettle for organizing a snack, and a couch for a short break.
These rooms will help divide areas of activity into zones and contribute to comfort during the work process.
The diagram of the utility room with the dimensions of its furnishings must be made on the same sheet with the main workshop.
The storage area for long timber or lumber should be located opposite the front door for ease of storage. A machine for sawing workpieces should be placed near the rack.
After receiving the layout of the carpentry, we move on to drawing up its sketch. We determine the material for the walls, their thickness and height. Select the type of roof and roofing material. Here it is recommended to rely on your wishes, budget and the ability to do it yourself.
An important issue in the design of a carpentry workshop is the development of a ventilation system. It must be forced, supply and exhaust. Such a system will ensure the removal of chips and harmful substances, complete air recirculation and microclimate regulation not only in the carpentry room, but also in the painting department. Draw on the sketch all the components of the ventilation, indicating the parameters and dimensions.
The final stage of design is the creation of a power supply circuit, lighting, both basic and individual for each workplace, and a grounding loop. Each workplace must be equipped with a grounded socket, each machine must be grounded. Upon completion, a sketch of the connection to the communications workshop building is made.
Construction of a carpentry workshop with your own hands
The location has been chosen, the project has been prepared, and the construction of the carpentry workshop can begin. Construction should be divided into several stages:
Foundation

foundation
- At a pre-selected location, we mark the perimeter of the future workshop.
- We select soil to a depth of 70 cm for the future slab foundation.
- Along the edge of the pit we place formwork 20 cm protruding above ground level.
- We prepare the base from gravel and sand, carefully compacting it to a thickness of 20 cm.
- We carry out reinforcement. We take the reinforced mesh and lay it on the base. We screw the second layer of reinforced mesh to the bottom one using pieces of reinforcement 250 mm long with Ø1.5-2 mm knitting wire.
- We install anchor bolts in places where the machines are installed.
- Fill it with M200 grade concrete.
- Cover the concrete with a tarpaulin or film and leave until completely hardened for 3-4 weeks. In hot weather, it is advisable to periodically water the concrete.
Walls
 Wall installation primarily depends on the selected material. If the structure is wooden, then to fasten the lower crown when pouring the foundation along its perimeter it is necessary to lay threaded rods. Further construction of walls comes down to the construction of a wooden structure. The room can be made of brick or foam concrete blocks at your discretion. After making the box, install the window and door blocks. Make the roof according to a pre-prepared sketch with your own hands.
Floor


Floors in a carpentry shop play an important role. It is usually made from several layers. A base of 5 mm thick sand is made on the foundation, then it is covered with roofing felt and boards are laid on top or an armored mesh is laid and poured with concrete. The second option is more reliable and popular.
If the carpentry is made of wood, then it is necessary to impregnate the walls with fire retardant compounds.
Next, you need to bring all communication networks into the room and perform the wiring. All cable lines in cross-section must correspond to the current load imposed on them during further operation. In a workshop, wood is placed in metal pipes for fire safety purposes in case of a short circuit; in other buildings, corrugated pipes made of self-extinguishing polymers are used.
Heating in the workshop is provided using oil radiators or autonomous water heating. An electric boiler can be used as a source of heating the coolant, and if it is possible to equip the premises for a boiler room, gas or solid fuel boilers can be used. It is better not to use solid fuel boilers in a wooden workshop; there is a high probability of accidental fire.
How to equip a carpentry workshop
Fig 1. General view of the workshop
In the center there is a sawing machine, near the wall there are blanking machines that allow you to end-process the board, make a cut, etc.
Figure 2. Procurement area
Prepared or processed wooden blanks, veneer, blanks for the façade of furniture, doors, etc. are stored here.
Fig 3. Cross-cutting machine
A cross-cutting machine is used to “cut” lumber. For example, 6 meter boards are shortened to 4 meters; the length is selected depending on the type of processing machine, the size of the room and the required dimensions of the finished product. Various waste after trimming lumber is stored at the bottom of the machine.
Fig 4. Drum grinding machine
Near the end machine there is a drum grinder, which is also made by hand.
Fig. 5. Hood - as an important factor in setting up a carpentry workshop
This drum sander hood is designed to collect all the wood dust after the sanding process.
Fig 6. Circular machine
Next to the drum sanding machine there is a circular one, which is also used for “rough” cutting of lumber.
Fig 7. Jointer
In the center of the workshop there is a jointer, which was made in the USSR. The length of the table is 2800 cm and the width reaches 420 mm.
Fig 8. Thicknesser
The thicknesser is located next to the jointer with a workpiece size of 420 mm.
Figure 9. Aspiration
Between the thicknesser and the jointer there is a powerful aspiration unit, which during the processing process collects all the wood dust into a special reservoir, which can then be easily cleaned.
The milling mechanism was borrowed from the factory machine, and the work table, frame, aspiration and control system were made independently. Milled titanium was used as a tabletop. The factory shaft from the milling machine was removed and a new one was machined according to the dimensions of the working part of the machine. The shaft turned out without any cones for the old landing cutters, which is very convenient.
Fig 11. Milling machine shaft
Fig 12. Lathe
Figure 13. ShLDB machine
Figure 14. Cross-cutting machine
Do-it-yourself carpentry will require not only specific skills for fine-tuning and assembling machines, but also significant financial costs for purchasing the necessary materials.
Fig. 15. Factory-made Corvette 33 band saw
Figure 16. Angle cross-cutting machine
Figure 17. Sharpening machines: emery, diamond and felt
These machines are used for sharpening chisels, drills and other working tools.
Figure 18. Slotting machine
Some elements from the slotting machine were borrowed from the factory milling machine. The frame base, desktop, and controls were made independently. The motor is used at 380 volts with a bearing mounted at the rear. The bearing was installed in order to increase the power of the engine, which simply did not work under such a load without modification.
Fig 19. Sliding slipway on tripods
Figure 20. Homemade universal machine (plane, saw)
The countertops are made of high quality and durable titanium.
Fig. 20. Saw-milling factory machine with the ability to adjust the height and angle of processing lumber.
Figure 21. Drilling machine
The picture shows a factory-made drilling machine from the times of the USSR. The engine was modified and the pulleys were re-sharpened.
Fig 22. Workbench
Figure 23. Rack with hardware
Fig 24. Cabinet for chisels near the workbench
Figure 25. Cabinet for working cutters
Second room of the carpentry workshop
Fig 26. Homemade press
The dimensions of the press are 900 mm in length and 2700 mm in width. The workpiece is placed on plastic stops, which is then compressed by a press.
Figure 27. Universal sharpening machine
Here is a jointer and emery for sharpening cutters and knives.
Fig. 28. JET 16-32 drum grinding machine with a modified work table and feed roller.
Figure 29. JET drum grinding machine
Factory machine with modified support plates, internal aspiration casing installed.
Figure 30. Painting room
At this point, processed blanks are installed on tripods, which are subsequently painted and painted using a spray gun and brushes.
Figure 31. Compressor for painting
One of the mandatory conditions in a paint and varnish room is the creation of effective supply and exhaust ventilation. It should be noted that in winter, this room where painting work is taking place must be well heated. Otherwise, you will not be able to properly paint or apply varnish.
Figure 32. Slipway
The slipway is located in the assembly and grinding room, where the final stages of processing of wood products take place. The slipway is made of high-quality laminated plywood, which is mounted on a metal frame with the ability to be adjusted in height. This is done in order to create a perfectly flat surface in rooms with uneven floors.
Additional photos of the carpentry workshop
1. Shelving

Shelving
2. Trimmings
Trimming saws are used for cutting (dissolving) workpieces. Near the trim, you can immediately organize a place to store wooden scraps that can be used in the future.
In order to be able to produce any wooden product, it is better to equip the workshop with several trimming machines - with a six-meter longitudinal, with a transverse and with a rotating table.

Trimmings

Trimmings

Trimmings

Trimmings
3. Drum grinding machines

Drum grinding machines

Drum grinding machines

Drum grinding machines
4. Circular

Circular
5. Electric jointers

Electric jointers

Electric jointers
6. Reismus

7. Vertical milling machine

Vertical milling machine

Vertical milling machine
It is best to place a cabinet near the milling machine to store various cutters.

Cabinet for storing cutters
8. Lathe

Lathe

Grinding machines with reel and disc (ShlDB)

Grinding machines with reel and disc (ShlDB)
10. Band saws
This equipment is designed for cutting wood using a band saw. Unlike a circular saw and a cross-cut saw, this machine provides a lower roughness of the processed surface, which means that the surfaces (ends) obtained as a result of sawing do not require finishing.
It is better to equip your carpentry with two band saws - for sawing large and small parts.

Band saw machines.

Band saw machines.
11. Sharpening machines

Sharpening machines

Sharpening machines

Sharpening machines

Sharpening machines
12. Slotting machine
In woodworking, a slotting machine is necessary to create rectangular and oval grooves in wooden workpieces.
The work table, with the workpiece attached, can move along and across the body, as well as tilt at a certain angle, which allows you to create grooves of various configurations.

Slotting machine
13. Sliding slipway

Sliding slipway
14. Drilling machine
A carpenter in the workshop cannot do without a drilling machine, which provides drilling of holes of various depths and diameters.

Drilling machine
Near the drilling machine it is rational to place a cabinet with interchangeable tools - drills of various sizes.

Tool cabinet with replaceable tools
15. Aspiration

Aspiration

17. Place for metal work
The area for processing metal workpieces should be equipped with related equipment and tools (vise, anvil, hammer, pliers, etc.), which are best placed on the table and surrounding racks and shelves.

Place for metal work
18. Joiner's table
The main equipment of a carpentry workshop is a reliable workbench for drawing, manual processing of wood products and other tabletop carpentry operations.

Carpenter's table
19. Area for painting and varnish work
The ideal option is to allocate not a zone, but an entire room for painting and varnishing wooden products. In any case, this place of work must be equipped with a good exhaust hood and have a window.

Paintwork area
20. Slipway for final assembly
Any flat and clean surface can be used as a building stock for assembling furniture. Ideally, if the area of the slipway is at least 10 m2.

Final assembly berth
21. Goats (weims)
Weights are used to facilitate the assembly and gluing of joinery products.

Shelves with tools (glue, tape, tape measure, screwdrivers, rulers, pencils, compasses, etc.) should be located close to the workbench.

Storage space for carpentry tools

Storage space for carpentry tools
To store chisels, it is better to select a cabinet where each tool will be in its designated place. Such orderliness will help improve work efficiency.

Storage space for carpentry tools
23. Space for storing hardware
It is better to package any metal fasteners (nuts, bolts, screws, nails, etc.) and accessories (handles, legs, guides, etc.) in separate jars and label each of them. Hardware distributed in containers is placed on shelves near the furniture assembly area.

Storage space for hardware
Before making carpentry or a carpentry workshop at your dacha with your own hands, you need to purchase a suitable room, and then purchase all the necessary equipment. All of the above-described machines necessary for working in a carpentry workshop can be purchased from companies that sell metal-cutting and woodworking equipment on their websites or trading platforms. You can also visit special exhibitions and get acquainted in detail with the examples of carpentry devices presented in order to choose the best option for your carpentry.
Video tour of the carpentry workshop
Most of the woodworking carpentry machines used in the video were made independently using some ready-made factory elements that were refined and improved. Another important aspect in a carpentry workshop is effective suction. This article answers the question in more detail - how to make a carpentry workshop or carpentry shop with your own hands. As can be seen from the material described above, this is a labor-intensive and costly process. However, if you have all the necessary woodworking machines and tools, you can easily make not only wooden windows, doors, furniture and interior items, but also restore especially valuable wood products from past centuries. Good luck.
We also recommend:
Welcome to our "Dream Workshop Ideas" page!
This is an update to the review photo gallery in which we have collected a variety of ideas and options for realizing a dream: My ideal Workshop. In version 2.0, the information is structured, supplemented with explanations, and of course, a lot new schemes and photos
.
* This photo review was created for informational purposes and is not a product. You can print this page yourself and for free.
What amateur or Master does not dream of his own secluded corner in which he could realize his dreams and ideas? And our Russian people have the Kulibin vein embedded in their genes. Just give us time, a place and tools in our hands and oh, we’ll turn around and our soul will sing...

In this photo gallery article, we have collected a variety of ideas and options for realizing your Dream: from a tool box and workbench in an apartment (house, barn) to a full-fledged, free-standing Workshop, equipped with a full range of equipment and tools that you may need. We will definitely consider such a solution as a mobile (mobile) Workshop. There is also a photo
A workshop from a historical point of view - how carpenters did it in past centuries. Of course, modern solutions have also been added.
Everyone has their own path to their Dream Workshop, but As in any other matter, solution options and results depend on the approach and experience. You can do it yourself as simply as possible. Often this is exactly what we are used to: doing it quickly and cheaply, without embellishment or convenience. Because there is always not enough money or time, and therefore we have what we have. But still, using examples of other solutions - with imagination, a thorough approach and creative hands - we will show how you can make your own Dream Workshop.
So, let's begin! Dream Workshop 2.0
Contents (quick links down - page navigation):
"... In a carpentry workshop, workbenches are positioned perpendicular to the windows so that the light falls from the left. It is advisable to arrange workbenches in 4-5 rows, 4 workbenches in each row with a distance between rows of at least 100 cm. Area per carpenter: 4.5 sq. m.
The industry standard for carpentry workbenches with a wooden base provides the following requirements:
The height of the workbench can be in three positions: 700+15, 790+15, 900+15 mm; tabletop dimensions: length - no less than 800, width - no less than 450 mm; the moisture content of wood for the manufacture of workbench parts should not be more than 12%; all wooden parts must be made of hardwood (Lumber. GOST 2695-71) or softwood (GOST SEV 2369-80), provided that the main working surfaces are covered with plywood in accordance with GOST 3916-69; the height of the stool should be fixed in the range from 700 to 750 mm, the shape of the seat is round, with a diameter of 350+5 mm or square with a side of 350+5 mm; The average service life of carpentry workbenches should be at least 6 years (for the highest quality categories - at least 8 years)... "
Regarding the height of the working surface when working while standing, ergonomics has the following recommendations:
in the picture The first rice is for precision work, The second rice is for light work, The third rice is for heavy work:

More good examples of carpentry workbenches:


An assembly table is of great importance in the workshop, where products can be assembled.
But in many cases it is replaced by either a workbench or a multifunctional table.
In this regard, an excellent ready-made solution is :
and its smaller brothers who took this idea into service. Eg
Or a stationary table in addition to the MFT-3 table itself
All homemade improvements and options are in the 2019 update reviews
You can see a more detailed review of workbenches on the page


Or on a movable cart, you can make it yourself or buy it, for example


Don’t forget about the storage location of the material.
Moreover, the option in the photo on the right is preferable, as it provides good ventilation for almost every board.


And each of them was valued no less than the contents themselves.


Boxes, Systainers and organizers are available and factory-made:
A special place in tool storage systems is occupied by
.
Their main advantage is docking with each other, with vacuum cleaners (on top). and in addition they can withstand a weight of 120 kg. That is, a person of heavy build can stand on them without fear of breaking them.
Box chest.
This is what they did before:
Popular photo

In this photo, the tool box looks like an inherited chest. Home kit for an amateur carpenter: everything is in its place, accessible and compactly placed.
If you look carefully, you can see that the placement of the instrument was thought out by the Master down to the details,- next to , next to and - . and the sharpening stones are placed on a soft surface.and the chisels are located vertically close to the side walls, and at the same time any of them is convenient to get out.
And this is what they do now:


View in the catalog
Arsenal Masters Reviews
Popular photo
This is a photo of the Arsenal Masters kit. The popularity of this picture is understandable, with the growing interest in carpentry, the first thing everyone is interested in is where to start? Served "deliciously" in the photo (from left to right): , , , , , , , , , , And .
Dresser drawers are made as before


Combination of a workbench built into a chest of drawers from the old Hammacher-Schlemmer company:

Modern implementation:
In past centuries, such boxes were often made portable, so they used to try to fit as much as possible into them.

Particularly successful in this was Henry O. Studley, a carpenter and piano maker from Massachusetts, who spent 30 years creating the Masterpiece - a set of tools for repairing, tuning, and even assembling grand pianos, pianos, and organs from scratch. The suitcase measures 99 x 46 x 23 cm (when closed) and holds over 300 unique handmade tools and accessories.
Popular photo

Video review of the Henry O. Studley Tool Chest

The main thing when placing a tool is to take into account the division into zones with similar functional purposes: in one place, in another, in the third and so on.


Popular photo

Both the selection of tools, and its beautiful, functionally convenient placement, and the wall-mounted storage box itself speak of the high professionalism of its owner. Everything you need for full-fledged work. As they say: neither add nor subtract.

The photo shows a magnificent cabinet both in its manufacture and in its contents!
Popular photo
In our opinion, this is the “alma mater” of carpentry cabinets and carpentry tool storage systems. By the way,enjoys well-deserved popularity, just like this photo.
More photos of tool cabinets:

Popular photo

Another wonderful cabinet of carpentry hand tools. I just want to look at everything, take it out and touch it with my own hands. And the solution is extremely budget-friendly. Material - plywood. The bottom drawers are plastic “baskets” painted in wood color for all sorts of small things. Economical, practical and aesthetically pleasing!


Setting up the Workshop
There is a work surface. There is a tool and there is a place to store it. And now our home Workshop is born. At the same time, of course, we value more what we have created with our own hands - a home-made home Workshop.


With the accumulation of tools, the Workshop acquires a variety of tool cabinets, convenient shelves and, as we have already noted, at least one large table, workbench (whatever you need). And then the storage system. begins to expand to its “wall”, corner, room.


Popular photo

This photo is captivating with its beautiful symmetrical interior content. When open, this tool cabinet provides quick and convenient access to any tool within arm's reach. I worked, put everything in the closet, and closed it. Cleanliness, order and tools are safe. With this storage, the work surface is uncluttered and free as a “blank canvas” for creativity. And if we add to this the extremely low execution budget, then the great interest in this solution is justified in all respects.


It is necessary to consider how conveniently everything is placed.
In this case, ergonomics advises the following:
Right - minimum opening dimensions in inches (25.4 cm)


Finding your style The master arranges the room The workshop is at your own discretion, from which a lot can be said about its owner.
For example, the Carpentry Workshop is difficult to confuse with something else. This is how it looked mostly in past centuries:

We can often find echoes of this approach in our time. This Workshop looks like a museum.
Popular photo

Respect and great interest are always aroused by historical continuity, a special attitude to every little detail, and even in the working disorder one can discern the hidden but clear organization of one’s business! We wish the same to you from the bottom of our hearts!
But here is a solution where everything “revolves” around the Master himself. It is immediately clear that the main working position here is sitting.
Popular photo

This is the workspace of a handyman who works with a wide variety of materials and hand tools. What captivates and surprises is, again, the large area of free working surfaces that have the most luxurious appearance! ABOUTthe abundance of tools and materials in the working accessibility zone indicatesa thoughtful and structured approach to creating this Workshop. Therefore, such interest in this solution is absolutely justified.

And this is what a modern home carpentry workshop looks like:

You can’t confuse a home forge with anything else either. This is how it looked not only in past centuries, but even now it is not uncommon to see such forges:

And this is what a modern full-fledged forging factory might look like:

Arranging everything compactly, conveniently, and even beautifully, tastefully - isn’t this the aerobatics!

But over time, the room becomes small over time. And we are setting up a garage as a Workshop and we are also having fun as best we can. Here, too, a lot depends on the direction of the hobby.
Some people gravitate toward metal and set up a metalworking workshop with the appropriate equipment.


At the same time, the most modern materials, equipment and devices can be used to manufacture a locksmith auto repair shop.
Popular photo

Dream - Garage - Workshop! Garage is a toy! You can feel whatever way you want about this decision. But one thing is clear - fifth place in the viewing rankings speaks volumes.


Below - examples of workshop arrangement
and equipping them with a variety of tools and machines.
Popular photo

The clever placement of the Carpentry Workshop in a compact environment, a large number of storage spaces and a wide variety of work surfaces makes this photo justifiably popular.
Separate workshop with organized space:


Some Masters are fans of a particular brand.
This is what it might look like Workshop with tools
:

Popular photo

This is what free creative thought does!Everything ingenious is simple. There is not enough space, but we have to work somehow. And without hesitation, the Master “shoved in” 4 tabletop machines instead of two, making a transforming table with a reversible working surface (tabletop). Practical, convenient and “let others be amazed at your ingenuity”!


In the end, your workshop may just be your “den”:

But, with special desire...
In fact, it may turn out to be a ready-made furniture workshop or even mini factory.
For example, an ideal studio workshop or an ideal workplace where you want to spend more time:

*- regarding the supply of Hammer machines, you can contact the managers of our company.
Popular photo

In our opinion, this is exactly the Dream Workshop!
At one time, our Photo Review “Dream Workshop” began with this photo in 2016. It was this photograph that started this Topic!
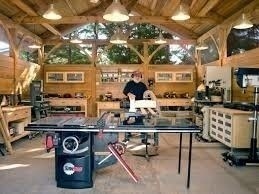
This Workshop is obviously a Successful Master. It is absolutely certain that he spent a lot of time thinking through all the details of his Workshop, and in it he proceeded not from what he had (limited space, limited budget, lack of time), but from the Idea in what conditions he wants to create and create . The abundance of natural light and properly organized local lighting is captivating, with the light coming from above, and in the work area (at a height of 2 meters) all the space along the walls is occupied by equipment and storage areas. The vaulted ceiling adds a sense of freedom and space for activity. The entire building is made of wood. What is called: “What I work with is what surrounds me.” Cleanliness, order, sufficient space for work, professional equipment - everything works for high productivity and high-quality results.
View of a similar Workshop from the left and right rear corner.
Popular photo


And this is practically a factory version of the Workshop, but made in all respects “with love”. Luxurious floors made from the material with which the Master (or Masters) works, high ceilings with a translucent roof, a glazed wall with an excellent view. This means that there is no word “work” here in the usual sense. Everything here is a pleasure. In such "mansions"The customer will come running himself.
And this is what a full-fledged furniture workshop might look like


However, this may not be a purely carpentry workshop, but a universal Workshop in which you can realize your wildest ideas.

Photo example of a Russian Master
He set up and equipped his Workshop from scratch. The Workshop building is on a welded frame made of metal profiles. Both channels and corners were used. The frame is covered with sandwich panels. The floors are self-leveling. Heating - diesel boiler. The supplied electrical power is 15 kW.
Carpentry equipment: Combined Belgian machine Robland HX 310 PRO (we will supply you upon request), miter saw ,
manual frezer ,
dowel router ,
tenon cutter with dust removal device and router support, belt sander ,
sander ,
vacuum cleaner and vacuum cleaner FESTOOL CLEANTEC CT 17 E .
Prefabricated racks from standard elements.

All wooden furniture in the Workshop is made in-house.

This workbench is homemade. Welded frame from a box-section profile. The screws for the vice are also made in-house.
Table top made of laminated birch bars, oiled . Regarding the material, this is an unusual solution, but almost a year of use has not revealed any shortcomings.

He makes such products in his Workshop: wooden chairs and stools of original design:

In addition to furniture, he also deals with interior wood finishing. The walls and ceiling in this room are made of self-made glued panels.

Once again we invite everyone to share their experiences and successes!
Exterior of the Workshop
The decision on how the Workshop will look from the outside depends on your taste and capabilities:


The main secret is to buy only what you really need and don’t waste money on expensive trinkets. Take a closer look at professional workshops where each tool justifies its price. Think about how you can achieve the same results and how you can get the most out of every penny you invest without sacrificing quality.
START WITH THE MAIN THINGS
There are different opinions about which machines and tools for the workshop should be purchased first. Here's how we set those priorities. The list includes machines, power tools and other equipment. (This assumes you already have the basics, such as a screwdriver, jigsaw, and vacuum cleaner.)
First thing - sawing machine
This versatile machine is the heart of most carpentry shops. With its help you can saw lengthwise and crosswise, cut out grooves, tongues and tenons, and do much more. Since this will be your main machine, you don't want to be too stingy. Avoid purchasing lower-end desktop models, which often lack precision and power.
Pay attention to simple machines with an open stand or tabletop ones costing $300-500. They have plenty of power, are more accurate, and will allow you to use a variety of attachments.
By raising the bar higher, you can own an even more powerful and accurate entry-level closed stand saw, or (for the same money) a great open stand saw with a powerful electric motor and a 50-inch rip fence. Any of these machines can remain the only one for life. A good longitudinal stop always justifies its price, so you should choose it carefully and not skimp too much. When determining the costs of purchasing a saw in your budget, do not forget to add funds for the purchase of a high-quality combination saw blade with 40-60 carbide teeth to avoid numerous chips and burns on the wood.
Once you have purchased your saw, use one of its side wings as a router table by installing a mounting plate. This way you can avoid the unnecessary costs of a separate base and save valuable space on the workshop floor. You can also use the same rip fence alternately when working with the saw blade and cutters.
A router with replaceable soles plays any role
The router is undoubtedly one of the most versatile power tools in the carpentry shop. And today, for the same money, you can have many more routers than before.
The milling machine itself is useless, however, you can buy cutters in large sets, which will save you a lot of money. When several cutters in a cheap set have exhausted their service life, they can be purchased separately and replaced with higher quality ones that will last longer.
It makes sense to purchase a router with several interchangeable bases - fixed, submersible and, in some cases, with a bracket-shaped handle. Place one base on the table and use the other for manual routing. Add a large, inexpensive set of cutters and you're good to go.

Most measurements and markings can be done using a tape measure, combination square, steel ruler, compass and mechanical pencil. For more complex work, you will need a hammer, digital calipers, a protractor and a drawing square.
Tools for measuring and marking
The accuracy of processing directly depends on the accuracy of the marking, so you should definitely purchase several basic measuring and marking tools, choosing the highest quality ones. There are many clever devices, but you don't need to pay attention to them. Just a few basic ones are enough, which are shown in right photo above.
A work surface is essential

The workbench must be level, stable and durable. You can make it yourself by adding a commercial vice and bench stops for convenient clamping of parts.
Now that you can turn the boards into pieces for your project, you need a place to work with them. A solid woodworking bench makes an ideal workbench, but you can do a lot with a small folding bench, a door resting on a sawhorse, or the simple homemade bench shown in photo above.
You can't do without good clamps
Woodworkers often say that you can never have too many clamps, but just a few are enough to get started. Rack and pipe clamps are considered the champions of versatility, and they are especially useful when gluing panels together. Buy half a dozen pipe clamp heads, several lengths of pipe threaded on both ends, and couplers. Then you can always have clamps of any length on hand. Quick-release one-handed clamps are very convenient, so it is useful to have at least a few with a jaw width of 300-600 mm. Over time, when funds allow, add new clamps to your arsenal.

The soleplate of the eccentric sander rotates and makes oscillatory orbital movements, due to which individual marks merge into a continuous pattern that covers the entire surface.
Don't forget about sanding
If you can only afford one sander, let it be a random orbital sander. With coarse discs it will aggressively remove material from the surface, and with fine-grained discs it will provide a smooth base for finishing.
A drill press should be next on the list.
Modern electric drills impress with their power and convenience, but for maximum accuracy and precision, a drilling machine is required. In 90% of cases, a relatively inexpensive tabletop model will suffice, saving you over $100 compared to a larger floor-standing machine. Use the savings to buy sets of twist drills, Forstner drills, and some sanding drums. In addition, you can use a slotting attachment for selecting sockets, which is bolted to the quill neck.
Some may require a planer

Even if you don't take full advantage of a planer, it can help you quickly prepare rough boards for further processing and get perfectly straight edges for gluing.
If you often have to deal with rough boards, you should think about buying a planer and planer. Perhaps in other cases you will be satisfied with the possibility of jointing the edges using a router. However, planers are not overly expensive machines.
With its help, you can remove burn marks from a saw blade, ideally joint the edges of boards for gluing panels, and some models allow you to select folds. Most importantly, the planer is the only machine capable of perfectly leveling the face of a board.
IS THERE STILL MONEY LEFT? THINK ABOUT THESE PURCHASES
With the equipment listed on the previous pages, plus a jigsaw and drill, you should be able to make most projects. However, over time you may need a couple more machines.
Add a thickness planer to the additional list

It will help you save on purchasing lumber, since you will process rough boards yourself to the required thickness. In addition, you can obtain blanks of non-standard cross-section, which cannot be found on sale.
Be prepared for the fact that these machines produce a huge amount of chips and dust. However, some modern models have a built-in dust extraction system that makes later cleaning easier, and this can help put off purchasing special equipment if it's not within your budget.
A band saw wouldn't hurt either.

The band saw excels at curved cuts, but it can also be used to rip boards to width and thickness, cut crosswise, cut circles, and even turn small logs into boards.
Carpentry does not always require only straight cuts. A portable electric jigsaw can do a lot of things, but in some cases you can't do without a band saw. In our opinion, 14-inch models make the most sense in home workshops.
With all these machines, tools and equipment, you will be ready for almost any job. Then, as needed and budget permitting, add specialized tools to your arsenal. Read the section to see a list of what you may need in the future.
IT'S TIME TO GET ORDER IN ORDER
Work in the workshop will be productive only if each thing in it is immediately assigned a permanent place, and you regularly maintain order. But you shouldn’t go to extremes, thinking that the furniture in the workshop must certainly be fashionable or expensive. Efficiency is based on completely different principles. Try the following methods.
Store your tools in cabinets
You can organize storage for your treasures without spending a penny if you take a look at your unnecessary kitchen cabinets. Your relatives, friends or neighbors will often be happy to get rid of them after renovation.
Once you get your cabinets into your workshop, get creative with their placement. For example, the drilling machine shown in photo at the end of the article, installed on two wall-mounted kitchen cabinets. They raise the machine to a convenient height for work, and inside there is a lot of space, closed from dust by doors.
Make cabinets more functional by adding drawers and extra shelves, and attaching holders to the inside of the doors. Paint old cabinets with a light enamel to freshen up their look and make your craft room smarter.
Store boards compactly
Boards leaning against the wall and stacked on the floor quickly become a source of clutter and are often damaged when dropped. Store them properly by securing them to the wall with inexpensive metal brackets, as shown in photo at the end of the article. Place them at intervals of about 200mm in height and place particleboard shelves on top. Each shelf can easily hold 6-8 boards.
With such small stacks, it's easy to select the board you want, especially if you label each one.
ADDITIONAL WAYS TO MAKE THE MOST OUT OF YOUR BUDGET
How to save on clamps

Want to reduce the need for clamps? Try replacing them with several hairpin nails when gluing.
A small compressor and pneumatic nailer will cost about $200, which is no more expensive than a few good rack clamps. If you already have a compressor, purchasing a nailer will only cost $40-50.
Buy boards by the cubic meter
Purchasing lumber is not part of setting up a workshop. But all the work in a carpentry shop involves boards. Why not save on this too by buying them in bulk? If the professionals do this, then you can do it too by teaming up with a group of friends and buying boards together. You may be lucky and be able to get an additional discount.
Next steps
Other tools and accessories help make carpentry work easier, faster and better. Once you have the machines and tools we've included on the main list, you might want to consider purchasing the following items.
HAND TOOLS
- Chisels
- Planers
- Kiyanka
- Japanese hacksaw
- cycle
POWER TOOLS
- Lamellar router
- Belt sander
- A circular saw
- Second router
MACHINES
- Chip blower and air filter
- Miter saw
- Combined Belt and Disc Sanding Machine
- Spindle grinding machine
- Jigsaw machine
- Lathe
EQUIPMENT AND ACCESSORIES
- Mobile platforms for machines
- Roller support
- Jig for drilling oblique holes - pockets
- Tenon milling device
- Reismus

Most summer residents outside the city not only relax and grow crops, but also constantly make something, improving their dacha. For this reason, a variety of tools for working with wood and metal are brought here. However, before tinkering, it is advisable to take care of a place for safe and productive work, so in this article we will look at how to set up a workshop in the country with your own hands.
Workshop space
The easiest way is to equip a workshop in the basement or an existing outbuilding.
The only thing is that the room must meet the following requirements:
- The area must be at least 5 square meters. In this case, it is necessary to properly organize the workplace.
- The area of the room should be at least twice the space occupied by the tools.
- The floor in the workshop must be hard and always dry.
- The room must be well ventilated.
If there is no place at the dacha that meets these requirements, then a workshop needs to be built.

Construction of a workshop
Project
Before starting construction, you should prepare a design for a workshop at your dacha, which should take into account the following points:
- Dimensions of the future building.
- The layout of the building, for example, in addition to the workshop, the building may include a room for storing garden tools.
- Location of windows and doors.
- Location of the building on the site, etc.
The more accurate the project, the less likely it is to make a mistake during the construction process. However, it is not necessary to draw an exact drawing to scale. You can depict the design schematically, even by hand, the main thing is to accurately indicate the dimensions and other important parameters.

Materials
The easiest way to build a workshop is from wood, and the price for this material is the most affordable. Moreover, you can perform a frame structure, which will save time. To do this you will need the following materials:
Advice!
Recently, outbuildings and country houses made from block containers have become popular among summer residents.
They are affordable and quick to install.
This design can also be adapted for a workshop.

Construction
Brief instructions for building a workshop are as follows:
- First of all, you need to build a foundation. To do this, holes are dug for concrete blocks to a depth of about 25 cm, which are subsequently covered with a 10 cm layer of sand.
- Blocks are placed on compacted sand. Such support pillars should be located at all corners of the building, as well as along the walls at a distance of 2.5-3 meters. In addition, the posts should be located under the floor joists.
- Next, the concrete pillars are covered with roofing felt..
- Then, in accordance with the project, you need to cut the beams into parts of the required length.
- Foundation beams should be laid around the perimeter. The parts can be fastened using self-tapping screws and metal corners or using the tongue-and-groove method.

- Then the floor joists are laid, which are also attached to the outer beams using metal corners and self-tapping screws.
- After this, vertical pillars are installed, which are fastened with transverse bars.
- Horizontal beams are laid on top of the vertical pillars. The result should be a strong frame of the box.
- A roof truss system is installed on top of the frame, which can be made gable or even single-pitch.
- When the frame is ready, you can start covering it with chipboards. It is better to start work with the outer cladding. The panels should be secured with self-tapping screws. It must be said that instead of chipboard for external walls, you can use lining.
- Before sheathing the frame from the inside, mineral mats must be laid in the space between the beams.

In the photo - covering the frame with clapboard
- After covering the walls, you need to lath the rafter system, cover it with waterproofing material and lay a roofing covering, for example, metal tiles.
- When the building is almost ready, you need to lay the floor and sheathe the exterior with finishing material, which will protect them from the negative effects of the environment.
- To complete the work, you need to install windows and doors.
Note!
All wooden materials must be treated with an antiseptic before being used for construction.
This will protect them from rotting and, accordingly, extend the life of the building.
Communications
The first thing that needs to be done in the workshop is the wiring. The easiest way to conduct electricity is from the distribution box of the country house. However, a separate line can be drawn. In this case, you will need a separate counter.
When wiring, you need to carefully consider lighting. In addition to the central one, local lighting sources should be installed near the machines and workbench.
Advice!
If for some reason there is no electricity at the dacha, renting a diesel generator for the dacha will temporarily solve the problem.
To make the workshop even more convenient, you can install water supply into the room and install a drainage system. However, such communications are not mandatory.