DIY concrete figures for the garden. Exhibit # 2 - elegant flowers made of concrete. Decorative openwork ball made of cement.
Concrete is a universal material. It is widely used in many fields: construction, architecture, landscape design and other industries. Now we will focus on the creation of sculptures made of concrete.
The sculptures made of concrete are much superior to figures made of other materials. Compared to stone, sculptural liquid concrete is more flexible and easy to work with. Any figures of different sizes are created from it.
Such a sculpture will not be destroyed by any rains, winds, or other “surprises” of the weather. Concrete works of art can endure frost and sunshine, so they can decorate your garden all year round, requiring only a rare update in appearance.
Concrete sculptures will dry under normal weather conditions for several days. Such a relatively long drying period allows you to refine the material: correct unevenness, change something, add relief, remove excess solution.
The plus of monolithic concrete figures is also that it is hard to go far with such a sculpture, because even small works of concrete are quite heavy. Therefore, you can remain calm about the fact that someone is trying to steal your “beauty”.
Manufacturing methods
Sculptors working with concrete create their works on two principles.
On a metal frame basis
 Many craftsmen choose this technology because the frame retains the original appearance of the concrete sculpture in, while preventing the solution from deforming. In addition, such a technique ensures the end result of work durability.
The metal frame for concrete sculptures is made of large wire or welded from reinforcing bars. The more accurately the frame displays the shape conceived by the master, the less labor will be spent on concrete molding. If, according to the author’s idea, the sculpture should be hollow, then the frame should be wrapped with a construction net.
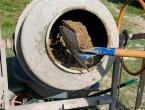
The manufacturing technology of concrete mix is \u200b\u200bthe same for frame sculptures as well as for monolithic ones. The composition of the solution includes cement, water. It is better to mix sand with cement with an appropriate ratio of 1: 3.
For accelerated hardening, a mixed solution should be added to the composition of the solution. It should not be liquid. Its consistency should correspond to the density of plasticine. If the mixture is ready, start sculpting. The initial layer of the solution superimposed on the frame outlines only the approximate outlines of the future work.
Apply a second layer of concrete after the first one has a little grasp. This will give the figure a solidity. If you want a concrete sculpture to be light, fill its body with construction foam or rags.
When you achieve the desired dimensions of the product, you can start sculpting small parts, as well as applying a relief pattern. To do this, you will need: awl, sandpaper, chisel, as well as other tools that are at hand. After the final form of the sculpture is ready, let it dry completely. This usually takes about two weeks.
 Then apply a waterproof primer to the job. After it dries, the figure is painted. For painting garden sculptures, it is better to use acrylic compositions of dyes or any other ones intended for outdoor work. It is painted several times. Each next layer is applied after the previous one has completely dried.
Sometimes the paint is replaced with a coating simulator of different rocks. For example, sprinkle a slightly hardened figure with stone chips, sea sand.
Using forms
Often masters practice pouring concrete already inside the finished silicone or plastic containers, which are purchased in special stores. And you can make them yourself.
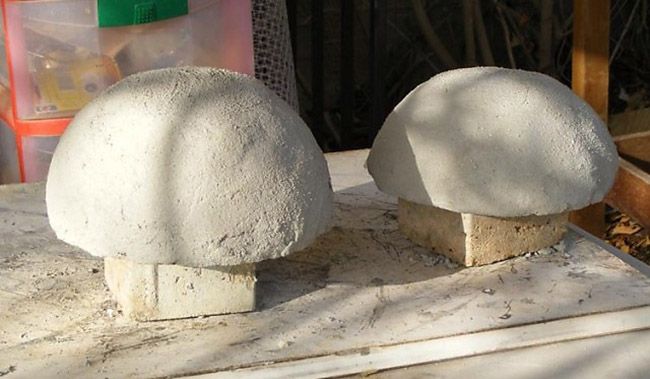
Mushroom
 To form a concrete mushroom, you need to separately prepare the leg and hat. But one cannot do without a form. To make it, you need to roll a piece of linoleum or roofing material, fix the formed pipe.Liquid sculptural concrete made from a standard composition is poured inside. In the center of the poured concrete, reinforcement is installed for the strength of the product.
To form a hat, take a basin of a suitable size of a rounded shape, grease it with any oily liquid. Put a large sheet of burdock inside, which will make the mushroom cap corrugated, pour the solution inside to the edges of the bowl. Then wait half an hour. While the mixture is setting, place a few large nails in the middle of the head, which will give strength to the figure.
When the cap leg is completely dry, begin assembling the product. First, install, slightly deepening the ground, leg. It’s better to do it right where the figure will always be. Put a little fresh solution on top of the legs, put a cap of mushroom on it. It will take 5 days to completely dry the product.
Vase
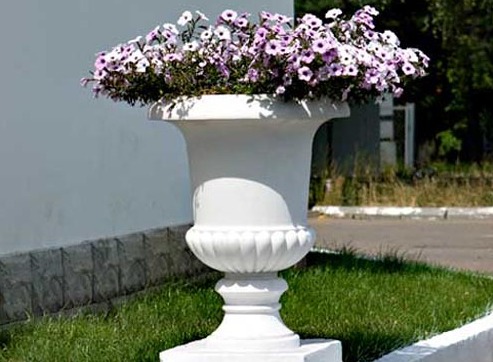 A vase will need two forms. Under one of them use an old canister or box. The composition of concrete for a vase should include sand, cement, gravel in appropriate proportions 3: 2: 3. For strength, use cement of certain grades. Stir the solution well during cooking until it looks like thick sour cream. Then grease the containers with oil. At the bottom, lay about 5 cm of the solution, tamp.
Next, place the upper mold so that it has the same thickness over the entire surface. Between the forms, reinforcement is inserted, a concrete mixture is laid. Then put the work where it will be protected from sunlight, wait a few days until the product completely hardens.
Then take out the resulting vase, wrap it with a moist burlap, then polyethylene. Let stand another week. This will not allow the vase to deform. After this time, you can begin to finish, as well as paint the concrete vase, after going through it with a primer.
If you do not like the resulting contours of the product, feel free to correct them with a grinder with a diamond wheel. You will not harm the sculpture. It is very easy to sculpt the figures of turtles, ladybugs. Take the old ball, cut into two identical parts, put the plastic bag inside the halves, fill it with concrete. After hardening the product, remove the pieces of the ball, decorate the work with a mosaic of tiles of different colors.
Modeling massive concrete sculptures takes a lot of time. Creating such statues without an additional foundation is impossible. The frame can be a bucket or a large log, which is wrapped with a wire mesh. Try to make small details of the sculpture, for example, parts of the face, from polystyrene foam. Excess cracks are clogged with foam.
During cooking concrete mortar it should be remembered that it should not be too liquid. Otherwise, when the sculpture is formed, the concrete will blur, and you will not be able to give the work the desired shape. It is better to dry the finished concrete statues away from the sun, because the sun's rays adversely affect the product - it can crack. During drying, the operation should be coated with a water repellent.
Finished painted sculpture can be varnished.
Home-made garden sculptures are made of gypsum, polymer concrete, fiberglass (polyresin) or concrete. They can be both monolithic and hollow. They are sold almost at every step, but if you want, it’s not difficult to make a cat or Babu Yaga. The manufacturing process consists in casting a mixture of concrete with various additives in special forms with continuous compaction on a vibrating table. If this is not the case, the mold must be shaken to compact the mixture. In addition to the garden sculptures themselves, craftsmen themselves pour balusters, fence elements, wall panels, tile. The main disadvantage of this hobby is serious investments at the stage of mold manufacturing.
Garden sculpture mold
The simplest figures are performed by pouring concrete mixture into an elastic form - silicone, latex, polyurethane, fiberglass on a metal frame. In forms with a complex texture inside there is an insert of non-shrink rubber. Forms are sold ready-made or are custom-made according to sketches. As a rule, two forms are made for one sculpture: for the front and back, which are subsequently connected. For the strength of the connection on the surface there are special protrusions that play the role of locks.
The final service life is determined by attitude and care. After each pouring, the mold must be disassembled, washed, cleaned with a spatula, wiped with a rag, do not fill the new solution with the remnants of the previous fill, so as not to damage small parts. Store in a dry, frost-free room. If the mold is cleaned, not beaten and not dropped after each pouring, it will last more than 10 years.
Issue price. A mold with a non-shrink rubber insert for a fine texture costs about 40 thousand, withstands 10 thousand castings. Cheap molds made of silicone and ABS plastic are many times cheaper, but they withstand less fillings.
Solution for making
As the main raw material for the preparation of the mixture, cement of a grade not lower than M400, water, sand with a screening of hard rocks of a fraction of 5 mm, plasticizer, and, if desired, resin and colored pigments are used.
As a rule, the proportion is as follows: 3 parts of sand, 3 parts of crushed stone, 2 parts of cement.
The higher the grade of cement used for the mortar, the stronger the products will be.
The sand must be sieved to remove small debris from it. Water is poured into the mixture of dry components gradually, gently stirring. The finished cement-sand mixture should be thick enough to hold its shape.
After pouring the mold for a hollow figure, the inner space is filled with rags (preferably greased with something greasy - for easy extraction). The displaced solution is removed. The rags are taken out when the solution slightly hardens and holds its shape.
The use of hyperplasticizer improves the quality of the concrete mix, prevents the figures from cracking, provides quick hardening and frost resistance, while tamping minimizes the formation of bubbles. Cast mixture easily fills the form and forms a smooth smooth surface that does not require finishing.
Attention! Plasticizers reduce the setting time of cement.
First level
The simplest and most popular garden figure is a mushroom. For the mold, a plastic bottle will go under the leg, before pouring into the middle, place the reinforcement bar so that the parts of the rod stick out from above and below. In any deep form, cast the hat, stick a few long nails.
Work in a shady place so that the concrete does not crack in the sun. The cement must be dried so that it can be cut with a knife and a recess for the leg (about 7-8 cm). When the solution hardens, dig the leg of the sculpture in the soil and place the hat on the top of the rod. After 4-5 days, when the mushroom is completely dry, it can be painted.
Advanced level
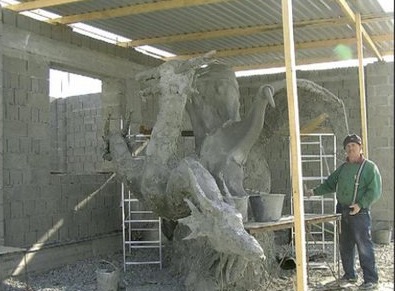
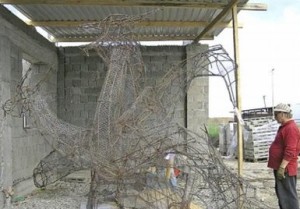
Creating more complex shapes (such as magical creatures with arms and legs) requires modeling ability and spatial imagination. For strength, first mount the frame from thick wire or welded - from reinforcement rods. To prepare a hollow creature, the frame is wrapped with a construction mesh. Under the large sculptures, a log wrapped in wire mesh can serve as a basis. The solution is made from the same components as for casting, but in a ratio of 1: 3, and diluted with water to the consistency of plasticine.
Beginners are recommended to add PVA to the solution - it will be easier to correct errors. To make a monolith, concrete is put with a spatula in layers, with incomplete drying between the layers. First, the general contours are molded, after creating the desired volume, small details are worked out (nose, lips, mouth). The remaining slots are filled with foam.
It is possible to paint, glaze, varnish in about 10-12 days, when the concrete finally sets and dries.
Bringing to mind
For painting garden sculptures, acrylic-based paints for external use (facade), varnishes for stone are used. Each subsequent layer is applied only after the previous one dries. In addition to paint and varnish, you can use coatings that mimic rock.
Working process
On the example of a garden lion. Dimensions: weight - 25 kg, height - 450 mm, length - 150 mm, width - 250 mm.
„Clean the mold from the concrete mortar and put it in storage.
“Paint the lion with facade paint.
“Sand bubbles from the air and remove with putty for facade work.
Products can be left on the street for the winter, but in the accumulating moisture (in the flower bed, flowerpots, etc.), you need to make holes with a puncher so that cracks do not go when the water freezes.
In the Middle Ages, statues adorned suburban areas exclusively for practical reasons - to drive away evil spirits and bring good luck to the owners of estates. Today, everything has changed and concrete garden figures are set for decoration. Of course, in order to create a classic sculpture, you will have to spend money on expensive bronze or marble and hire a sculptor who can erect the monument in human height. However, the growing popularity of art sculptures, sculptural additions and small plastic allow owners of suburban real estate to try their hand and creative endeavors.
The garden area can be decorated with bright decorative figures made of concrete
To make unusual figures for the garden with your own hands, you can take advantage of several popular ideas.
Artificial Boulders for Rock Garden
To make a hollow stone you only need a cement-concrete mortar (1 part of cement for 3 parts of sand and water) and a stucco mesh. Next, the following steps are performed:
- From any material with a low weight, the frame of the future stone is formed (literally everything fits: pieces of used mounting tape, crumpled sheets of paper, and so on).
- The resulting "mass" is wrapped with a net.
- A very thin layer of cement mortar is applied to the frame (it does not need to be evened out so that fake diamond turned out to be as believable as possible).
- The finished decorative stone is covered with polyethylene until completely dry.
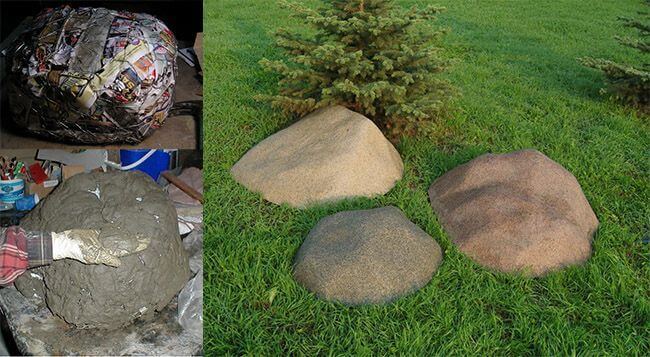
Manufacturing technology of hollow artificial boulders made of cement
Useful! Drying such a boulder in the fresh air is not recommended, as it can spread.
In the same way, you can create perfectly round cement balls with your own hands, which can be painted in bright colors and animate the summer cottage. In this case, you can use the old children's ball as the “filler”.
Leaf-shaped bird drinkers
If you want to create more complex figures from cement, then on the site you can install unusual drinking bowls for birds. To do this, you need to find a leaf of any large-leaved plant (mallow or rhubarb), prepare the same composition of the sand-cement mixture, as described above. The resulting mixture should resemble cottage cheese in consistency. It is also necessary to prepare a piece of polyethylene and pipe scrap and a tin bar with a diameter of about 10-15 cm.

Using a leaf of burdock or rhubarb, you can make an unusual drinker for birds
Thereafter:
- Form a small hill of sand on polyethylene (it is better to moisten the sand a little).
- Lay a piece of cellophane on the mound and fix it with stones.
- Lay a sheet of burdock without holes on the surface.
- Coat it with a solution about 2 cm thick in the middle and 1 cm for the edges of the figurine.
- Install a pipe in the center of the sheet and fill it with concrete residues.
- Wait until the mixture has completely dried (2 days) and remove the rest of the sheet.

So that the concrete figure does not crack when dried, moisten it with water
The resulting drinker can be coated with a primer and painted in any color.
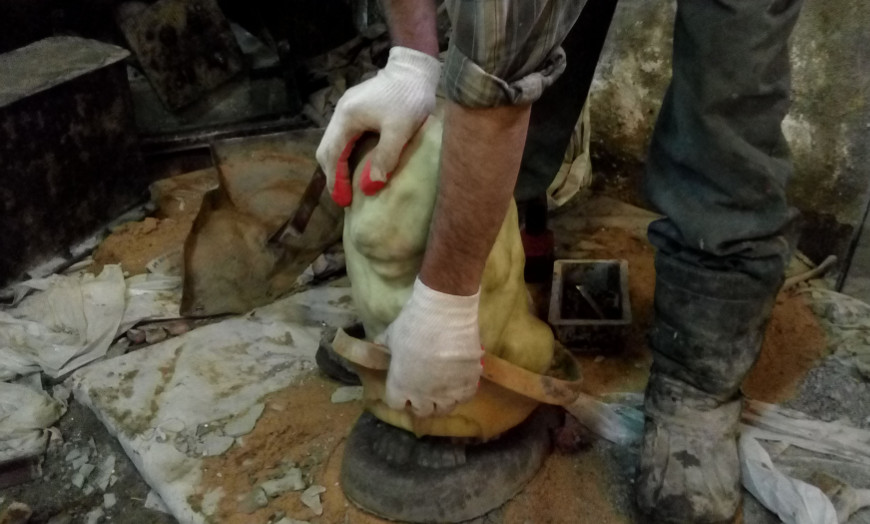
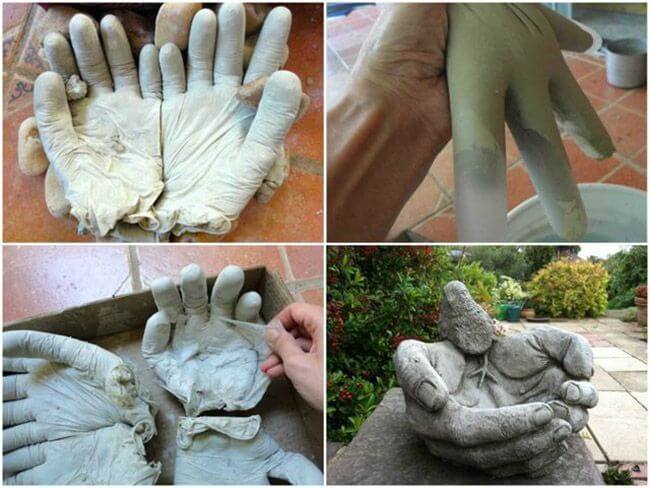
Flower bed
At first glance, it is difficult to make such a “creation” of concrete with your own hands, however, you can make a hand using a regular medical glove, as well as:
- cement mortar (1: 3);
- putties (it is better to buy a special composition for outdoor work);
- reinforcing composition for concrete;
- sandpaper (fine-grained);
- deep capacity.
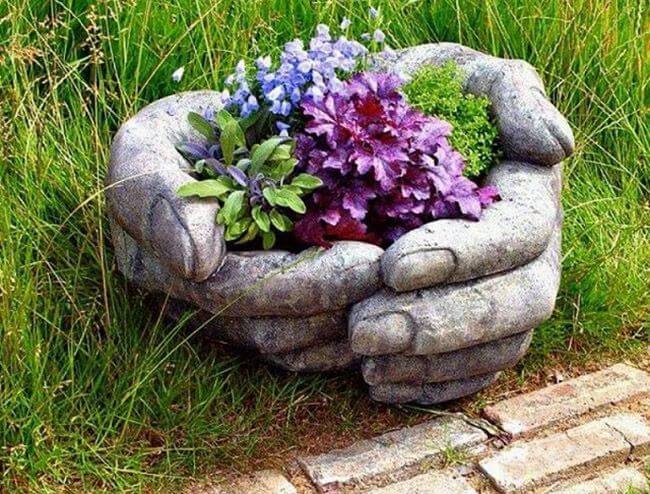
Using ordinary rubber gloves you can make an unusual flowerbed or fountain
To make an unusual flowerbed:
- Gradually fill the gloves cement mortar.
- Put them in a container, giving them the desired shape (for example, you can close your palms, fold your fist or create an unusual interlacing of fingers).
- To strengthen the strength of the figures for the garden, install a wire frame in the form of pieces of wire inside the "hands".
- Leave the resulting workpiece for 2-3 days until the solution solidifies.
- Cut the gloves and remove them from the surface of the “hand” with tweezers.
- Coat the figure with putty, wait a few hours and smooth the surface with sandpaper.
To make the figure last longer, strengthen it with wire
After this, the resulting form can be filled with earth and plant flowers in it.
Useful! If you want to give the figure an unusual shade or vice versa as close as possible to the structure and shade of natural stone, then use special pigments that are added during the mixing of the cement composition.
Concrete fungus
Another fun idea for decorating the garden is a fungus made of concrete. The cement mixture in this case should be like plasticine so that the future “craft” could be easily formed from it.
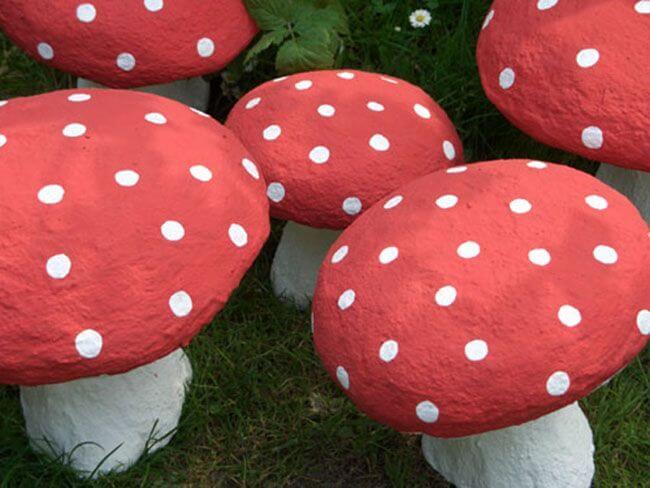
Mushroom figures can be made from cement.
To obtain such a fly agaric:
- Make a small indentation in the sand with a bowl to get a shape for the future mushroom cap.
- Lay any sheet at the bottom of the resulting fossa to make the hat roughened.
- Install a piece of pipe or a can without bottom in the center to reinforce the structure.
- Form a “leg” from a rolled up piece of roofing material or linoleum and fill this form with cement.
- Wait for both components of the concrete garden mushroom to solidify.
- Pour the top of the legs with a sand-cement compound and attach a hat to it from which the pipe sticks out.
- Wait 3-4 days and give the sculpture any color.
You can color the finished figure after it dries or in the process of preparing the concrete solution
Concrete flowers
Such products harmoniously fit not only on concreted recreational areas, but also in areas with green spaces.
To make artificial flowers, you will need a special matrix. It is best to choose a silicone mold, which is often used by housewives for baking, or use a special decorative formwork. If there is no mold for filling, take a cut plastic bottle or an old rubber ball.
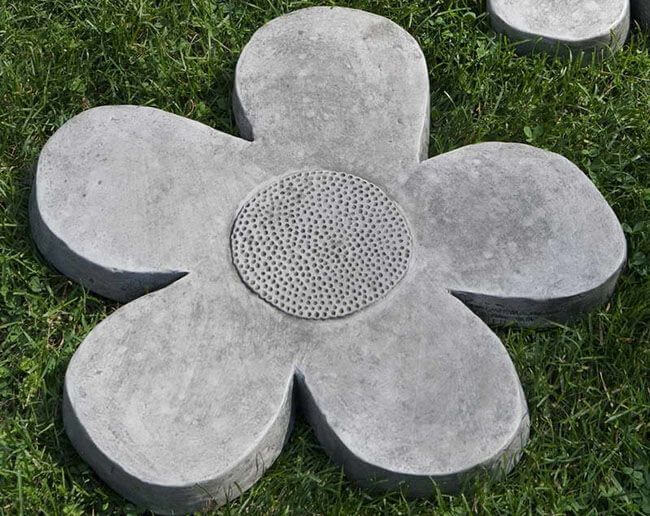
For more realistic colors, use ready-made silicone molds.
To create a flower arrangement, prepare:
- already known cement mortar (1: 3);
- oil or acrylic paint (the main thing is that the label says "For outdoor work");
- drying oil (usually engine oil or petroleum jelly is also suitable);
- polyethylene.
Thereafter:
- Lubricate the walls of the matrix with oil to extend its life.
- Add a bit of expanded clay to the cement mortar to lighten the weight of the future decorative element.
- Fill the mold with the solution and shake it a bit to compact the mixture.
- Add the mixture so that it reaches the edges of the matrix and cover it with polyethylene.
- Remove the workpiece in a dark place for 2 days.
- Remove the frozen product and lay it on a flat surface.
- Wait 4-6 days.
- Treat the flower with firming impregnation.
- Apply paint.
Useful! To prevent concrete figures from cracking during the drying process, they need to be moistened daily with water.
Other ideas
If you have mastered the manufacture of such figures, then you can also expand the range of materials and skills used to create:
- Frame sculptures. With the help of armature (frame), you can make an angel, a dog or any object. In this case, cement is applied directly to the frame of the composition, and a construction mesh is used to make the finished decorative element remain hollow.
- "Drowning" sculptures. Unusual and sometimes frightening figures, as if crawling out from under the ground, are made of gypsum, which is diluted with water until a solution of sour cream consistency is obtained. The finished composition is poured into a clay mold and left to dry for 24 hours at a temperature of about +15 degrees.
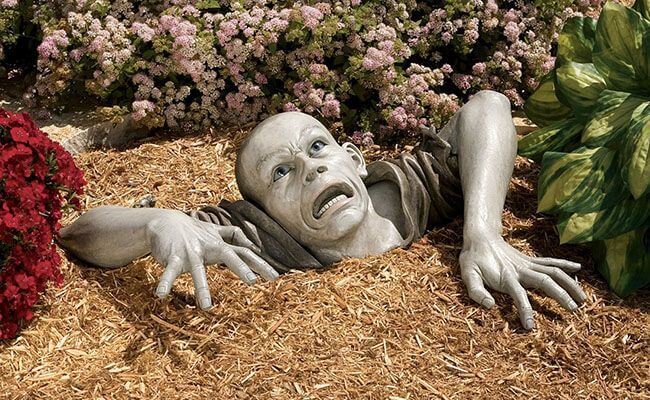
In the garden you can create very believable and creative plaster figures
- Mosaic figures. The finished cement turtle or mushroom can be decorated with colored mosaics, which fit directly onto the raw mixture.
In the same way, you can make creative urns for a summer cottage, decorate the sidewalk and much more.
In custody
In order to decorate your site with unusual sculptures, it is not necessary to contact designers and sculptors, because all you need is a little imagination, patience, cement and sand.
Good day to all. On the street in April. Many gardeners are already preparing for the summer season. They not only plant plants in their garden, but also love to decorate it. Recently, it has become especially fashionable to decorate your garden with handicrafts made from waste materials - plastic bottles, tires, and so on. I also decided to decorate my garden with hand-made crafts. And I made a forest clearing with mushrooms and hemp.
For manufacturing, I needed:
- A semicircular plastic plate and a small plastic ball.
- Cement, sand, water.
- Disposable glasses (volume 0.5 l. And 0.1 l.).
- The knife.
- Form for filling (old leaf for the oven).
- Tassels.
- oil paints.
- A plastic bottle of green color.
- 5 liter plastic bottle.
- Primer for painting.
- Masking tape.
- Scissors.
- Matches, a candle.
- Sandpaper.
- Glue.
- Optional (flowers, butterfly, ladybug).
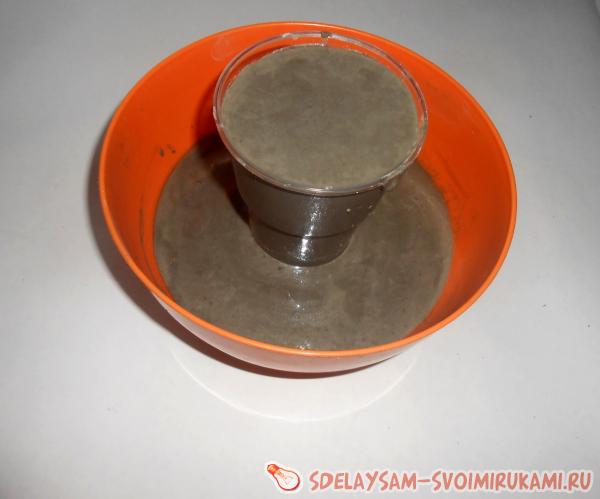
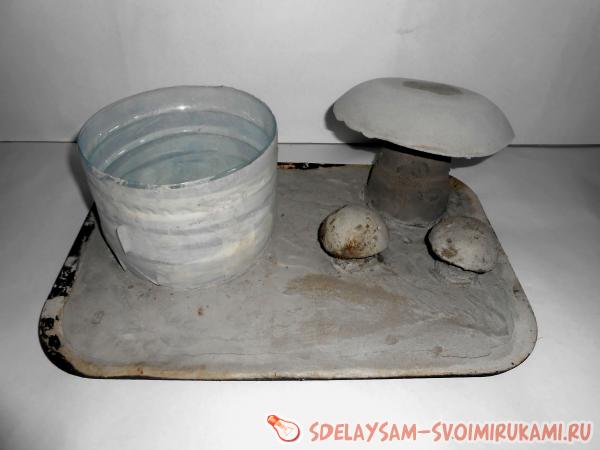
First, I took a plastic plate with a round bottom, for insurance, smeared it from the inside with a drop of sunflower oil, so that the mushroom hat came out well. I diluted a solution of cement and poured into a plate. As you probably already understood, this is the future mushroom hat.
A little later, when the cement had already set, but still not completely frozen, I took a disposable glass of 0.5 l, cut off the bottom of it and put it on top of the hat, bottom down, and also poured cement mortar. The mushroom is ready.
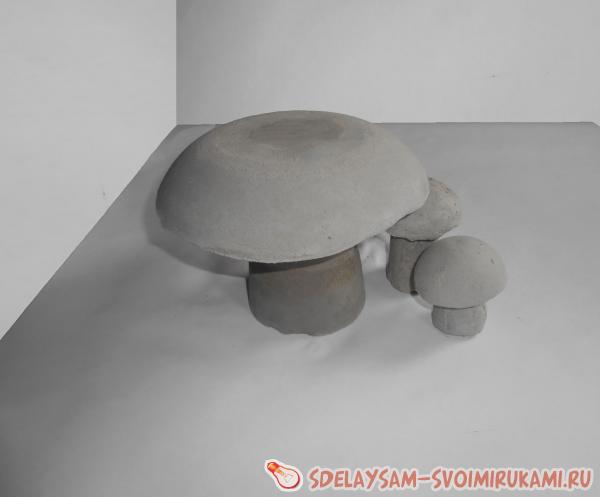
Left the mushroom to dry for a couple of days in a warm place. Then I easily got it out of shape, I also removed the glass from the leg. I also made two small mushrooms. I put the hats in a small plastic ball, which I first cut in half, and the form for the legs was disposable cups with a volume of 0.1 l. When the mushrooms were completely dry, I sanded all the rough edges with sandpaper.
Mushrooms are ready, it's time to make a stump. To do this, I took a 5 liter plastic bottle, cut off the bottom of the desired height.
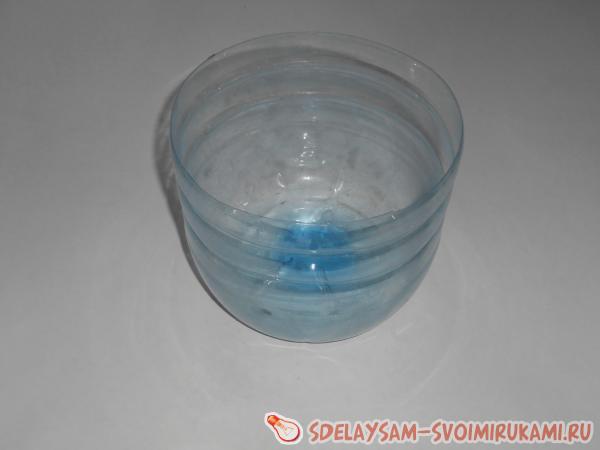
She glued the workpiece from the outside with masking tape, so that the cement sticks better. The stump blank is ready.

Since I wanted to make a clearing, I needed a form for filling it. I thought for a long time what to make of it and then the idea came to my mind to use an old baking sheet in the oven. I took a leaf, poured it with cement mortar and set the stump blank and mushrooms inside. All this left to dry for another couple of days.
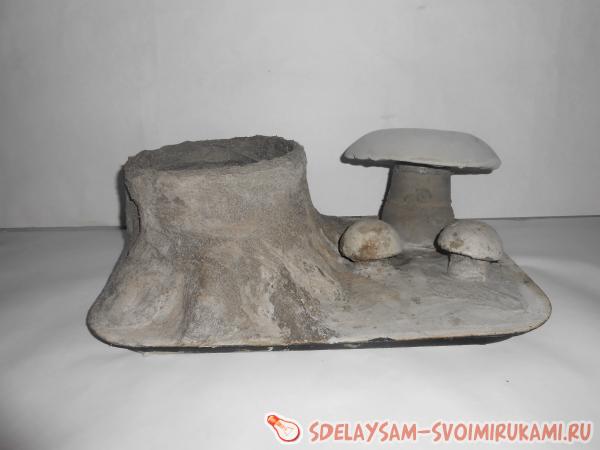
When everything froze and began to stick together well, I began to shape the hemp. Once again, I knead a solution of cement, sand and water, slightly moistened the stump with water and began to apply cement to it. I smoothed out any irregularities with a wet brush. Inside the stump, I also applied cement on the sides of the bottle and to the bottom. When I liked the shape of the stump, I left it to dry until completely dry. Here's what happened.
Then I again sanded everything to smoothness. The remaining dust was swept away with a soft brush. Put a primer for painting. When the primer dried, I painted everything with oil paint. The stump turned brown, the mushroom caps on top were painted with dark brown paint, and the bottom was light brown, the grass was painted green.
I also stuck decorative flowers on a meadow and planted a butterfly and a ladybug on mushrooms, which, by the way, I made of a black button and covered it with nail polish. I glued grass along the edge of the meadow. My forest clearing is ready.
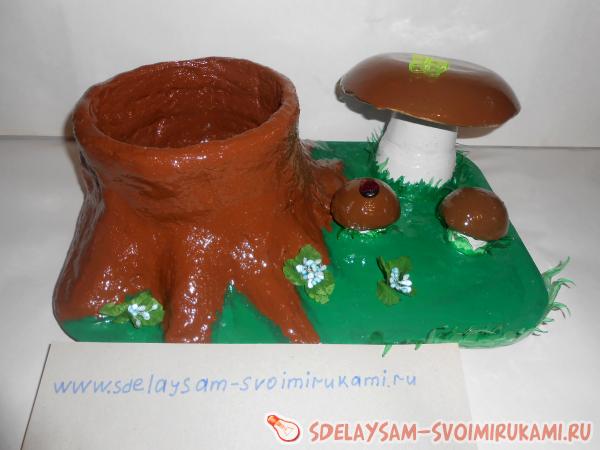
When I take my forest clearing into the garden, I will put a pot inside the stump and plant flowers in it. It will look very beautiful. I hope you enjoyed my garden craft.
Goodbye, see you soon.