We make a concrete tabletop with our own hands: step-by-step instructions. Concrete kitchen worktop - do-it-yourself manufacturing and restoration
The technology is popular in both industrial and private construction. From this material, you can pour window sills, steps for stairs, floor tiles, countertops and so on. The main thing is that any thing can be made independently, without involving outside experts. We give an example of how a countertop is made of concrete with your own hands.
Like any construction process, the manufacture of countertops from concrete mortar divided into several stages. Each of them is very important, one cannot allow any operation to be skipped.
Preparatory process
Preparation consists in acquiring the necessary materials and tools. To begin with, all the same components are purchased that are necessary for the production of a standard concrete mortar. Namely:
- cement;
- sand;
- crushed stone;
- water.
Since the countertop is a decorative element, it is worth considering the question regarding its color design. For example, if you use ordinary gray cement, then the countertop itself will be gray. Fortunately, today there are a large number of colors that can be added to the mixture, choosing the color shade.
Main materials
To increase the strength of the concrete countertop, it is necessary to lay a metal reinforcing frame in the solution body. To do this, you need a steel wire with a diameter of 2-3 mm. To assemble a mesh from this wire, you need to tie it, for which you need a knitting wire. For fastening the frame, self-tapping screws will be needed.
The table top must be poured into the formwork. It is made from several different materials. The main one is a sheet of moisture-proof plywood with a thickness of at least 12 mm. Instead of plywood, you can use laminated particleboard or MDF.
Please note that the strength of these materials must be high. A slight curvature will immediately appear on the concrete product itself.
To create the thickness of the countertops, boards with a cross section of 50 × 30 mm and several wooden bars of 50 × 50 mm will be required.
Since a sink will be installed on the kitchen worktop, it will be necessary to make a hole for the mixer. Why do you need a plastic pipe with a diameter of 35 mm and a length of 50 mm. Typically, the diameter of the mixer mounting pipe is 35 mm.
Instruments
For the manufacture of concrete worktops, the following tools will be required: a shovel, usually a trowel, a spatula, a bucket, a construction mixer (if a small volume is kneaded) or a concrete mixer.

To assemble the formwork you will need a saw and a screwdriver. For the manufacture of reinforcing frames - pliers. Do not forget that all the elements of the formwork will have to be accurately set according to a pre-made drawing, so a ruler, level and pencil will also be needed. To measure the size of the future countertops, you need to prepare a tape measure.
Drawing creation
You can draw a sketch either before or after preparation. It is important to accurately measure the space where the cabinets with a concrete mortar worktop will be installed. If the kitchen furniture will be installed in the corner of the room, then a convincing request is to align the angle to 90º. This is not only a criterion for the quality of the repair, but also the ease of installation of furniture exactly on the wall planes.
Now tape measures the boundaries of the installation of countertops. Very often, the working area of \u200b\u200bthe kitchen has a curved shape with an approach to an adjacent wall. If such a shape (angular) is adopted, then it is better to divide the element into several sections and make a countertop for each part. In this case, the formwork will be unified, but divided into sections.
The main thing is to make the borders of the plots transverse, which must exactly coincide on the walls of the kitchen tables. This is the only way to avoid cracking. A monolithic countertop will weigh a lot, which will create inconvenience when installing it.
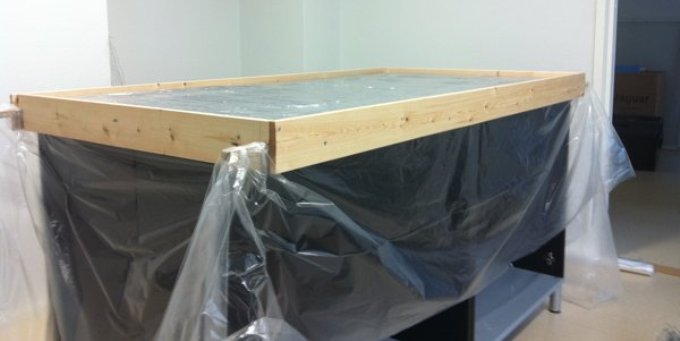
Install a sheet of moisture-proof plywood on a flat horizontal surface. It could be a table. Now transfer all dimensions from the drawing to this sheet, for which we use a ruler and a pencil. At the edges of the lines are installed on the edge of the board 50 × 30 mm. They will determine the height of the concrete countertop, which will be equal to 50 mm. Why exactly this size? A decrease in thickness will result in a decrease in strength. Increase - to increase the weight of the product. Therefore, 50 mm is the optimal size.
Since the concrete mortar will create a lot of pressure on the walls of the formwork, it is necessary to fix them well. There are two options:
- use for fastening the bars 50 × 50 mm;
- install metal corners.

In the first case, the bars are attached at the corners of the structure. If the installed board is long, then additionally 2-3 bars are fixed in the middle evenly from each other along the entire length of the board.
As for sinks for washing, you need to pay attention to the type of device purchased. There are built-in sinks, there are overheads. They differ from each other in that the invoice in the design has a horizontal side around the entire perimeter of the plumbing fixture.
For overhead models
If this option is installed, then the sink is turned over, laid on a sheet of plywood and a stroke is made on its side. Then the side width is measured, for example, it is 3 cm, which means that exactly the same shape is laid inside, at a distance of 2.5 cm.
For recessed
In the case of a built-in sink, the outline is drawn along its edge. Now, 50 × 50 mm bars are installed along the lines, which are attached to the plywood with self-tapping screws. Please note that 50 × 30 mm boards are installed outside the applied lines, and in the case of a sink, 50 × 50 mm bars are installed inside.

And one more thing - in the built-in sinks there is a landing chamfer, which is not easy to do. Therefore, those who are going to make a countertop of concrete with their own hands, it is recommended to choose a laid-on model. It remains only to glue the pipe at the installation site of the mixer.
It is necessary to make a reservation right away that the reinforcing frame made of steel wire should be like a grid with 25 × 25 mm cells. At the same time, it should also be located at a distance of 25 mm from the plywood sheet and from the edges of the formwork. Therefore, pieces of wire are cut with these reservations.
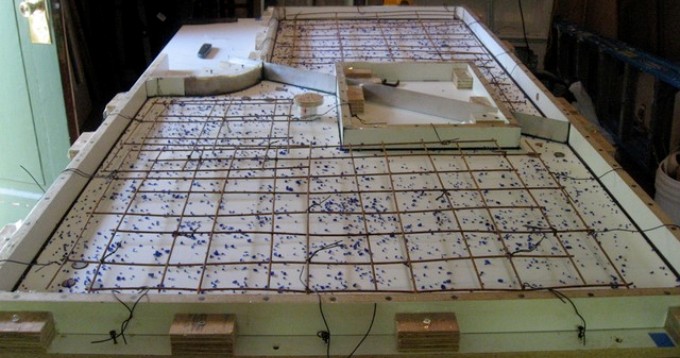
A plastic film is laid in the formwork, the edges of which are wound on the boards. Pay attention that the film lies flat without wrinkles.
Mounting mounting structure
Now the frame itself. It can be done separately, and then installed in place. You can assemble it directly in the formwork. Installation at a height of 25 mm is carried out using self-tapping screws. For example, the second installation option.

Screwed the screws into plywood around the entire perimeter of the formwork every 25 mm. Aligning the hats in height is done using a ruler and level. After that, pieces of wire are already screwed to the screws. In places of intersection, a knitting wire is used for fastening.
Almost everything is ready to start pouring concrete worktops with your own hands. It remains only to process the joints between the formwork elements with sealant. It is important here that this material is filled precisely with gaps and crevices.
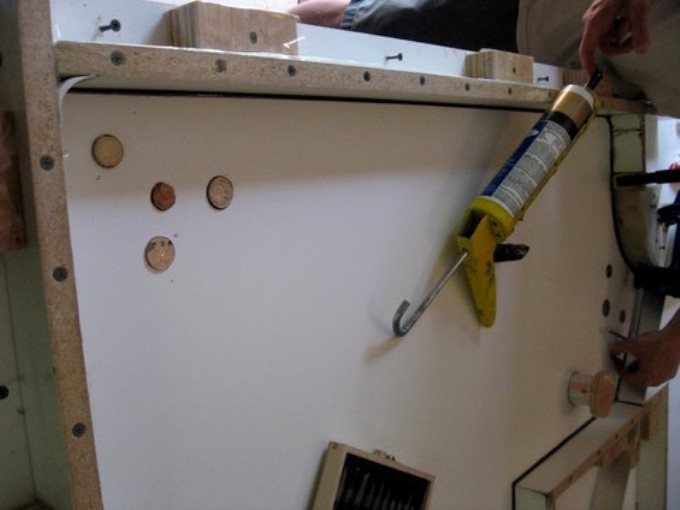
If there is a need to make rounded corners at the countertop, then a pipe is installed in the place of joining of two boards 50 × 30 mm, that is, in a corner. And the corner space, limited by a pipe and two adjacent boards, is filled with sealant.
Concreting
There are two ways to pour concrete.
- Completely filling the formwork.
- Layer by layer.
In the first case, concrete is prepared according to the classical recipe: 1 part of cement, 2 parts of sand (pure river), 4 parts of coarse aggregate (in this case, it is best to take marble chips), and 0.5 parts of water. First, cement and water are mixed until a cement milk is formed, then other components are added portionwise. Mix the solution very carefully.
A worktop made from concrete mortar can look very original. The main thing is to correctly approach the design of its front side. For example, pieces of broken glass, beads can be laid on plastic wrap, patterns of copper wire or strands of fiber optic cable can be laid out.
It is necessary to fix these decorative elements with glue so that they do not move during the pouring process. The brand of glue is unimportant, the main thing is that it holds together well.
For the first front layer, a solution of fine sand without large fillers (gravel, crushed stone) is required. Water should be slightly less than in the classic recipe. In this way, the appearance of pores can be avoided. But it is also impossible to add too little water, because this can lead to the formation of cracks.
Therefore, if there is any doubt that the solution may turn out not so, then it is better to purchase a ready-made dry mixture for screed. On its packaging there is an instruction that indicates how much water needs to be added. Mixing should be carried out at low speeds. And it doesn’t matter, the process is done with a mixer or concrete mixer. This solution is poured a third or half of the height of the formwork. There is no need to wait until it dries.
Fill the base layer
Filling of the main carrier layer can be done in half an hour. There are no restrictions on the composition of this mixture. This can be a classic recipe, in which claydite can be added instead of gravel or gravel to facilitate the entire structure.
After which (it doesn’t matter whether it is the first or second option), the concrete worktop must be covered with a film. After a day, the film is removed, and pieces of wet tissue are laid on top. After two days, you can disassemble the formwork.
If the countertop is made of concrete without a decorative layer, then its front side must be sanded. Use a grinder for this is not worth it. It is better to use an angle-type grinding machine. It is more convenient to use for horizontal surfaces. Plus, the machine will have to buy several grinding wheels.

First, the plate is ground with a coarse-grained wheel. Then they switch to fine-grained. And polishing is best done with a felt circle. If it is necessary to trim the countertops, then a grinder with diamond discs is used.
If small depressions have formed on the surface of the plate, they can be removed by applying a special acrylic-based sealing mixture. After drying, additional grinding is carried out.
This is how a concrete worktop is made with your own hands. We will not assure that this process is simple. It is complex and requires attention and accuracy.
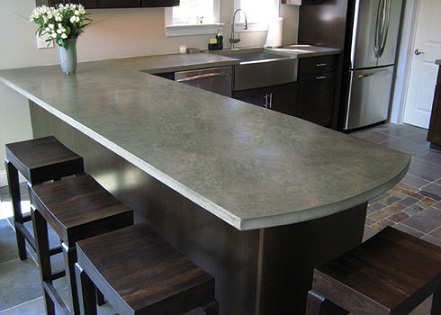
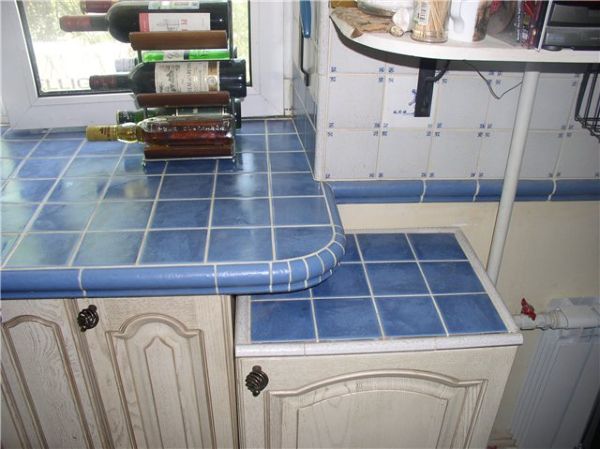
Countertops from decorative concrete and tiles (left photo)
Despite the apparent complexity, it is not difficult to make such a practical part as a concrete countertop with your own hands. The video in this article will help to cope with this task. As a result, you will get both a solid work surface and an individual design solution.
The main points that should be considered before making a concrete countertop with your own hands:
- During operation, actions can be performed on the table that cause a significant shock load. For example, chopping part of a carcass of meat containing cartilage. Therefore, reliable reinforcement is required.
- The sink and hob for the kitchen, it is better to choose the overhead type. They do not need special accuracy in the size of the opening, and the mounting flange is wide enough. It will hide possible flaws, while the product itself will be securely fixed. Mortise structures require specific equipment and work in a workshop.
- The countertop for concrete has considerable weight, which means that the frame on which it will stand must have sufficient strength. To reduce weight, try to reduce the thickness without sacrificing strength.
- One of the stages of work will be grinding the surface, which causes a large amount of dust.
This manual describes how to make a countertop made of concrete with your own hands in place, or as a separate product.
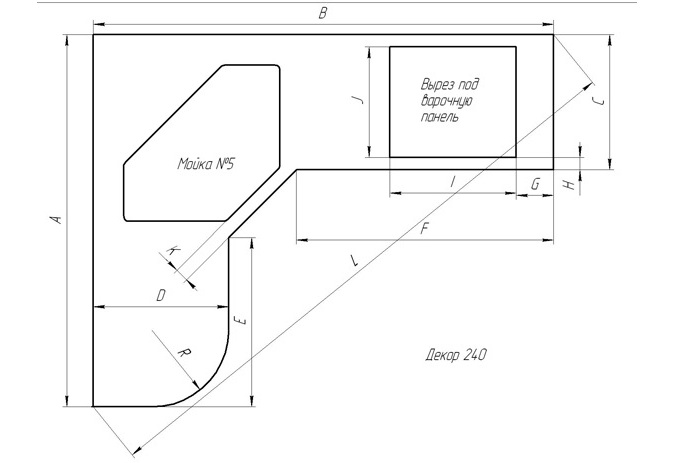
Drawing
A correctly drawn up plan is the key to the success of any business.
In this case, the main factor is size compliance. The most difficult is the transfer of the angle, if it provides for the design. This will require a goniometer.
Advice! The most accurate and cheapest goniometer - two even strips at the right height are inserted into the corner, pressed against the walls, and fixed in a convenient way.

The next stage is the preparation of the frame.
Base, reinforcement and formwork
The best option is to use a moisture resistant plywood or OSB board. The contour cut exactly according to the drawing will greatly facilitate the manufacture of countertops made of concrete with your own hands.
In cases where work is carried out locally, the base remains in the structure, so all openings and seats must be prepared in advance. If the manufacture of concrete worktops is not carried out at the point of operation, then the base is cut only along the contour, and the cavities in the future work surface are limited by the corresponding frames.
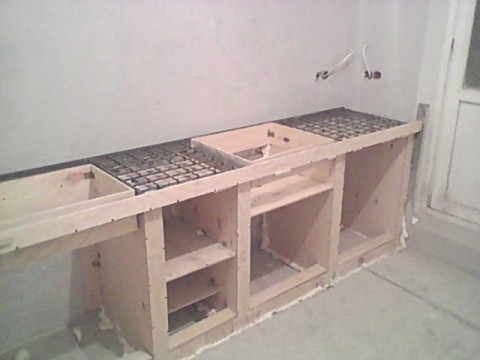
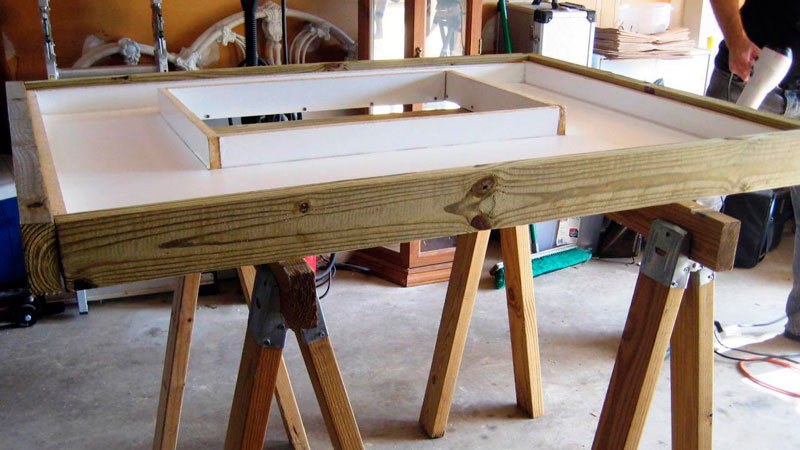
Formwork of rectilinear forms can be made of any molded materials, as in the photo above. The profile for gypsum board is well suited for curly products.

Advice! When installing the formwork, it is better to lay the inner side with 20 mm thick foam strips. When laying reinforcing elements, it will be necessary to deepen their edges into the foam. Such a “trick” will allow the decorative layer to grab onto the armature.
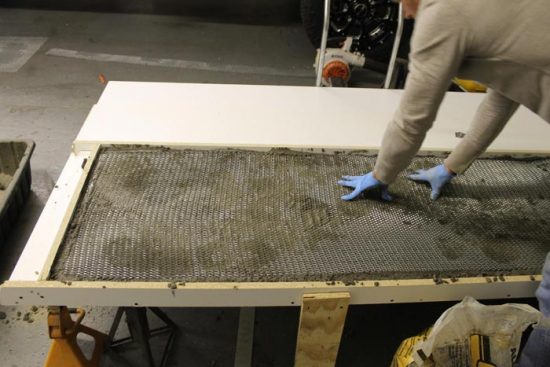
A reliable countertop made of concrete with your own hands will work only if it is well reinforced. The best, although not cheap material for this, is a stainless expanded sheet. Since its use is rarely found in such advice, it is worth considering PVL in detail.
Such sheets are made by sifting through slots in a conventional steel sheet and stretching it. In this case, the jumpers between the slots rotate perpendicular to the plane of the sheet. Thus, the carrier becomes not the thickness, usually 2-3 mm, but the width of the bridge. For these purposes, sheet 308 with a total thickness of 16 mm is suitable.

In view of the high strength of PVL, it is used for the manufacture of stairs and floors.
The parameters to which PVL must comply are governed by GOST 21014:
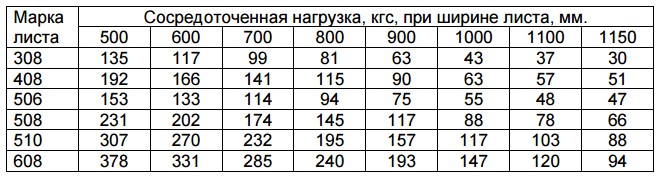
Concrete worktops typically have a thickness of at least 50 mm. The ability of PVL to withstand such loads can reduce this figure to 25-30 mm.
This means that the material consumption, weight and requirements for the frame, on which the kitchen countertop made of concrete will stand, will also decrease. Complex contours for the insert can be made a grinder, or when buying at a metal warehouse.
Concreting
At the pouring stage, you need to choose the composition of concrete for the countertop. The presence of PVL makes the presence of crushed stone unnecessary.
The statement that gravel and gravel have a higher compressive strength than steel is true, but in this case is useless. Concrete countertops do not compress. They beat meat and crack nuts. Shock loads are better tolerated by steel.
A fine mixture of cement and granite sand, the so-called granotseva, can be used for pouring. Choosing these components, you will need to buy plasticizers that increase bending strength. Their retail price is high, the chemical composition of granotseva is unknown, it is easy to make a mistake. The process of "how to make a countertop made of concrete" may end with the cleaning of its residues.

In order not to take risks, it is better and easier to buy ready-made sand concrete of high strength grades, M400 and higher. This material is designed for pouring reinforced foundations and is designed to work with reinforcement. Just the right situation. All the additives in it are already there.
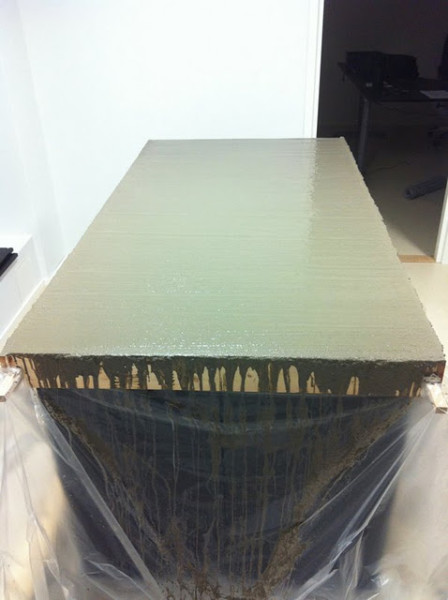
It remains to knead the solution to the consistency of sour cream, and pour into the mold. If further processing will consist of varnish or paint, then fill in at the edge of the formwork, and immediately level it.
In the case when it is supposed to use decorative concrete for the countertop, or if you want to leave free space under the tile, the height depends on the decorating material.
Advice! When reinforcing PVL, it is better to leave 2-3 mm of sheet protruding above the fill. They will provide the connection of two layers into one, or reinforce the tile adhesive. If traditional fittings were used, a plastic mesh should be put on the surface of the poured concrete. Such a notch will increase the adhesion of the next layer.
After pouring, you need to cover the form with a film, and leave for 1-2 days. Further processing will depend on the finish.
Dressing with varnish or paint
In this case, 2 days after pouring, the film is opened, and concrete worktops are left until they completely harden. Depending on the conditions, this may take up to several weeks.
The table top is ground, primed, painted or varnished according to the technology provided for selected materials.
Tile and stone application
For decorating with tiles or stone, the kitchen worktop made of concrete is dried in the same way as under the paint. After that, the product is removed from the mold, installed in its place and draped with decor.
The reinforcement or hardened notch left under the foam and on the surface will ensure reliable fixation of stone elements or tiles.
Advice! If preference is given to tiled models, it is better to choose porcelain tiles for the floor, the most resistant to mechanical stress.
Provides the greatest scope for imagination in choosing: how to cover a concrete countertop. At the final stage, you can choose a ready-made dry mix from those offered on the market, there are a lot of options.
Or make it yourself on the basis of the same sand concrete with the addition of dyes, sea pebbles, quartz, marble chips, any decorative elements. The only thing to consider when choosing inserts is that a worktop made of decorative concrete should be polished.
Advice! The composition of the finished mixtures includes additives that increase the hardness of concrete, facilitate grinding work and increase the life of the surface until the next grinding. The best option is to choose the right color and texture from ready-made offers. The range of inserts is best entrusted to your own imagination.

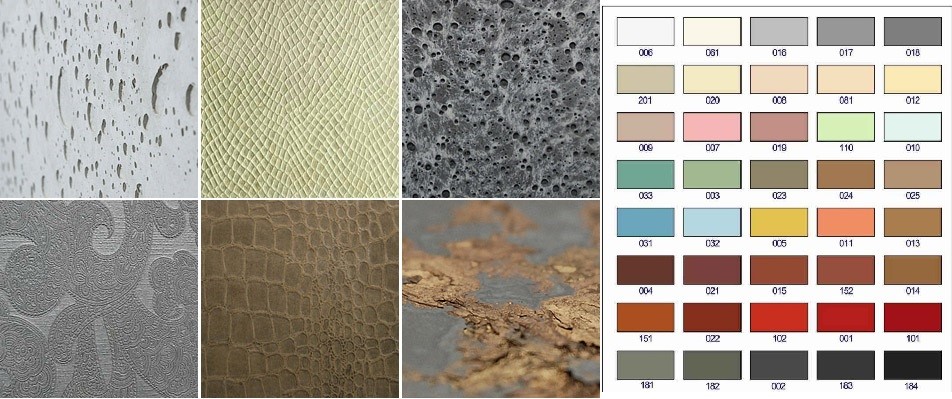
Wood inserts and artificial stones (on right)
Work on the final pouring, it is necessary to carry out one day after filling with the base layer. Concrete in the mold should cease to be liquid, but not yet solidify completely.
Having decided on the composition of the finish layer, you need to remove the foam from the formwork. In the vacant space at the edges and to the upper level of the formwork, decorative concrete is poured and the surface is leveled. The form is again closed for two days. After removing the film, allow the product to completely harden.
From this video you will learn how to make a concrete worktop with your own hands.
The final stage is the grinding and polishing of concrete countertops. Only an ardent enthusiast can do such a job manually. The Chinese grinder will die half way.
The final tip! A good professional grinder can be rented. Over the weekend, the fruit of long labor will be over.

Independent production of concrete worktops - although painstaking but not complicated. The price of the product will be several times lower than that ordered in the workshop, and moral satisfaction is as many times higher, and it will also serve grandchildren.
Jamie Gaokas's project began with the purchase of a book on how to make a kitchen do-it-yourself concrete countertop. At first, the master made them for himself, then for friends, and then started his own business. The master class is conducted by Jamie himself.
First of all, the master asks for patience, since about a month passes from the start of production to the full installation. During this time, you can make a complete repair in the kitchen.

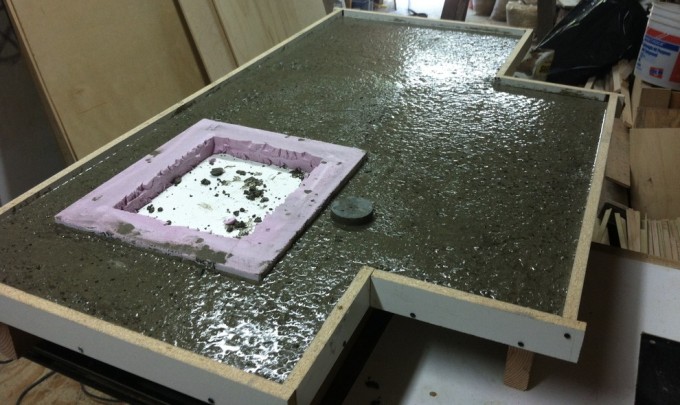
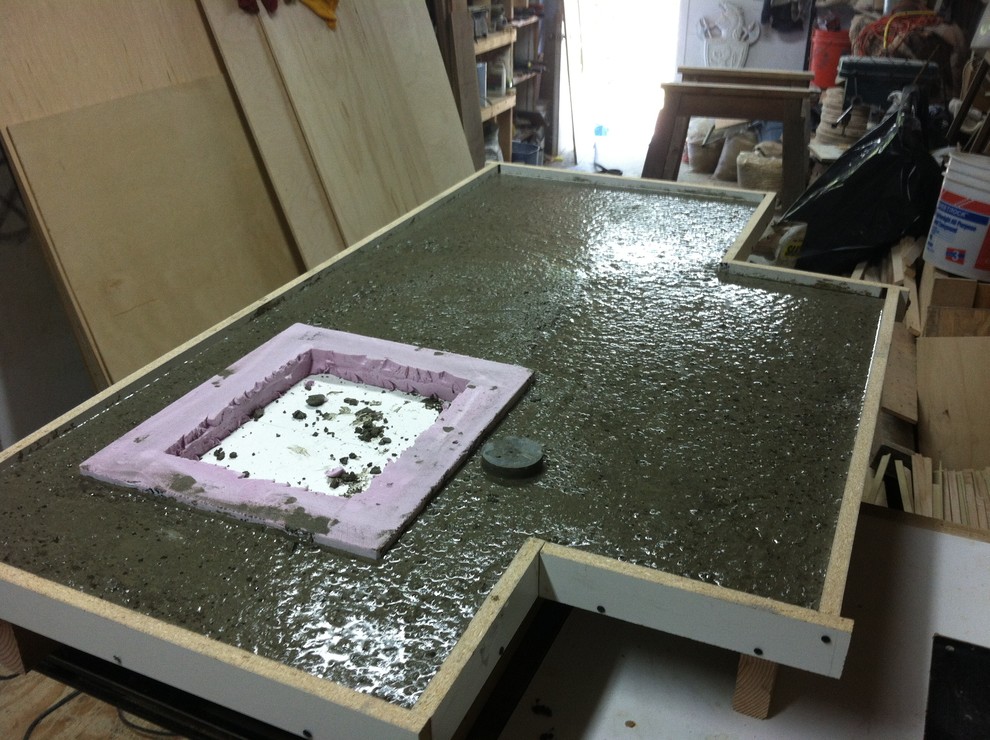
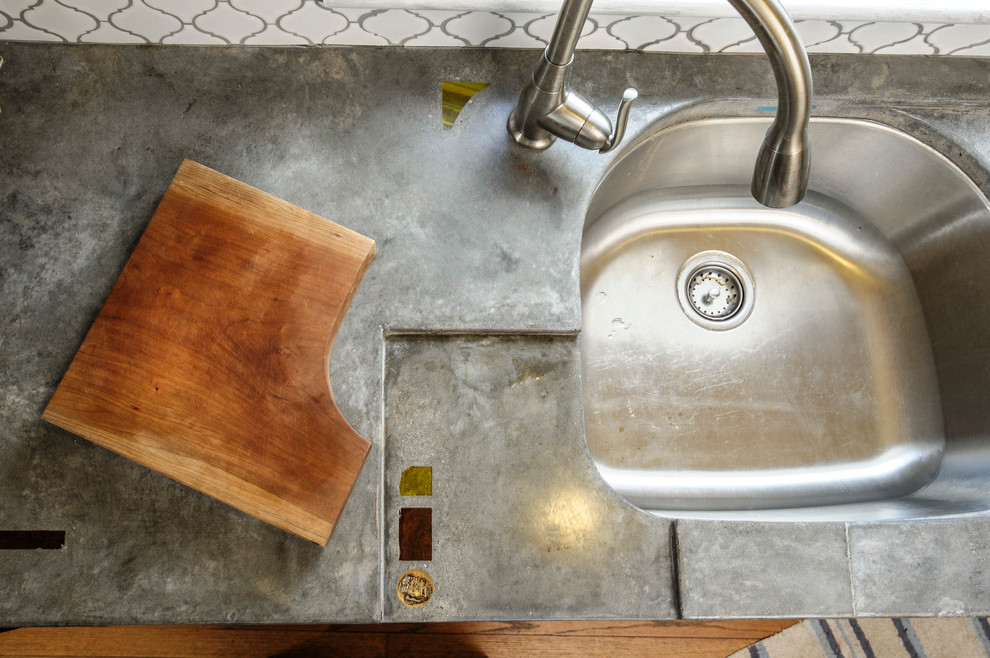
After measuring the working surface, templates are made. Concrete flows into the trays, which will soon become a countertop. Cut inlays are inserted into selected locations.

For the manufacture of sinks, plywood is used, from which the shape is knocked out. Solid insulating foam is needed to form a recess.

After the tide, the concrete remains in the tray for two weeks. A well-made countertop with a sink looks beautiful, as in this photo.
The tabletop is polished with a diamond wheel grinding machine.

The last stage of manufacturing is filling silicone compounds. This makes them waterproof. After that, the surface is polished with a paste of wax and mineral oil to create an additional protective layer. The procedure is recommended to be performed once or twice a year.
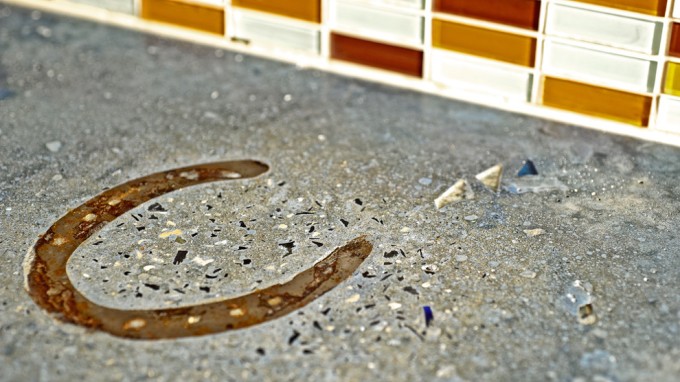
Pieces of glass, porcelain, metal and everything that supports the original interior design and will impress, should be carefully selected, as it will remain there forever.

Personal Inlay of the Owner
This horseshoe belonged to a horse that the client loved very much. Pieces of glass and gravel fit into the big picture. Other customers choose coins or even fragments of mechanisms.

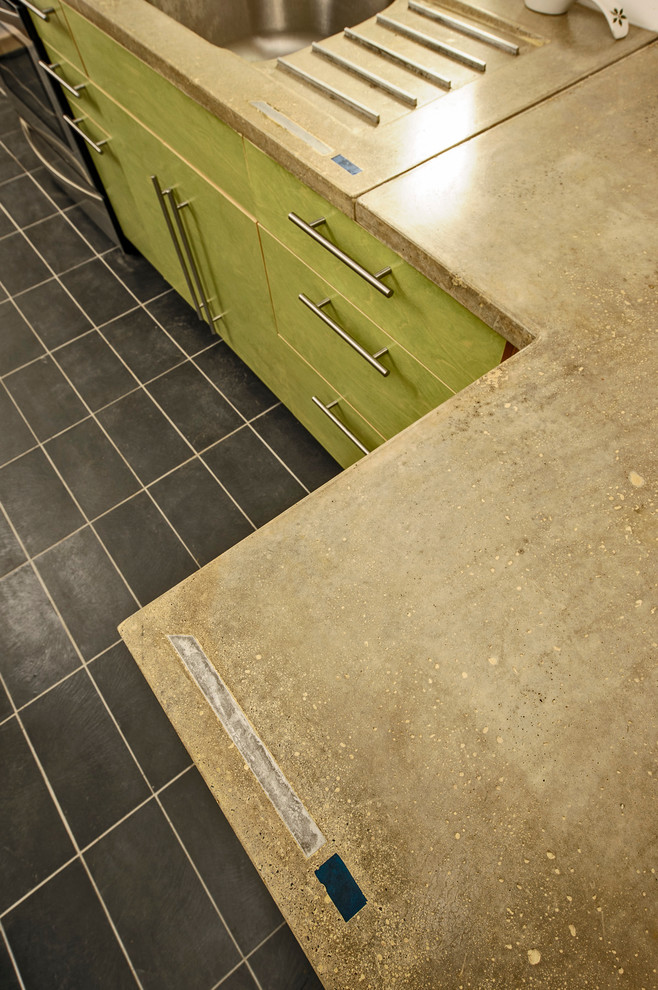
The decoration can be embedded in the profile of the countertop.

The board is taken out to throw away the husk from nuts and other garbage that should not get into the sink. Pleasant blue inserts open on the profile.
The gray material is in perfect harmony with the brownish pieces of glass.
![]()
Bluish-green shades look inspiring. Pigmentation of the material is not easy, but the result is excellent.

Gaokas is an artist. He has degrees in art and its history. This is felt in the products of the master, creating a special atmosphere in the space of the house.
Modern kitchen sets can be equipped with various countertops: from familiar products from particleboard and MDF to heavy and expensive marble and composite materials.
If none of them satisfies the interests of the owners, then you can do concrete countertops for the kitchen with their own hands, which will meet the main requirements for such structures: high wear resistance, durability and moisture resistance.
In addition, the countertop, despite the fact that the most ordinary building materials are used for its manufacture, can become a truly highly aesthetic object, around which you can form the interior space.
Features and benefits of concrete worktops
No matter how technically equipped the kitchen is, its main element is the countertop. It serves to carry out almost all culinary processes and experiences maximum loads: mechanical, thermal, chemical, as well as constant exposure to steam and moisture.
In addition, this surface must meet high hygiene requirements: fungus or mold should not multiply on it, and the complexity of caring for it should be minimal.
The use of concrete for the manufacture of countertops is almost an ideal solution: their cost is much lower than natural stone products, and in many respects they are not inferior to them. It is also worth noting that such a handmade or custom-made design can have different sizes and shapes, which are determined by personal preferences, the configuration of the furniture in the kitchen and other factors.
Where to start manufacturing concrete worktops?
To do it yourself is a concrete worktop for everyone, but only subject to all production cycles and their strict sequence.
Before you begin, you should prepare countertop project or drawing indicating all sizes, while it is important to take into account the possible curvature of the walls, which subsequently it will adjoin. Correctly pre-align all surfaces perfectly, especially corners.
The size of the working area of \u200b\u200bthe kitchen, as a rule, is determined by the area of \u200b\u200bthe room. And if the designed countertop turns out to be quite large, it is recommended to divide it into several elements ( this is especially true for corner structures) Directly in the process, you can make one formwork, but divided into sections, or fill it in separate forms.
How to make a concrete countertop? Video:
Preparation of materials and tools
Although the process of manufacturing a concrete countertop is simple, but without a special tool it will not work out qualitatively. Required:

After, in accordance with the prepared drawing, the size of the countertop is determined, you can calculate and prepare the right amount of materials for its manufacture:
- portland cement;
- filler, in the role of which sand and small gravel are used ( or gravel);
- pigments or tinting additives for cement ( without them you can get a countertop only gray);
- decorative elements such as bugles, various small decorative stones or seashells for decoration, but they are not required.
For pouring countertops, it is quite possible to use ready-made building mixtures, the choice of which is quite large on the market. This option is more expensive, but convenient.
In addition to the fact that the manufacture of the solution in this case is greatly simplified, it should be noted that the drying process is significantly reduced.
Necessarily required materials for the manufacture of formwork:
- plywood 10-12 mm or other sheet material;
- timber ( 40 × 40 mm or 40 × 50 mm) or board 50 × 30 mm;
- self-tapping screws or nails for assembling the formwork frame;
- a metal mesh or wire 2-3 mm in size - for the manufacture of a reinforcing frame;
- plastic pipe with a diameter of 35 mm - for making holes for the mixer.
Making molds for countertops
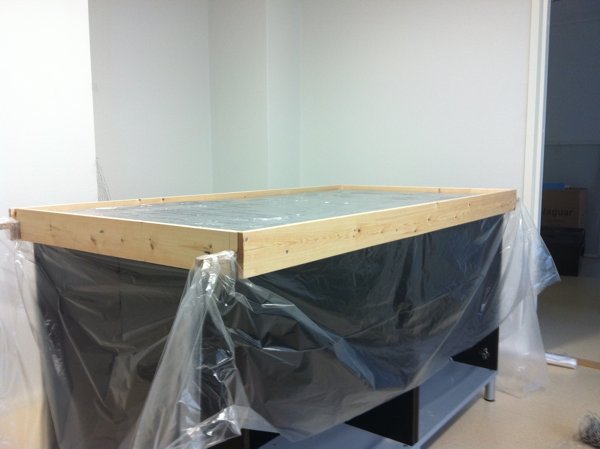
To fill the countertops, the formwork is first made, which is the frame of the future product:
- all the necessary dimensions of the structure are applied to the sheet material;
- a timber or board is installed and fixed along its perimeter so that the edge is 50 mm - this thickness of the future product is considered optimal: it provides the necessary strength, but does not lead to a large weight of the countertop;
- formwork is assembled using screws or nails, and for added reliability and to prevent deformation during casting, it is recommended that corners be further reinforced with metal corners.
Be sure to properly prepare the formwork for the hole for washing, and the method of its manufacture will be determined by the type of model chosen: built-in or invoice.
It is most convenient to carry out this work by attaching the front wash to the plywood sheet in the place where the design should be located. Or use its exact linear dimensions. For the integrated structure, the fastening of wooden blocks is made exactly along its edge.
It is important that they are located on the side of the hole, otherwise it will turn out to be too large and the selected washing model will not work.
For overhead models, it is important to consider the size on the outer edge and the width of the side, along the perimeter of which with a small overlap of 5 mm, bars are installed.
Countertops and window sills made of concrete. Video:
Reinforcing frame installation
Concrete, of course, is strong material, but rather fragile. The tabletop during operation can withstand quite large mechanical loads, so the presence of a metal frame will positively affect the strength characteristics of the product.
In its manufacture, it is important to adhere to certain rules: the size of future cells should average 25 mm, while the same distance must be observed on all sides of the structure.
The manufacture of the reinforcing frame can be done separately, and then fix it in the formwork or immediately assemble it in place. But before this stage, it is necessary to lay in advance neatly and evenly, without the formation of wrinkles on the surface, a plastic film.
In order to create a beautiful edge, you can use the pipe, which must be installed in the corner formed by plywood and timber, and the free space, which should not be filled, is filled with sealant or silicone.
Production (filling) of countertops
The manufacture of countertops is most often done separately, and not on the spot, that is, directly on the body of the kitchen unit. But the latter, in any case, will need to be further strengthened, taking into account the rather large weight of the structure.
If the manufacture of furniture was not initially carried out taking into account the heavy countertops, then all the connections between the cabinet elements are additionally connected using wood beam or other material.
Direct filling can be done in two ways: in layers and as a single monolith. If the second method is chosen for the manufacture of countertops, then after preparing the solution for which the formula is used: 1 part cement, 2 parts sand and 4 parts coarse filler ( crushed stone, marble, granite, gravel chips) and ½ part of water, filling is performed over the entire height of the mold.
In some cases, expanded clay can be used as a filler to facilitate construction.
Layer fill It is made in two stages:
- first, the front layer is poured to a height of 1/3 to 1/2, for which the solution is made without the use of large fractions and with a smaller ( approximately 10%) the volume of water;
- after the initial setting of the first layer, after about 30-60 minutes, the main one is poured, for which the solution is prepared as for a monolithic structure.
After finishing the pouring work, the countertop should be covered with film, and after a day with a wet rag or burlap. This ensures a uniform drying process and, accordingly, the strength of the product, the absence of cracks or other defects. Formwork can be removed after 3-5 days.
If you plan to complete decoration of the upper surface, then before pouring on the prepared and laid in the formwork polyethylene film, shells, pebbles, bugles, etc. are laid out and glued.
The final step in the manufacture of concrete worktops is its grinding, which is carried out in several stages using circles of different grain sizes. The last grinding is recommended to be carried out with a felt circle. Although, if it is planned in the future to surface the surface with, for example, ceramic tiles or mosaics, thorough grinding is optional.
The final chord is the installation and fastening of the countertops on the frame.
Features of the manufacture of countertops made of decorative concrete
It will even more effectively fit into the interior decorative concrete countertop, which also has increased strength, resistance to mechanical, chemical and thermal influences, as well as to high humidity.
It differs from products from ordinary concrete with a wider variety of colors, as well as the possibility of applying a corrugated pattern.
Do-it-yourself manufacturing presents some complexity and requires exact adherence to the entire production cycle. Mandatory is the use of concrete grade not lower than M400, as well as fiber.
1. After pouring concrete into the formwork alignment and, preferably, vibrocompression. But, if it is technically impossible, when doing the work yourself, it is necessary to perform compaction using vibration.
Pay attention to this material -
2. The next step application of colored pigment powderwhich is necessarily smoothed out. Moreover, in order to obtain an even and deep staining, the process is performed in two layers.
After the concrete begins to harden and reaches the consistency of dense plasticine, you can proceed to the corrugation, for which special rubber stampings or pre-prepared stencils are used.
3. At the final stage, which is carried out in a day, excess pigmenting powder is washed off with waterthen, to achieve a beautiful effect and create external protection, a varnish coating is applied, which together with concrete creates a strong top layer by fixing in the pores the material that is opened after the washing process.
In industrial conditions, in addition to washing with water, hydrochloric acid treatment is also used, but for home conditions this option is not suitable for the manufacture of countertops.
You need JavaScript enabled to vote.Step 1: Assembling the formwork

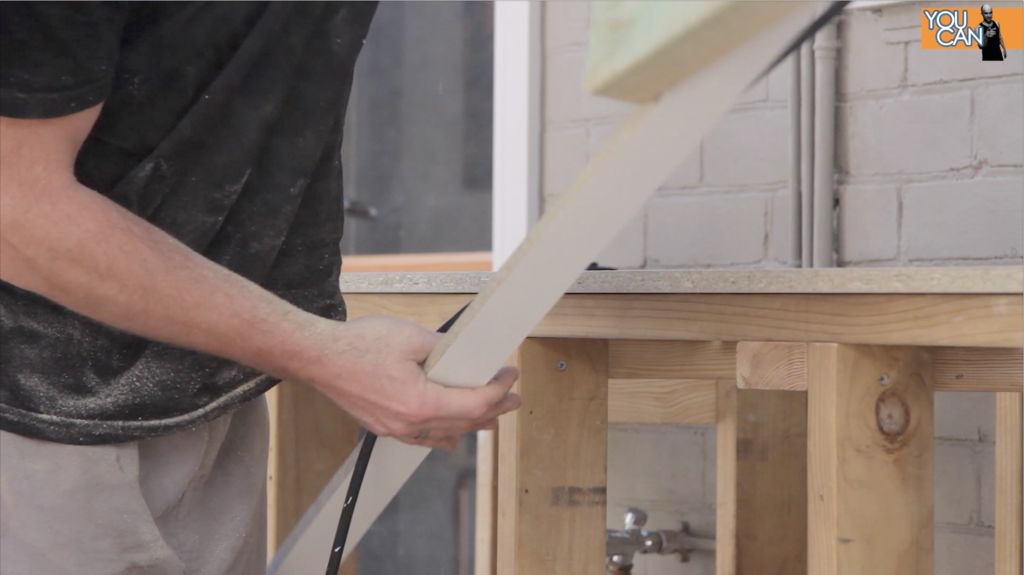


Getting started brain process with cutting to the size of the desired countertop of the melamine formwork details. And at this stage, you should pay attention to two points: the thickness and the protrusion, in my case the thickness was 45 mm, and the protrusion of the front side was 30 mm. I chose this thickness value based on the results of my research on the topic, my experience with concrete was small, so I thought it would be better to rely on someone else's. I am sure that at will homemade can be made thinner, but then something like fiberglass will need to be added to the mixture.
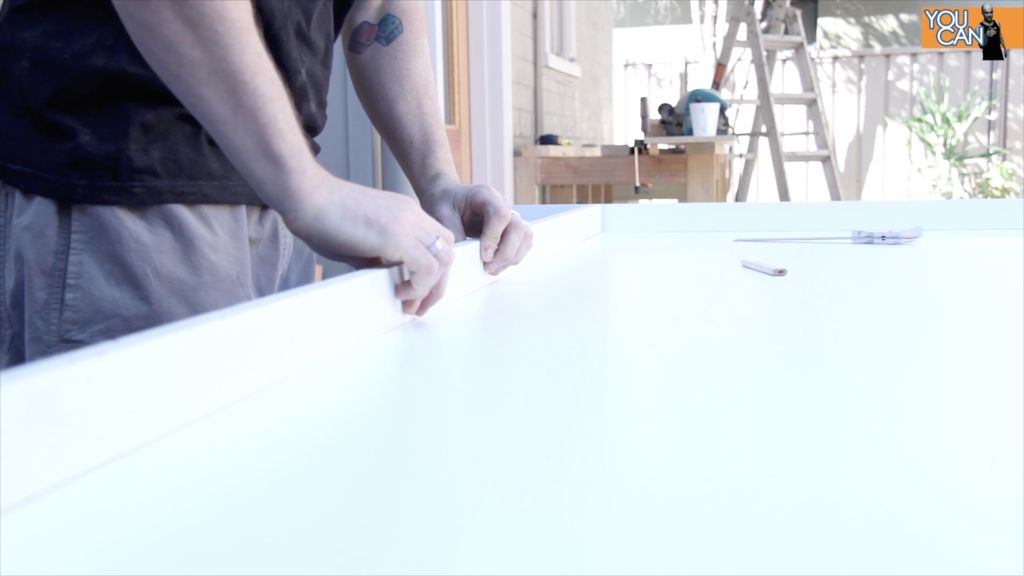
Next, we mark the inner contour of the formwork, which corresponds to the size of the countertop, and we apply previously cut melamine stripes along its outer perimeter. Then we fix them with clamps and fix with self-tapping screws, having previously drilled holes for them, because we do not want melamine to expand from screwing in self-tapping screws. And these holes need to be countered, plus this action will appear later.
We seal the self-tapping hats with tape so that when disassembling the formwork there are no difficulties if a solution gets into these places.
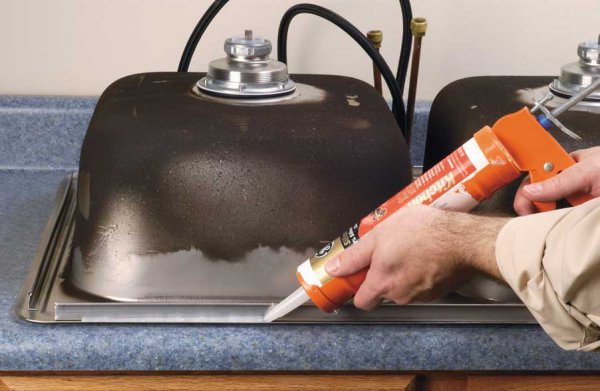
Step 2: Guiding the edge with silicone sealant


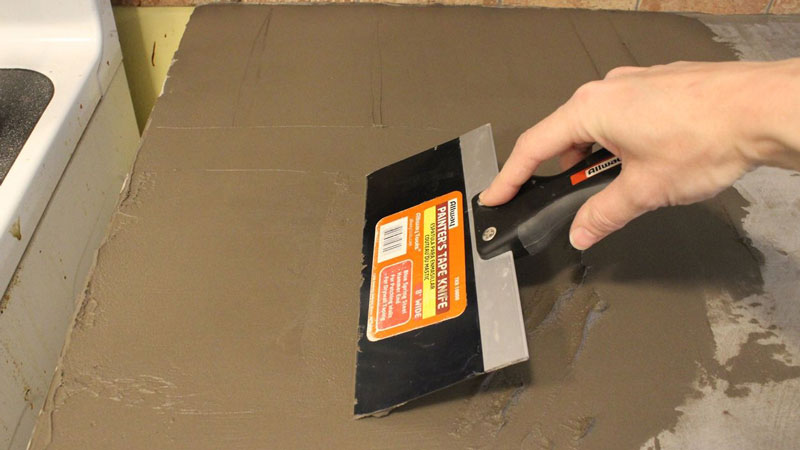
Having assembled the walls of the formwork, we proceed to sealing the perimeter. The use of silicone sealant for this is certainly too, but another way that I found is the use of soap solution and rags. The inner seam corresponds to the top edge of the countertop, so find some object suitable for the desired shape of the edge, in my case it was a round marker cap. Be sure to make a silicone “bevel” around the entire inner perimeter, since you won’t even believe how clearly any chips and bumps are visible on concrete.
After the sealant has completely dried (24 hours is enough), wipe with olive oil the entire inner surface of the formwork, this will help in the future to more easily “release” concrete homemade.
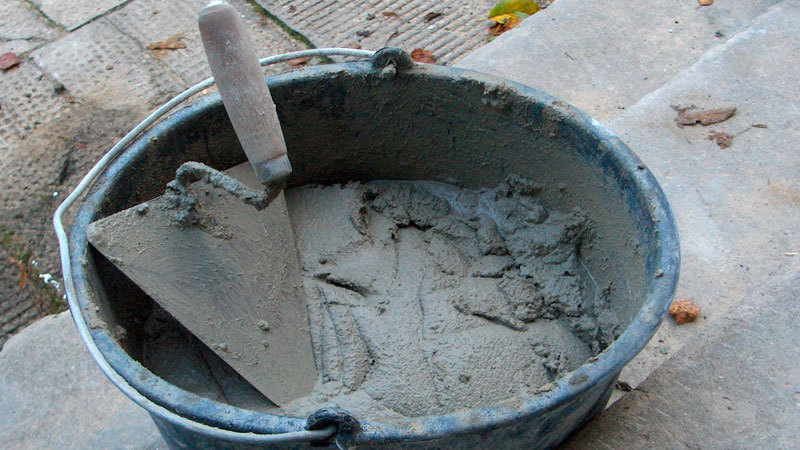
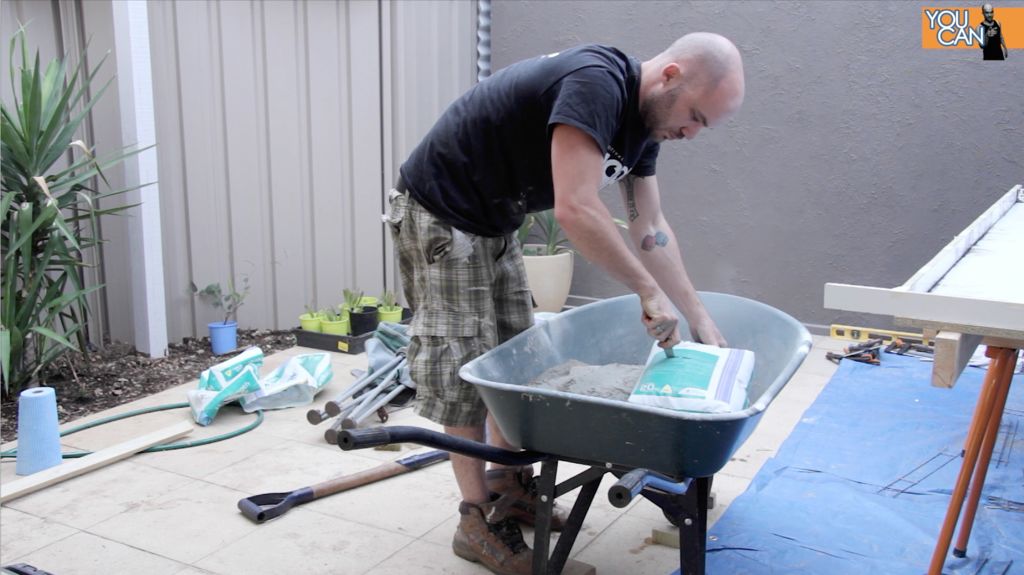
Step 3: Mixing and Pouring the Solution
![]()

Well, the time has come for mixing the solution. For this, I used a high-strength mixture from the nearest construction store. In all the videos I watched, they either used the Quickrete mixture, but I don’t think that it is found in our area, or the brand was not mentioned at all. I believe that any cement, except for rapidly hardening, is perfect.
When mixing the solution, do not fill in excess of water, excess moisture significantly reduces the strength of concrete. First servings brain solution you need to "drive" into the corners of the countertops, because if the mixture in them is "overdried", then they will serve you not so much as you expect.
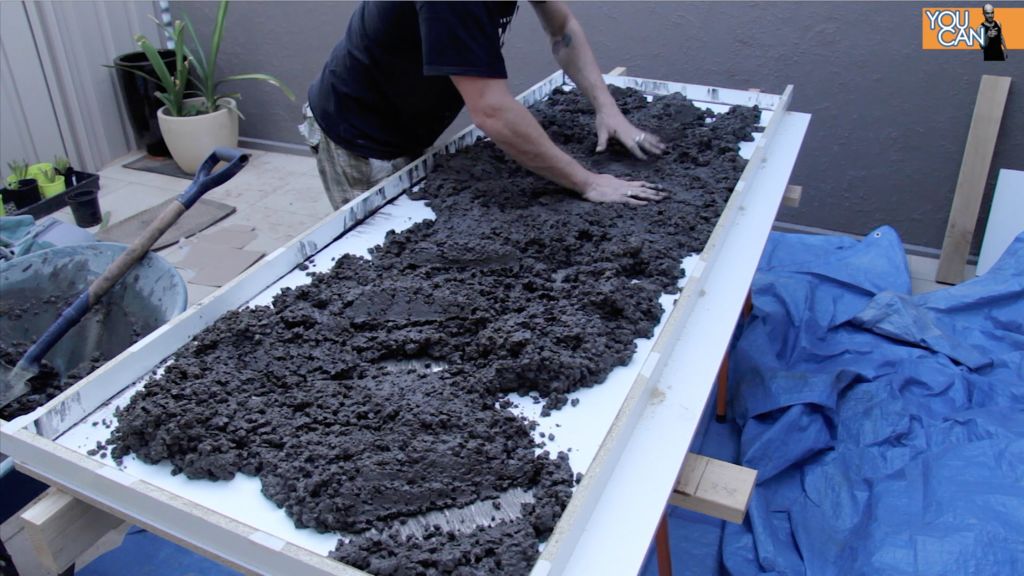
Step 4: Reinforcement and Vibration


Getting started reinforcing brainworms, that is, we add reinforcing elements to the filled solution, for this I would like to use a piece of metal mesh instead of mesh strips. I, again, conducted a study on the topic of how concrete products reinforcing bars are used to increase strength, and this helped me to understand where these bars should be located. Therefore, I suggest that you familiarize yourself with the video that helped me.
After reinforcing, we again proceed to vibrate the poured solution. I did this for an hour with the same mallet, and this method worked perfectly, but you are free to do whatever is convenient for you. The main thing is to go over the entire area of \u200b\u200bthe formwork.
During the vibration of the solution, you will observe how air bubbles rise from it, which then burst, and the voids formed are filled with the solution, which is what we need. When is this bubble brain process end, vibration can be stopped.
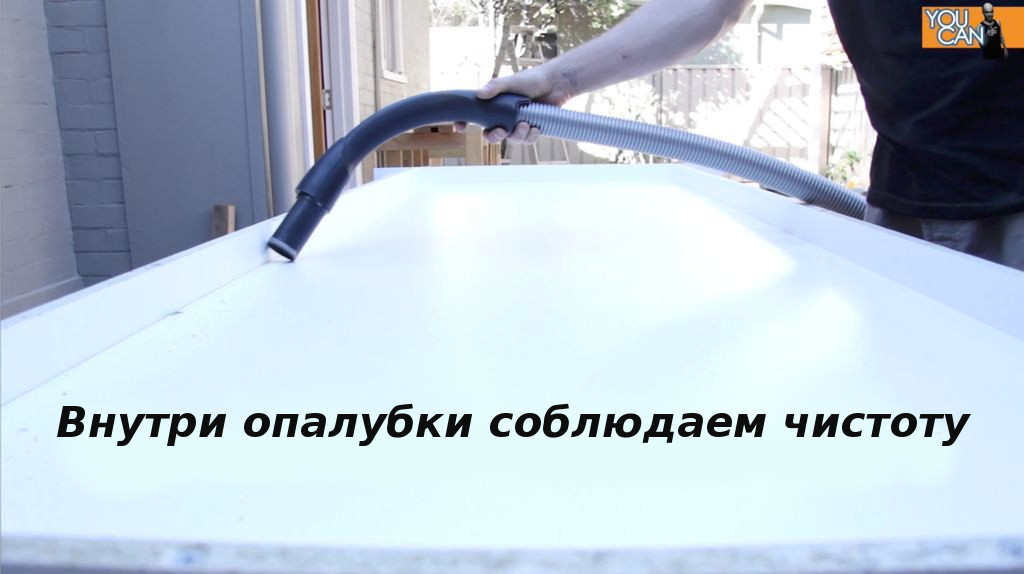
Step 5: Covering the formwork

At this stage, the future brain top it should be covered with something to thereby maintain a sufficiently high humidity and prevent the solution from drying out too quickly. After that, we give the craft 4 days to harden, it does not take longer, but during this time the solution should be moist. Do reading at this time if you still doubt that this is really interesting material for brain building.
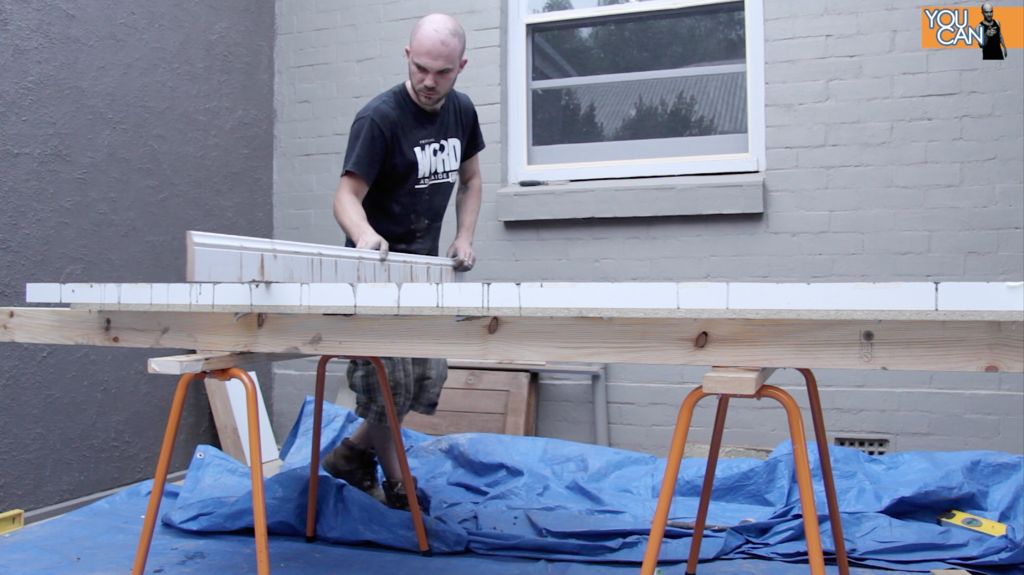
Step 6: Removing the formwork and turning the countertops


After 4 days, we remove the formwork, by the way, thanks to olive oil, it should separate easily.
As soon as I broke the water layer under the concrete (at this stage it is the underside) using a metal spatula for this, it became possible to turn the countertop face up. At 120 kilograms it was not easy, but the water created a slight suction.
So, we turn the tabletop over, my friends came to my aid and after a little discussion and planning of actions, we did it. I advise you not to be heroic and to also call someone for help.
Step 7: processing the countertops


Now let the countertop dry again for 4 days, and then, before applying the finish coat, to check brain quality drying, we’ll put a piece of rubber on the countertop. And if after 2 hours there will be a wet spot under it, then crafts need to give more time to dry.
Well, after complete drying, we finish the surface of the countertop. So I applied the 6th layer of a water-based topcoat, starting with the 25% concentration of the first layers and moving on to the 100% of the last two. The low concentration of the first layers helps the coating to penetrate deeper into concrete, thereby improving its water-repellent properties.
Step 8: Installation on the frame

Well, the countertop is ready, it remains to install it in its place.
In the end I will say, in the manufacture of such brainworms Plan the whole process from start to finish and have an idea of \u200b\u200bwhat you are doing at each stage. But most importantly, start the process itself!
That’s all, and if I could, then you can!