Self-replacement of the wheel, or what to do if a flat tire. How to change a wheel on a car: a step-by-step guide
Stop the car on level ground. If you are not staying in a garage or on a house road, you must turn on the emergency light.
Place wooden blocks or large stones in front of the front and rear wheels of the car (front under the left wheel, rear under the right wheel, or vice versa) to prevent the car from rolling. If changing the rear wheel, put the car on the hand brake. If you change the front wheel, turn on “P” on the automatic gearbox or turn on the neutral gear on the manual gearbox.
Remove the protective cap. Use a large flat head screwdriver to remove the cap. When remove the cap, put it in the trunk of the car so that it is not scratched.
Relax wheel bolts or nuts. Now insert the key into the head of the wheel bolt or nut and turn it counterclockwise. It is necessary to loosen each bolt or nut by only a quarter of a turn. Continue until all the bolts or nuts of your wheel are loose.
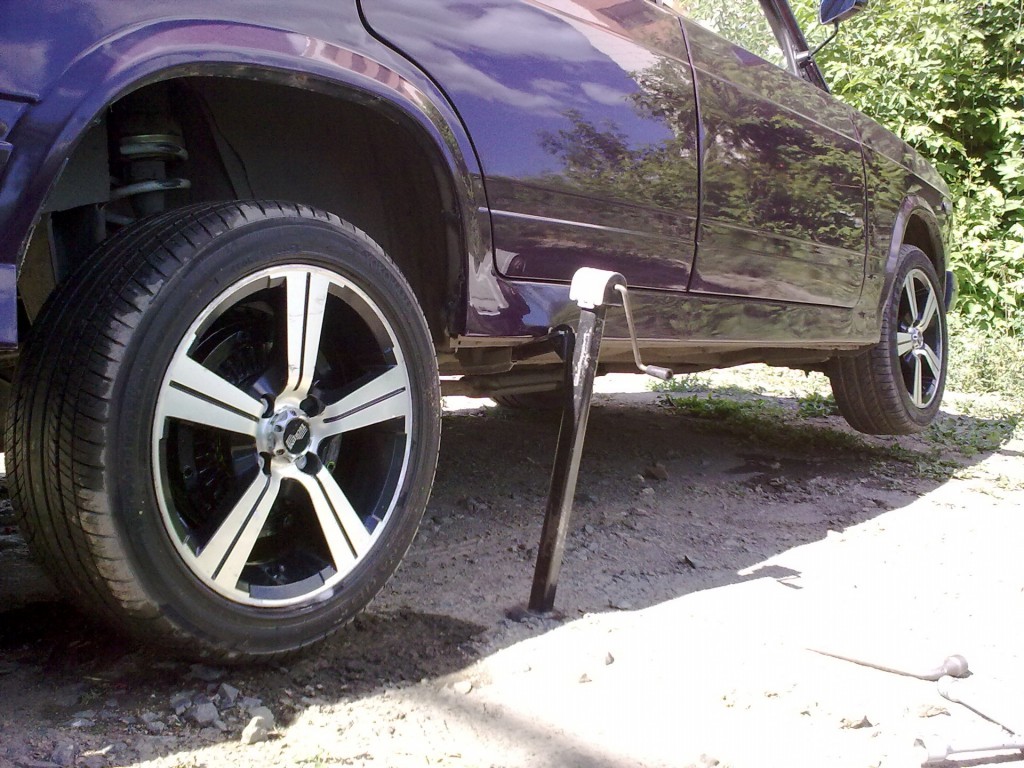
Find a place to jack on your car. On older cars, you can use the frame directly, and new cars have two marks or protrusions at the junction directly under the door, on which you need to jack the car. Place the jack in the required place and slowly raise the car. Make sure the car is not trying to roll when its wheels begin to lift off the ground.
Raise the car to such a height that you have access and the ability to remove the old wheel and install a new one. A new wheel may be larger in diameter than an old, broken or flat tire. You will need enough space to install a new wheel.
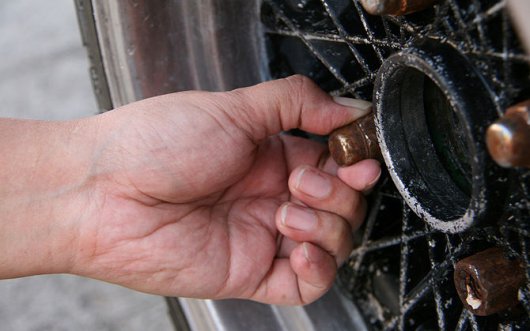
When the wheel is completely in the air, remove the wheel bolts or nuts and place them on a towel so that they do not roll away.
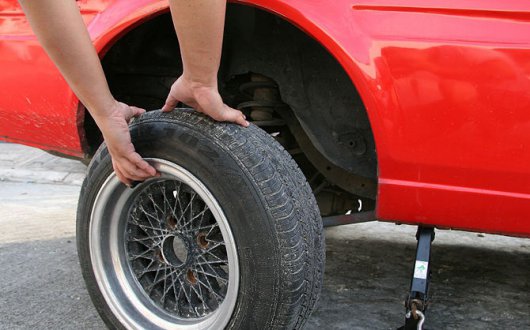
Remove the wheel from the vehicle. Make sure the car is firmly on the ground and not rolling. Remove the spare tire from the boot and put the old one in the boot.
If you use nuts, then the new wheel just needs to be threaded onto the studs protruding in the hub. But if you use bolts, then the wheel must be attached to the hub, aligned with the holes and locked in this position.
Start tightening bolts or nuts again. Make sure that you tighten the nuts with the rounded side towards the wheel, otherwise it will be loosened. Bolts or nuts must be manually tightened more than half the length. Take the key and tighten with maximum force with the wheel raised in the air. You tighten them a bit later, but you need the wheel to be properly fixed.
Recheck the tightness of each bolt or nut.
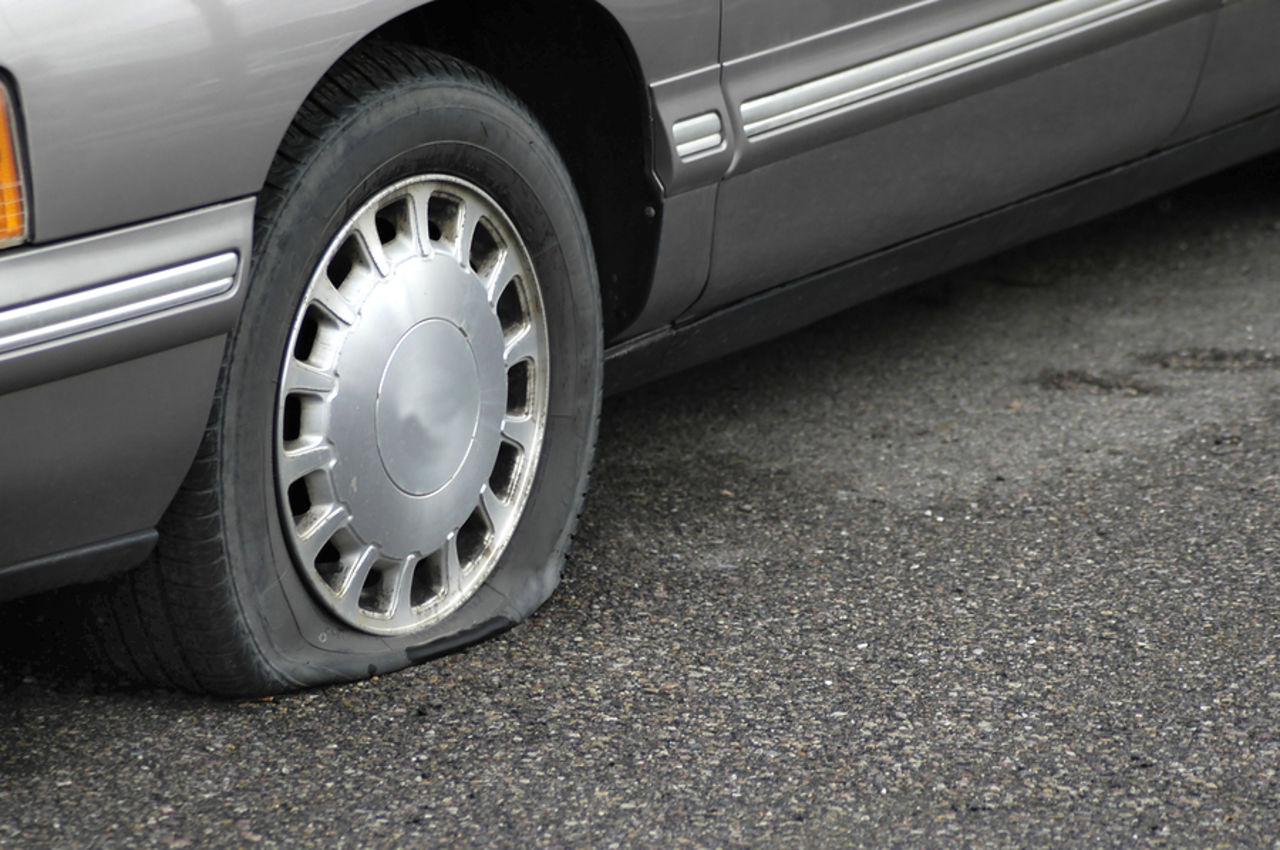
A broken wheel is usually indicated by extraneous noise from the outside, as well as loss of speed and poor handling. If the car drives away, and in order to keep it on the road, you have to make efforts, then, most likely, a puncture on one of the front wheels. If the rear of the car starts to enter, then the problem is there.
When this happens, you will understand exactly what the matter is. In no case do not panic. Level the car and, gradually lowering speed, pull over.
How to change a wheel
1. Park on the side of the road
You can’t continue driving with a punctured tire, but stopping in the middle of the road is also not a thing. Therefore, do not be afraid to drive a couple of tens of meters and choose a flat, dry place on the side of the road.
Drivers of cars with a manual gearbox need to engage first gear, and owners of automatic gears must put the lever in the parking position (P).
And in any case, you need to put the car on the handbrake.
2. Set the warning triangle and prepare the tools
When you park the car in a safe place, do not forget to turn on the alarm and set the warning triangle in the trunk. In settlements it is put 20 meters behind the car, and on the highway - 40 meters.
In the same place, in the trunk, find a spare wheel and a jack with a balloon key. Typically, the manufacturer has it all in a special niche under the floor, where you can get by lifting the bottom panel.
It is good if you have a pump and a pressure gauge with you to check the pressure, as well as wheel chocks. Well, and, of course, gloves do not hurt, because you still have to get your hands a little dirty.
3. Remove the wheel
Having taken out all the tools and the spare wheel, put them next to the broken wheel and ask all passengers to get out of the car. Even if it is outside or heavy rain, safety comes first.
Despite the handbrake and the gear engaged, before installing the jack, you must additionally fix the wheels with the stops. Any stones or pieces of brick, however, will come down for them.
If you need to replace the rear wheel, stops are placed on both sides of the front wheels, and vice versa.
Now you can begin to remove the wheel. First, remove the disc from the plastic cap and use a balloon wrench to loosen the bolts. To move them away, you will need a lot of effort, which can be provided by the weight of your body, simply by pressing the key with your foot. It is not necessary to completely unscrew the bolts: it is enough to unscrew them one turn.
After that you need to raise the car with a jack. In no case can you install it anywhere. Especially for these purposes, the bottom has small reinforced seats that are usually located behind the front wheel or immediately in front of the rear. The manufacturer designates them using triangles or cutouts at the bottom of the thresholds. If the weld is closed with plastic pads, they will be interrupted at the points of installation of the jack.
Bring the jack under the bottom and start twisting its handle clockwise. Be sure to make sure that the jack rises evenly and does not roll.
If under the weight of the machine the lower leg of the jack goes into the ground, you need to put something like a piece of board or brick under it.
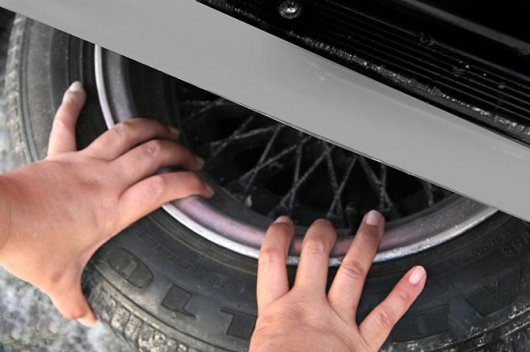
Do not raise the wheel too much. It is enough to stop 5 cm from the ground. After that, you can completely unscrew the bolts and remove the punched wheel from the hub. It is better to push it under the car as insurance, and put the bolts somewhere on a cloth so as not to get lost.
4. Install and check the reserve
It remains to put a spare tire instead of a punctured wheel. To do this, align the holes on the disk with the holes in the hub, put on the wheel and make the bolts, completely wrapping them by hand.
It is important to install the nuts fastening the wheels to the hub with the semicircular side to the disk, and not outward.
Remove the broken wheel from under the machine, lower the jack and finally tighten the bolts. You need to do this correctly. In wheels with four or six holes, the opposite bolts are tightened in pairs. If there are five holes, then you need to pull in this order, as if you are drawing a five-pointed star.
It remains to assemble the tool, remove the jack and stops, and also check the pressure in the mounted wheel and, if necessary, pump it up. If there is no pump at hand, you can ask for assistance from passing drivers.
If you use a small reserve, the so-called dokatka, then do not forget about caution: usually it can be moved at a speed of no more than 80 km / h and a maximum distance of 100 kilometers.
Well, of course, try to fix the punched wheel in a specialized tire fitting as soon as possible so as not to tempt fate and not drive without a spare wheel.
This short guide is written for those who do not know how or do not know how to independently remove a punched wheel and put a reserve in the field.
If you never had to stop on the side of the road due to a flat tire and you never removed the wheels from the car, and also want to meet the trouble (if that happens) fully armed, then this wheel change instruction consisting of 14 simple points will help in this .
Moreover, there is nothing complicated in this operation, it is a fairly simple task, provided that you are prepared and take a little effort.
1. Find a flat, solid, hard-surfaced place to remove the wheel.
You will need a hard, flat surface to prevent the car from moving. If the problem has caught you on the road, park as far as possible from the carriageway, turn on the emergency lights and set an emergency sign if necessary *
* The warning triangle is set in accordance with Chapter 7 of the Rules of the Road. .
Avoid loose, blurry unpaved roadsides. The ideal option is with an asphalt, wide curb.
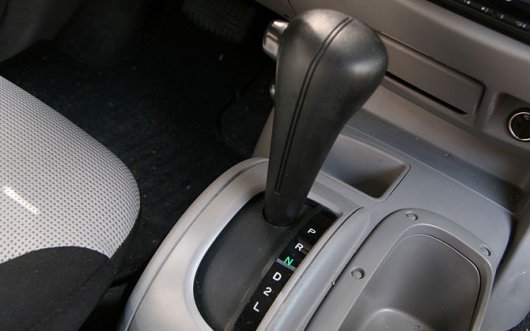
2. Switch off the engine, fix the standing car with a “handbrake” and put the automatic transmission selector in the Park position “P”. In the case of a manual gearbox, put the gearbox in first or reverse gear.
![]()
3. To prevent rolling or rolling of the wheels, put under the front and rear wheels or under the wheel the opposite side to the jack which will be able to jack wheel chocks and heavy objects will come up (stones, bars are good for these purposes).
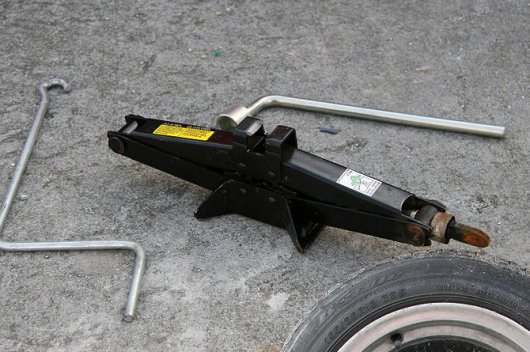
4. Remove the spare tire, jack and wheel wrench.
Place the jack under the car frame in special technological grooves. If you do not know where they are located, you will have to find them manually or try to look under the car and use a flashlight or highlighting them with a mobile phone to find them visually. This will need to be done when using this type of jack. TYPE OF JACK.
What is it for.
I. Many cars have plastic ornate “skirts” around the edges. If the jack is installed in the wrong position, it may crush, break the plastic when you start to lift the machine. So, if you are not sure that you put the jack in the right place, read the instructions for the car, which it is advisable to carry with you.
II. Some modern cars have a mark behind the front arch or in front of the rear wheel arch, in the place where the jack should be located.
The second type of jack.
With this type of lift, everything is much simpler. Open the decorative plug in the lower plastic of the car or find a jack on the jack, insert the pin into the jack, you can jack.

5. Lift the jack until it touches the seat on the car or asphalt (without lifting the car).
The jack should be perpendicular to the bearing surface, make sure of this. Otherwise, the car may break off the jack.
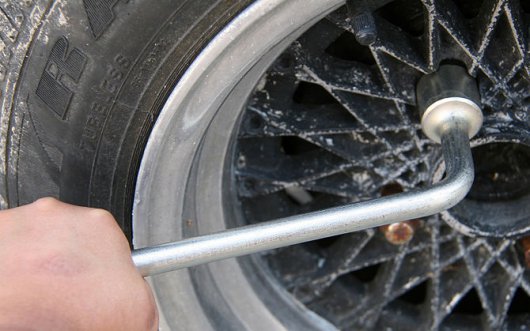
6. Remove the protective cap on the hub of the machine and loosen the nuts by unscrewing them counterclockwise. Do not unscrew them completely, just loosen them until they begin to spin freely.
Leaving the wheel on the ground, you will be able to turn the nuts themselves, and not the wheel itself, which would undoubtedly happen if you tried to unscrew the posted wheel.
I. Use the wrench that came standard on the car.
II. It takes a lot of effort to turn the nuts. Especially if they have not been removed for a long time. If necessary, use a longer lever or the weight of your own body (make sure that you unscrew the nuts counterclockwise).
III. A Phillips wrench will give you more force than the standard spray can with one handle.
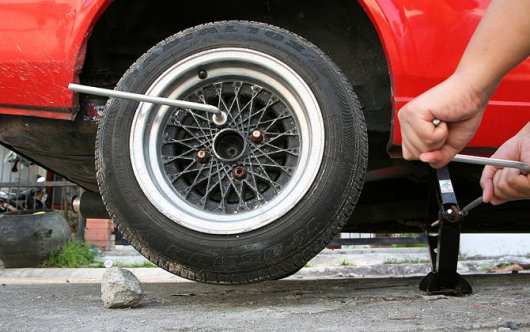
7. Jack the car. Raise the wheel so high that it would be possible to remove the wheel and replace it with a spare one.
I. Lift the car carefully and slowly. Watch for body stability. If you see unstable car behavior, lower the jack and correct the problem before fully raising the car.
II. If the jack bends or stands at an angle, bring it into a low position, adjust and continue lifting.
Also, for safety, place a spare tire underneath the car, just in case. Or already on a jacked-up car, attach the just-shot flat tire if the clearance is too small.
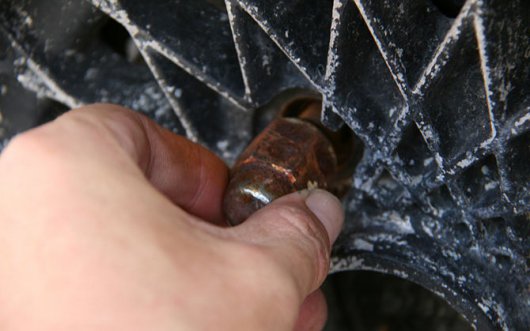
8. Turn out bolts. Turn out all bolts counterclockwise.
9. Remove the wheel. The disk can stick to the "hub". Because of this, it will have to be slightly staggered or kicked from the inside, then the wheel will be removed with no problems.
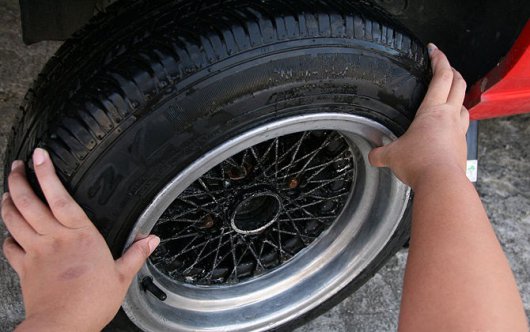
10. We put a new wheel on the hub. Make sure that the bolt holes are aligned, then alternately insert the bolts themselves, holding the wheel with your knee or hand.
11. We twist the bolts until they lie down with their hats on the disk. Do not tighten the bolts completely yet!
I. Using a balloon wrench, lightly screw the bolts.

12. Lower the car, but do not give the full weight of the car to the wheel.
Tighten the bolts crosswise. This is necessary to balance the wheel. Slowly tighten, half turn or turn bolt by bolt until it becomes difficult to scroll them.

13. Fully lower the car, take out the jack. Strongly tighten the bolts, put the cap in place.
14. We put the punctured wheel in the trunk or on another seat and take it to the tire fitting.
ALL IS READY!
The widespread use of personal cars and, as a result, the emergence with little experience (mainly from among the beautiful half of humanity) has led to more frequent situations where the driver simply does not know what to do when the tire is punctured and, accordingly, how to change the wheel correctly on the car.
In addition, the quality of roads, no matter what they say, still improved, and car tires have become better, for the most part. All of these factors have led to a significant reduction in the likelihood of tire puncture or damage.
Therefore, even a wise driver, who has not changed the wheel for several years, can make a number of mistakes, which can lead to a loss of time (due to a large number of actions), or even injury.
The best way out of this situation is to comply with simple technology when replacing a wheel. The procedure can be remembered or printed out and put in the glove compartment of the car to eliminate forgetfulness.
So, if you need to replace the wheel - first of all you need to make sure that you have everything you need. This will require:
- Spare wheel, whole and pumped up.
- Serviceable jack.
- “Balloon” key of the corresponding size (for most cars “19”).
- Wheel chock (you can without it, but safety will decrease).
If you can still successfully change the wheel without a wheel chock, then without a spare wheel (or with a flat tire) it makes no sense to start work. When you have everything you need, you can safely proceed to action.
Wheel replacement is carried out in three stages.
Stage One - Preparation
First of all, it is necessary to put the machine on a flat and hard surface. Suitable section of the road without a strong slope or parking / pocket, with asphalt (or another strong enough so that the jack does not fail).
The machine should be installed so as not to interfere with the movement of other vehicles. You should not be afraid to drive a little (naturally slowly, with an alarm) with a flat tire - the chance to damage the tire is minimal, in addition, it is already damaged.
After installing the car in a suitable place, it is necessary to put the car “on the handbrake” and engage first gear, in the case of a manual transmission; when automatically set to “parking” mode and turn off the engine.
Then you need to install a wheel chock under the wheel, located diagonally from the damaged one. Those. emphasis should be on the opposite side and the other axis. For example, when replacing the right rear wheel, the emphasis is set under the left front.
Note. Emphasis is both bilateral and unilateral. In the case of using one-way - it is necessary to install it under the wheel on the side of the slope.
Note. If decorative plastic caps on wheels are used, then it must be removed from the damaged wheel.
Stage Two - Replacement
First of all, it is necessary to loosen the fasteners of the damaged wheel. To do this, install the “spray can” on the bolt (or the nut - in different cars in different ways) so that its handle is relatively horizontal and “looks” to the left (to unscrew - you need to turn it counterclockwise).
Then you need to loosen the tightening of the bolt / nut, you can use your feet, literally standing on the edge of the handle of the "spray bottle" (you may even have to jump on it). Thus, you need to “break” all the nuts / bolts by half a turn.
The next thing to do is lift the car with a jack. For this purpose, the jack is located under a special platform on the threshold of the car (there are also special mounts, cunning designs - then you must use them accordingly) and the car is lifted until the damaged wheel comes off the ground with a fairly large clearance (so that the inflated spare )
Now you need to unscrew all the nuts / bolts, which is quite easy to do - special efforts are no longer required here, after which the wheel is removed. Then a spare wheel is installed (in the case of using rails in the hub design - it is necessary to ensure that the wheel gets into them) and, by hand, bolts / nuts are baited. After that, it is required that the “spray bar" “by hand” partially tighten the fixture. Tighten bolts / nuts diagonally - i.e. one tightened, the next will be the one that is opposite.
The final stage - cleaning
In order not to leave anything behind ourselves on the road (and not to be in a difficult situation with another similar case) - we carry out the most important part of the work. We put everything in its place and carefully examine whether anything has been forgotten.
A situation in which it is necessary to replace a wheel can happen anywhere - near a house, in a parking lot, even on the road. Regardless of circumstances, when replacing it is necessary to adhere to safety standards, otherwise the damage will be caused not only to the machine, but also to their own health.
Key Symptoms
The need to replace the wheel can be determined by the following signs:
- the car wags "backwards";
- it pulls to the left / right side;
- third-party noises coming from the wheel are observed.
If you have one of these signs, stop the car immediately (if you have not done so earlier), carefully inspect it. And if it turns out that the reason for all this was a flat tire, proceed to replace it. But first, take care of everything you need.
What will be needed for replacement?
To carry out this procedure, you will need:
- jack;
- tight gloves;
- balloon type wrench (its dimensions should be the same as for nuts on the wheel);
- “Shoe” (if one is not at hand, then you can use a pair of stones from the side of the road);
- in fact, a reserve.
In addition, a special technical aerosol is also useful, the marking of which looks like a WD-40 (in the environment of car enthusiasts it is known by the name "wreck"). A feature of this aerosol is that it is able to penetrate rusty compounds and make them more mobile. After all, if the wheel, for example, has not been changed long enough, then certain difficulties will arise with unscrewing the nuts. And the use of "vedeshki" this task will greatly facilitate.
How to change the wheel: step by step instructions
The procedure can be divided into two stages - preparatory measures and the replacement itself. Let's get acquainted with the features of each of them.
Stage One. Preparatory Activities
Before changing the wheel, you need to carry out preliminary training. It consists in performing a few simple steps.
- First turn off the car (if the incident happened on the road), then put it on the parking brake.
- Install a warning sign, and do it correctly. So, if you stopped at the “oncoming lane”, then this sign should be located in front of the car at a distance of 15 meters, and if on your lane, then also at 15 meters, but already at the rear (within settlements, this distance should be 30 meters).
- Inspect the vehicle, install the stops under the wheels. Pay special attention to the fastening of the wheel, which is located diagonally in relation to the damaged.
- Prepare all the necessary equipment in advance, as well as a spare tire.
After that proceed to the main part of the work.
Stage Two. Wheel change on a car
The procedure for replacing is shown below.
- Check if the car is really on the handbrake. You can also include the first gear for reinsurance purposes. If your car has automatic transmission, then move the selector to the "parking" position.
- Next, under those wheels that do not need replacement, put pieces of bricks or special wedges that prevent rollback. Moreover, even ordinary logs in the form of blades can be used for this. You have to hammer them tightly under the wheels (it is recommended to use a hammer for this, thanks to which the wedges can be adjusted extremely deeply).
- Then loosen the nuts on the damaged wheel. If you do this even before you lift the car with a jack, the process itself will be easier and simpler.
- Prepare the spare wheel in advance by placing it next to the vehicle. Never lean it against the body, otherwise it can easily roll, leaving deep scratches on it.
- Only then lift the machine with a jack.
Note! Many inexperienced car owners make a mistake at this stage, the result of which is an inevitable visit to a car workshop. The upper part of the jack should abut against a specially designed socket for this from below the threshold - this will prevent serious damage and subsequent repairs.
- Work the jack until the entire damaged wheel comes off the ground.
- Raising the machine, unscrew to the end of the nut, and completely remove the wheel.
- Take a new wheel and install it in place of the old one, fixing it with the utmost care by means of nuts. Here you have to be careful and make not very big efforts - this is due to the fact that due to excessive zeal in tightening the machine, you can easily push it off the jack. As for the final tightening of the nuts, it is recommended to carry it out only after the machine is again on the ground.
- You have almost completed replacing a damaged wheel. Now lower the machine to the ground and finally tighten the nuts (in a word, do what was recommended in the previous step).
- Take the removed wheel to where it will not bother you (for example, in the trunk).
- Remove all wedges from under the wheels. Using a manometer, check that the tire pressure is in accordance with the norm; if necessary, pump it up a little.
- Pack all the tools and the warning sign, after which you can safely continue the trip.
Note! Replacing a damaged wheel takes a maximum of ten minutes. Thanks to the coherence of actions, you can quickly resolve this issue and hit the road. If you do not want / can not do everything yourself, then leave the car and ask for help. In any case, there are people who will help you.
Your attention is invited to a few more sensible recommendations that will help to cope with the procedure.
- The machine must be standing on a flat surface, with the hand brake applied or the “parking” mode (it all depends on the type of gearbox).
- Most modern car models are equipped with a jack, located, as a rule, in the additional compartment of the trunk under the deck.
- Finally, it is important that the nuts tighten with a torque of 103 Nm.
In addition, pay attention to the tire manufacturer directly during the replacement. The fact is that only one manufacturer should have tires on one axis of the machine. For uniform wear, you can change them in sets (four pieces), also do not forget to alternate the rear wheels with the front.
Note! Do not change the wheels diagonally - do it only as described above! Then their original direction of rotation will be saved.
When replacing, make sure that on one axis there are tires not only of one manufacturer, but also with the same profile and date of manufacture (plus / minus 1 year).
How to replace a wheel on a car (video)
To summarize
Every car owner sooner or later faces a situation in which they need to show their abilities and knowledge in order to maintain the health of the “iron horse”. One of these situations is, say, breaking a tire on the road. Further movement is, of course, impossible, but if you follow the instructions above, you will quickly solve the problem and continue on your way.