Passage of game Gray Matter. Ghosts of the subconscious. Gray MatterGray Matter. Ghosts of the subconscious Game gray matter ghosts of the subconscious
Original name: gray matter
Russian name: Gray Matter Ghosts of the subconscious
Developer: Wizardbox
Publisher: dtp
Localizer in Russia: New Disc
Release Date: October 29, 2010
Release date in Russia: I quarter 2011
Platform: PC
Management and some features of the game
Management in the game is mainly carried out with the mouse. But there are hot buttons on the keyboard that can make gaming easier:
M - map
Space - on the screen immediately appear inscriptions over all things on which you can perform an action
P - level passing statistics
Now everything about the map.
New areas will open up on the map over time, in which case the map icon at the top of the screen will blink. Areas can be written in gold letters (meaning there are unsolved problems on it), silver letters (remaining bonus tasks), and black letters (everything is solved, there is nothing else in this area).
The inventory is opened by moving the cursor to the top of the screen. To take an item in hand, you need to right-click on it.
Good luck in the game!
Chapter 1
Education
To begin with, the developers offer us to go through a little training to get the basic skills of the game. Our task is simple - you need to find and feed the rabbits named Houdini. The rabbit sits under a plant in the corner of the room. Having found it, we open the travel bag and take out a carrot, a deck of cards, a Houdini water bottle, a wallet, a knife, a matchbox and a book with tricks from it, close the bag. Pour into a bottle of water from the carafe, which stands on the mirror next to the bed. We give Houdini water and carrots. Training is over, you can leave the room.
Looking around the mansion
Immediately we leave in the foyer, we go down the stairs. We go outside (the exit is located at the very bottom of the screen). We go into the garage, which is located at the back of the house. We try to start the motorcycle, but it seems to be broken. We inspect the car and pictures and exit. We read the sign that hangs near the front door, now at least it’s clear where we got to. We go into the house, go to the dining room, examine everything in it (photos on the wall, stereo system), and then go into the office (the door opposite the dining room). We also examine everything, paying special attention to photographs of patients and diplomas. The door to the office is still closed, so we leave the office. An old woman catches us in the corridor and offers to go to the kitchen to have breakfast. So we do, we go in for breakfast, at the same time we talk with an old woman, who, by the way, is called Miss Dalton. She looks after the house. We will find out what kind of building it is and where it is located, who is the owner here, how to get to Oxford and much more. We are offered to stay in the house if we become assistants to the professor. In general, the idea is good.
Let's talk, we go to the bulletin board and examine the business cards of the police and the professor and the calendar. We leave the kitchen and approach the door on which the letter for the future assistant hangs. The letter describes our first assignment and includes several business cards. Now we need to find 6 student volunteers who will agree to take part in the experiment that has begun. In addition, we need a cell phone and a map, for all this we go to Miss Dalton. She will give her sister's phone and we will have a card. Click on the compass icon in the top left corner of the screen. Using the map, you can instantly move around the locations, click on Oxford.
Oxford
So we arrived in the most famous student city! The weather is not so hot, but this does not bother us much.
So, first of all, we turn onto Queen Street, where we talk with three guys: two guys and a girl, unfortunately, they will all refuse “easy work”. After everyone has been interviewed, Sam will pick up a freshman party announcement from the ground. Yes, you understood correctly, we will recruit “fresh meat”! A new active point "St Edmund Hall" appeared on the map, so we go there.
St Edmund Hall
Arriving at the place, we become an unwitting witness to a quarrel between two students: a guy and a girl. We talk with a guy (his name is Harvey), it turns out that the girl stole the film from him. We agree that if we bring the film, then Harvey will take part in the experiment. In order to return the film, we approach the girl who is sitting next to (to Lisa) and show our first trick in this game. We read the instructions from the book of tricks and do everything according to it, step by step.
The first focus will be “burning the card”, or, for that matter, the cassette. Having shown it, we get the desired cassette, which we give to Harvey.
That's it, there is one student, there are five left!
We talk with another victim - with a girl who takes sunbaths (her name is Helena). The only way to get her to take part in the experiment is to get the guy she likes to also take part in this experiment. Just during the conversation, this guy (his name is Charles) will appear. The problem is, we don't have anything to talk to him about yet! Let's leave him alone for a while and turn our attention to the girl who modestly sits on a bench in the corner of the screen. Her name is Angela, she is not a freshman, but most likely she can also be persuaded to experiment. Let's show her a phone trick! First you need to find out the phone number that hangs on the wall next to Angela. We examine the phone closer, pick up a cell phone and use it on the phone number, which is written under the dial of the telephone. We have a number, which means that we can safely show the trick. Having shown it, we will get the second volunteer.
Now let's deal with Charles. We look at the books that lie next to him, we talk about books. Then we look at the letter that lies next to the books and talk about the letter. Now you need to steal the letter, for this you need to show focus. Of course the focus is about writing. To begin with, we only need the first part of the focus, which is described in the first paragraph. If everything is done correctly, then the letter will be with us. We're going to Oxford.
Oxford
We hold the letter over the steam that comes out of the sewer manhole. The letter will open and you can read it. We turn onto Cornmarket street and go into the magic shop. We examine the casket, which has the symbols of the secret club of magicians. The owner of the store will immediately appear, we talk with him several times about the club. After that, we again approach the casket. You need to put up two cards so that they together give 21 points. For example, 9 and an ace. After that, we pull the handle and get the first riddle from the club. Back to St Edmund Hall
St Edmund Hall
We read Charles's letter and change the business card from the letter to Dr. Styles' business card. With the help of focus, we return the letter to Charles, after which we talk with Helena. Two more students are ready to take part in the experiment. We return to Oxford.
Oxford
We read the sign on the tower, after which we go into the tower itself and close the door behind us. We examine the red box, it has a logo familiar to us. To open the box, you need to bring a burning match to the hole below. We use matches on the box, we get a letter and part of the map. And now attention! To go to another location, you will need to find all the pieces of the map that are scattered throughout Oxford. We go down to the street.
We approach the signboard on the left, which provides the entire list of educational institutions and their symbols. We are looking for a college with the same symbols as on the letter, this is Christ Church, this place will appear on the map, we go there.
Christ Church
We examine the statue in the fountain, then we turn our attention to the black box with the club logo, which also lies in the fountain. Open the lid and drip a drop of water (which suddenly appears in the inventory) on a piece of paper. Then, with the help of matches, open the box. We take the second part of the map and step into the garden. We examine the flower bed, which is located at the bottom of the screen, look at the fresh dirt and dig out another part of the map. Doctor Styles will immediately call and summon Sam for an experiment. Let's look at the intro.
Chapter 2
mansion
After talking with Miss Dalton, we take a newspaper from the table and read it. We leave the kitchen and go down to the basement, look around and go into the main laboratory. From the table we take a note with the task and a letter from the surgical clinic. The note says that Sam needs to clean up the filing cabinet. We approach the file cabinet and lay out all the documents by name. That is, we look at the first letter of the document and put it in a box with such a letter. After everything is laid out, it will be possible to rummage through the boxes!
We open lockers: F, E, L, N we read all the documents that can be read, after that we leave the laboratory. There are two new active points on the map: Radcliff Infirmary and Horspath Track (let's go there).
Horspath Track
We talk with Eddie, he will tell a lot of interesting things about last night. We examine the strange curls on the track and go to the Radcliff Infirmary.
Radcliff Infirmary
We go to Susie's office. Susie is the secretary of Mr. Hidley, a friend of Dr. Styles. We talk with Susie, during the conversation we give her one of the papers, as a sign of gratitude, Susie will give us the opportunity to talk with Mr. Hidley. This is a very pleasant man in communication, but who, unfortunately, does not answer all questions. One such issue is the enemies of Dr. Styles. It seems that we will have to look for the answer to this question ourselves.
We talk with Susie, ask her about the enemies, about a copy of the experiment plan and tell her that Mr. Hidley asked to bring him coffee. Of course, this was said in order to borrow the keys that open the lockers with documents. But here's the bad luck - Susie takes the keys with her, and when she arrives, she puts them in a cup. To get the keys, you need to perform a cup trick, but so far we do not have a magnet that will be needed during the trick. We go to the magic shop in Oxford.
Oxford
In the store we talk with the seller, after that we inspect the shelves with the goods. Today we will buy well, here is a list of what you need to buy: a magnet (magnet), a fingertip (false thumb), a thing that makes the sound of tearing paper (shredded-paper noisemaker) and a special chewing gum (spirit gum). We go to the center, now there is a grandmother who sells flowers. We buy a bouquet. We return to Susie's office, now everything that is needed for the focus is in the inventory.
Radcliff Infirmary
We show Susie the trick with the disappearance of the key from the mug. Now we need Susie herself to disappear from the office. We go out into the corridor, go into the nightingale of the staff and hide the first aid kit hanging on the wall. In the inventory we combine the fingertips and blood, after that we smear the fingertips with invisible chewing gum, now we go to Susie and show a trick with a wounded finger. When Susie leaves the office, open the lockers with documents using the key. Having found the necessary document, we copy it on the scanner. At this moment, Susie will come and give the first aid kit, Sam will leave the office.
In the corridor we will meet a volunteer of Dr. Styles, who participated in the night experiment. We talk with him and make sure that this is a very secretive young man. It's time to visit wonderful Oxford again.
Oxford
We walk to Queen Street and go to the pub. There is a huge horn in the middle of the pub, we try to blow into it, but nothing happens, apparently some part is missing. We talk with the bartender, ask about the horn. The bartender will generously dispense the missing piece. We insert it into the horn and blow, in return we get part of the card and a postcard. We go to St Edmund Hall.
St Edmund Hall
We talk with the guys and exchange phone numbers. After the conversation, a new active point "Bodleian Library" will appear on the map, we step there.
Bodleian Library
That's the way things are, you can't get into the library without a special access card! So, you need to get it first, but this is a little later. First we go to Christ Church.
Christ Church
We go inside, ask the guide a few questions and approach the altar. We examine the pool, there is something under it! We pull the lever nearby, the pool will be filled with water, and the missing piece of the map will lie at the bottom! We select it, collect all the parts! In fact, this is not a map, but puzzles that will help us move forward! We step into the Bodleian Library.
Bodleian Library
In a whisper, we call Helena to us. We ask her to give us a pass card, Helena will refuse, although she has two of them: old and new. Please show both. Let's start with a new card. A window will pop up in which we will be asked to choose 3 compliments. We choose these:
1)That's a good picture
2)You look like a top model on this one
3) You are right, that MUCH better!
For the old card we make such compliments:
1) You look like you're on drugs
2)Can you put a paper bag over that picture?
3)Your nose doesn't look that big in real life
After that, Helena will take the cards and return to the table. Now we can show her a trick with a broken - restored ring, but first we need to prepare! We put the noise maker from the magic store into the paper shredder and start showing the trick!
Having shown it, we will have a pass in our inventory, with which you can go inside. After passing, we talk with the librarian. We sit down at the computer and look for all the information regarding Dr. Styles. We watch a small cutscene and go to Styles' mansion. When we enter the house, the phone will ring, we answer the call, then we go to the kitchen and talk with Miss Dalton. Let's go to Oxford, it's time to think about the rebus.
Oxford
There are three words in the rebus: Carfax, tower and phone. Agree, the puzzle is very simple. But it is he who points us to the place where we will need to solve the problem more difficult, to a telephone booth in the center of Oxford. We go into the booth and pick up the phone. You need to dial a number of 5 digits. What's the number? And let's read the task that we received in the magic shop. The task says that you need to enter the name of the one who sold his soul. Sold his soul and 5 letters. The correct answer is Judas. Or Judas in English. So, dial 58327. Congratulations, the first task of the Club is solved! A token will fall out of the phone, pick it up. And we return to the mansion.
We put the flowers in a glass in Sam's room and in a vase in the main laboratory. We look at the card index with the letter C and take out a photograph with signatures. Now you can find those for whom Dr. Styles is an enemy. You just need to get a telephone sheet and compare it with signatures, thereby you can find out who signed and who did not.
So, only Abram Linkweller didn't subscribe!
This is where the chapter ends.
Chapter 3
mansion
In this chapter, Dr. Styles himself is under our control!
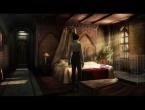
We examine the room, look in the mirror, also examine the bathroom and wardrobe. We leave into the corridor and go down to the kitchen. We talk with Miss Dalton, go down to the basement and use the key from the inventory to open a personal laboratory. When we open the door, the front door will ring. We rise to check who it is, it turns out that the package has arrived. Some kind of ingenious device came in the package, we inspect it, connect it. We read the notes and the letter that lie on the table. In the laboratory we consider a tank, a board, a computer and everything else. Right now, Dr. Stiles needs to do a Laura recall session in a tank (I agree, sounds silly), but he needs visualization-enhancing items to do so. We go upstairs, go into the office and study the box with photographs, take one photo for ourselves. We step into the dining room, open the cabinet with the stereo system, look through the discs and pick up one. We go up to David's bedroom, take Laura's shampoo from the bath, take Laura's swimsuit from the wardrobe. It remains to choose a bottle of wine. We step into a private laboratory, sit down at the computer and open the wine library. We choose dry (dry), red, 1972, the place of production of Loire. The result that satisfies the query is 3 bottles of wine. We leave the laboratory, examine the wine shelves and taste the wine at number 94. Everything you need is collected!
We look at the terminal that controls the tank. First, fill in the shampoo, then press the top button on the right and insert the disk, press the bottom button and climb into the tank.
After reviewing the memories, we get up, leave the house and go into the garage. We examine the motorcycle, then we talk in the kitchen with Miss Dalton about it.
We return to the private laboratory. It's time to deal with the most ingenious device that came in the package. It serves to enable ghosts (or spirits) to communicate with people. The words or letters spoken by the spirits (in our case, Styles' deceased wife) will appear on special "letter shafts". On the right is an apparatus, by adjusting which we help the spirit to say something.
So, to begin with, in cell 0 we set the number "99", in cells from 1 to 26 we leave percent signs, and in all the rest we put zeros. Then we press the red button on the device, so the letter I appears.
We leave in the lobby, we call the police on the phone to bring some clarity about that terrible night when Styles' wife died. Then we go to the office and look at the photos again, take the last one with us and scan it with a scanner in our personal laboratory. We process the photo on the computer, make it a little larger, remove the lights and add shadows. There should be something in the background! After that, we look at the shafts with letters, where the letter M has already appeared. End of the chapter.
Chapter 4
mansion
Sam is under our control again.
We leave the room, talk to Styles, go down to the kitchen and take the latest issue of the newspaper. We're going to Oxford.
Oxford
To begin with, we visit the magic shop, we tell Mephistopheles that we have done the first task. And this means that we can take the second. We also dial 21 and pick up the card with the task. We buy magic powder, a noise maker, a special thread, a container for powder in the store. We pay and leave. We combine the powder, thread and capacity in the inventory. We walk on Queen Street, go to the store dedicated to Alice in Wonderland.
We buy a map of London in the store, examine the Cheshire cat and a poster on the wall, the word SMILE is highlighted in orange on the poster, we enter this word on the cat's teeth. We pick up a piece of puzzles and a ticket to the museum. We pay for the card and go to the museum, which has just appeared on the map.
University Museum
We examine the stand with the egg of the Dodo bird, pick up the egg, as it has the Club logo on it. You need to somehow open this egg. Breaking it is clearly not an option, because you need to return it back. Let's hatch him! We put the testicle on the bench, Sam will sit on it. The body heat will open the egg. Inside it: a part of the rebus and ... a visiting card of the Hogwarts school of magic!
We go to St Edmund Hall.
St Edmund Hall
We go into the lobby, show the pass to the security guard and go into the pool. We talk with the guy, we select the photographs lying on the bench on the left. We examine the filter, this is just the filter that was in the red water. We go back to the guard, we look at the list of those living in the hostel. We go up the left stairs.
We look around in the corridor, tear off a piece of pink toilet paper, knock on room 102, where Helena lives, but no one opens it for us. We knock at 106, the “pool victim” will open for us, we go into the room and talk to the girl. We leave after the conversation. The phone will ring, after talking, we go to the gym, which is located opposite the pool. We inspect the closed door, use a powder device on it. We look at the schedule of the hall, which hangs next to the front door and leave. We leave for Radcliff Infirmary.
Radcliff Infirmary
We go into Susie's office, look at her phone. We use our cell phone to the number 5555-7814 recorded on the phone. The phone number will be stored in memory. We examine the list of contacts and see that the number 11 is opposite the name Linkveller.
We leave the office and call the Department of Neurobiology by cell phone. At the time when we are prompted to enter the employee number, enter 1.1. While Linkweller will be away, let's rummage through his office. We install a spy bug from the magic store into the phone, look around and run away. Then we'll listen to what the bug will record, but for now we'll go to the magic store.
Oxford
In the store we talk with the seller, he will give very practical advice. We go to St Edmund Hall.
St Edmund Hall
We go into the lobby, go up the stairs to the second floor, where the guy with the cards is sitting. We are trying to persuade him to open the 204 number, but it seems that we cannot do without a trick. We'll have to play one card game with him. Its meaning is very simple: at the beginning of the game you choose a card, you need to make sure that this card is the last one not turned over. It is extremely easy to do this. When the guy deals the cards, count their number. If the number is even, let the guy go first; if it's not even, let Sam go first. The player chooses two cards, the opponent must turn over one of the chosen cards. Do not touch the card that you thought of at the beginning during the game! Don't choose it when you have to choose two cards, and don't choose it when your opponent has chosen 2 cards. It's very simple, play a couple of times and you'll understand. To finally win, you need to collect 30 coins. After that, the guy will open room 204, where Charles lives. We examine the photo on the nightstand. The photo shows a guy who is signed as Charles. Who, then, is our Charles? We enter the phone number of Charles's mother, which is pasted on the photo, into the contact list of the cell phone. We examine the magazine lying on the desktop. Our Charles said he didn't know who Dr. Styles was, but the magazine was signed by the doctor. After looking around, we leave the room and go up to the third floor. We talk to the guy sitting in the chair, we ask him to open room 302, but he firmly says "No!". So, we will open the door with cunning. Let's show the guy a trick with a door. In inventory, combine the pink toilet paper and the noise maker from the magic store. We put it under the door and click on the controller, which lies in the inventory. When the guy opens the door, inspect the lock and click the door blocker, now the door will not close.
When the guy leaves, we go into the room, inspect everything, pay special attention to the script lying on the table. We leave and go down to the first floor, to Helena's room.
We move the bucket to the door and climb through the window. As soon as you get into the room, Sam will take out the key to the room from the door, he will be more comfortable in his pocket. We examine the room, after which we climb under the bed and take out a strange box with a lock. It is not yet possible to open it, since there is no suitable key. As soon as we move away from the box, Helena will enter the room. She'll have to explain everything. After the conversation, we look at the camera that stands near the laptop, ask permission to borrow it from Helena. We leave and go to Christ Church.
Christ Church
In the church we meet Angela and talk with her. She will give us a paper angel. After that, we return to Helena and tell her about Angela. We go to the mansion.
mansion
We watch the screensaver and a conversation with Dr. Styles. After talking, we return to St Edmund Hall, where we show students a trick with voting.
End of the fourth chapter.
Chapter 5
mansion
Under our strict guidance again, Dr. Stiles.
We leave the room and go down to the private laboratory. We look at the new letters that Styles' dead wife writes. We read the bottom entry on the white board.
After we step into the main laboratory, sit down at the computer and select the results of the first experiment. They need to be analyzed. We choose the time 11:30, we choose 45 seconds, we see that all the brains are red. Now we analyze the results of the second experiment. Time 11:42, 30 seconds. The result is the same.
We go to Professor Ramusskin. We talk to him and return home.
We are talking with Miss Dalton. A new active point will appear on the map - the park. We step there.
A park
Entering the park, we approach the tree and touch the carved letters. Stiles is flooded with memories. Now we go to the fountain, and from it - to the playground. We approach the seller of ice cream and buy sweets. We eat ice cream that we bought, memories again. Now let's go to the garden. We are looking at flower beds. One flower can be picked, but we do not have time to do it, because the little dexterous girl has already done it. We go to the site after her, talk to her, offer ice cream, but she will not agree. Then we pick up the apples lying on the ground nearby and show the girl a trick. As a sign of gratitude, the girl will give us a flower. Smell it and feel memories, heavy memories.
There are only a couple of things to do in the park.
We cross the bridge and find ourselves near the lake. We order a song from an accordionist, and rent a boat for a while. Having saturated with memories and watching a video about the lake, we return home.
mansion
We go down to the main laboratory, leaf through the book lying on the table, after which we go to the kitchen and look at the business cards attached to the reminder board. Seeing the business card of a psychologist and an old friend of Styles, we walk into the lobby and make a phone call. We go to see a psychologist.
Simon Helborn's Office
We lie down on the couch, close our eyes and enter a trance. During hypnosis, we answer questions from a psychologist. If you make a mistake, you can simply choose a different answer. After hypnosis we return home.
mansion
We talk with Miss Dalton.
End of chapter.
Chapter 6
mansion
We go down to the basement, talk to the doctor, read Laura's letter. We go up to the kitchen and talk with Miss Dalton. We leave for Radcliff Infirmary.
Radcliff Infirmary
We listen to Linkweller's telephone conversation, after which we go to his office. Blackmail, so to speak, was not entirely successful. Well, nothing can be done, you need to move on, for example, to Oxford.
Oxford
We go to the store of tricks, we immediately receive a gift from Mephistopheles. We talk with him, buy disappearing ink and go outside, where we will see Helena. After the meeting, we go to the library.
Bodleian Library
We pass through the turnstile with the help of a pass, we talk with the librarian. She gives very good advice. We take a sheet of paper that lies next to her and approach Harvey. We show him a trick with a torn and restored newspaper. We go to Christ Church.
Christ Church
This time we go to the hall, cross the dining room and approach the fireplace. We examine the certificate, after which we lean towards the fireplace. We unscrew the right head and take away part of the rebus. We go out and walk into the garden, talk to Charlie, after that we leave the garden and call his mother. Let's go to the Horspath Track.
Horspath Track
We take Eddie's phone number, examine the pancakes lying next to him, take one. We go to St Edmund Hall.
St Edmund Hall
Open room 102 with the key and go in. We take the theater program from the table and the hairpin from the mirror. We take out the box from under the bed and open it with a hairpin. Are drugs involved in the case?
We leave the room and go up to the third floor. An electrician works near the electrical panel. We need a shield to turn off the alarm, but the electrician will not let us do this. Let's use Sam's magical powers the old fashioned way. Nearby on the floor are three cups and a ball, we select them. Let's play a famous game with an electrician. Its meaning is simple - you need to guess under which glass the ball is located, only Sam will guess, and the electrician will rearrange the glasses. Guessing is easy, since the electrician names under which glass he put the ball (glasses are numbered from left to right 1,2,3) and names which glasses he moves. All you need is attention and nothing more. Having won, we force the electrician to turn away and count to a hundred, and while he is counting, we approach the shield and flip the alarm switch and go to another part of the third floor. We meet Malik, after talking with him, we knock on room 322, where Angela lives. Her neighbor will let us in, unfortunately, while she is here, the room cannot be searched. Therefore, we simply spill invisible ink on it, and at a time when the neighbor is not there, we search the room: we look at the pictures, at the figurines of fairies, rummage through the desk drawer, where we find an old magazine and a sheet on which it is noted that Angela arrived in Oxford in September 2002. After looking around, we leave and go to the electrician. We ask him to bring coffee. We go to the mansion.
mansion
We pick up the envelope that lies near the phone. This is an envelope from the Club! We leave the house, go to the garage, inspect the bike, then thank Miss Dalton for fixing it. We rise to the second floor. It needs to be examined for traces of the presence of a ghost. We examine the chair, the statue (Monk), the picture and the door to Styles' bedroom. Then we go down to the main laboratory, we approach Styles, who is standing at the computer, and we talk to him.
Let's go to the magic store.
Oxford
We talk with Mephistopheles and move to St Edmund Hall.
St Edmund Hall
We go into Helena's room and rummage through the desk drawer, where we find a letter of admission to the university. We call Helena. We return to the mansion.
mansion
We approach the tower, inspect it from all sides. It is closed, but the key lies under the statue standing nearby. Open the door with the key and go upstairs. We examine the window and the chair, after which we go to the mansion, talk to Miss Dalton and take the flour from the table, which we sprinkle the window in the tower with. Yeah, someone's handprints, obviously female. Once again we look at the chair, once again we talk with Styles in the main laboratory and go to St Edmund Hall.
St Edmund Hall
We talk with the guys and move to Christ Church.
Christ Church
We go into the hall and examine the picture. We click a couple of times on the Club logo in the lower right corner. Then we take out the knife and use it several times on the book that the girl is holding. The fourth piece of the puzzle is ours. We collect the rebus and go to the garden, and from there - to the clearing.
We have to find the rabbit hole. In principle, it is not so difficult - the hole is on the left, closer to the river. Having found it, we climb inside and see a rabbit with a clock and a dial. On the dial again, you need to dial the name of the person, as we already did in the telephone booth in Oxford. So the name is Lewis Carroll, the person who wrote Alice in Wonderland. Thus, the combination is as follows: 5, 3, 9, 4, 7, 2, 2, 7, 7, 6, 5, 5. Having done everything correctly, we get the second coin. Now look at the map of London. We need to mark those famous places that are depicted on the coins, and then connect these places to make a cross. Thus, we will find out the location of the Club. We get out of the hole.
End of the chapter, watch the video.
Chapter 7
Under our guidance, Dr. Stiles.
mansion
We watch the cutscene when we find ourselves on the street, open the map and go to St Edmund Hall.
St Edmund Hall
We go into the lobby and go into the dining room (you need to go a little to the right). In the hall we talk with the detective, after which we inspect a huge hole in the wall. Insert the disk from the inventory into the hole. Surprisingly, it fits. We leave the hall, we talk with Angela, then with the watchman. We go to the mansion.
mansion
We talk with Miss Dalton, we go down to the main laboratory. We sit down at the computer and choose the third experiment. The time is 11-30, at 30 and 45 seconds we see extremely interesting results. We choose the fourth experiment: time 4–30, 45 and 60 seconds. Also very interesting results, especially with Angela. We step into a private laboratory, look at the new letters.
We go up to Sam's room, inspect the bag (we receive a letter), examine the drawer of the bedside table (we get a pass with Helena's name and Sam's photo). We also look at the photo of Sam's parents and go downstairs to make a couple of calls: one is Sam, but she will not pick up the phone, the second is on the phone number indicated on the sheet found. We go to St Edmund Hall.
St Edmund Hall
We talk with the guys, after which we move to Oxford.
Oxford
We walk to the magic store, look at the poster glued to the glass, tear it off. Unfortunately the store is closed. We go to St Edmund Hall.
St Edmund Hall
We go into the dining room and ask the detective about the Club. He will give us his address (apparently the Club is not so well kept secret). We head to the mansion.
mansion
We go down to a private laboratory, sit down at the computer, open the “My files” folder, open the first file and print it out. We step to the computer in the main laboratory, open the third or fourth experiment and set the time so that a snapshot of Angela's "glowing" brain appears. Open the picture and attach a printout to it. Now you can go to the Club.
Club
We knock on the door and show the painted guy a poster with the image of Sam.
Let's watch the video. End of chapter.
Chapter 8
In the final chapter, we will control Sam, or as she is also called - Lady Byron.
So, we look around in the hall and go to the bar. We raise the crumpled newspaper, which is lying next to the chair in which the full lady is sitting. Then we talk with the lady and the bartender, we ask them about Mephistopheles. We pass a little to the left and talk to the person sitting behind the ball of predictions. Looks like I'll have to play another game. We step into the hall from which we came and approach the Devilish Automaton. First you need to pull the right and left handles so that 3 lines fly out. We pull the left, and then 3 times the right. When the light goes around in a circle, we wait until it reaches the middle of the celestial sector clearly, and pull the handle located on the left side of the machine. If everything is done correctly, Sam will fall into another room.
Now we need to open the door, above which the text of the riddle hangs. You need to find the key, and to find it, you need to solve the riddle. We examine the room: paintings, a box with a heart, a doll with a ball. Also pay attention to how many doors there are in this room. You can get lost going into each one. To begin with, we go to the far right, we get into the swamp, in the middle of which there is a green key. But you can’t go to it, because the support along which you have to go is extremely unstable. Therefore, we go back and go into another door, which is located through one door, from the "swamp".
We get into the "torture" room. We examine the sawn coffin, read all the records, look at the showcases with weapons and handcuffs. We examine the picture and go out into the very front door (Queen of Hearts). We find ourselves in a room where a ceiling with spikes will fall on Sam, but, thank God, Sam will fall into another room. In "Mirror Corridor". In the middle of it is a big red button. Click on it. Everything around will change its colors, and what we have not seen before, we can now see. We examine the picture hanging in the corridor, this is very important. We examine everything else and go into the very front door.
We fall into the mirror maze. It is quite easy to pass if you understand its secret. And the secret is this: you need to go to the side where the reflection of the figure in the mirror is smaller. That is, as you can see, before the moves there are reflections of some figures. If you do everything right, you will come to the orange key. But we will also have to look for a way back, but more than that, on the way we will see Helena in the reflections! She will scream and ask for help. We go towards the reflection of the smaller Helena, when we are offered what to say, we say “Stay steal”, which means “stay in place”. After that, we take a few more steps and meet Helena. We go out into the corridor. We return to the very first room, in which there is the door that we need to open with the keys. From there we go into the "torture" room. We pick up the handcuffs and return to the first room.
We leave through the door closest to the screen on the left side and get into the "jungle room". We examine it, we approach the door, near which there are statues. We examine the statues and go in the door. We find ourselves in the "swamp room". We use the handcuffs on the boards, go over them and take the green key. We return to the "jungle room".
We examine the right statue again and push it. She will be in a room with a falling ceiling. Now we ourselves go to this room (through the "torture room", if you forgot). The ceiling will fall on Apollo, not Sam. We examine the foot of the statue and find the purple key.
Everything, we return to the very first room, insert all three keys into the lock and open the door.
In the next room we will see Mephistopheles sitting in a chair. We will not speak without protection. We go to the "torture room", take a weapon and return to Mephistopheles, this time we start a conversation with a gun in our hands.
Let's watch the video.
When Angela finds herself in a circle of fog, we use on her the device that Mephistopheles gave us, having previously charged it with a fairy. When control passes to Styles, pull the lever on the right. The pool will open, Angela will lose her power for a while.
We enjoy the final.
Article taken from the site
The passage is written for the English version of the game. When localized, some names and names of items may differ.
The girl rides a motorcycle along a deserted night road and turns off the right path. Arriving at a mansion on the outskirts of the city, she witnesses a strange incident. On a sudden impulse, she introduces herself as an assistant to Dr. Stiles, professor of neuroscience. Samantha Everett begins her duties as an assistant, not yet knowing that she will be embroiled in a strange story involving the mysterious death of the doctor's wife, a magic club and the paranormal.
In this game you have to control two characters - an informal girl Samantha (Sam) Everett and doctor of neuroscience David Stiles.
Interface:
point&click control.
The cursor is represented as an arrow.
Cursors: Eye - Pay Attention (Sam/David will comment), Magnifier - Look Closer, Hand - Take, Door - Exit Zoom, Exit Room, Gears - Interact, Outstretched Hand with Question Mark - Apply Item, Outstretched Hand with plus - to combine the object, the mouth - to speak, a hat with a cane - to show tricks.
Pop-up inventory at the top of the screen.
Right mouse button - take an item from the inventory (an image of a hand with an item will appear on the right side of the screen). To apply an item, you need to take it, bring it to the right place (the outstretched hand icon with a question mark should appear there) and press the left mouse button. To combine items, you need to take one of them from the inventory (an outstretched hand icon with a plus should appear on it), and then apply it to another item from the inventory by pressing the left mouse button.
Esc key - exit to the menu.
Space key (space) - show active points on the screen.
P key (English layout) - the progress of the game and a list of tasks. Inspect all available items, the completion of some tasks also depends on this.
M key - map.
The golden color of the letters in which the names on the map are written indicate mandatory tasks, silver - bonus and gray - completed. When a new marker appears on the map, an indicator flashes in the upper left corner.
You can also view the map and progress through their inventory by clicking on the icons in the upper left corner.
Sam/David has a diary where all dialogues and comments are recorded. To read them, select the diary in your inventory, click on the desired tab with the part designation, and then flip through the pages with the right mouse button.
Sam also has a magical book that contains magic tricks. When Sam wants to show the trick, a cursor with a hat and a cane will appear. Click once and a magic book will open. There you can select any focus by clicking the left mouse button on the desired page. If the focus isn't appropriate for the occasion, Sam will let you know. Scroll through the pages with the right mouse button.
Double click with the left mouse button - run.
Chapter 1.
After the cutscene, Sam will be in the room. She is worried that she lied about being Dr. Stiles' assistant. Before you will be the first task: to inspect the room and find the rabbit Sam, Houdini. Click "Continue" to continue. You will find a rabbit near a tree

Now you need to give him food and water. Examine Sam's backpack (Backpack) and take everything you can take from it, namely: a deck of cards, carrots, wallet, box of matches, army knife, drinker, pocket book about tricks. Take a water bottle (Water bottle), go to the washbasin (Water pitcher) and apply the drinker to the jug. Now take a full drinker and apply to the cage with the rabbit. Then take a carrot and apply it to the cage too. Now Houdini is settled, it is time to inspect the house. Exit the room. Sam wants to escape, but first she needs a map. You can press the spacebar and inspect all the items in the corridor. Then exit to the lobby (the door to the right of Sam's room). You will be on the stairs. Examine the portrait on the wall on the right. It depicts a beautiful girl. Approach the door under the stairs, examine and see a note addressed to the new assistant ("New assistant" envelope), but Sam will not want to read it. Examine the items near the stairs, then go through the door on the left, this is the Dining room. Here you can view the paintings above the fireplace and music center (Hi-Fi system), as well as listen to Sam's comments about other things (table, candles, chairs). Exit the room, then exit to the courtyard by clicking on the door icon at the bottom of the screen (Front entry, in the lobby). Examine the sign with the name near the front door (Entry Plague), and then go to the right (Back exterior), examine the tree, the statue and the garage doors. Then return to the house and go through the door on the right (Parlour). There you can see diplomas against the far wall and a photograph of a man and a woman, as well as photographs of the doctor's patients. The door at the end of the room (Office door) will be closed. After that, go out to the lobby again, and there you will be met by a woman who will offer you breakfast. Go to the kitchen (Kitchen), the door next to the dining room. Sam will have breakfast and talk to the woman. This is Dr. Stiles' housekeeper, Mrs. Dalton. Ask the woman all the questions that will be highlighted below. She will offer you a job as a doctor's assistant for fifty pounds and the opportunity to live in a nice room. Then go to the noticeboard on the wall on the right (Noticeboard) and examine it. Sam will notice the calendar, Dr. Helborn's business card, and the police number. Exit the kitchen and go to the next door. Read the letter for the assistant. Dr. Stiles will ask you to find six students for an experiment tonight. If you do not complete the task, you can pack your things and leave. Enclosed are checks for £15 to be paid to students for the experiment. The doctor also asked you to leave your phone number to Mrs. Dalton. Go to her and Sam will say that she doesn't have a phone. Mrs. Dalton will give her hers. Now you have a map of Oxford, and you can go on business. Go to the garage and go inside. Try to start the motorcycle, but it is broken. Exit the garage, go to the yard and exit in the direction of Exit, or click on the Oxford Town Center map. You will find yourself in the center of Oxford. Examine the college name sign and turn onto Cornmarket Street

To your right will be the Black Wand magic shop, go there. Examine the box to the right of the door (Game machine) and note the icon at the bottom

Sam recognizes the logo of a famous magic club. The owner of the store, Mephistopheles, will come to you. Talk to him. You will find out that Sam's dream is to become a magician and belong to a famous club. Plus, she has a stage name, Lady Byron. After the conversation, look at the shelves with the magician's props in front and to the right. Play a game of cards. To win, click on the buttons below and set such a combination

Then take a note from the machine on the right. There will be a task from the magic club Daedalus Club. Talk again to Mephistopheles. Then exit the store and go straight to Queen Street. Take turns talking to two guys and a girl on the street, but they will refuse to take part in the experiment. When the black guy leaves, he drops the party invitation at St. Edmund Hall and Sam picks it up. This place will be marked on the map. Try to enter Brasenose College, but the man at the entrance won't let Sam in. Go to The Windy Dog Pub, but it will be closed. Head to the party at St. Edmund Hall. Sam will witness a quarrel between a guy and a girl. Talk to the guy, Harvey Kinderman. He will say that he had a fight with a girl because of his movie. Sam will offer to help if he agrees to participate in the experiment. Harvey will give you a tape. Now you need to show Lisa (she is nearby, on the right) the focus. Choose the "Up in smoke" focus. A focus preparation window will open in front of you. Instead of cards, we will have cassettes, one real, the other fake. Getting ready:
1. Transfer the fake cassette (Spare cartridge) from the top window to the left sleeve of Sam

2. Place a real cassette (Lisa's cartridge) in Sam's right hand.
3. Move the fake cassette to your left hand.
4. Move the real cassette to your left hand

5. Click on the rabbit icon in the center of Misdirect.
6. Move the fake cassette to your right hand

7. Hide the real cassette in the left sleeve.
Remember! Sam's left hand is on your right, and his right hand is on your left - don't mix it up!
Click on the magic wand icon that will appear in the lower right corner of the screen. If you did something wrong, then the wrong functions will be deleted, but the correct ones will remain.
Sam will lure the real cassette from Lisa, discreetly change it to a fake one and burn it, and give the real one to Harvey. Harvey promises to come to the experiment.
Now approach the girl in the sun lounger, Helena Beaugard. She's not interested in the experiment, but she's interested in the guy on the bench, Charles Ettington. Sam had to lie that she knew him, and he would also come to the experiment. Now you need to meet Charles. Come and talk to him. He is very humble and does not know how to continue the conversation. Notice the objects next to him - a letter from his mother and a book, Homer's Iliad. Talk to him again about these things. After that, we can talk about the experiment. Charles refuses because he needs to talk to his mother. Let's do a little trick with him - "The Ominous Mailbag". Getting ready:
1. Click on the "Misdirect" icon.
2. Put the letter in Sam's left hand.
3. Hide the letter in the left sleeve.
Click on the magic wand and the letter will be with you.
Now we need to somehow open it so that Charles does not notice that it was open. Return to Oxford Town Center and use the letter on the ventilation grate (Steam Vent)

Examine the letter and the check attached to it. Combine Charles' letter with Dr. Stiles' letter and checks, and Sam will replace the check from Charles' letter with the doctor's check. Now it turns out that the mother herself sends Charles to the experiment. Go to Charles and finish the letter trick. Getting ready:
1. Put the letter from the top window in your right hand.
3. Move the letter to the work area (on the table in front of Sam)

Change the letter, and then go back to Helena. She will be amazed that you talked to Charles and Sam will convince her to attend the experiment. Now go process another girl who is sitting near the pay phone against the wall, Angela Mulholland. Talk to her. It's time to show focus again. This will be the "Telephone psychic" focus. Getting ready:
Go to the pay phone (Pay phone) on the wall next to the girl. Apply your mobile to his bottom and Sam will enter his number into the phone's memory. Now open the mobile, go to the menu by pressing the button on the right, and select the "Options" function. Turn on the sound by pressing the key under the word "Select". Instead of the word “Off”, “On” should light up

Now turn to the girl again and get ready for the trick:
1. Put the phone in your left hand.
2. Click on the "Misdirect" icon.
3. Click on the "Manipulate left item" icon, the icon with the hands on the right side (Sam's left hand).
4. Hide your phone in your left sleeve.
It turned out to be quite easy to deceive Angela, and she agreed to participate in the experiment. You have collected all the students, return to Dread Hill House. Go up to your room (to go up the stairs, press Upstairs hall) and take out the photo of your parents from your backpack. Sam will put it on the bedside table.
Now it's time to play the game from Daedalus Club. Head to the Oxford Town Center and enter the Carfax Tower top. You will climb to the roof of the tower. Close the door and examine the red box behind it. There will be a hole at the bottom of the box. Apply matches to it and get a hint - a piece of paper with the college logo and a puzzle piece that needs to be folded to complete the task. Return to the street and approach the plate with college logos. Take the piece of paper with the logo and bring it to the Christ Church College logo

The college will be marked on the map. Go there. Approach the fountain and examine the black box in it (Black box). Open the top cover. Take a drop of water next to the box from the fountain, and apply it to the sheet of paper on the box. The college logo will appear there. Open the box and take the second piece of the puzzle from it. Then go to the garden on the right (Christ Church College Garden), and look at the flower bed opposite the entrance (Flower Bed). Examine the area under the lion's head and see a flag in the ground. Dig up the ground a few times and get a beer stand and the next puzzle piece. At this time, the doctor will call and order you to return home. You only got four students, the doctor found another one, and Sam had to be the sixth. The doctor conducted a very strange experiment, during which he put everyone into hypnosis and asked them to imagine themselves on the field and the treadmill of one of the colleges. Watch the video about what happened to the track.
Game: Platform: PC, X360 Genre: adventure Release date: February 25, 2011 In Russia: June 23, 2011 Developer: Wizarbox, Tonuzaba Entertainment, Spiders Publisher: Mamba Games Publisher in Russia: New Disc Localizer: Lazy Games / Hunt The passage is written for the British version of the game. When localizing, some names and names of objects may differ.
A woman rides a bike along a deserted night road and turns off a suitable path. Arriving at a house on the outskirts of the town, she becomes an eyewitness to an unusual incident. On a sudden impulse, she introduces herself as an assistant to Dr. Stiles, a neuroscience doctor. Samantha Everett begins to do her duties as an assistant, not yet knowing that she will be embroiled in an unusual story related to the mysterious death of the doctor's wife, the magic club and the paranormal.
In this game, you have to control 2 characters - an informal girl Samantha (Sam) Everett and neuroscience doctor David Stiles.
Interface:
point&click control.
The cursor is represented as an arrow.
Cursors: eye - direct attention (Sam/David will speak his own comment), magnifying glass - look closer, hand - grab, door - exit zoom, exit room, gears - interact, outstretched hand with question mark - apply object, outstretched hand with a plus - to cooperate with an object, a mouth - to speak, a hat with a cane - to demonstrate tricks.
Pop-up inventory at the top of the screen.
Right mouse button - take an item from the toolkit (an image of a hand with an item will appear on the right side of the screen). To use an item, you need to take it, bring it to a suitable place (the outstretched hand icon with a question mark should appear there) and press the left mouse button. To cooperate items, you need to take one of them from the toolbox (the outstretched hand icon with a plus should appear on it), and later apply it to another item from the toolbox by pressing the left mouse button.
Esc button - exit to the menu.
Space button (space) - show active points on the display.
Button P (English layout) - the progress of the game and a list of tasks. Inspect all available items, the performance of certain tasks depends on this.

Button M - map.
The golden color of the letters in which the names on the map are written indicate indispensable tasks, silver - bonus and grayish - completed. When a new marker appears on the map, an indicator flashes in the upper left corner.
You can also view the map and progress through their toolkit by clicking on the icons in the upper left corner.
Sam/David has a diary where all dialogues and comments are recorded. To read them, select the diary in your inventory, click on the appropriate bookmark with the part designation, and later flip through the pages with the right mouse button.
Sam also has a magical book containing magic tricks. When Sam wants to show the focus, a cursor with a hat and a cane will appear. Click once and a magic book will open. There you can choose any focus by clicking the left mouse button on the appropriate page. If the focus is not suitable for this option, Sam will tell you about it. Scroll through the pages with the right mouse button.
Double click with the left mouse button - run.
Chapter 1.
After the cutscene, Sam will be in the room. She is worried that she lied about being Dr. Stiles' assistant. Before you will be the 1st task: look around the room and find the bunny Sam, Houdini. Click "Continue" to continue. You will find a bunny near a tree
Now we need to give him food and water. Examine Sam's backpack (Backpack) and take from it everything that you can take, namely: a deck of cards, carrots, wallet, box of matches, army knife, drinker, pocket book about tricks. Take a water bottle (Water bottle), go to the washbasin (Water pitcher) and apply the drinker to the jug. Now take a full drinker and apply it to the bunny cage. Later, take a carrot and apply it to the cell too. Now Houdini is settled, it's time to look around the house. Exit the room. Sam wants to escape, but first she needs a map. You can press the spacebar and look around all the objects in the corridor. Later exit to the lobby (door to the right of Sam's room). You will be on the stairs. Look at the portrait on the wall to the right. It depicts a beautiful woman. Go to the door under the stairs, look and see a note addressed to the new assistant ("New assistant" envelope), but Sam will not want to read it. Take a look at the items near the stairs, then go through the door on the left, this is the dining room (Dining room). Here you can see the paintings over the fireplace and the music center (Hi-Fi system), also listen to Sam's comments about other things (table, candles, chairs). Exit the room, then exit to the courtyard by clicking on the door icon at the bottom of the screen (Front entry, in the lobby). Take a look at the sign with the title near the front door (Entry Plague), and later go to the right (Back exterior), make out the wood, sculpture and garage doors. Later, return to the house and enter the door on the right (Parlour). There you can see diplomas against the far wall and a photo of a man and a lady, also a photo of the doctor's patients. The door at the end of the room (Office door) will be closed. After that, go out into the lobby again, and there you will be met by a lady who will offer you breakfast. Go to the kitchen (Kitchen), the door next to the dining room. Sam will have breakfast and talk to the lady. This is Dr. Stiles' housekeeper, Mrs. Dalton. Ask the lady all the questions that will be highlighted below. She will offer you a job as a doctor's assistant for £50 and the opportunity to live in a nice room. Later, approach the Noticeboard on the wall to the right (Noticeboard) and take a look at it. Sam will turn his attention to the calendar, Dr. Helborn's business card, and the police number. Exit the kitchen and go to the adjoining door. Read the letter for the assistant. Dr. Stiles will ask you to find six students for an evening experience. If you do not complete the task, you can pack your things and leave. Enclosed are checks for £15 to be paid to students for the experience. The doctor also asked you to give Mrs. Dalton's own phone number. Go to her, and Sam will say that she does not have a phone. Mrs. Dalton will give her one of her own. Now you have a map of Oxford, and you can go on business. Go to the garage and go inside. Try to start the bike, but it's broken. Exit the garage, go to the courtyard and exit in the direction of Exit, or click on the Oxford Town Center map. You will find yourself in the center of Oxford. See the college sign and turn onto Cornmarket Street

To your right will be the magic store "Black Wand", go there. Look at the box to the right of the door (Game machine) and look at the icon below
 .
.
Sam will figure out the logo of a famous magic club. The owner of the store, Mephistopheles, will come to you. Talk to him. You will find out that Sam dreams of becoming a magician and belonging to a famous club. Plus, she has a stage name, Lady Byron. After the conversation, make out the shelves with the magician's props in front and to the right. Play a game of cards. To win, click on the buttons below and set such a combination

Later, take a note from the machine on the right. There will be a task from the magic club Daedalus Club. Chat again with Mephistopheles. Later, exit the store and go straight to Queen Street. Take turns talking to the 2 guys and the woman on the street, but they will refuse to accept a role in the experience. When the black boy leaves, he will drop the invitation to the party at St. Edmund Hall and Sam will pick it up. This place will be marked on the map. Try to enter Brasenose College, but the man at the entrance won't let Sam in. Go to The Windy Dog Pub, but it will be closed. Set sail for a party at St. Edmund Hall. Sam will witness a quarrel between a guy and a girl. Chat with the guy, Harvey Kinderman. He will say that he quarreled with a woman because of his own movie. Sam will offer to help if he agrees to participate in the experiment. Harvey will give you a tape. Now you need to show Lisa (she is nearby, on the right) the focus. Choose the "Up in smoke" focus. You will see the focus preparation window. Instead of cards, we will have cassettes, one real, the second fake. Getting ready:
1. Transfer the fake cassette (Spare cartridge) from the top window to the left sleeve of Sam

2. Place a real cassette (Lisa's cartridge) in Sam's right hand.
3. Move the fake cassette to your left hand.
4. Move the real cassette to your left hand

5. Click on the bunny icon in the center "Misdirect".
6. Move the fake cassette to your right hand

7. Hide the real cassette in the left sleeve.
Remember! Sam's left hand is on your right, and his right hand is on your left - don't confuse!
Click on the magic wand icon that will appear in the lower right corner of the screen. If you did something wrong, then the wrong functions will be deleted, but the correct ones will remain.
Sam will lure the real cassette from Lisa, discreetly change it to a fake one and burn it, and give the real one to Harvey. Harvey will promise to come for the experience.
Now approach the girl in the sun lounger, Helena Beaugard. She's not interested in the test, but she's interested in the guy on the bench, Charles Ettington. Sam had to lie that she knew him, and he would also come to experience. Now you need to meet Charles. Come and talk to him. He is very moderate and does not know how to continue the conversation. Pay attention to the objects next to him - a letter from mom and a book, Homer's Iliad. Talk to him again about these things. Then you can talk about experience. Charles refuses, as he needs to talk to his mother. Let's do a little trick with him - "The Ominous Mailbag". Getting ready:
1. Click on the "Misdirect" icon.
2. Put the letter in Sam's left hand.
3. Hide the letter in the left sleeve.
Click on the magic wand and the letter will be with you.
Now it is necessary to somehow open it so that Charles does not see that it was opened. Return to Oxford Town Center and use the letter on the ventilation grate (Steam Vent)

Examine the letter and the check attached to it. Combine Charles' letter with Dr. Stiles' letter and checks, and Sam will change the check from Charles' letter to the doctor's check. Now it looks like Mom herself sends Charles to the experiment. Go to Charles and finish the letter trick. Getting ready:
1. Put the letter from the top window in your right hand.
3. Move the letter to the work area (on the table in front of Sam)

Change the letter, and later go back to Helena. She will be amazed that you spoke with Charles and Sam will assure her to be on the experience. Now go work on another lady who is sitting near the pay phone against the wall, Angela Mulholland. Chat with her. It's time to show focus again. This will be the "Telephone psychic" focus. Getting ready:
Go to the pay phone (Pay phone) on the wall next to the woman. Apply your own mobile to his bottom and Sam will enter his number into the phone's memory. Now open the mobile, go to the menu by pressing the button on the right, and select the "Options" function. Turn on the sound by pressing the button under the word "Select". Instead of the word "Off" should light up "On"

Now turn to the girl again and get ready for the trick:
1. Put the phone in your left hand.
2. Click on the "Misdirect" icon.
3. Click on the "Manipulate left item" icon, the icon with the hands on the right side (Sam's left hand).
4. Hide your phone in your left sleeve.
Fooling Angela was easy enough, and she agreed to participate in the experiment. You have collected all the students, return to Dread Hill House. Climb up to your room (to climb the stairs, press Upstairs hall) and take out the photo of the parents from the satchel. Sam will put it on the bedside table.
Now it's time to play the game from Daedalus Club. Set sail to the Oxford Town Center and enter the Carfax Tower top. You will rise to the roof of the tower. Close the door and see a reddish box behind it. There will be a hole at the bottom of the box. Apply matches to it and get a hint - a piece of paper with the logo of the institute and a piece of the puzzle that must be folded to complete the task. Return to the street and approach the plate with college logos. Take the piece of paper with the logo and bring it to the logo of Christ Church College

The institute will be marked on the map. Go there. Approach the fountain and make out in it a black box (Black box). Open the top cover. Take a drop of water next to the box from the fountain, and apply it to the sheet of paper on the box. The logo of the institute will appear there. Open the box and take the 2nd puzzle piece from it. Later, go to the garden on the right (Christ Church College Garden), and make out a flower bed opposite the entrance (Flower Bed). Look under the lion's head and see the flag in the ground. Dig up the ground a couple of times and get a beer stand and the next puzzle piece. At this time, the doctor will call and order you to return home. You only got four students, the doctor found another one, and Sam had to be the sixth. The doctor conducted a very strange experiment, during which he put everyone into hypnosis and asked them to imagine themselves on the field and treadmill of the 1st of the colleges. Watch the video about what happened with the track.
12345
Esc - exit to the menu.
Space - view all active points on the screen.
Pop-up inventory, map and level progress - at the top of the screen.
Using items from the inventory - select the item with the right mouse button (RMB) and left-click (LMB) on the place on the screen where you want to use it. At the same time, the item will appear in the upper right corner of the screen under the hand icon.
Each chapter is divided into several tasks. You can see the progress of the level by clicking on the English "P". Bonus tasks are optional. The tasks can be completed in any order, but if you want to collect all the bonuses before finishing the chapter, do the tasks by bonus.
You will have to move around the locations on the map, which you can call with the English "M".
Run - press LMB twice.
Lost in the rain, professional illusionist Sam Everett poses as Dr. Styles' new assistant and ends up in his clinic.
Chapter 1
We play as Sam.
1) Where does Houdini live.
Find the Houdini rabbit (he is sitting under a tree to the right of the bed, and his ears are visible). Put the rabbit in the cage and open the backpack that is by the bed. Remove all active items from it (diary, deck of cards, Magic book, matches, wallet, knife, carrot and bottle). Use the right mouse button to take out the carrot from the inventory and give it to the rabbit with the left mouse button. There is a jug of water on the bedside table. Take the bottle from the inventory, fill it with water from the jug (RMB in the inventory on the bottle and LMB on the jug) and give it to Houdini.
2) Dread Hill.
Sam decides to look for a map to get out of here. Exit to the corridor and go down the stairs.
Examine the woman's portrait on the wall and the envelope for the new lab assistant on the basement door. Enter the living room (door on the right) and look at the patient photos and Dr. Styles' diplomas on the far wall. Go out into the courtyard and read the inscription on the sign at the entrance.
Return to the house - the housekeeper should go up the stairs, who will invite Sam to have breakfast.
Go to the kitchen and talk to Mrs. Dalton on all topics. After breakfast, go to the door to the basement and take an envelope for a new laboratory assistant - it contains a task: to find six student volunteers in Oxford. Styles demands to leave his cell number to the housekeeper, but Sam doesn't have one. Return to Mrs. Dalton and talk about the mobile phone - in response, she will give her phone.
Go outside and click on the exit at the bottom right of the screen to get to the map. Select "Oxford".
3) The price of betrayal.
Walk from Oxford city center to the right onto Cornmarket Street. Enter the magician's shop and pay attention to the slot machine. Under the two spinning cards there are two buttons, and on top - the instruction: "Knock out at least 21 points." Below - the emblem of the club "Dedalus" (you need to click on it). You will automatically exit the zoom mode and meet the owner of the shop, Mephistopheles. Sam wants to get into the world's best club of magicians called "Daedalus", and for this she needs to arrange a "big game" - a mass illusion.
By pressing the buttons, set the cards "ace" and "ten" (or "ace" and "king") and take the prize from the slot on the right. This is a riddle in verse called "The Price of Betrayal".
"Five golden
In the heart of a scientist
Where: height above height and above the queen,
Find a room with a view, Quadrifurkus..."
Go to the center of Oxford and read the sign on the Carfax tower (it's nailed to the left of the entrance). Sam will say that this tower is somehow connected with the riddle ("higher than the height" and "higher than the queen" are the names of Oxford's High Street and Queen Street), and it used to be called Quadrifurkus, as in the riddle. After that, the entrance to the tower will become active.
"Then: fire, water, earth..."
Climb to the roof and close the door behind you. There is a red box on the wall. Zoom in on it and click on the emblem of the Daedalus Club on the side surface - Sam will say that the box is also related to the riddle. Examine the gap below. Take away matches from the inventory ("fire" - the hint in a riddle) and apply on a crack. You will get a paper with a coat of arms and a piece of a rebus. In inventory, examine the paper with the coat of arms of the LMB - Sam will say that this is the coat of arms of some Oxford college. The second clue is to be found there.
Go down to the square and approach the golden plate with coats of arms nailed to the wall of the house on the left in the foreground of the screen. Examine the sign, take out the paper with the coat of arms from inventory and LMB click on the coat of arms of Christ Church College (sixth from the top in the left row). A new location will appear on the map.
Go to Christ Church and look at the fountain ("water" - a clue in the riddle): a wooden box floats in it. Zoom in on the box and click on the emblem of the Daedalus club, and then on the doors - there will be litmus paper under the lid. Click LMB on the fountain water on either side of the crate and a drop of water will appear in your inventory. Apply it to litmus paper and examine the coat of arms that appears. Sam will say that the next piece of the puzzle should be somewhere here, because the coat of arms points to Christ Church.
Click on the emblem of "Dedalus" on the lid and take the second fragment of the puzzle from the secret compartment.
Examine the sign on the path and go right into the garden. Zoom in on the flower bed in the foreground of the screen and note the recently dug hole with the flag of the Daedalus Club ("earth" is a clue in the puzzle).
Use your hand to dig a hole and take a beer stand (which means you will need to look for a pub) and the third piece of the rebus.
Return to Oxford and go left of the Carfax Tower onto Queen Street.
Find the Windy Dog Pub, but the door is locked and you'll have to return to the puzzle later.
4) Sheep for Dr. Styles.
On Queen Street, talk to three townspeople (you need to start with a man in a blue sweater, then a girl in a white jacket and a man in a red sweater). All of them will refuse to take part in Dr. Styles' experiment, but the man in the red sweater will throw some paper on the pavement. Pick it up and read it - this is an invitation to St. Edmund Hall College. On the map, move to the college and you will witness a quarrel between two students.
After the video, talk to Harvey: if you take the cassette with his film from Lisa, he will come to Styles for an experiment. Sam will ask him for an empty cassette (it will automatically be in your inventory).
Click on Lisa: the cursor will turn into a cylinder icon, which means you have to make a focus. Open the Magic Book in the inventory LMB and select the "No smoke without fire" focus. You need to turn the pages with RMB, and confirm the choice of focus - LMB.
Focus "There is no smoke without fire."
Sam will appear on the screen. Above in the inventory is an empty cassette that needs to be replaced, and in a circle among empty circles is Lisa's cassette with a film. Each circle represents a place where an item can be moved (for example, the left sleeve or the right pocket). Above Sam's head are three circles with symbols: a rabbit (distract action) and two hands (object manipulation). Sam needs to rehearse the trick, and you have to help her make the right sequence of actions.
1. Hold LMB on an empty cassette and drag it to the circle labeled "Left Sleeve".
2. Transfer Lisa's cassette to your right hand.
3. Transfer the empty cassette to your left hand.
4. Move Lisa's cassette to your left hand.
5. Click on the rabbit.
6. Move the empty cassette to your right hand.
7. Move Lisa's cassette to the left sleeve.
If all actions are selected correctly, a magic wand will appear on the left of the screen, by clicking on which, we will see the result of your focus. If you made a mistake somewhere, the correct actions will be ticked on the left of the screen, and the wrong ones will automatically disappear.

Sam will return Harvey his tape, and he will agree to go on an experiment.
Two students remained in the yard - one is sitting in a deck chair, the second is on a bench near a telephone booth. Talk to the girl on the bench (her name is Angela) - it looks like she is waiting for a call. Open the Magic Book and read the "Telephone Psychic" focus page.
Approach the telephone booth, RMB take out the mobile phone from the inventory and apply it to the telephone booth number (it is stamped on a square plate under the telephone disk) - Sam will write it down in the mobile phone.
In inventory, click on the mobile phone LMB so that it appears in front of you on the screen. Use the "-" button above the red button to enter the "Menu", use the arrows to scroll to "Settings" and press the "-" button. Mute the phone with the "-" button.

Click on Angela (the cursor should turn into a cylinder).
Focus "Telephone psychic".
1. Move the mobile phone to your left hand.
2. Click on the rabbit.
3. Click on the circle at the top representing left hand manipulation.
4. Move the mobile phone to the left sleeve.
Click on the magic wand - Lisa will agree to take part in the experiment.

Chat with the girl in the sun lounger - her name is Elena. She wants to get to know Charles better, who, during the conversation, will come to the garden and sit on a bench. Go to Charles and inspect the book and letter that he brought with him and put on the bench to the left. After talking with Charles, it becomes clear that he does nothing without consulting his mother.
Open the Magic Book and read the "Bad Letter" trick.
Focus "Bad letter".
1. Click on the rabbit.
2. Move the letter to your left hand.
3. Move the letter to the left sleeve.
Click on the magic wand and Sam will quietly steal the letter.

Further in the instructions it is written that you need to hold the letter over the steam. Follow the map to Oxford and use the letter on the sewer grate in the foreground of the screen. RMB from inventory, take an envelope for a new laboratory assistant and click it with LMB on the letter - Sam will put an invitation to the experiment in the letter. Return to the college and click on Charles.
4. Move the letter to your right hand.
5. Click on the rabbit.
6. Move the letter to the lowest circle "Environment".
Click on the magic wand - Charles will also come to the experiment in the evening.

After that, talk to Elena again, and she will also agree to take part in the experiment.
When all required actions are completed, Sam will automatically talk to Dr. Styles and the chapter will end.
Chapter Bonuses:
1) Dread Hill:
Go to the garage and try to start the motorcycle.
After Sam agrees to be the new lab assistant (having spoken to Mrs. Dalton for the first time), go up to her room and get the photo of her parents out of her backpack.
2) Oxford:
In the magician's shop, examine the left rack with goods next to the slot machine by the door.
After you win the prize in the machine, talk to Mephistopheles about the "scientist's heart".
On Queen Street, look at the sign for the Windy Dog Pub.
Chapter 2
We play as Sam.
In this chapter, it is much more convenient to do some tasks at the beginning of the chapter.
1) Strange events at the Horsepath stadium.
After breakfast, Mrs. Dalton will say that the doctor left instructions for Sam in the basement, and also someone brought the newspaper. Read the newspaper (on the table) and a new location "Stadium" will appear on the map.
Go to the stadium and chat with the workers. After that, Sam will conclude that the lined treadmill is someone's prank, and she needs to look for information about the illusionists.
Move to St. Edmund Hall College. Talk to a group of students who will suggest Sam look for some information in the local library. A new location will open on the map.
2) Sam is a laboratory assistant.
Return to Dread Hill.
Go down to the basement and go to the main laboratory (opening in the basement on the right by the stairs). Take Stiles' note from the table. He asks to spread the folders with documents, Sam will also find a note from the Radcliffe hospital.
Go to the closet at the back of the screen.
In front of you on the screen is a cabinet, and in the foreground is a folder with the name. Click on the box with the letter that begins the folder name. All of them must be in alphabetical order (they simply cannot be laid out in a different way), except for the folder with the name "MRI", which must be put in the "P" box. After you've done everything, open the drawer under the letter "T" and take the invoice. Also check all the other drawers ("P", "L-L") and you will find an article by Dr. Styles, a list of hospital staff, and an article by Dr. Linkweller.
A new location will appear on the map - Radcliffe Hospital, go there.
Enter the room with the "Administration" sign and talk to the secretary named Susan. Give her the invoice.
3) The mysterious Dr. Styles.
Talk to Susan again and she will let you meet with the director of the Hadley Clinic. Automatically, Sam will enter the director's office, where you will learn that Styles has enemies in the clinic, and also that a copy of the experiment plan is kept in the hospital. Try asking Susan about it, but she will refuse to explain anything. Go to the trick and say that Hadley asked for coffee. Susan will go to the director's, taking the key to the filing cabinet with her, and when she returns, she will put it in a cup.
Click on Susan and the cursor will turn into a cylinder. Open the Magic Book and read the page about the "Bottomless Cup" trick. Sam will need a magnet.
Go to the shop magicians and buy a magnet (lies in the right rack). Talk to Mephistopheles about your suspicions about the stadium and the famous illusionists.
Return to the hospital and steal the key to the filing cabinet.
Focus "Bottomless Cup".
1. Move the magnet to your right hand.
2. Move the cup to your left hand.
3. Move the cup to your right hand.
4. Click on the circle that is responsible for the manipulation of the right hand.
5. Click on the rabbit. Sam will pull the key out of the cup.
6. Move the key to your left hand.
7. Move the key to the left sleeve.
Click on the magic wand - the key will be in your inventory.

Now you need to get Susan out of the room. Click on it again - you have to do another trick. Open the Magic Book and read about the Vile Wound trick.
Visit the magician's shop again and buy a fake finger and theatrical glue (in the right rack) and fake blood (in the left rack by the machine). Click on the door and return to the hospital.
In inventory, use the finger on the blood and the bloody finger on the glue. Click on Susan and open the Magic Book. Choose the Nasty Wound trick, but Sam will notice that if you just do the trick, Susan will leave for a short time.
Open the door on the right that leads to the staff kitchen and examine the first aid kit above the sink. Remove it from the wall (Sam will automatically hide it) and return to Susan.
Focus "Abominable Wound".
1. Move the knife to your left hand.
2. Click on the circle that is responsible for the manipulation of the left hand.
3. Click on the rabbit.
4. Click on the circle that is responsible for the manipulation of the left hand.
Click on the magic wand.

After Susan leaves, open the closet with the key and copy the experiment plan found on the copier. After talking with Susan, Sam will go out into the corridor and talk to Malik, one of the participants in the experiment.
Return to Dread Hill and go to the main laboratory. Check the file cabinet - under the letter "J" is a postcard from the hospital staff expressing condolences to Styles. Sam decides to find out if all the doctor's colleagues signed it or if, as Hadley said, he has enemies. Take the list of employees from inventory and combine it with a postcard. Click on the printed names on the list after finding them on the postcard, and Sam will cross them out. As a result, the names of Styles himself and Abram Linkweller will remain on the list. Sam will circle Linkweller's name in red and say that he is an enemy of Styles.

4) Pass for Sam.
Go to the library.
Please note that you can only get inside through the turnstile, attaching a pass to it, which Sam, of course, does not have. Elena is sitting at the table, call her and talk about the passage to the library. Elena will refuse to give her pass, but will tell that she has another one with a bad photo. Two passes will appear on the table.
You need to click on both tickets in turn, and for a student with a good photo, select three encouraging answers, and for a student with a bad photo, three condemning ones. Move the cursor to the answer and click LMB.
For a good photo, the answers are:
1. Good photo!
2. Great photo!
3. You are very pretty in this one.
For bad photography, the answers are:
1. You look like you're spreading out here.
2. Phew, you can throw a rag on this photo.
3. You need to sue this photographer!
After that, click on Elena - the cursor will turn into a cylinder. Open the Magic Book and select "Ring Destruction Trick". Sam will notice that she needs a noise maker. Go to the shop of magicians. Examine the right rack and take the Shredder Noise Maker. Click on the shop door - Sam will automatically pay off Mephistopheles. Return to the library and put the noise maker on the shredder. Click on Elena.
Focus "With the destruction of the ring."
1. Move the remote from the noise maker to your left hand.
2. Move the pass to your right hand.
3. Click on the circle on top, responsible for the manipulation of the right hand.
4. Click on the rabbit.
5. Click on the circle above, responsible for the manipulation of the left hand.
6. Move the pass to the right sleeve.
Click on the magic wand and Sam will have the pass.

Apply the pass to the turnstile and go to the library. Talk to the librarian about Dr. Stiles, who will point to the computers (on the left table from Elena). View all the information about the doctor - Styles' wife died in a car accident.
5) The price of betrayal-2.
It's time for the mystery.
Fifth, at the end
Where souls choose their fate"
The previous clue was in the form of a coaster for a beer mug. Go to Windy Dog on Queen Street.
In a conspicuous place next to the bartender is a large silver horn ("wind" is a clue in the riddle). Zoom in on it and try blowing it by clicking on the hole in the horn (next to Sam's head). Nothing will work, the visitors of the bar and the bartender himself will just start laughing. Talk to the bartender about the horn and he will give Sam the mouthpiece. Apply it to the horn - it turns out that the one who thinks to ask the bartender for a mouthpiece and then blow a normal sound out of the horn has the right to fulfill his desire. Sam will ask for a piece of the puzzle, and in addition, he will receive a postcard with a view of Christ Church Cathedral. Head there and enter the cathedral.
Go to the altar and inspect the font - Sam will say that there is emptiness under it. Pull the lever to the right of the door to the sacristy (the font will open) and fish out the package with the fifth part of the rebus.
In inventory, fold it (RMB rotates the pieces) and solve the puzzle. The first word means "tower", the second - "Carfax". There is a telephone booth next to it.

"All together: they point to the place
Enter a name
The one who sold his soul for thirty"
Judas sold his soul for thirty pieces of silver, this is the answer to the riddle.
Return to Oxford Central Square and enter the red telephone booth. Pick up the handset and dial the name "JUDAS" in numbers: 5-8-3-2-7 ("Judas" in English). Our localizers did not bother to translate this name into Russian. Take the coin.
Sam will automatically meet with the students and the chapter will end.
Chapter Bonuses:
1) Christ Church:
Talk to the guide, who will tell you that the church has an altar with an image of Judas with a purse around his neck.
2) Oxford:
Buy a bouquet of flowers from the saleswoman near Carfax Tower.
3) Dread Hill:
Go up to Sam's room and place the bunch of flowers in the vase on the bedside table.
Place the bunch of flowers in the vase on the table in the main lab.
4 - Library or Dread Hill:
Talk to the librarian about Dr. Stiles' lost paper if you haven't found it in the main lab closet yet.
If you already found the article and then went to the library, go back to Dread Hill and talk to Mrs. Dalton about the accident.
The girl rides a motorcycle along a deserted night road and turns off the right path. Arriving at a mansion on the outskirts of the city, she witnesses a strange incident. On a sudden impulse, she introduces herself as an assistant to Dr. Stiles, professor of neuroscience. Samantha Everett begins her duties as an assistant, not yet knowing that she will be embroiled in a strange story involving the mysterious death of the doctor's wife, a magic club and the paranormal.
In this game you have to control two characters - an informal girl Samantha (Sam) Everett and doctor of neuroscience David Stiles.
Interface:
point&click control.
The cursor is represented as an arrow.
Cursors: eye - pay attention (Sam/David will comment), magnifying glass - look closer, hand - grab, door - exit zoom, exit room, gears - interact, outstretched hand with question mark - apply object, outstretched hand with plus - to combine the subject, mouth - to speak, a hat with a cane - to show tricks.
Pop-up inventory at the top of the screen.
Right mouse button - take an item from the inventory (an image of a hand with an item will appear on the right side of the screen). To apply an item, you need to take it, bring it to the right place (the outstretched hand icon with a question mark should appear there) and press the left mouse button. To combine items, you need to take one of them from the inventory (an outstretched hand icon with a plus should appear on it), and then apply it to another item from the inventory by pressing the left mouse button.
Esc key - exit to the menu.
Space key (space) - show active points on the screen.
P key (English layout) - the progress of the game and a list of tasks. Inspect all available items, the completion of some tasks also depends on this.
M key - map.
The golden color of the letters in which the names on the map are written indicate mandatory tasks, silver - bonus and gray - completed. When a new marker appears on the map, an indicator flashes in the upper left corner.
You can also view the map and progress through their inventory by clicking on the icons in the upper left corner.
Sam/David has a diary where all dialogues and comments are recorded. To read them, select the diary in your inventory, click on the desired tab with the part designation, and then flip through the pages with the right mouse button.
Sam also has a magical book that contains magic tricks. When Sam wants to show the trick, a cursor with a hat and a cane will appear. Click once and a magic book will open. There you can select any focus by clicking the left mouse button on the desired page. If the focus isn't appropriate for the occasion, Sam will let you know. Scroll through the pages with the right mouse button.
Double click with the left mouse button - run.
Chapter 1.
After the cutscene, Sam will be in the room. She is worried that she lied about being Dr. Stiles' assistant. Before you will be the first task: to inspect the room and find the rabbit Sam, Houdini. Click "Continue" to continue. You will find a rabbit near a tree 
Now you need to give him food and water. Examine Sam's backpack (Backpack) and take everything you can take from it, namely: a deck of cards, carrots, wallet, box of matches, army knife, drinker, pocket book about tricks. Take a water bottle (Water bottle), go to the washbasin (Water pitcher) and apply the drinker to the jug. Now take a full drinker and apply to the cage with the rabbit. Then take a carrot and apply it to the cage too. Now Houdini is settled, it is time to inspect the house. Exit the room. Sam wants to escape, but first she needs a map. You can press the spacebar and inspect all the items in the corridor. Then exit to the lobby (the door to the right of Sam's room). You will be on the stairs. Examine the portrait on the wall on the right. It depicts a beautiful girl. Approach the door under the stairs, examine and see a note addressed to the new assistant ("New assistant" envelope), but Sam will not want to read it. Examine the items near the stairs, then go through the door on the left, this is the Dining room. Here you can view the paintings above the fireplace and music center (Hi-Fi system), as well as listen to Sam's comments about other things (table, candles, chairs). Exit the room, then exit to the courtyard by clicking on the door icon at the bottom of the screen (Front entry, in the lobby). Examine the sign with the name near the front door (Entry Plague), and then go to the right (Back exterior), examine the tree, the statue and the garage doors. Then return to the house and go through the door on the right (Parlour). There you can see diplomas against the far wall and a photograph of a man and a woman, as well as photographs of the doctor's patients. The door at the end of the room (Office door) will be closed. After that, go out to the lobby again, and there you will be met by a woman who will offer you breakfast. Go to the kitchen (Kitchen), the door next to the dining room. Sam will have breakfast and talk to the woman. This is Dr. Stiles' housekeeper, Mrs. Dalton. Ask the woman all the questions that will be highlighted below. She will offer you a job as a doctor's assistant for fifty pounds and the opportunity to live in a nice room. Then go to the noticeboard on the wall on the right (Noticeboard) and examine it. Sam will notice the calendar, Dr. Helborn's business card, and the police number. Exit the kitchen and go to the next door. Read the letter for the assistant. Dr. Stiles will ask you to find six students for an experiment tonight. If you do not complete the task, you can pack your things and leave. Enclosed are checks for £15 to be paid to students for the experiment. The doctor also asked you to leave your phone number to Mrs. Dalton. Go to her and Sam will say that she doesn't have a phone. Mrs. Dalton will give her hers. Now you have a map of Oxford, and you can go on business. Go to the garage and go inside. Try to start the motorcycle, but it is broken. Exit the garage, go to the yard and exit in the direction of Exit, or click on the Oxford Town Center map. You will find yourself in the center of Oxford. Examine the college name sign and turn onto Cornmarket Street 
To your right will be the Black Wand magic shop, go there. Examine the box to the right of the door (Game machine) and note the icon at the bottom 
Sam recognizes the logo of a famous magic club. The owner of the store, Mephistopheles, will come to you. Talk to him. You will find out that Sam's dream is to become a magician and belong to a famous club. Plus, she has a stage name, Lady Byron. After the conversation, look at the shelves with the magician's props in front and to the right. Play a game of cards. To win, click on the buttons below and set such a combination 
Then take a note from the machine on the right. There will be a task from the magic club Daedalus Club. Talk again to Mephistopheles. Then exit the store and go straight to Queen Street. Take turns talking to two guys and a girl on the street, but they will refuse to take part in the experiment. When the black guy leaves, he drops the party invitation at St. Edmund Hall and Sam picks it up. This place will be marked on the map. Try to enter Brasenose College, but the man at the entrance won't let Sam in. Go to The Windy Dog Pub, but it will be closed. Head to the party at St. Edmund Hall. Sam will witness a quarrel between a guy and a girl. Talk to the guy, Harvey Kinderman. He will say that he had a fight with a girl because of his movie. Sam will offer to help if he agrees to participate in the experiment. Harvey will give you a tape. Now you need to show Lisa (she is nearby, on the right) the focus. Choose the "Up in smoke" focus. A focus preparation window will open in front of you. Instead of cards, we will have cassettes, one real, the other fake. Getting ready:
1. Transfer the fake cassette (Spare cartridge) from the top window to the left sleeve of Sam 
2. Place a real cassette (Lisa's cartridge) in Sam's right hand.
3. Move the fake cassette to your left hand.
4. Move the real cassette to your left hand 
5. Click on the rabbit icon in the center of Misdirect.
6. Move the fake cassette to your right hand 
7. Hide the real cassette in the left sleeve.
Remember! Sam's left hand is on your right, and his right hand is on your left - don't mix it up!
Click on the magic wand icon that will appear in the lower right corner of the screen. If you did something wrong, then the wrong functions will be deleted, but the correct ones will remain.
Sam will lure the real cassette from Lisa, discreetly change it to a fake one and burn it, and give the real one to Harvey. Harvey promises to come to the experiment.
Now approach the girl in the sun lounger, Helena Beaugard. She's not interested in the experiment, but she's interested in the guy on the bench, Charles Ettington. Sam had to lie that she knew him, and he would also come to the experiment. Now you need to meet Charles. Come and talk to him. He is very humble and does not know how to continue the conversation. Pay attention to the objects next to him - a letter from his mother and a book, Homer's Iliad. Talk to him again about these things. After that, we can talk about the experiment. Charles refuses because he needs to talk to his mother. Let's do a little trick with him - "The Ominous Mailbag". Getting ready:
1. Click on the "Misdirect" icon.
2. Put the letter in Sam's left hand.
3. Hide the letter in the left sleeve.
Click on the magic wand and the letter will be with you.
Now we need to somehow open it so that Charles does not notice that it was open. Return to Oxford Town Center and use the letter on the ventilation grate (Steam Vent) 
Examine the letter and the check attached to it. Combine Charles' letter with Dr. Stiles' letter and checks, and Sam will replace the check from Charles' letter with the doctor's check. Now it turns out that the mother herself sends Charles to the experiment. Go to Charles and finish the letter trick. Getting ready:
1. Put the letter from the top window in your right hand.
3. Move the letter to the work area (on the table in front of Sam) 
Change the letter, and then go back to Helena. She will be amazed that you talked to Charles and Sam will convince her to attend the experiment. Now go process another girl who is sitting near the pay phone against the wall, Angela Mulholland. Talk to her. It's time to show focus again. This will be the "Telephone psychic" focus. Getting ready:
Go to the pay phone (Pay phone) on the wall next to the girl. Apply your mobile to his bottom and Sam will enter his number into the phone's memory. Now open the mobile, go to the menu by pressing the button on the right, and select the "Options" function. Turn on the sound by pressing the key under the word "Select". Instead of the word “Off”, “On” should light up 
Now turn to the girl again and get ready for the trick:
1. Put the phone in your left hand.
2. Click on the "Misdirect" icon.
3. Click on the "Manipulate left item" icon, the icon with the hands on the right side (Sam's left hand).
4. Hide your phone in your left sleeve.
It turned out to be quite easy to deceive Angela, and she agreed to participate in the experiment. You have collected all the students, return to Dread Hill House. Go up to your room (to go up the stairs, press Upstairs hall) and take out the photo of your parents from your backpack. Sam will put it on the bedside table.
Now it's time to play the game from Daedalus Club. Head to the Oxford Town Center and enter the Carfax Tower top. You will climb to the roof of the tower. Close the door and examine the red box behind it. There will be a hole at the bottom of the box. Apply matches to it and get a hint - a piece of paper with the college logo and a puzzle piece that needs to be folded to complete the task. Return to the street and approach the plate with college logos. Take the piece of paper with the logo and bring it to the Christ Church College logo 
The college will be marked on the map. Go there. Approach the fountain and examine the black box in it (Black box). Open the top cover. Take a drop of water next to the box from the fountain, and apply it to the sheet of paper on the box. The college logo will appear there. Open the box and take the second piece of the puzzle from it. Then go to the garden on the right (Christ Church College Garden), and look at the flower bed opposite the entrance (Flower Bed). Examine the area under the lion's head and see a flag in the ground. Dig up the ground a few times and get a beer stand and the next puzzle piece. At this time, the doctor will call and order you to return home. You only got four students, the doctor found another one, and Sam had to be the sixth. The doctor conducted a very strange experiment, during which he put everyone into hypnosis and asked them to imagine themselves on the field and the treadmill of one of the colleges. Watch the video about what happened to the track.
Chapter 2
Sam will be in his room and then come downstairs to have breakfast. After breakfast and a conversation with Mrs. Dalton, take the newspaper on the left side of the table. Read about unusual stripes on a treadmill. Sam wants to go there. But first, let's read the note Dr. Stiles left. Go to the door to the laboratory (there was yesterday's first note on it), enter and go into the first door to the right (Main lab). Go to the table with the computer and take a note (Textbook) on it. Read the note from the doctor asking him to sort his files alphabetically and the letter from Susan Whittier. Examine the items on the table and around, notice that something can be applied to the vase. On the table is a photo of the same woman whose portrait hangs in the hall. Well, it will take a little work. Examine the shelving at the other end of the room. Close the letter with instructions and folders will appear in front of you that you need to put in boxes. Arrange files alphabetically by the first letters, except for files marked Publicated, they must be placed under the letter "P". Don't worry, Sam won't put the file where it doesn't belong. When you're done, look in the drawer with the letter E and take Dr. Stiles' article "Extraordinary Powers Of Ordinary Minds" (Extraordinary Powers of the Ordinary Mind). The doctor seems to believe in the paranormal. Then open drawer F and take the folder “fMRI Delivery Receipt” (MRI delivery receipt). We are talking about the MRI machine - magnetic resonance imaging, which is used to diagnose brain diseases. Sam will want to meet Susan Whittier. Open drawer L and take out the "Linkweller's Article" folder, read Dr. Linkweller's article on the topic of the paranormal. Then open drawer N and take out the third folder "Neurobiology Department Staff List". Sam will take a sheet with the phones of neuroscientists from there. Then go deep into the room (Main lab, past the rack with files) and examine the laboratory in which the experiment was conducted.
Now it's time to make inquiries about unusual phenomena. Go to the Horspath Track, look at the track and talk to Eddie (the guy who cleans it up). He will tell you about the storm, about something moving along the path. Ask him all questions. Now head to Radcliffe Infirmary (Redcliffe Hospital). Look at the map on the right first, and then go through the first door on the left (Susan's office). Talk to the woman at the table, this is Susan. Talk to her again about the "equipment receipt" (receipt for equipment) and Sam will give her the right paper, which she could not get from Dr. Stiles. Talk to her again about Dr. Stiles, and then about Dr. Helborn. Susan will call the doctor and he will see Sam. Talk to the doctor. When Sam comes out, talk to Susan again. Sam needs Dr. Stiles' plan for an experiment, but neither the doctor nor Susan is willing to give it. Send Susan for coffee for the doctor (just choose all the lines in order) and Sam will notice that she keeps the key in a cup on the table. It's time for a little focus. Look at Susan again until the "hat with cane" icon appears. Choose the "The Bottomless Cup" trick, but Sam needs a magnet to pull it off. Head to Oxford city center and talk to the woman selling flowers near Carfax Tower. Sam will buy a bouquet of flowers. Then go to the magic store and buy there (just take it on the shelves): artificial blood (stage blood), fake finger (fake thumb), magnet (magnet), a device for creating the sound of tearing paper (shredded-paper noisemaker), a bottle of spirit gum. Talk to Mephistopheles, he will tell you about the most outstanding tricks. Then exit the store, and Sam will pay off Mephistopheles upon exiting. Since we're already here, visit The Windy Dog Pub on Queen Street. Examine the huge horn on the pedestal (Hunting horn). Look inside and Sam will see the fourth piece of the puzzle. Blow the horn, but nothing will work and it will only cause the laughter of visitors. Then talk to the bartender. He will give you a horn pipe and a card with a hint. Apply the straw to the narrow end of the horn, Sam will blow into it and get a piece of the puzzle. It remains to find one more, but for now we have other things to do. Return to the Radcliffe Infirmary and get ready for the trick with Susan.
1. Put the magnet in Sam's right hand.
2. Place the cup in your left hand.
3. Move the cup from your left hand to your right.
4. Manipulate the cup (click the "Manipulate right item" icon).
5. Distract Susan ("Misdirect" icon).
6. Take the key and put it in your left hand 
7. Hide the key in the left sleeve.
You have the key! We need to lure Susan out of the room, but first Sam needs to prepare. Exit the office and go to the office opposite (Staff kitchen). Examine the first aid kit on the wall, then interact with it and Sam will hide it behind a tray. Then combine the fake finger in the inventory with the artificial blood, and then with the Ouija rubber. Preparation is over. Go to Susan and perform the trick on her: "The Super Gross Out, Self-Healing wound". Getting ready:
1. Place the letter opener in Sam's left hand.
2. Manipulate the knife ("Manipulate left item" icon).
3. Distract Susan ("Misdirect" icon).
4. Manipulate the knife ("Manipulate left item" icon).
You got your way and Susan left. Go to the filing cabinet on the left side and open it with the key. Sam will find the right paper. Apply it to the copier nearby (copy machine) and Sam will make a copy of the experiment plan. Sam will exit the office and run into Malik (the fifth student volunteer invited by Stiles himself). Talk to him. Then go home, go down to the laboratory and put the flowers in a vase on the table. Go to the filing cabinet and open the letter C. Take out a postcard from the Condolence Card folder with the signatures of the employees of the Neuroscience Department. Then go up to Sam's room and put the remaining flowers in a glass near the photo of the parents.
Now go to Christ Church College and enter the second passage on the right (Christ Church Cathedral nave). Talk to your guide, ask questions about the church. Then look at the stained glass window at the top (Angel window) and go deep into the cathedral (Christ Church Cathedral altar). Press the lever on the right near the door and the pool in the center will open. Approach him and take the fifth piece of the puzzle. Now we can put the puzzle together. Rotate the pieces with the right mouse button in this way and put them together. Now you need to solve the rebus depicted on paper: 

1 word: car + ax + F = car + ax + F = Carfaxe
2nd word: flower - FL + T = flower - FL + T = Tower
3rd word: bone - B + PH = bone - B + PH = Phone
So, we got it: "the telephone at the Carfax tower." If it is not clear to someone, then for clarity, a telephone booth is also drawn. We go to the tower and examine the booth. We need to enter a number, or rather a name. The last line of the first clue says to enter the name of the person who sold his soul for thirty. We enter: Judas (Judas), those numbers in which there are letters of this name, that is: 58327, having previously picked up the phone. As a gift for the completed task, you get a coin. Roll it from side to side.
Now go to St. Edmund Hall, where the participants of the experiment have been waiting for you for a long time. Talk to them, exchange phone numbers, and then head to the Bodleian Library. Sam doesn't have a student ID and can't get in. But Helena is sitting in the library, call her. Talk to her and she will show her two tickets. There are three comments to be made about each ticket. We speak badly about the old ticket (it is on the right) (choose three of the underlined remarks, on the left side you can choose only one): 
And about the new one, well (choose three of the underlined replicas): 
Now you can arrange a trick for Helena, "The Destroyed and Restored Ring Truck", only instead of the ring we will have Helena's old student card. To start preparing for the trick, use your shredded-paper noisemaker on the paper shredder on Sam's side. Now getting ready:
1. Place the noisemaker remote control in Sam's left hand.
2. Put the ticket in your right hand.
3. Manipulate the ticket ("Manipulate right item" icon).
4. Distract Helena ("Misdirect" icon).
5. Manipulate the button ("Manipulate left item" icon).
6. Hide your ticket in your right sleeve.
Helena will think the ticket has been destroyed and Sam will get it. Use the ticket at the terminal in front of you (Turnstile). Go to the library and talk to the librarian behind the counter. Sam will ask for information about David Stiles. The librarian will advise you to use a computer filing cabinet. Approach the computer terminal on the left (Computer terminals) and interact with it. Sam will type the name into the search bar herself. Read articles about the doctor, choosing information by year on the left. When you get to the last article (October 23, 2002), you'll watch a cutscene in which Sam reminisces about her past (most likely her parents died in a car accident). David Stiles was a public person, in 1998 he married Laura Edmondzorp (Laura Edmondthorpe). On October 22, 2002, he was returning home with his wife after dinner and they had an accident. David's wife died and he ended up in the hospital.
Go home, Sam will answer the phone. Then go to the kitchen and talk to Mrs. Dalton about Laura. She will ask you never to talk about it with David. David is obsessed with his wife's death, so there are photos of her all over the house and a calendar with October 2002 on the bulletin board. He didn't let me change anything.
Sam wonders if Dr. Stiles has enemies in the Neurological Department. Combine in your inventory the postcard that you took in the box (condolences are expressed on it and murals are put on it) with the list of department employees (“Neurobiology Department Staff List”). Now you need to cross out from the list those who did not sign the postcard: 
Just click on the names on the sheet, and they will be crossed out. At the end there will be one person left - Abram Linkveller. After that, close the window with papers and watch the video.
Chapter 3
Here you play as Dr. David Stiles.
Examine the items in the room, and then go to the dressing room (David's closet), examine the chest of drawers and open the drawers. You can also see Laura's dress there. Return to the bedroom and examine the mirror. Then go to the bathroom (David's bathroom), look at the cabinet on the dressing table (Cabinet) and pay attention to other items in the bathroom. Return to the bedroom and exit the room, through the double doors (Upstairs Hall), look at the painting near the door and the figure under the ceiling. You can also listen to David's comments about Sam's room and the next bedroom. Go to the lobby, look at the portrait of Laura on the wall, then go to the kitchen. After talking with Mrs. Dalton, look at the bulletin board, then talk to Mrs. Dalton again. David thinks the house is haunted by Laura's ghost and Mrs. Dalton said she saw the woman's reflection in the bedroom mirror. Sam's presence weighs heavily on David, but he wants to continue his experiment. After the conversation, go to the dining room. Look at the pictures on the wall, Laura painted them. Then look at the music center in the closet, it also reminds David of Laura. Leave the dining room and go to the office opposite (Parlour). Look at the photos on the table with the computer (Box of photos). Take pictures one by one, look at them and listen to David's comments. Also look at the patient photos and diplomas on the wall. David won't want to go into his old office. Leave the room, go to the courtyard, go to the garage and look at the items there. Then return to the house and go to the laboratory. First, visit the large laboratory (Main lab). Go to its far part and interact with the computer. When it loads, select Session 1 on the monitor, but David won't want to view it. Then exit the lab and go through the next door (Private lab). Someone will ring the doorbell, go back to the lobby and Mrs. Dalton will say that David has received a package. You will immediately find yourself in David's private laboratory. Look at the computer, select the My Files folder, there will be an article about the brain and an experiment plan. Then select the Video Logs folder and view the video reports on the work. Examine the plaque on the wall (Whitedesk) and read about Laura's presence, which David and Mrs. Dalton noticed. Also look at the terminal on the right (Tank controls) and find out what David needs for further experiments (objects that activate the senses). In the middle of the room is an apparatus (Tank Lid). Approach the table on the left (Work counter) and examine the items on it. Read the letter from Dr. Remaskin, and then the book lying next to it. It describes psychokinetic phenomena and includes instructions for using the RNG (random-number generator) apparatus. Interact with the generator, it's on the right. Before you will be a field with cells for numbers. In cell number 0, put the number 99 (by clicking the arrows on the sides of the cell), in cells 1 to 26, leave the percent signs, and from 27 to 39, set zeros. This is easy to do by clicking on the top right arrow. 
Then examine and press the red button, on the right side of the generator. Consider the large letter roller (RNG rolodex). David is waiting for Laura to contact him through this machine and write something.
David needs to remember all the details of his night with Laura on the lake in order to activate the receptors in the brain that are responsible for the senses: hearing, sight, taste, smell, touch. Go up to David's bedroom, go to the bathroom, open the cabinet on the dressing table and smell Laura's shampoo (second shelf, purple bottle). David will have a flashback. Go into the dressing room, open the bottom drawer and examine its contents. Then take Laura's swimsuit. Go down to the dining room, consider the music center. Look at the disks on the bottom shelf and then take one from the stack on the right. Again a memory. Go to the office, view the photo again and select the photo with the house. David will have a flashback again. Go into the kitchen and talk to Mrs. Dalton about Sam's motorcycle. Then go down to your laboratory. Along the way, you can see the wine rack in the cellar on the left, and David will remember that they drank wine that night on the lake. But there are too many bottles to find right away. Well, let's use the catalog. Look at your computer and open the "Wine steward" folder. David will say that Laura loved dry red. In the "Type" column select "Dry", in the "Color" column - "Red", in the "Region" column - "Loire" (on behalf of Lore). In the Year column, select any year, and David will say that they drank wine before Laura's birthday and chose wine of the same age as her. In the 8/8/2005 video, David says that Laura would have been 33 years old. So she was born in 1972. Choose this year. David will find three different bottles. Exit the laboratory, go to the wine rack and examine it. There will be three shelves in the middle, labeled "092", "093" and "094". You can taste wine with each of them. The correct wine is from the shelf “094”. David is back in the lab. Consider the Tank controls panel. Pour the shampoo into the funnel (1), press the drive open button on the panel (2), apply the music disc to the drive (3) and open the machine (4) 
Then interact with the device (Tank Lid). David's pleasant memories of the lake are interrupted by the memory of the accident. Go to the panel again and close the machine by pressing button 4.
Go up to the lobby, go to the office and look at the photos again. David will pay attention to the latter, because in the vision Laura was talking about "blue tiles" (blue tiles). Go to the lab and apply the photo to the scanner. Press the "Scan" button, then "Edit", then: twice the "Zoom" button, use the arrows to zoom in on Laura's face, then once each next button. When the image looks like this, press the "Blur" button, and David will find a strange shadow. Then go to the lobby and take the phone. David will call the inspector who was investigating the accident and ask if there was anything strange in the car. 
Watch the video about the second experiment.
Chapter 4
You play again as Sam Everett.
David will pop into Sam's room. After he comes out, go after him. He will send you to St. Edmund Hall to find out about the incident at the pool. Go down to the kitchen, Sam will refuse breakfast offered by Mrs. Dalton. Take the newspaper on the edge of the table and read about the pool full of blood in St. Edmund Hall. Go there and enter the lobby (Lobby). Examine the plaque on the wall on the left and note the room number for Jeanie Smith, room 106. This girl was in the pool at the time of the incident. Show the person behind the counter your fake ticket (Helena's ID) and then go to the pool (St.Edmund Hall pool). Examine the clock and the figures on the wall, and then take the photos of the bloody pool (Polaroids) from the bench on the left. Consider the filter near the pool (Filter). Sam will ask the pool attendant if this filter was on the night of the accident, and he will say it is. But no traces of paint were found on the filter. Talk to the pool worker, but he doesn't know much. Come out of the pool, you can look in the door opposite (St.Edmund Hall gymnasium). At this point, the participants in the experiment will have to imagine themselves in the next "visual exercise". Return to the lobby and go up the stairs to the left (St.Edmund Hall 1st floor). Pay attention to the bucket on the floor and to the table on the left, examine the toilet paper and take a piece. Pay attention to the open window above the door of room 102. Then knock on the door of room 106. Gini will open it for you, she is very upset by what happened. Talk to her. Genia will tell that the paint in the water took the form of a person, and she felt evil. Sam will ask Genia not to give up her education. When Sam leaves the room, the phone will ring. Participants of the experiment are waiting for her in the courtyard of St. Edmund Hall. Get out into the yard and Sam will talk to the company. Harvey wants to opt out of the experiment and Charles is also hesitant, but the others can't wait to see what happens next. After the conversation, go to the gym. Sam wants to hide here and see what happens during the experiment. Examine the door (Locker room). Sam will say that he can get there, but for this she needs something from the magic store. Head to Oxford Town Center and go to the store. Talk to Mephistopheles about recent events. Sam believes that one of the magicians has started a "big game" to compromise Dr. Stiles and his experiment. Mephistopheles will first suggest that Sam herself started it, but then she will lead her to the idea that this is one of the students. He will also advise you to play the game again. Go to the car with cards and set this combination 
and then take a clue to the next game from the magical club Daedalus Club. This time the game is related to Alice in Wonderland. Note that many of the words in the poem are misspelled but contain clues if recognized correctly. The first clue leads to "Alice's shop", this is indicated by the phrase: "At Alise Liddell's pohs". Read the word "pohs" backwards and get "shop". Then inspect the shelves and take: a three-piece trap set (flash powder trap) and a device for creating a sound for a call for help (cry-for-help noisemaker). When Sam goes outside, she will meet Harvey. I wonder what he's doing here?
After the conversation, go to Queen Street and go to Alice's shop. Talk to the salesperson behind the counter, but she won't be able to help you. Examine the postcards on the right (Post card rack). You will learn that the clue can be found in Christ Church Hall. Also, Sam will buy a map of London, which he has long dreamed of. Consider also the poster with the biography of Lewis Carroll (History board) nearby. Go to the opposite wall and look at the poster. It features the Mad Hatter and the word "smile" highlighted in yellow. Now consider the figure of the Cheshire cat nearby (Cheshire cat). Letters are drawn on his teeth, which can be pressed to write a word. Press the letters to get the word "SMILE" 
The cat's head will open, take a piece of the puzzle and a business card from Oxford University Museum - another location to visit.
But first, let's finish our business. Go to St. Edmund Hall and take another look at the board with the location of the rooms. Sam will notice that all the students in the experiment live in the same dormitory, and also in one side of it, except for Malik and Angela (since they are graduates). Remember the room numbers: Helena - 102, Charles - 204, Harvey - 302, Malik - 326 and Angela - 322. Climb to the first floor of the hostel on the left (St. Edmund Hall 1st floor). Interact with the bucket (Bucket) on the floor, Sam will move it to the door and make his way into Helena's room. Immediately at the door will raise the key to the room. Look at the things in the room (books, computer, camera on the table, drawers) and Sam will say that she needs a camera for a night out. Examine the box under Helena's bed (Box). Sam can't open it without the key. Close the viewport and Helena will enter the room. Talk to her. Helena will let you take the camera. Exit the room and go up to the second floor of the dorm, the door at the end of the corridor. There are two guys playing cards, then one of them will leave. Approach the second one and talk to him. This is the attendant, and Sam will ask you to take her to room 204. All three versions of the answers, why she needs this, will not suit the guy. Well, it's time for another trick. This is the Divide and Conquer card trick. Its principle is to choose one card at the beginning of the game, which must remain uncovered at the end. Each player in turn chooses two cards, and the other can close any of them. If your chosen card is closed, then you have lost. What you need to do to win: if there is an even number of cards on the table, then invite your opponent to play first (I’m a gentlewoman, go first), and if it’s odd, then you play first (Better, I first). Pick any card, then any two each time it's your turn. If your opponent chooses your card, then you choose to close another. You only need to win three times for the guy to agree to open the door to Charles's room. Look at the photo next to the bed. Charles is very fat on him. Take the photo and apply your phone to the leaflet on the frame. Sam will write down the number of Charles' mother. Examine the magazine on the table. It was written by Dr. Stiles. So Charles is interested in him, although he never spoke about it. Exit the room and look at the door to room 202, the lock on it is broken. Climb up to the third floor. There is no one in Harvey's room, and the attendant is also sitting on the floor. Talk to him twice, but he won't want to let you through. It's time for the "The Locked room Mystery" trick. Combine the piece of toilet paper and the device for creating a call for help in inventory, and then put it under the door of Harvey's room (302). Click on the device button in your inventory and the attendant will enter the room. Examine the door and press the button (Knob) 
Now the door will not close when the attendant leaves the room. When he leaves, come in. Examine the objects in the room, and then examine the table. It contains a script written by Harvey about a mad scientist and his experiments, as well as about the main character Harry Kid (he probably meant himself) and Jimmy's girlfriend (this is most likely Sam). Exit the room. Go to Helena and tell her about what you found. You can't enter the alumni dorm right now because the man downstairs forbade it.
Go to the University Museum, then solve the riddles. Check out the exhibits in the museum, but you'll be interested in the Dodo's egg, which is in the bottom display case opposite the entrance. Examine the shop window, touch the egg, and Sam will see the magic club logo. Take it and apply it to the ottoman near the dinosaurs (Bench). Sam will sit on the egg and it will open. There will be the second part of the puzzle and the visiting card of the Hogwarts school (as in Harry Potter). Sam needs to find a location in the city associated with this school. Go to the library and ask the librarian about Hogwarts. She will say that some episodes of the film were filmed in Christ Church Hall. There is Hogwarts Dining Hall (the dining room of Hogwarts). Go to Christ Church Hall, but it is closed today and you will have to return to this task tomorrow. Go to Christ Church Cathedral nave, talk to Angela and she will give Sam a paper fairy.
Now let's go home. When Sam enters, she will see a woman coming up the steps. Then he will hear the cry of the doctor, who discovered Houdini and is unhappy with the animals in his house. Mrs. Dalton will take Houdini away and the doctor will ask Sam about the woman on the steps. Then he will ask about the news from the university. Talk to him.
Then go to Radcliffe Infirmary, go to Linkweller's office, but Sam will say that she needs to lure him out. Enter Susan's office and talk to her. Then look at the phone on her desk. Use your cell phone on the number at the bottom of the phone and Sam will write down Susan's phone number. Then look at the side of the names on the phone. These are the line numbers. Linkweller has number 11. Exit the office, look at the mobile, open the Contacts list and select the number Neur.Dept. When the voice asks you to dial a number, dial 11 and call Linkweller. Choose any of the three answers to have him leave the office. Then go to Linkweller's office. Consider the things in it. Sam will say that she has little time and quickly leave. Now go back to the magic shop and buy a phone bug (telephone spy) there. Go back to Radcliffe Infirmary, lure out Linkweller with a phone call again. This time you will have more time. Use the phone bug on the phone on the table (Phone).
Go to St. Edmund Hall, to the gym. Put together all three parts of the flash powder trap (bottle, box and spring) and get a powder-and-line trap. Apply it to the door through which you entered and to the door in the hall itself (Locker room). Come out to the yard.
You are again in the courtyard of St. Edmund Hall, surrounded by participants in the experiment. Let's draw the "Fruit bowl" trick over them all. Everyone will write down their decision to participate or not participate in the experiment, and Sam will change the pieces of paper so that it comes out “participate”.
Watch the video.
Chapter 5
You again play as Dr. David Stiles.
Go down to the kitchen and talk to Mrs. Dalton. Then go down to the private laboratory, examine the table and RNG rolodex. It has two more letters. Go to the board on the wall and read from above (by clicking on the eye icon) the latest information about Laura's presence, noticed by Sam and David. Read the list of tasks for today at the bottom. David plans to visit Dr. Remaskin, his house will be marked on the map. Go there. Talk to the doctor. David and Remaskin will discuss paranormal phenomena, David will talk about his experiments. He hopes to bring Laura back to life, but Remaskin does not agree with him, since now Laura is a disembodied spirit. David will return home. Today he wants to remember Laura's favorite places, namely Timmons Park, where they went boating. Go to the dining room and look at the paintings above the fireplace, pay attention to the lower one in the center, which shows a couple in a boat. This place will be marked on the map, go there. At the entrance to the park, the child will call David a monster because of the mask. Enter the park, go to the bench and look at the tree to the left of it, then the tree to the right of the bench, and then the tree to the right of the bridge. All the trees will have inscriptions carved into them, but the tree to the right of the bridge will have the initials of Laura and David. Touch the inscription and David will be visited by a memory. Then go straight across the bridge (Timmons Park boat house), pay attention to the boats and the lake, to the man in the booth (Timmons Park rent boat) and to the man with the harmonica on the bench. Talk to the harmonist. David will ask him to play the song they listened to with Laura when they were here. Then head right into Timmons Park paved path. Consider trees, a dried river (River) and a shop. David will say that they often liked to sit here with Laura and look at the river. Now go left to Timmons Park gardenia garden. Pay attention to the flower beds in the fence, look at the right flower bed and try to pick a flower. The gardener will forbid David to do this. At this time, the girl will pick a flower and run away. Follow her to the left (Timmons Park playground). Talk to the girl. She'll be interested in David's mask, but won't want to hand over the flower. David will move away and an apple will fall on him. Take the apples under the tree (Apples) and apply to the girl. David will start juggling. The mother will take the girl, but she will put the flower on the ground. Take it and smell it in inventory. Another memory of Laura. Now pay attention to the ice cream seller and talk to him. Buy ice cream and lick in inventory. Now follow the path straight ahead towards the Timmons Park fountain. Return to the boat pier (Timmons Park boat house), you can go there by returning from the fountain again to the Timmons Park paved path. Talk to the man in the booth. David will hire a boat. Watch the flashback video and get another message from Laura: Student and October 21st. Now David needs to remember the day before the tragedy.
Come back home. Go to the private lab and read Sam's report on the computer. Then go to the large laboratory, interact with the computer, select the first experiment (Session 1) and you will see images of the brain of each of the participants, scanned by the MRI machine. In Sam's report, it was written that an unusual occurrence in the Horspath Track occurred at 11.30. By pressing the "-" and "+" keys at the bottom of the screen, set the time to "11.30". Then view the images, choosing in turn the time intervals indicated on the right: 1, 15, 30, 45 and 60 seconds. At 45 seconds, all images will turn red, which means an incredible increase in brain activity. Choose one of them. David will want to experiment with old equipment to test everything. Now return to the menu by pressing the left button on the monitor (MRI data sessions) and select the second experiment (Session 2). Sam's report stated that an unusual occurrence in St. Edmund Hall pool occurred between 11.40 and 11.45. You need to check this gap. Unusual activity will be recorded at 11.42 at 30 seconds.
Go to the private laboratory and examine the notebook on the table (David's appointment book 2002). Memorize David's daily routine. David will say that he doesn't remember what happened on October 21st, but Simon Halborn can help him. Go to the kitchen and look at the bulletin board and Dr. Halborn's card. Then go out to the lobby and call him on the phone. Head to Halborn's office. Dr. Halborn will offer to help David remember the day with hypnosis. You will have options for answering what David did. Right answers:
1. I took a shower. What did David do when he woke up? - Took a shower.
2. Had breakfast with Headly. What did he do next? - I had breakfast with Hadley.
3. A coffee shop. Where did they have breakfast? - At the coffee shop.
4. Neural connectivity in infants. What was the topic of David's lecture? - "Neurological activity in infants"
5. Office hours. What did David do next? - He had office hours.
6.Female. Who came to David's office? - Woman.
A student came to David's office and announced that she had paranormal powers. David didn't believe it. Then something terrible happened.
Come back home. To complete the bonus task, go to the office and look at the photos of the patients, and then go up to David's bedroom, enter the dressing room and look at Laura's white dress. Then go to the kitchen and talk to Mrs. Dalton. Watch the video about the third experiment.
Chapter 6
Sam Everett.
Go down to the laboratory. Mrs. Dalton will be there with Dr. Halborn. Sam will talk to Halborn, he will hint that David is hallucinating about Laura's death and that he got his burns when he tried to save her from the fire. Sam will hold up a note with David's notes about Laura's presence. Now Sam also thinks that a ghost lives in the house and wants to find even more confirmation of this. Try to enter the door of the private laboratory, and Sam will say that Mrs. Dalton opened it. Go to the kitchen and talk to Mrs. Dalton. She does not want to hear anything about the ghost and forbids Sam to be interested in it. She will also say that Sam's motorcycle was fixed. Go outside and the phone will ring. The bug has been triggered, and you will listen in on Linkweller's conversation with a certain Shelly, most likely his mistress. Then go to the garage and inspect the motorcycle. Exit the garage and look at the Bottom of tower. Try to enter, but the door will be closed. Examine the statue next to the entrance and Sam will pick up the key. Use it on the tower door. Examine the stairs and climb up. Pay attention to the chair and look at the window. Sam will notice some kind of imprint on it, but will not be able to see it in more detail.
Go to the center of Oxford, to the magic shop. Mephistopheles will give Sam a lantern that can reflect images. Then talk to him again and he will give Sam an idea: since she thinks that some magician is doing his tricks in those places that Dr. Stiles uses for his experiments, then something needs to be changed at the last moment in order to No one knew. Take the disappearing ink from the shelf and exit the store. Sam's phone will ring, but she won't have time to pick up the phone. Then she will hide and see Helena, who will go into the magic shop. Now Sam suspects her and Mephistopheles of the incidents.
Return home, go down to the big laboratory and talk to David. Sam will suggest that he reschedule the experiment for another time.
Go to St. Edmund Hall, Sam will talk to the janitor and go up to the first floor of the hostel. Angela will approach the watchman. Use the key (Helena's key) to open Helena's room. Examine the drawer and take out the letter from the university. Then go to the table on the left, and take the Hairpin from it. Go to the table in the middle of the room, examine and take the theater program (Theater program). Sam will say that Helena was in London in 2002. Now look at the box under the bed and apply a hairpin to the lock. The box will contain syringes and ampoules. Sam will assume that Helena went to Mephistopheles to get drugs. Go downstairs, go to the gym, inspect the door, lamps, dumbbells and watches.
Go to the Horspath Track, look at the discs next to Eddie (discus), and then talk to him. After the conversation, take one disc.
Return home, take the envelope in the lobby with the emblem of the Daedalus Club. Then go down to the laboratory and talk to David. Sam will tell him about his suspicions about Helena and offer to use the disk for today's experiment.
Now go to the Radcliffe Infirmary and enter Linkweller's office. Sam will threaten to tell his wife about Shelly's mistress if he doesn't leave Dr. Stiles alone. Linkweller will say that he knows nothing about this, find a bug and kick Sam out of the office.
Now again go to the center of Oxford, to the magic shop and talk to Mephistopheles. Sam will lie to him that David did not agree to reschedule the experiment.
Now head to the Bodleian Library. Harvey is there. Use your student ID on the terminal, enter and talk to Harvey. To find out the truth about him, let's do the "The Shredded and Restored Newspaper" trick with him. For this trick you need paper forms (Paper stack). Pick them up at the Librarian's Desk. Now getting ready:
1. Put the paper forms (Paper stack) in the left sleeve.
2. Place Harvey's paper in your right hand.
3. Move the blanks to your left hand.
4. Move Harvey's sheet from your right hand to your left.
5. Distract Harvey.
6. Move the forms from your left hand to your right.
7. Hide Harvey's sheet in the sleeve.
8. Manipulate forms (right object).
Sam will tear up the fake manuscript and tell Harvey that he will restore it if he tells him if he was involved in the incidents at the university and Mephistopheleus. Harvey will say that he doesn't know anything.
Go to St. Edmund Hall, go up to the third floor, take cups and a ball (Cups and ball) near room 302. Examine the electrician (Maintenance man) and electrical shield (Fuse box) and try to press the switch (Switch). Sam will say that the electrician is interfering with her. Let's do the Cup and Ball Psychic trick with him. You put three cups in front of the viewer. One of them contains a paper ball. You assign a position to each cup and turn away. Your viewer swaps cups and says which one he swaps with which. Trick: you remember which cup the ball is under, it's always cup number 1 
If the electrician utters the phrase: “I hide the ball” (I hide the ball), then after shuffling, the ball will always lie under cup number 3. If he immediately starts mixing the cups (the phrase “I swap ...”), then the ball will remain lie where he was, cup number 1. When you win, the electrician will ask you to tell him the secret of the trick. Sam will promise that he will do it if - and you will have several options in front of you. Choose the one that will send the electrician away: " Get me coffee downstairs". Then examine the shield and press the switch 
You have turned off the security system between floors and can now go to the graduate floor to check on Malik and Angela. Enter the black door at the end of the corridor marked (St.Edmund Hall 3st floor). There, Sam will immediately talk to Malik, who will reveal that Lickweller fired him, and that he came to study at Oxford University because of Dr. Stiles, because he admires him. Now we need to check Angela. Knock on room 322. Sam will enter and talk to Kelly, Angela's neighbor. After the conversation, look at Kelly again, and Sam will say that you need to somehow remove her from the room. Let's do the "The Last Great Disappearing Ink Trick" trick with her. Sam will hide his disappearing ink in his sleeve, ask Kelly for a pen and paper to write a note, then start waving his pen like it's out of ink and douse Kelly with ink from his sleeve. When Kelly leaves, look around the room. Look at the table by the window and you will see a magazine in the drawer, which describes the wedding of David and Laura, as well as a document with a photograph of Angela, which shows that she was a brunette. Then look at the photos on the chest of drawers (Photo of Angela's father) and you will see hair dye next to the photos. Then look at the shelves (Shelf) and you will see figures and a picture with fairies there. Exit the room and Kelly will enter. She will report that Angela's father died in a fire. Get out and go to the other side of the third floor. An electrician is standing near the shield again, talk to him.
Go to Christ Church, enter Christ Church Hall, examine the painting to the left of the entrance, then go to the right side of the dining room, examine the certificate above the fireplace, and then the fireplace itself. Before you are two heads in hats. Consider the one on the right, then the hat on the head and twist it several times. The head will fall off and you will get the third piece of the puzzle. Then again go to the picture, which depicts three girls and examine it. Pay attention to the book, the inscription in the corner and the signature 
After examining the book several times, apply the knife to it four times. You will find the fourth and final piece of the puzzle. Put the pieces together 
Now we have to solve the puzzle. The result is a mangled word that will mean "Christ Church Meadows." Exit to the garden and talk to Charles. He will confirm that he is in the photo, and Sam will realize that he knows nothing about magic. Then take the right or left path between the flower beds towards Christ Church Meadows. You will enter the field. Sam will remember that the hint note contained the phrase: "Fine the rabbit if you nac". The last word doesn't mean anything, but if you read it backwards it reads, "Find the rabbit if you can." So, on the field you need to find a rabbit hole. To do this, a large magnifying glass on the left is given to help you. Guide Sam across the field, looking at the ground through a magnifying glass. To find a hole quickly, put Sam here 
And she will discover it herself. Examine the hole and Sam will climb into it. In front of you will be a white rabbit with a clock, on the stomach of which there are buttons, like a telephone. The last line of the tooltip says "Enter the name of mage". If you rearrange the letters in the word "mage", you get the word "game" (game). But the name of this game is also a meaningless set of words. You need to rearrange the letters so that you get the name of the author of "Alice in Wonderland":
C Railer Swoll
Lewis Carroll
Enter the name on the buttons, these are numbers: 539472277655.
The rabbit clock will open and you will receive a second coin. Consider it from two sides. It also, like the first one, depicts the historical places of London. Daedalus Club invited you to the performance. To find out where the club's meeting place is located, open a map of London and mark on it the places indicated on the coins: Parliament House, St. Paul's Cathedral, Buckingham Palace and the British Museum 
Then click on one circled place and on the second one diagonally to draw a line. Do the same for the other two places. 
At the intersection there will be a meeting point. But until you complete all the tasks, Sam cannot go to the meeting.
Return to Christ Church. Let's check Charles' information. Look at the mobile phone and select the number of Charles's mom. Sam will introduce himself as a university worker and ask the mother to describe her son. Then she will say that he looks different in the photo, but the mother will say that over the past year he has changed because he went in for sports. So Charles was telling the truth.
Go back home and tell David about Angela. Then go to the kitchen and talk to Mrs. Dalton. Take a bag of flour (Flour) from the far wall and go to the tower (the tower needs to be unlocked every time with a key). Climb up and look at the window again. Apply flour to it and you will see handprints. Look at them and Sam will think they belong to a woman. Then look back at the chair. Sam will deduce that someone has been sitting here for hours spying on David. When you go down, look at the steps again. Exit the tower and go into the house. Climb up to the second floor. Sam will say that he wants to look around here to detect the presence of a "ghost". Examine all items: the doors to David's room and the empty room, chest of drawers, painting, chairs and statues. Then go downstairs, and Sam will say that the one who was here cleaned up well after himself.
Go to St. Edmund Hall for another meeting with the test subjects. The only thing missing is Harvey and Helena. Everyone else will agree to come at three o'clock in the afternoon.
Call Helena from your mobile. She says she can't come.
Watch the video about the experiment. Angela and Sam will read a poem.
After the experiment, Sam will call Eddie and find out that nothing happened on the Horspath Track. Sam will decide that these were the tricks of Mephistopheles and leave for London.
Chapter 7
Chapter 8
Sam Everett.
You can inspect the items in the club reception, and then go to the bar (Daedalus Club public bar). Talk to the bartender at the counter and the man and woman at the table on the left. But they won't help Sam. Take the newspaper near the chair on the right and read about the incident in Oxford. Go to the left side of the bar and talk to the magician (Trickster). He will say that in order to find Mephistopheleus, Sam will have to participate in one more game. Consider also the magic ball (Zoltan) near the conjurer.
Then go back to the reception area and look at the Devil machine. By clicking on the right and left horns, you need to put three identical pictures on the scoreboard. Press the left horn so that the devil appears in the first window of the scoreboard, and the angel in the second 
Then click on the right horn until three images of the devil appear on the scoreboard. Now the lower part of the machine is activated. A red light will move around in a circle. It is necessary that she stops at the lower scoreboard "Hell". Wait for the light bulb to reach the countdown 
and press the lever on the left. Sam will fall into some room. Examine the items in it. Under the picture on the right, consider the box 
There will be a heart with the inscription "Look for a woman." Now look at the statues at the far end of the room. At the top there will be poems with a hint, in the middle - a door. To open it, you need to find the keys. This game is called "The Game of Life". You can also see items here: the Zoltan automatic machine that predicts the future, a piano, a Venetian mask. Also consider the picture.
Exit through the third door on the right (the other doors lead to the same room). You will find yourself in another room. Approach the iron apparatus on the right (Iron maiden), examine it and open the lock. There you will find a clue: "Going out is a choice, ask the diamond six." Consider pistols, another Zoltan machine gun, Houdini's handcuffs. Exit through the door at the far wall of the room (Queen of Spades). Sam will fall into a strange room and a ceiling with spikes will begin to fall on it. Then she will find herself in another strange room. Consider the items here too: two rabbits, another Zoltan machine gun, diamonds in boxes on the walls. Examine the next box with a hint on the wall to the right (Information box). The clue reads: "Don't trust, read everything." In the middle of the room there will be a big button (Switch), press it. The room will go from multi-colored to black and white. If you go out the first door on the left, you'll be outside again. Enter the club, talk to the magician by the ball, but he won't give any clue other than the ones we've already seen. Go back to the reception room, interact with the machine as you did at the beginning, and again you will find yourself in the purple room. Only now card suits are drawn on each door. The piano has become miniature. Look at the picture again. Now magicians hold cards and books on it. Consider the statues. Each of them holds a card suit, and the inscription above the door has disappeared. Exit the first door on the left (9 worms) and get into the Indian room, examine the items in it. After examining the Zoltan apparatus, examine its ball and read the clue: "Be brave, nothing will harm you, right?". Examine the picture and see that the magicians are depicted with weapons. Look at the back of the room and see two Greek statues. Examine the statue on the right (Atlas) and move it. Then exit through the door labeled Queen of Clubs. You will find yourself in a swamp-like room. In the center there will be an island with a green key. But in order to get it, Sam needs to go through the swamp. Examine the Planks. But something needs to be applied to them so that they are sustainable. Go back and enter the second door on the left. You will again find yourself in a black and white room with a button. Examine the painting on the wall. Now magicians point to clues. Exit the second door on the left. You will again find yourself in the torture room, only now it looks different. Examine the Handcuffs and take them. Then you leave into the accomodation with spikes (Queen of Spades). The spikes will start moving, but the statue will hold them. Examine the statue and take the purple key from it. Return to the torture room through the door on the left and go to the purple room through the second door on the left (8 diamonds). Then through this room, into the Indian room (9 of hearts) and through the door of the Queen of Clubs. Connect the boards in the swamp with handcuffs and go to the platform. Take the green key there. Go back to the black and white room (the second door on the left). The clue given by the female magician is: "Choose the exit where your prize is the farthest." Enter the middle door of the Queen of Diamonds. There are three mirrors around you and two exits - on the right and on the left. Each exit also has a mirror in which the goblet is reflected. Go in the direction in which the cup will be smaller 
So you will need to go through six times, and the cup will be in front of you. Take the orange key from it. Go to the exit to the right. You will hear Helena's voice and see her silhouette. To find her, go to where her silhouette is smaller: right, left, right 2 times. Sam will talk to Helena, tell her to stay in one place (Stay still), then go right, left, right 2 times and meet Helena. She will say that she came to warn Sam and got here. Sam learns that Helena was not partnering with Mephistopheles, but was simply looking for her in a magic shop. You are in a black and white room, press the button in the center and go to the torture room (second door on the left), and then into the purple one (third door on the left). Go to the door at the end of the room (Queen of hearts) and use each key in turn on the lock to the left of the door. Open the door and enter. You will find yourself in the secret room of the club. Pay attention to Mephistopheles. Sam will say that she needs something to get him to tell the truth. Go back, enter the torture room and take the gun from the box (Guns). Return to the secret room of the club and use the gun on Mephistopheles. He will say that he is not involved in the incidents and will show Sam an old recording - a performance by an outstanding magician. Sam recognizes him as Angela's father. Angela will come to David and impersonate Laura. When Sam wants to interfere, she will set fire to her with her power. David's face will return to normal.
Sam and David will come to Christ Church Cathedral nave to comfort Angela. She will start setting fire to the cathedral.
You play as Sam.
Combine in inventory the lantern of Mephistopheles (Lantern) and the paper figurine of the fairy (Fairy) and apply to Angela. Sam will turn on the lantern and the figurine will be projected onto the pool. Angela will be there.
You play as David.
Approach the lever (Switch) and press it. Angela will fall into the pool and her gift will disappear. She will run to the balcony of the cathedral. David will follow her.
Watch the video.
Angela has the gift of telekinesis and pyrokinesis and was the student who visited David on the eve of Laura's death. He didn't want to listen to her, so she killed Laura with her gift. She also burned her father alive. Angela will go crazy and jump off the balcony.
The participants in the experiment will meet at David's and discuss Angela. She had an active site in her brain that had not been studied by science, and she was the cause of all the accidents in college. Sam will stay with David.
Wait until the credits roll and you will see another small cutscene.
Game completed.